
You can use glue on vinyl plank flooring in kitchens and bathrooms because it handles moisture well and offers strong durability. You need to focus on proper installation and regular maintenance to keep your flooring looking great. Many people face issues like improper subfloor preparation or using the wrong adhesive. Check the table below for common problems:
| Common Installation Issues | Description |
|---|---|
| Improper Subfloor Preparation | Gaps, flexing, or cracks may appear in the flooring. |
| Failure to Acclimate the Vinyl | Gaps or buckled seams can develop. |
| Neglecting Expansion Gaps | Buckling or warping of the floor may occur. |
| Using the Wrong Adhesive | Planks might lift or fail to bond well. |
| Poor Cutting Techniques | Gaps and misalignment can happen during installation. |
Is Glue On Vinyl Plank Flooring Suitable for Kitchens and Bathrooms?
Performance in Moisture-Prone Areas
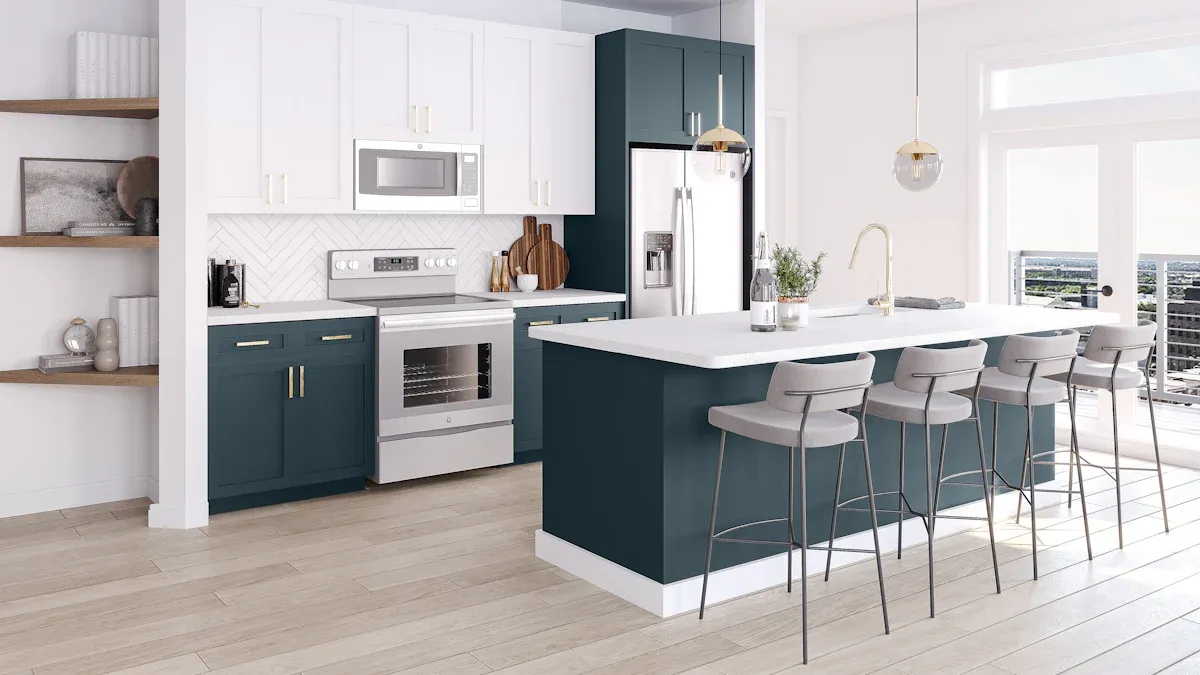
You want your kitchen and bathroom floors to stand up to water and humidity. Glue-down vinyl plank flooring gives you that peace of mind. This type of flooring is engineered for high-moisture areas. The material is completely waterproof, so you do not have to worry about swelling or warping like you would with hardwood or laminate. When you install glue-down vinyl plank flooring, you create a tight seal that keeps water from reaching the subfloor. Edge sealing and perimeter caulking help maintain this waterproof barrier. Quick cleanup of spills and regular maintenance keep your floors looking new.
Modern vinyl plank flooring uses synthetic materials that resist water damage. You can mop up spills without fear of ruining your floor. In kitchens and bathrooms, this is important because water exposure happens every day. Floating vinyl plank flooring can let water seep through seams during big spills, but glue-down vinyl flooring blocks moisture better. You get extra protection against mold and warping.
Tip: Always seal the edges and seams during installation. This step helps prevent water from sneaking under the planks.
Here is how glue-down vinyl plank flooring compares to other options in high-moisture areas:
- Glue-down vinyl plank flooring is made from 100% waterproof materials, so it handles moisture with ease.
- Laminate flooring is not water-resistant. It can swell and warp when exposed to water.
- SPC and WPC flooring types are also completely waterproof, just like glue-down vinyl plank flooring.
Durability and Water Resistance
You need a floor that lasts in busy spaces. Glue-down vinyl flooring offers strong durability and excellent water resistance. In kitchens and bathrooms, you get a surface that stands up to daily wear and tear. The installation method creates a tight seal, so water cannot seep through. This helps prevent damage to the subfloor and keeps your floors safe from mold.
Vinyl plank flooring is tough. It resists scratches, dents, and stains. You can move furniture or drop items without worrying about ruining your floor. Glue-down vinyl flooring stays in place even in high-traffic areas. You do not see shifting or lifting because the adhesive holds each plank firmly.
Check out the average lifespan of glue-down vinyl plank flooring in kitchens and bathrooms:
| Product Type | Lifespan (Years) | Installation Type |
|---|---|---|
| Luxury Vinyl Plank | 15 to 25 | Residential |
| Luxury Vinyl Tile | 15 to 25 | Residential |
| Commercial Vinyl | 10 to 15 | Commercial |
| Vinyl Sheet Flooring | 10 to 20 | Residential |
| Vinyl Plank Flooring | 15 to 20 | Residential |
You get long-lasting performance when you choose glue-down vinyl flooring for high-moisture areas. The moisture resistance and durability make it a smart choice for kitchens and bathrooms. You can trust your floors to look great and stay strong for years.
Key Benefits of Glue-Down Vinyl Plank Flooring
Strength and Stability in High-Traffic Spaces
You want your kitchen and bathroom floors to stay strong, even when many people walk on them every day. Glue-down vinyl plank flooring gives you excellent stability. The adhesive holds each plank firmly in place. You do not see shifting or lifting, even in busy areas. This makes it a smart choice for homes and commercial spaces.
Industry experts agree that glue-down vinyl plank flooring stands up to heavy foot traffic better than many other options. You get a floor that does not move or buckle. Compared to click-lock flooring, glue-down types offer more durability and strength. You can place heavy furniture or appliances on your vinyl floor without worrying about damage.
Here is a quick look at the main advantages:
| Advantage | Description |
|---|---|
| Durability | Handles heavy foot traffic and furniture with ease. |
| Moisture Resistance | Works well in kitchens and bathrooms without water damage. |
| Ease of Maintenance | Needs only regular sweeping and occasional mopping. |
| Cost-Effectiveness | Gives you the look of hardwood at a lower price, lasting 15 to 20 years. |
Stain Resistance and Easy Cleaning
You want your floors to look clean and fresh every day. Glue-down vinyl plank flooring makes this easy. The surface resists stains from spills, food, and daily messes. You can clean up accidents quickly without leaving marks behind.
To keep your vinyl plank flooring in top shape, follow these simple tips:
- Sweep or vacuum every day or two to remove dirt and dust.
- Wipe up spills right away to prevent stains.
- Use a damp mop with a pH-neutral cleaner made for vinyl.
- Place mats at entryways to catch dirt before it spreads.
- Avoid rubber-backed rugs, which can stain the floor over time.
You do not need special tools or harsh chemicals. Regular care keeps your glue on vinyl plank flooring looking new for years. You get a beautiful, low-maintenance floor that fits busy kitchens and bathrooms.
Do’s for Installing Glue-Down Vinyl Plank Flooring
Choose Quality Products Like skspcflooring
You want your kitchen and bathroom floors to last for many years. Start by choosing high-quality products. Not all vinyl is the same. Some brands offer better durability, water resistance, and design options. When you select glue-down vinyl plank flooring from a trusted manufacturer like skspcflooring, you get products that meet strict international standards. These floors resist scratches, stains, and moisture. You also enjoy a wide range of styles and finishes that match your home’s look. Quality matters because it affects how well your floor performs in busy, wet spaces. The best glue-down vinyl plank flooring will give you peace of mind and a beautiful finish.
Tip: Always check for certifications like ISO9001 and ISO14001. These show that the flooring meets high safety and environmental standards.
Prepare and Level the Subfloor
You need a smooth and stable base for your glue-down vinyl flooring. A well-prepared subfloor helps prevent problems like gaps, lifting, or uneven surfaces. Follow these steps to get your subfloor ready:
- Clean the subfloor. Remove all dust, dirt, and debris. Make sure there are no nails or bumps sticking up.
- Check the level. Use a long level to see if the floor is flat. The surface should not have more than 3/16 inch difference over a 10-foot span.
- Fill holes and cracks. Use a portland-based self-leveler to fill any dips. Grind down any high spots so the floor is even.
- Encapsulate old adhesive. If you see old glue, coat the subfloor with a product like Taylor Enhance. This step helps the new adhesive stick better.
- Test for moisture and pH. Use a moisture meter and pH test kit. The moisture level should not go over 85% RH or 8 lbs per 1,000 square feet in 24 hours. The pH should stay between 5 and 9.
A flat, dry, and clean subfloor gives your glue-down vinyl plank flooring the best chance to last. You avoid future repairs and enjoy a smooth, comfortable surface.
Use the Right Adhesive for Kitchens and Bathrooms
You need the right adhesive to make your glue-down vinyl flooring last in kitchens and bathrooms. The adhesive holds the planks in place and keeps water from getting underneath. Different adhesives work best for different needs. Here is a table to help you choose:
| Adhesive Type | Description |
|---|---|
| STIX P956 2K | High bonding performance for heavy use or high stress. Works well with PVC, rubber, and linoleum. |
| Pressure-sensitive acrylic | Gives a strong initial bond and lets you adjust planks during installation. Good for homes. |
| Permanent bond adhesives | Offers extra stability and resists heavy loads. Best for large or commercial spaces. |
You should always follow the adhesive manufacturer’s instructions. The right adhesive helps your glue-down vinyl flooring resist water, stains, and daily wear. You get a floor that stays strong and looks great for years.
Note: Using the wrong adhesive can cause planks to lift or shift. Always match the adhesive to your flooring and room conditions.
Acclimate Flooring Before Installation
You want your glue-down vinyl flooring to last in kitchens and bathrooms. Before you start, let the vinyl adjust to the room. Place the boxes of vinyl plank flooring in the space where you plan to install them. Leave them there for 48 hours. This step helps the flooring get used to the air and humidity in your kitchen or bathroom. When the vinyl acclimates, it expands or contracts to match the room’s conditions. You avoid problems like gaps or buckling later. Always keep the vinyl flat and unopened during this time. Do not skip this step. Proper acclimation gives you a smooth and stable floor.
Tip: Keep the room at normal living temperature and humidity during acclimation. This helps the glue-down vinyl plank flooring settle correctly.
Follow Manufacturer’s Guidelines
You want the best results from your glue-down vinyl flooring. Always read and follow the manufacturer’s instructions. Each brand may have different steps for installing vinyl plank flooring. The guidelines tell you how to prepare the subfloor, which adhesive to use, and how long to let the glue cure. You also learn about the right tools and cleaning products. If you follow these directions, you protect your warranty and avoid costly mistakes. Manufacturers test their flooring to make sure it works well in kitchens and bathrooms. Trust their advice for a strong and beautiful floor.
- Read the full installation guide before you begin.
- Use only recommended adhesives and tools.
- Follow curing times for the glue.
- Check for any special tips for kitchens and bathrooms.
Note: If you skip steps or use the wrong products, you may damage your glue-down vinyl flooring and lose your warranty.
Seal Seams and Edges Properly
You need to keep water out of your glue-down vinyl plank flooring. Sealing the seams and edges stops moisture from getting under the planks. This step is very important in kitchens and bathrooms. Start with a dry surface. If the floor is wet, the sealant will not stick. Apply the sealant in a steady bead along the seams and edges. Use even pressure and do not overlap the bead. After you apply the sealant, tool it within 5 to 10 minutes. You can use a wet finger or a spatula for a smooth finish. For clean lines, place masking tape along the edges before sealing. Remove the tape right after you finish tooling. Pay attention to the room’s humidity. High humidity can slow down the curing process and affect how well the sealant works.
- Make sure all surfaces are dry before sealing.
- Apply the sealant with steady, even pressure.
- Tool the sealant quickly for a neat finish.
- Use masking tape for straight edges and remove it right away.
- Watch the humidity in the room during sealing.
Callout: Proper sealing keeps your glue-down vinyl flooring safe from water damage and helps it last longer in kitchens and bathrooms.
Allow Full Curing Time
You need to let your glue-down vinyl plank flooring cure before you walk on it or move furniture back. Curing means the adhesive dries and forms a strong bond with the subfloor. This step is important because it helps your floor stay flat and secure for many years.
If you rush this process, you can cause problems. The planks might shift or lift. Water can get under the floor and cause damage. You want your kitchen and bathroom floors to last, so patience is key.
Tip: Always check the adhesive label for the exact curing time. Different products may have different requirements.
Most adhesives for glue-down vinyl plank flooring need time to set. Here is what you should expect:
- The typical curing time for adhesives is between 24 to 48 hours.
- Some adhesives may need more time if the room is cold or humid.
- You should avoid heavy traffic during this period.
- Do not place appliances or furniture on the floor until curing is complete.
You can use this table to help you remember what to do during the curing period:
| Step | What You Should Do |
|---|---|
| First 24 hours | Stay off the floor as much as possible. |
| 24–48 hours | Light foot traffic only. |
| After 48 hours | Move furniture and appliances back. |
You should keep windows and doors closed to control temperature and humidity. This helps the adhesive cure evenly. If you live in a humid area, you may need to wait a little longer.
Callout: Giving your floor enough time to cure protects your investment. You get a strong, beautiful floor that stands up to daily life in kitchens and bathrooms.
Patience during curing pays off. You avoid repairs and enjoy a floor that looks great for years.
Don’ts for Glue-Down Vinyl Flooring Installation
Don’t Install Over Damp or Uneven Subfloors
You should never install glue-down vinyl flooring over a damp or uneven subfloor. A wet or bumpy surface can cause many problems. The adhesive will not stick well if there is too much moisture. This can lead to warping, mildew, discoloration, and bubbles under your floor. You may also see the vinyl peel up because the glue cannot cure properly. An uneven subfloor can make the planks lift or buckle. You might notice gaps or even damage from moisture that gets trapped.
- Excess moisture stops the adhesive from bonding the vinyl to the subfloor.
- You may see warping, mildew, discoloration, and bubbles.
- Moisture can cause the vinyl to peel by stopping the adhesive from curing.
- An uneven or wet subfloor leads to poor adhesion, lifting, buckling, or moisture damage.
Always make sure your subfloor is dry and level before you start.
Don’t Skip Moisture Testing
You should always test for moisture before installing glue-down vinyl flooring. Even if the subfloor looks dry, hidden moisture can cause big problems later. Use the right tools to check. The Rapid RH® L6 test gives fast and accurate results. For concrete subfloors, use relative humidity (RH) testing. In situ probes, as suggested by ASTM F2170, help you measure RH inside the concrete. These steps help you avoid future damage and keep your floor strong.
- The Rapid RH® L6 test checks moisture levels quickly.
- RH testing works best for concrete subfloors.
- In situ probes measure RH inside the concrete for accurate results.
Testing for moisture protects your investment and helps your floor last longer.
Don’t Use Incompatible Adhesives
You must use the right adhesive for glue-down vinyl flooring. Not all adhesives work with every type of vinyl. Using the wrong one can cause serious problems.
Not all adhesives are compatible with all Vinyl products (LVT or sheet vinyl). Some combinations will be chemically incompatible resulting in a weak bond or a negative chemical reaction that results in something called ‘plasticizer migration’. This can cause distortion within the vinyl flooring itself, resulting in expansion, gapping and buckling related issues.
Always check the manufacturer’s recommendations for adhesives. This step helps you avoid costly repairs and keeps your floor looking great.
Don’t Ignore Expansion Gaps
You need to leave expansion gaps when you install glue-down vinyl plank flooring. These gaps help your floor handle changes in temperature and humidity, especially in kitchens and bathrooms. If you skip this step, your floor can buckle or develop gaps over time.
- Expansion gaps allow vinyl flooring to expand and contract naturally.
- Kitchens and bathrooms often have changing temperatures and moisture levels.
- Without these gaps, your floor may buckle or separate.
- The size of the gap depends on the size of your room. Always check the manufacturer’s guide for the right measurement.
Tip: Place spacers along the walls during installation to keep the expansion gap even.
Don’t Rush the Installation Steps
You might want to finish your flooring project quickly, but rushing can cause problems. Take your time with each step to make sure your floor lasts.
- If you rush, you may leave gaps or spread the adhesive unevenly. This weakens the floor’s stability and makes it look uneven.
- Glue-down vinyl needs 24–48 hours to set. Walking on the floor or moving furniture too soon can cause the planks to shift.
- Skipping steps or hurrying can void your warranty. You may end up with misaligned planks or long-term issues.
Note: Patience during installation helps your floor stay strong and beautiful for years.
Don’t Use Excess Water or Harsh Cleaners
You want your vinyl plank flooring to look its best. Using too much water or the wrong cleaners can damage the surface and shorten its life.
- Wax-based cleaners or floor polishes leave a sticky film that attracts dirt.
- Oil-based soaps create a residue and dull the finish.
- Ammonia-based cleaners strip away the protective layer, making the floor look dull.
- Bleach can discolor vinyl and break down the wear layer.
- Abrasive cleaners, scouring powders, or steel wool scratch the surface.
- Steam mops (unless approved by the manufacturer) can weaken the adhesive and cause planks to lift.
Callout: Always use a damp mop and a pH-neutral cleaner made for vinyl floors. This keeps your kitchen and bathroom floors clean and safe.
Maintenance Tips for Glue-Down Vinyl Flooring in Kitchens and Bathrooms
Clean Spills Immediately
You want your glue-down vinyl plank flooring to look fresh every day. Spills happen often in kitchens and bathrooms. When you see water, juice, or soap on the floor, grab a cloth and wipe it up right away. Quick cleaning stops stains from forming and keeps your vinyl safe from moisture. If you leave spills too long, they can seep into seams and weaken the adhesive. You should sweep or use a dust mop regularly to remove dirt and grit. A vacuum with a hard floor setting also helps, but avoid beater bars that can scratch the vinyl plank flooring.
Tip: Use a damp mop with a pH-neutral cleaner for deeper cleaning. Mop small sections and let them air dry.
Use Mats in High-Traffic Zones
You walk through your kitchen and bathroom many times each day. Placing mats in busy areas protects your glue-down vinyl flooring from scratches and wear. Mats catch dirt and water before they reach the vinyl. Choose mats with non-rubber backing to prevent staining. Entryways, sinks, and stove areas benefit most from mats. You keep your vinyl plank flooring looking new and reduce cleaning time.
- Place mats at doors and sinks.
- Pick mats that do not have rubber backs.
- Shake out mats often to remove trapped dirt.
Inspect Regularly for Moisture Issues
You need to check your glue-down vinyl plank flooring for signs of moisture. Look for planks that feel loose or come off the floor. Moisture can weaken adhesives and cause bubbling or blistering. Sometimes, you see telegraphing, where subfloor imperfections show through the vinyl. Discoloration may appear if moisture raises the pH level. Walk around your kitchen and bathroom and inspect the flooring every month. Early detection helps you fix problems before they get worse.
- Watch for loose planks or bubbling.
- Check for discoloration or changes in the vinyl surface.
- Look for telegraphing, which means the subfloor is showing through.
- Fix leaks or plumbing issues quickly to protect your glue-down vinyl flooring.
Alert: Regular inspections help you catch moisture problems early and keep your vinyl plank flooring strong for years.
Avoid Dragging Heavy Appliances
You want your glue-down vinyl plank flooring to stay smooth and beautiful. Heavy appliances, such as refrigerators, dishwashers, and washing machines, can scratch or dent your floor if you drag them across the surface. The adhesive bond under the planks can weaken when you move heavy items without care. You may see scuff marks, tears, or even lifted planks after dragging appliances.
When you need to move an appliance, plan ahead. Lift the appliance if possible. If lifting is not an option, use furniture sliders or plywood sheets. These tools help distribute the weight and protect your vinyl plank flooring from damage. You can place a thick blanket or towel under the appliance to reduce friction. Always move appliances slowly and check the floor as you go.
Tip: Ask a friend or family member to help you move heavy items. Teamwork makes the job safer and easier.
Here are some simple steps to follow when moving appliances:
- Unplug and empty the appliance before moving.
- Place furniture sliders or a protective sheet under the appliance.
- Lift or gently push the appliance, avoiding sharp turns.
- Check the floor for scratches or dents after moving.
- Clean the area to remove any dirt or debris left behind.
You should never use wheels or casters directly on the vinyl plank flooring. These can leave deep grooves or marks. If you must use a dolly, make sure it has soft, non-marking wheels.
| Appliance Type | Risk Level | Recommended Moving Method |
|---|---|---|
| Refrigerator | High | Use sliders or plywood sheet |
| Dishwasher | Medium | Lift or use blanket |
| Washing Machine | High | Use sliders and extra help |
| Oven | Medium | Use protective sheet |
Protecting your glue-down vinyl plank flooring from heavy appliances helps you keep your kitchen and bathroom looking new. Careful movement prevents costly repairs and extends the life of your floor.
Common Mistakes to Avoid with Glue-Down Vinyl Plank Flooring
Overlooking Manufacturer Warranties
You might think warranties are just paperwork, but they protect your investment. Manufacturer warranties cover defects and performance issues. If you follow the installation and maintenance guidelines, you keep your warranty valid. This means your floor stays strong and lasts longer. When you understand the warranty details, you avoid surprises if something goes wrong. You get peace of mind knowing your floor is covered.
- Warranties help you fix problems without extra cost.
- Following instructions keeps your warranty safe.
- Reading the warranty helps you know what is covered.
Tip: Always keep your warranty documents in a safe place. Review them before starting any repairs or cleaning.
Neglecting Routine Maintenance
You need to care for your glue-down vinyl plank flooring every day. Skipping regular cleaning lets dirt and spills build up. This can cause stains and wear down the surface. If you ignore small problems, they can become big repairs. Sweeping, mopping, and checking for damage help your floor look new.
Here are some common mistakes homeowners make:
| Mistake | Explanation |
|---|---|
| Skipping Proper Subfloor Preparation | Failing to clean, repair, or level the subfloor can lead to visible bumps and gaps in the flooring. |
| Ignoring Acclimation Time | Installing planks immediately without acclimating can cause them to expand or contract improperly. |
| Poor Planning of Expansion Gaps | Not leaving enough space for expansion can result in buckling or lifting of the planks. |
| Using the Wrong Adhesive | Using an incompatible adhesive can lead to planks not sticking properly or lifting over time. |
Alert: Routine maintenance keeps your floor safe from damage and helps it last for years.
Failing to Address Leaks or Plumbing Problems
You must fix leaks and plumbing issues quickly. Water under your vinyl plank flooring causes serious problems. If you ignore leaks, you may see bubbling, cupping, or edge curling. Warping and mold growth can also happen. These defects ruin the look and strength of your floor.
| Defect Type | Description |
|---|---|
| Bubbling | Bubbles form under the surface of the floor. |
| Cupping | Edges of the planks rise, creating a cupped look. |
| Edge Curling | Plank edges lift away from the subfloor. |
| Warping | Planks bend or twist out of shape. |
| Mold Growth | Fungal growth appears due to moisture exposure. |
Callout: Check for leaks often. Fix plumbing problems right away to protect your glue-down vinyl plank flooring.
Why Choose skspcflooring for Glue-Down Vinyl Plank Flooring?
Commitment to Quality and Durability
You want your kitchen and bathroom floors to last. skspcflooring gives you strong flooring that stands up to daily life. The company uses advanced technology and strict quality checks. You get vinyl planks that resist scratches, stains, and water. Each product meets international standards, so you can trust your flooring to stay beautiful for years. Many customers choose skspcflooring because they want reliable floors in busy spaces.
Tip: When you pick skspcflooring, you invest in flooring that keeps its shape and color, even with heavy use.
Eco-Friendly and Certified Products
You care about the environment. skspcflooring offers vinyl flooring that is safe for your home and the planet. The company uses eco-friendly materials and follows green practices in its factory. All products have important certifications like ISO9001 and ISO14001. These show that the flooring is safe and meets strict rules for health and safety. You can feel good about using vinyl flooring from skspcflooring in your kitchen or bathroom.
| Certification | What It Means |
|---|---|
| ISO9001 | High quality management |
| ISO14001 | Eco-friendly production |
| EN, ASTM, GB | International safety standards |
Professional Support and Global Standards
You want help when you choose new flooring. skspcflooring gives you professional support from start to finish. The team answers your questions and helps you pick the best vinyl for your space. You get clear instructions for installation and care. The company serves customers around the world and follows global standards. You can trust skspcflooring to deliver flooring that fits your needs and lasts a long time.
Callout: With skspcflooring, you get expert advice and products that meet high standards everywhere.
You can achieve long-lasting, beautiful floors in kitchens and bathrooms by following the main do’s and don’ts for glue on vinyl plank flooring. Prepare the subfloor, use the right adhesive, and clean up spills quickly. Avoid rushing the installation or skipping moisture tests. Proper care and quality products help your floors stay strong. Choose skspcflooring for reliable results.
FAQ
Can you install glue-down vinyl plank flooring over existing tiles?
You can install glue-down vinyl plank flooring over tiles if the surface is flat, clean, and dry. Fill grout lines and repair any cracks first. This helps the adhesive bond well and keeps your new floor smooth.
How long does glue-down vinyl plank flooring last in kitchens and bathrooms?
You can expect glue-down vinyl plank flooring to last 15 to 20 years in kitchens and bathrooms. Regular cleaning and quick spill removal help extend its life. Quality products like skspcflooring offer strong durability.
Is glue-down vinyl plank flooring waterproof?
Glue-down vinyl plank flooring is waterproof. You can use it in kitchens and bathrooms without worrying about water damage. Sealing seams and edges adds extra protection against moisture.
What cleaning products are safe for glue-down vinyl plank flooring?
You should use a pH-neutral cleaner and a damp mop. Avoid bleach, ammonia, and abrasive cleaners. These can damage the surface. Use mats to catch dirt and keep your floor looking new.
Do you need to seal the edges of glue-down vinyl plank flooring?
You need to seal the edges and seams, especially in kitchens and bathrooms. This step keeps water from getting under the planks. Sealing helps prevent mold and protects your subfloor.




