
You can achieve a smooth floor by laying glue down vinyl plank flooring with the right approach. Start with a clean, level subfloor and use the proper adhesive for kitchens and bathrooms. Pay attention to common installation issues like curling, gapping, and moisture problems. The table below shows typical challenges that installers report:
| Issue Type | Description |
|---|---|
| Planar and Dimensional Issues | Problems like cupping, curling, and gapping from poor cutting or expansion. |
| Moisture Issues | Trapped moisture can lead to installation failures. |
| Surface Scratching | Furniture can scratch the flooring after installation. |
Take your time during installation. Careful steps help you avoid mistakes and create a professional vinyl plank flooring finish.
Preparation for Laying Glue Down Vinyl Plank Flooring
Clean and Dry the Subfloor
You need to start with a clean and dry subfloor. Dirt, dust, and debris can cause problems during installation. Sweep the area and vacuum to remove all particles. Make sure the subfloor is dry. Moisture can damage vinyl plank flooring and weaken the adhesive. Check the moisture levels before you begin. Here are the recommended moisture levels for acceptable subfloors for vinyl plank flooring:
- Moisture must be below 95% relative humidity (RH) according to ASTM F2170.
- Moisture should not exceed 8lbs Calcium Chloride as per ASTM F1869.
- If moisture levels are too high, use a moisture mitigation system.
A dry subfloor helps you avoid future issues like bubbling or adhesive failure. Careful floor preparation gives you a strong foundation for laying glue down vinyl plank flooring.
Check for Level and Smoothness
You must check the subfloor for level and smoothness. Uneven spots can cause gaps or make the planks sit unevenly. Use a straightedge or level to find any bumps or dips. Fill low spots with a floor patch and sand down high spots. Smooth surfaces help the vinyl plank flooring stick better and look professional. Subfloor considerations are important for a lasting floor. Take your time to inspect and fix any issues before you start.
Tip: A level subfloor prevents problems like cupping and gapping after installation.
Double Layer Wood Subfloor for Stability
If you have a wood subfloor, add a second layer for stability. This step reduces movement and makes the floor stronger. Secure the layers tightly with screws. A stable subfloor supports the vinyl plank flooring and prevents shifting. You get a smoother finish and longer-lasting flooring. Good floor preparation means you avoid costly repairs later.
Gather Tools and Materials
You need the right tools and materials to install vinyl plank flooring smoothly. Professional installers recommend a set of essential items that make the process easier and safer. Each tool serves a specific purpose and helps you achieve a neat finish. Here is a list of what you should have ready:
- Tape measure for accurate measurements
- Chalk line for layout alignment
- Utility knife with replaceable blades for cutting planks
- Kneepads to protect your knees during long installs
- Pry bar and pull bar for fitting tight edges and removing baseboards
- Rubber mallet for tapping planks into place without damage
- Moisture meter to test subfloor and flooring material
- Tapping block set for securing planks
- Vinyl cutter or shear for clean cuts
- Seam roller for glue-down vinyl plank flooring
- Pressure-sensitive adhesive and notched trowel if required
- 100-lb. flooring roller for strong adhesive bonding
- Laser level for perfect layout alignment in large rooms
- Oscillating multi-tool for trimming under door jambs
Tip: Organize your tools before you start. This saves time and prevents mistakes during installation.
Acclimate Vinyl Plank Flooring
Acclimating vinyl plank flooring is a step you should not skip. This process allows the flooring to adjust to the temperature and humidity of your space. If you skip acclimation, you may see problems like gapping, buckling, or curling after installation. Place the flooring in the room where you plan to install it. Let it sit for at least 48 hours. Keep the room temperature between 65°F and 85°F. Maintain humidity between 35% and 65% relative humidity.
| Type of Flooring | Acclimation Time | Temperature Range | Humidity Range |
|---|---|---|---|
| WPC / LVP | 48–72 hours | 65–85°F | 35–65% RH |
- Acclimation helps vinyl plank flooring stay stable after installation.
- You avoid expansion or contraction issues by following this step.
Note: Always check the manufacturer’s instructions for specific acclimation times.
Planning Your Vinyl Plank Flooring Installation
Plan the Layout for Kitchens and Bathrooms
You need to plan the layout before laying glue down vinyl plank flooring. Kitchens and bathrooms require careful attention because these spaces have cabinets, appliances, and plumbing fixtures. Start by measuring the room and marking the center line. This helps you create a balanced look. Choose a pattern that fits the space and minimizes waste. The brick bond or running bond pattern works well in kitchens and bathrooms. This pattern gives you a stable look and reduces material waste.
| Pattern Type | Best For | Pros | Cons |
|---|---|---|---|
| Brick Bond / Running Bond | Kitchens, bathrooms, commercial offices | Simple to install, minimal waste, stable look | Offers less visual variety than angled patterns |
Tip: Use a chalk line to keep your rows straight. This makes your glue down vinyl plank flooring look professional.
Dry Fit Planks Before Gluing
Dry fitting means placing the planks on the floor without adhesive. You see how the planks fit and check for gaps or uneven edges. Move the planks around to find the best arrangement. This step helps you avoid mistakes during installation. You can trim planks for a perfect fit. Dry fitting also lets you see how the pattern looks in your space. Take your time and adjust the layout as needed.
- Dry fitting prevents waste and ensures a smooth installation.
- You get a preview of the finished floor before you commit to gluing.
Install Vinyl Plank Flooring Before Cabinets
You should install vinyl plank flooring before adding cabinets in kitchens and bathrooms. This approach makes the installation easier and protects your new cabinets from damage. You also gain flexibility for future remodels. If you change the cabinet layout later, you do not need to patch the floor. Installing the flooring first gives you correct cabinet and countertop height. Appliances like dishwashers fit better and align properly.
| Advantage | Description |
|---|---|
| Ease of installation | Simplifies the installation process, reducing the risk of damage to new cabinets during floor installation. |
| Flexibility in design | Allows for future changes to cabinet layout without constraints from existing flooring. |
| Long-term durability | Provides additional support and stability, contributing to the durability and longevity of the remodel. |
- Ensures correct cabinet and countertop height
- Prevents appliance misalignment
- Creates a cleaner, more professional appearance
- Makes future remodels easier
Note: Installing the flooring first gives your kitchen or bathroom a seamless look and lasting durability.
Step-by-Step Installation with skspcflooring
Apply Adhesive Evenly
You need to apply adhesive with care during glue-down installations. Use a notched trowel held at a 45-degree angle. This creates small, even ridges across the subfloor. These ridges help the adhesive spread evenly and prevent pooling. Work in manageable sections. This keeps the adhesive from drying too quickly and allows you to focus on accuracy. Wait until the adhesive becomes tacky before laying vinyl plank flooring. Tacky adhesive stops planks from sliding out of place. After placing the planks, use a 100 lb floor roller. The roller presses the planks down and ensures complete bonding. You get a strong, lasting floor when you follow these steps.
- Hold the notched trowel at a 45-degree angle.
- Spread adhesive in small sections.
- Wait for adhesive to become tacky.
- Use a floor roller for even pressure.
Tip: Applying adhesive evenly prevents bubbles and gaps in your vinyl plank flooring.
Set Planks Firmly in Place
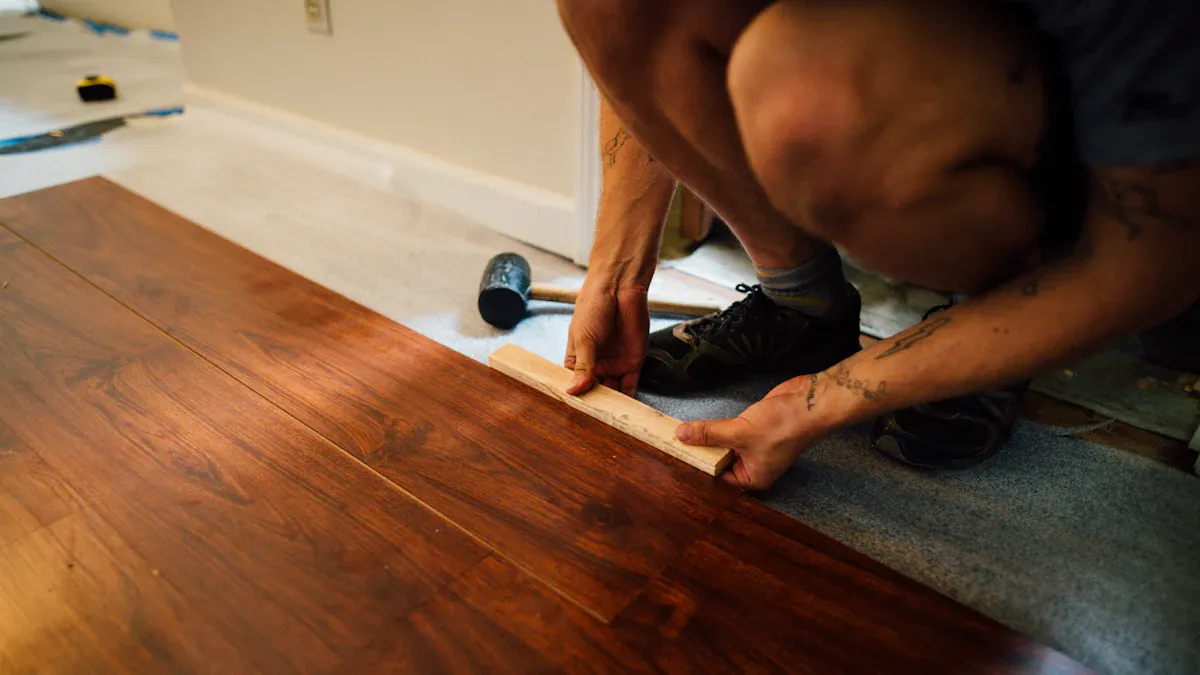
You must set each plank firmly in place. Start by aligning the plank with your layout lines. Press the plank down into the adhesive. Use a tapping block and rubber mallet to secure the edges. This keeps the planks tight and prevents movement. Check for gaps between planks as you work. Adjust the planks if you see any spaces. Repeat this process for each plank. Installing vinyl planks with care gives your floor a smooth, professional look. Take your time and check your progress often.
Note: Firm placement helps the adhesive bond and keeps your vinyl plank flooring stable.
Use Spacers for Expansion Gaps
You need to use spacers to create expansion gaps around the room. Expansion gaps allow the flooring to expand and contract with changes in temperature and humidity. Place spacers along the walls as you lay the planks. Remove the spacers after the installation is complete. The ideal width for expansion gaps depends on the size of your area. The table below shows the recommended gap widths:
| Area Size | Expansion Gap Width |
|---|---|
| Less than 50 ft | ¼ inch |
| Between 50-85 ft | ½ inch |
Expansion gaps protect your vinyl plank flooring from buckling and help maintain a smooth finish. You avoid future problems by following these guidelines.
Reminder: Expansion gaps are essential for glue-down installations in all climates.
Avoid Connecting to Wood or Wood-Look Floors in Bathrooms
You should avoid connecting glue down vinyl plank flooring directly to wood or wood-look floors in bathrooms. Bathrooms often have high humidity and frequent spills. Vinyl plank flooring handles moisture well, but wood and wood-look floors do not. When you place these two types of flooring next to each other, you risk creating an uneven transition. Water can seep into the gap and damage the wood. You also create a spot where cleaning becomes difficult.
You want your bathroom to look neat and unified. Connecting vinyl plank flooring to wood or wood-look floors can cause visual problems. The colors and textures rarely match. This mismatch draws attention and makes the space feel less cohesive. You can see the difference in the way the two materials reflect light and handle wear. The transition line stands out and breaks up the design.
- Installing glue down vinyl plank flooring next to wood or wood-look floors leads to aesthetic mismatches.
- You rarely find a close enough match between the two flooring types, which results in an unattractive appearance.
- Minimizing transitions between different flooring types helps you create a cohesive look throughout the space.
Tip: Use transition strips or threshold moldings if you must change flooring types. These tools help you create a smooth and safe edge. You protect both floors and improve the appearance of your bathroom.
Bathrooms need flooring that resists water and stays beautiful. Glue down vinyl plank flooring gives you these benefits. You keep your bathroom looking modern and easy to clean when you avoid connecting it to wood or wood-look floors.
Common Mistakes to Avoid During Installation
Skipping Subfloor Preparation
You might feel tempted to rush the installation process, but skipping subfloor preparation can cause major problems. If you do not prepare the subfloor, you risk poor adhesion and possible warping or buckling. Dirt and debris left behind can affect how well the planks stick. Moisture is another big concern. If the subfloor is not dry, you may see moisture damage in your vinyl plank flooring. Uneven surfaces can lead to gaps and shifting. Humidity levels matter, especially in areas like bathrooms and kitchens. Ignoring these steps can cause lifting or damage to your flooring.
- Neglecting floor preparation leads to poor adhesion and warping.
- Failing to clean the subfloor leaves dirt that affects installation.
- Not ensuring dryness risks moisture damage.
- Installing over uneven surfaces causes gaps and shifting.
- Ignoring humidity levels can lead to lifting or damage.
Tip: Always check the subfloor for cleanliness, dryness, and levelness before laying glue down vinyl plank flooring.
Using Incorrect Amount of Adhesive
You need to pay close attention to how much adhesive you use during installation. Using too much adhesive can cause it to seep through cracks and holes, making the installation messy and difficult. If you use too little adhesive, you may see ridges form under the planks. Both problems can affect the look and durability of your flooring. Always follow the manufacturer’s instructions for the right amount of adhesive. This helps you avoid issues and keeps your vinyl plank flooring secure.
Not Wiping Up Excess Glue
Excess glue can ruin the appearance of your new flooring. You should remove it right away to prevent surface damage. The best method involves a few simple steps:
- Gather proper tools like a scraper, squirt bottle, and a solution such as floor stripper or acetone-based nail polish remover.
- Spray the solution onto the glue using a squirt bottle. Always spot test first.
- Let the solution sit, then scrape carefully with the scraper held horizontally. Avoid pressing down to prevent damage.
- Clean the area with water to remove any chemicals and dry the floor afterward.
Reminder: Quick cleanup keeps your installation looking professional and protects your vinyl plank flooring from stains.
Ignoring Manufacturer Instructions
You might feel tempted to skip reading the manufacturer’s instructions, but this can lead to serious problems. Each brand of glue down vinyl plank flooring has its own set of guidelines. These instructions cover important details like acclimation time, adhesive type, and installation steps. If you ignore these directions, you risk damaging your floor or voiding the warranty.
- Different brands such as COREtec, Shaw, and Happy Feet have unique installation rules.
- Some brands require specific adhesives. For example, Happy Feet only honors warranties if you use H9100 or HF9200 adhesive.
- Acclimation times can vary between brands. Following the correct process helps prevent issues like gapping or buckling.
Tip: Always check the product manual before you start. This helps you avoid costly mistakes and keeps your warranty valid.
Manufacturer instructions protect your investment. They help you get the best results and keep your floor looking great for years.
Rushing the Installation Process
You may want to finish your flooring project quickly, but rushing can cause many problems. Taking your time ensures each step is done right. If you hurry, you might use the wrong tools or skip important steps. This can lead to planks that do not stick, seams that look messy, or even damage to the flooring.
- Rushing can cause poor adhesion, making planks lift or bubble.
- Using the wrong adhesive or skipping steps may void your warranty.
- Improper tools can damage the planks.
- Sloppy seams and air bubbles often appear when you rush.
- Planks may not lay flat, leading to long-term issues.
- Walking on the floor too soon can cause dents and scratches.
- Floors that are not fully cured may warp or buckle.
- Some adhesives release VOCs, which can affect indoor air quality if not given time to cure.
Note: Slow down and follow each step carefully. This helps you avoid mistakes and gives you a smooth, professional finish.
Taking your time with installation protects your new floor and ensures it lasts for many years.
Finishing Touches for a Professional Look
Roll the Floor for a Tight Bond
You want your vinyl plank flooring to stay secure for years. After you lay the planks, use the heaviest roller available. A 150 lb. roller works best. Roll the floor in two different directions. This method helps the adhesive stick to every part of the plank. Rolling right after installation gives you a tight bond. Check the installation a few hours later. If you see any loose spots, roll again to make sure the planks stay in place.
- Use a 150 lb. roller immediately after placing the planks.
- Roll in two directions for complete contact.
- Re-roll after a few hours if needed.
Tip: Rolling the floor helps prevent bubbles and keeps your installation smooth.
Clean Up Immediately After Installation
Cleaning up right after you finish makes your new floor look great. Remove any glue that gets on the surface. Use a damp cloth or a gentle cleaner. Avoid harsh chemicals that can damage the vinyl. Pick up all tools and scraps. Sweep the area to remove dust and debris. Quick cleanup stops stains from forming and keeps your floor looking fresh.
- Wipe up excess glue before it dries.
- Use a soft cloth for gentle cleaning.
- Sweep away dust and debris.
Alert: Cleaning right away protects your floor from scratches and stains.
Seal Edges in Wet Areas
Bathrooms and kitchens need extra care. Seal the edges of your vinyl plank flooring in these spaces. Use a waterproof sealant along the walls and around fixtures. This step keeps moisture from getting under the planks. Sealing helps prevent damage and keeps your floor strong. You protect your investment and make cleaning easier.
- Apply waterproof sealant to edges in wet areas.
- Focus on spots near sinks, tubs, and toilets.
- Check for gaps and seal them right away.
Note: Sealing edges stops moisture from causing problems under your floor.
Allow Floor to Set Before Use
You have finished installing your vinyl plank flooring. Now, you need to let the adhesive cure. This step is important because it helps the planks bond tightly to the subfloor. If you rush this process, you risk damaging the installation. Manufacturers recommend a waiting period before you use the floor for heavy activities or place furniture.
- Wait at least 48 to 72 hours before walking on the floor or moving furniture onto it.
- Avoid heavy foot traffic during this curing time.
- Keep pets and children away from the area until the adhesive sets.
You might feel excited to use your new space, but patience pays off. The adhesive needs time to harden and create a strong bond. Walking on the planks too soon can cause them to shift or loosen. Heavy furniture can press down and leave marks if the glue has not cured. You protect your investment by following these guidelines.
Check the manufacturer’s instructions for your specific product. Some brands may suggest a longer or shorter wait. If you live in a humid area, the curing time may increase. You can use fans to help air circulate and speed up the drying process. Make sure the room stays at a steady temperature. Sudden changes can affect how the adhesive sets.
Tip: Mark the area with tape or signs to remind everyone not to enter. This simple step helps you avoid accidental damage.
You want your vinyl plank flooring to last for years. Allowing the floor to set before use gives you a smooth, durable surface. You will enjoy a professional finish and avoid costly repairs.
Why Choose skspcflooring for Your Vinyl Plank Flooring Project
High-Quality, Durable, and Water-Resistant Products
You want a floor that stands up to daily life. skspcflooring offers SPC vinyl plank flooring that gives you strength and durability. SPC stands for Stone Plastic Composite. This material is completely waterproof. You can install vinyl plank flooring in kitchens and bathrooms without worry. Other types of vinyl flooring, like loose lay and dry back, do not offer the same protection. Loose lay vinyl relies on weight and friction, so water can seep underneath. Dry back vinyl is more water-resistant than loose lay, but it is not fully waterproof. SPC vinyl plank flooring from skspcflooring keeps your floor safe from spills and moisture.
Tip: Choose SPC vinyl plank flooring for areas where water is a concern. You get peace of mind and a long-lasting floor.
Eco-Friendly and Certified Flooring Solutions
You care about the environment. skspcflooring uses eco-friendly materials in every product. The flooring meets international standards like ISO9001 and ISO14001. These certifications show that the company values safety and sustainability. You can trust that your floor is free from harmful chemicals. The factory uses efficient production lines to reduce waste. You help protect the planet when you choose skspcflooring for your installation.
| Certification | What It Means |
|---|---|
| ISO9001 | Quality management |
| ISO14001 | Environmental safety |
| EN, ASTM, GB | International standards |
Expert Support for DIY Installation
You may want to tackle your flooring project yourself. skspcflooring makes diy easy. The company provides clear instructions and expert advice. You get support at every step of your diy installation. The products are designed for diy-friendly installation. You can install vinyl plank flooring without special tools. If you have questions, you can reach out to the team for help. You gain confidence and save money by choosing a diy approach.
Block Quote: “skspcflooring helps you succeed with diy. You get guidance and quality products for a smooth installation.”
You can enjoy a beautiful floor, protect the environment, and complete your diy project with support from skspcflooring.
You achieve the best results by focusing on careful preparation and patience when laying glue down vinyl plank flooring. Industry experts highlight these key points:
- Take accurate measurements to avoid mistakes.
- Follow a detailed plan for every cut and turn.
- Let the materials cure fully for lasting results.
Use these simple tricks and avoid common errors. Trust skspcflooring for quality flooring and helpful support.
FAQ
How long should you wait before walking on your new vinyl plank floor?
You should wait at least 48 hours before walking on your new floor. This gives the adhesive time to set and keeps your planks secure.
What tools do you need for glue down vinyl plank flooring?
You need a tape measure, utility knife, notched trowel, floor roller, and spacers. These tools help you measure, cut, spread adhesive, and secure planks.
Can you install glue down vinyl plank flooring in bathrooms?
Yes, you can install glue down vinyl plank flooring in bathrooms. The flooring resists water and works well in wet areas. Always seal the edges for extra protection.
How do you clean glue down vinyl plank flooring after installation?
Use a soft cloth and gentle cleaner. Avoid harsh chemicals. Sweep away dust and wipe up any glue spots right away. Quick cleaning keeps your floor looking new.




