
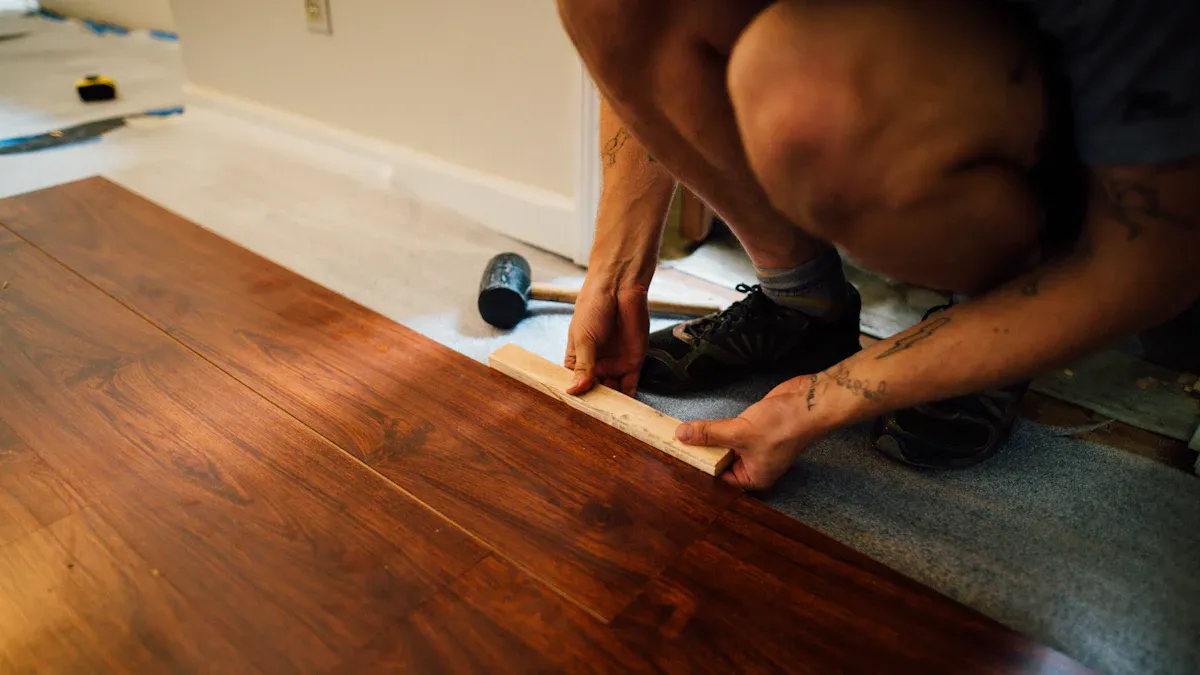
You install glue-down vinyl plank flooring by attaching each plank directly to the subfloor with adhesive. This method creates a stable surface that resists shifting or lifting, even in busy areas. Vinyl flooring gives you a solid feel underfoot, which many people find comfortable. Glue-down vinyl flooring absorbs sound better than laminate or wood flooring. Vinyl flooring keeps your space warmer and helps protect your subfloor from moisture. If you want to know how to install vinyl plank flooring glue down, you will find that the process offers lasting comfort and durability. Vinyl plank flooring works well in places like bathrooms and laundry rooms. You will notice the difference as soon as you step on vinyl flooring.
Step-by-Step Guide: How to Install Vinyl Plank Flooring Glue Down
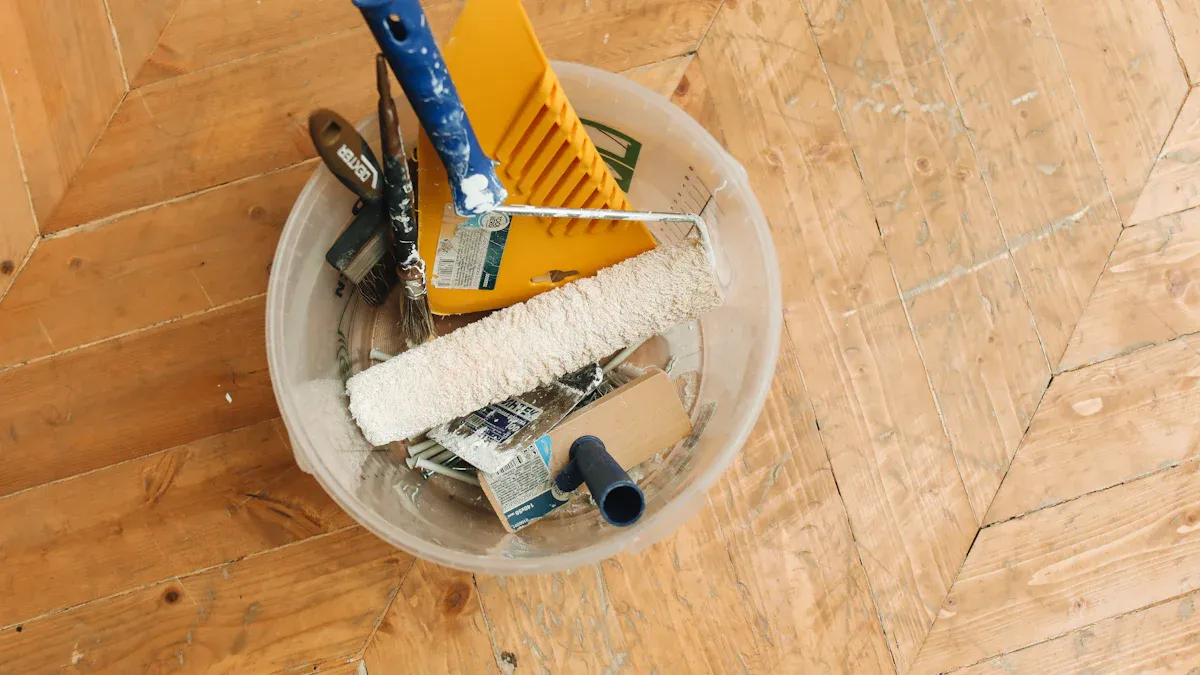
Tools and Materials for Vinyl Flooring Installation
You need the right tools and materials to install vinyl flooring successfully. Many flooring professionals recommend a set of essential items for diy-friendly installation. You can find these tools at most hardware stores. Here is a list to help you prepare:
- Tapping block set helps you fit each plank snugly.
- Vinyl cutter or shear allows you to trim luxury vinyl plank pieces cleanly.
- Seam roller ensures the adhesive bonds the vinyl flooring to the subfloor.
- Pressure-sensitive adhesive and notched trowel are necessary for glue-down vinyl flooring installation.
You should gather all tools before you start. This step makes your diy project smoother and more efficient. You will also need measuring tape, chalk line, and a broom to keep the workspace clean. These tools support different types of vinyl flooring and help you achieve a professional finish.
Preparing the Subfloor for Glue Down Plank
You must prepare the subfloor carefully before you install vinyl flooring. Clean the area and remove dust, debris, and old adhesive. Check for uneven spots or cracks. Fill gaps and sand down bumps. A smooth surface is important for luxury vinyl plank installation.
Imperfections in the subfloor can telegraph through. You are more likely to see flaws beneath the floor because the material is typically thinner than floating/click-lock.
Proper installation is crucial. A poor installation will leave you with a mediocre floor that reminds you of its flaws every day.
Ignoring the procedures outlined in the manufacturer’s installation instructions increases the risk that something will go wrong.
You should follow the manufacturer’s instructions for your chosen types of vinyl flooring. This step ensures your diy-friendly installation lasts for years. You can use a moisture barrier if needed, especially in rooms like bathrooms or laundry areas. A well-prepared subfloor supports luxury vinyl plank and keeps your flooring stable.
Planning Your Flooring Layout
You need to plan your layout before you install vinyl flooring. This step helps you minimize waste and achieve a luxury look. You can use several techniques to make your diy project easier. Accurate measurement saves materials and money. You should avoid thin strips at the edges and stagger seams for stability.
| Technique | Description |
|---|---|
| Consultation and Estimation | Accurate measurement to minimize waste, potentially saving up to 10% on materials. |
| Layout Planning | Avoids thin strips at edges and staggers seams for stability and aesthetics. |
| Finishing Touches | Installation of baseboards and transitions to conceal gaps and enhance the room’s appearance. |
You can start from the center or a wall for layout symmetry. Align planks parallel to the longest wall to enhance room perception. Use chalk lines for straight and consistent rows. Decide on a starting point for the planks. Run planks parallel to the longest wall for a larger appearance. Mark reference lines to maintain straight rows.
Room shape and size influence your layout strategy. The direction of the planks can affect the perception of space, with lengthwise installation making a room feel longer. Diagonal layouts can create a more dynamic appearance, enhancing the overall aesthetic. In small or narrow rooms, large format pieces draw the eye outward and make walls feel farther apart. Laying planks lengthwise can stretch the room, while a diagonal layout may create a more dynamic look. Laying planks parallel to the longest wall makes a narrow room appear longer, guiding the eye across the space. Proper installation can stretch sightlines and enhance natural light.
You should plan your luxury vinyl plank layout before you begin. This step ensures your diy-friendly installation looks professional and feels comfortable underfoot. You can use these techniques for all types of vinyl flooring, including luxury vinyl plank and glue-down vinyl flooring.
Applying Adhesive for Vinyl Plank
You need to choose the right adhesive for your vinyl flooring project. The type of adhesive you use depends on the room and the subfloor. You can see the most common adhesives in the table below:
| Adhesive Type | Recommended Use |
|---|---|
| Epoxy-based adhesives | High moisture areas (bathrooms, kitchens, basements) |
| Pressure-sensitive adhesives | Peel-and-stick planks and general use |
| Polyurethane adhesives | Demanding commercial settings or uneven subfloors |
You should match the adhesive to the backing and thickness of your vinyl plank. Always check that the adhesive works with your subfloor, whether it is concrete, wood, or another material. Look for adhesives that meet ASTM standards for strength and safety.
Before you start, make sure the subfloor is clean and dry. Remove all dust and old glue. Use a chalk line to mark straight guides on the floor. Spread the adhesive with a notched trowel held at a 45-degree angle. This helps you get even coverage. Wait for the adhesive to become tacky before you lay down the vinyl flooring. Drying time usually takes 30 to 45 minutes on non-porous surfaces. You should not rush this step. If you lay the planks too soon, they may not stick well.
Laying the Planks and Ensuring Proper Fit
You can now start to install the vinyl planks. Begin at the left side of the room and work toward the right. This method helps the planks lock together correctly. Use the chalk line as your guide to keep the rows straight. Press each plank firmly into the adhesive. Make sure the seams are tight and stagger the joints for a natural look.
Here are some tips to help you get a perfect fit:
- Check the subfloor for flatness with a straightedge before you install.
- Fill any low spots and sand down high spots.
- Use a moisture test if you are installing over concrete.
- Wait until the adhesive is tacky before you lay each plank.
- Use a tapping block and rubber mallet to fit the planks snugly.
- Calculate the width of the last row before you start, so you do not end up with a thin strip.
- Cut planks with a vinyl cutter or shear for clean edges.
- Remove baseboards before you install for a neat finish.
You should avoid common mistakes during installation. Do not skip acclimatizing the vinyl flooring. Leave the boxes in the room for at least 48 hours before you install. Always use the right tools. Do not forget to leave a small gap around the room for expansion. This prevents buckling and warping. Make sure you stagger the seams and do not end rows with very short boards.
Rolling and Finishing Touches for Lasting Comfort
After you finish laying the vinyl flooring, you need to roll the floor. Use a 100-pound floor roller to press the planks into the adhesive. This step is important for a strong bond. Rolling helps remove air pockets and makes sure every part of the plank sticks to the subfloor. If you skip this step, you may hear hollow sounds or see corners peel up later.
You should wait at least 72 hours before you move heavy furniture or use rolling loads on the new flooring. This gives the adhesive time to cure. During this time, keep the room at a steady temperature and avoid getting the floor wet.
For the final touches, install baseboards and transition strips. These cover the expansion gaps and give your vinyl flooring a finished look. Sweep the floor to remove dust and check for any spots that need extra attention. You can now enjoy your new, comfortable, and durable flooring for years to come.
Underfoot Comfort Comparison: Vinyl Flooring vs Laminate and Wood

How Glue Down Vinyl Flooring Feels Underfoot
You will notice a solid and stable feel when you walk on glue-down vinyl flooring. The glue-down method creates a permanent bond with the subfloor. This bond gives you a surface that does not shift or move. You get a sense of security and stability every time you step on it. The type of adhesive used also matters. Specialized adhesives help the planks resist lifting and keep the floor smooth.
The condition of your subfloor plays a big role in how vinyl flooring feels underfoot. A flat and clean subfloor means you will not feel bumps or dips. The overall design of the vinyl flooring adds to the comfort and appearance of your space. Thicker planks, such as those 6mm or more, give you more cushioning and soundproofing. These features make standing or walking for long periods more comfortable.
Here is a table that shows the key factors that influence the underfoot feel of glue-down vinyl plank flooring:
| Factor | Influence on Underfoot Feel |
|---|---|
| Installation Method | Glue-down method creates a permanent bond, enhancing stability and durability. |
| Type of Adhesive | Specialized adhesives contribute to the flooring’s ability to resist shifting and lifting. |
| Condition of Subfloor | Flaws in the subfloor can affect the final feel and performance of the flooring. |
| Overall Design of Flooring | Design impacts comfort and aesthetic appeal, contributing to the overall underfoot experience. |
You can also see how thickness affects comfort in this table:
| Thickness | Benefits |
|---|---|
| 6mm+ | More cushioning, soundproofing, and insulation, ideal for standing or walking areas |
Vinyl flooring gives you a warm feeling underfoot. It absorbs sound and reduces noise in your home. You will enjoy a quiet and cozy space, especially if you choose thicker planks. The appearance of vinyl flooring can also mimic natural wood, giving you both style and comfort.
Laminate Flooring Underfoot Experience
Laminate flooring gives you a different feeling underfoot. The surface feels firmer and less forgiving than vinyl. You may notice that laminate does not have as much cushioning. This can make standing for long periods less comfortable. Laminate flooring can also be noisier, especially in large rooms or open spaces.
Here is a table that compares laminate flooring and vinyl flooring:
| Feature | Laminate Flooring | Vinyl Flooring |
|---|---|---|
| Comfort Underfoot | Harder and less cushioned | Softer and more flexible core |
| Sound Absorption | Noisier, especially in large rooms | Better sound-dampening properties |
| Warmth | Less warmth compared to vinyl | Provides warmth, especially with underlayment |
You might hear footsteps or echoes when you walk on laminate flooring. The material can amplify sound, making rooms feel less cozy. Laminate flooring also feels cooler, especially in colder months. It does not hold warmth as well as vinyl flooring. Some types of laminate flooring offer a cushioned underlayment, but the overall feel remains firmer.
If you want a floor that feels soft and quiet, laminate flooring may not meet your needs. However, it does offer a clean and modern appearance. Many people choose laminate flooring for its easy installation and wide range of styles.
Wood Flooring Underfoot Experience
Wood flooring gives you a classic and natural feel underfoot. The density and finish of the wood affect how comfortable the floor feels. High-density wood provides better support and comfort. It acts as a shock absorber, which can reduce stress on your joints. This makes wood flooring a good choice for areas where you stand or walk often.
Here is a table that shows how density and finish affect wood flooring comfort:
| Density Type | Effect on Comfort | Additional Notes |
|---|---|---|
| High-Density | Provides better support and comfort underfoot | Acts as a shock absorber, reducing impact stress on joints and improving longevity of flooring. |
| Low-Density | May feel comfortable initially but lacks support | Can lead to discomfort as the foot bottoms out against the hard surface beneath. |
| High-Density Pads | Improves Noise Reduction Coefficient (NRC) | Absorbs kinetic energy, creating a quieter environment in the home. |
Wood flooring can feel cool to the touch, especially in winter. It does not offer as much sound absorption as vinyl flooring. You may hear footsteps or creaks as you walk. The appearance of wood flooring adds warmth and elegance to any room. Many people love the natural look and unique grain patterns.
If you want more comfort, you can add high-density pads under your wood flooring. These pads help reduce noise and make the floor feel softer. Wood flooring remains a popular choice for its beauty and durability. You get a timeless appearance and a solid feel underfoot.
Comfort and Durability Pros and Cons
You want a floor that feels good underfoot and lasts for years. Comfort and durability matter when you choose between vinyl flooring, laminate flooring, and wood. Each type offers unique benefits and drawbacks. You can see these differences in the table below.
| Flooring Type | Pros | Cons |
|---|---|---|
| Wood | Customizations, higher resale value | Messy installations, lack of versatility, little water resistance |
| Luxury Vinyl | Durable, water and scuff resistant, easy installation | May not have the same aesthetic appeal as real wood |
| Laminate | Affordable, moisture-resistant, better click lock system | Less durable than wood, may not have the same warmth or feel as natural materials |
You feel comfort underfoot with glue-down vinyl flooring. Vinyl flooring gives you a soft and stable surface. You notice less noise and more warmth. Vinyl resists water and scuffs, so you enjoy a durable floor in busy rooms. You clean vinyl easily and keep it looking new. Vinyl flooring works well in kitchens, bathrooms, and laundry rooms.
Laminate flooring feels firmer underfoot. Laminate flooring costs less and installs quickly. You find laminate flooring in many styles. Laminate resists moisture, but it does not last as long as wood or vinyl. You may see scratches or wear in high-traffic areas. Laminate flooring does not give you the same warmth as wood or vinyl.
Wood flooring gives you a classic look and natural feel underfoot. You can customize wood to match your style. Wood increases your home’s value. You need to protect wood from water and stains. Wood flooring lasts for decades if you care for it. You may find wood installation messy and time-consuming. Wood does not offer as much versatility as vinyl or laminate.
Tip: You can choose vinyl flooring for rooms with moisture. You can use laminate flooring for spaces where you want easy installation and style. You can select wood flooring for areas where you want beauty and long-term value.
Vinyl flooring stands out for durability. You see fewer scratches and stains. Vinyl resists water and holds up in busy homes. Laminate flooring gives you affordable comfort and style. You replace laminate flooring more often than vinyl or wood. Wood flooring offers unmatched beauty and strength. You enjoy wood for many years, but you need to maintain it.
You compare comfort and durability before you decide. Vinyl flooring gives you lasting comfort and durability. Laminate flooring offers quick style and easy care. Wood flooring brings elegance and long-term value. You pick the best flooring for your needs and enjoy a comfortable home.
Tips for Maximizing Comfort and Longevity with skspcflooring
Underlayment Options for Vinyl Plank
You can boost the comfort and durability of your vinyl flooring by choosing the right underlayment. When you install glue-down vinyl plank flooring, you have several underlayment options. Each type offers unique benefits for your installation. The table below shows popular underlayment choices and their advantages:
| Underlayment Type | Benefits |
|---|---|
| Cork | Reduces noise, hides imperfections |
| Foam | Cost-effective, provides cushioning and sound dampening |
| Felt | Better sound control, insulation, optional vapor barrier |
| Rubber | Absorbs sound, adds warmth, protects against water damage |
You install underlayment to create a softer feel underfoot. Underlayment helps even out minor imperfections in the subfloor. You also gain noise reduction, cushioning, warmth, and moisture protection. When you install vinyl flooring in multi-level buildings, underlayment reduces noise transfer. You protect against bacteria growth, especially on concrete subfloors. A moisture barrier is essential for below-grade installation to guard against water from concrete.
Tip: You provide proper support for your vinyl flooring by using underlayment. This step helps your installation last longer and keeps your floor comfortable.
Maintenance Advice for Lasting Flooring
You keep your vinyl flooring looking new by following simple maintenance steps. You install doormats at entryways to trap dirt and moisture. You sweep or vacuum daily, especially in high-traffic areas. Weekly mopping with a cleaner designed for vinyl flooring removes deeper dirt. You avoid harsh chemicals and abrasive tools to protect the finish.
You place protective pads under furniture to prevent indentations. You wipe up spills immediately to stop staining and mold growth. Regular maintenance extends the life of your flooring and prevents scratches and wear.
- Sweep or vacuum daily.
- Mop weekly or after spills.
- Use a damp mop with vinyl-safe cleaner.
- Avoid harsh chemicals and abrasive tools.
- Place doormats at entryways.
- Use protective pads under furniture.
- Wipe up spills right away.
You install vinyl flooring for lasting comfort and durability. You follow these maintenance tips to enjoy your floor for years. You choose skspcflooring for quality installation and reliable performance.
You can achieve lasting comfort with glue-down vinyl flooring by following a careful installation process.
- A level subfloor supports comfort and durability.
- Proper adhesive application creates a strong bond and stable surface.
- Pressing each vinyl plank firmly ensures a smooth finish.
- Take your time with the first row to set a solid base for the rest of the flooring.
- Careful attention during installation helps prevent future problems.
Vinyl flooring feels soft and warm underfoot. Laminate feels firmer, while wood offers a classic touch. Choose skspcflooring for quality, comfort, and reliable flooring installation.
FAQ
How long does glue-down vinyl flooring last?
You can expect glue-down vinyl flooring to last 15 to 20 years with proper care. Regular cleaning and quick spill removal help extend its life. High-quality vinyl and correct installation also increase durability.
Can you install vinyl flooring over existing floors?
You can install vinyl over some existing floors if the surface is smooth, clean, and dry. Avoid installing over carpet or uneven surfaces. Always check the manufacturer’s guidelines before starting your flooring project.
What rooms work best for vinyl flooring?
You can use vinyl flooring in kitchens, bathrooms, laundry rooms, and basements. These areas benefit from vinyl’s water resistance and easy cleaning. Many people also choose vinyl for living rooms and bedrooms for added comfort.
Do you need underlayment for glue-down vinyl?
You may not need underlayment for glue-down vinyl if the subfloor is smooth and dry. Some people add underlayment for extra comfort, sound reduction, or moisture protection. Always follow the flooring manufacturer’s recommendations.
How do you clean and maintain vinyl flooring?
You should sweep or vacuum your flooring daily. Use a damp mop and a cleaner made for vinyl. Avoid harsh chemicals and abrasive tools. Place mats at doors to trap dirt. Quick cleaning keeps your vinyl looking new.
Tip: Regular care helps your flooring stay beautiful and last longer.




