

You want your kitchen and bathroom floors to handle daily challenges like spills, steam, and high humidity. Construction adhesive for vinyl plank flooring gives you a strong, reliable bond that stands up to these conditions. If you use a quality vinyl plank and the right adhesive, you can trust your floors to last. skspcflooring provides flooring solutions that help you keep your home beautiful and protected, even in wet areas.
Why Construction Adhesive for Vinyl Plank Flooring Matters in Wet Areas
Preventing Water Damage
You want your kitchen and bathroom floors to stay safe from water. Water can sneak under your vinyl planks if you do not use the right adhesive. Construction adhesive for vinyl plank flooring creates a strong seal that keeps water out. Many other adhesives do not offer the same level of protection. Look at this table to see how different adhesives handle moisture:
| Adhesive Type | Moisture Resistance Characteristics |
|---|---|
| Construction Adhesive | Specifically designed for vinyl plank flooring, often includes moisture barriers for wet areas. |
| Carpet Adhesive | Needs a combination of adhesive and backing; moisture resistance depends on backing type. |
| Rubber Adhesive | Porous, absorbs moisture, can cause expansion and contraction in wet conditions. |
| Luxury Vinyl Tile (LVT) | Needs specific adhesive for moisture resistance in high-moisture environments. |
If you use the wrong adhesive, water can get between the planks. This can cause bubbling, cupping, or even mold. Here are some common reasons water damage happens:
- Gaps at seams or edges let moisture seep in.
- Using too much water when cleaning pushes moisture between planks.
- Leaving spills on the floor for too long breaks down the wear layer.
- Installing over a damp subfloor lets hidden moisture cause damage.
Ensuring Long-Term Stability
You want your floors to last for years, even in busy kitchens and bathrooms. Vinyl adhesive helps keep each plank in place, even when the room gets steamy or wet. When you use construction adhesive for vinyl plank flooring, you get a bond that stands up to daily use. This adhesive also helps prevent the planks from shifting or lifting over time.
Vinyl adhesive works well because it is flexible and strong. It can handle changes in temperature and humidity. You do not have to worry about your floor coming loose or getting damaged by water. With the right vinyl adhesive, you protect your investment and enjoy beautiful, stable floors for a long time.
How Construction Adhesive for Vinyl Plank Flooring Performs in Kitchens and Bathrooms
Water Resistance and Spill Protection
You want your kitchen floor to stay dry and safe. Spills happen often in kitchens. If you use construction adhesive for vinyl plank flooring, you protect your subfloor from water. High-quality adhesive creates a strong barrier. Liquids cannot seep through the planks. This helps keep your floor looking new and prevents damage underneath.
Vinyl adhesive works well in kitchens. It stops spills from reaching the subfloor. You do not have to worry about water causing problems. Proper adhesive application gives you peace of mind. You can clean up spills quickly and know your floor stays protected.
Tip: Always wipe up spills right away. Even with strong adhesive, quick cleaning keeps your floor in top shape.
Steam and Humidity Defense
Bathrooms often fill with steam after showers. Humidity rises and can cause problems for many types of flooring. Vinyl adhesive stands up to steam and moisture. It keeps each plank firmly in place. You do not see lifting or shifting, even when the air gets damp.
You can trust construction adhesive for vinyl plank flooring in bathrooms. It resists humidity and stops water from sneaking under the planks. Your floor stays stable and secure. You enjoy a bathroom that looks clean and feels comfortable.
- Vinyl adhesive prevents mold growth.
- It keeps edges sealed tight.
- You avoid costly repairs from water damage.
Withstanding Temperature Fluctuations
Kitchens and bathrooms change temperature often. Cooking heats up the kitchen. Hot showers warm the bathroom. You need a floor that stays strong through these changes. Vinyl adhesive keeps its bond even when temperatures rise or fall.
Here is a table that shows how construction adhesive for vinyl plank flooring performs during temperature changes:
| Feature | Details |
|---|---|
| Bond Strength | Maximum bond strength |
| Moisture Resistance | High moisture resistance |
| Application Method | Roller or trowel applied |
| Temperature Maintenance | 65°-95°F for 72 hours before, during, and after |
| Humidity Control | 35%-65% relative humidity for 72 hours |
| Moisture Barrier | Does not form a moisture barrier |
You get a floor that stays in place. The adhesive does not weaken when the room gets hot or cold. You do not see gaps or loose planks. Vinyl adhesive gives you lasting results in every season.
Choosing the Right Vinyl Adhesive for Kitchens and Bathrooms
Waterproof and Mold-Resistant Features
You want your kitchen and bathroom floors to stay safe from water and mold. The best type of adhesive for these rooms must be waterproof. This feature keeps water from seeping under your vinyl planks. Mold-resistant properties also help protect your home. When you use vinyl adhesive with these features, you stop mold from growing in damp spaces. This keeps your floors clean and healthy. Many vinyl flooring adhesives offer both waterproof and mold-resistant benefits, making them a smart choice for wet areas.
Tip: Always check the label to make sure your adhesive is both waterproof and mold-resistant before you start your project.
Flexibility and Strength for Lasting Bonds
You need an adhesive that stays strong but also moves with your floor. Kitchens and bathrooms often have changes in temperature and humidity. Vinyl adhesive with flexibility can handle these changes. It lets your floor expand and contract without breaking the bond. Strength is just as important. A strong adhesive keeps your planks in place, even with lots of foot traffic.
Here is a table that shows why flexibility and strength matter for your floors:
| Feature | Description |
|---|---|
| Flexibility | Remains permanently flexible to handle expansion and contraction. |
| Strength | Holds planks tight, even with heavy use and changing conditions. |
| Waterproof | Keeps your floor durable in wet areas for many years. |
When you pick an adhesive with these qualities, your floor lasts longer and looks better.
Compatibility with skspcflooring Products
You want your adhesive to work well with your skspcflooring vinyl planks. Not every adhesive fits every product. For the best results, use adhesives that match the recommendations for skspcflooring. Here is a list of adhesives that work well:
| Recommended Adhesives | Notes |
|---|---|
| 2200 | Use a comparable adhesive if needed |
| 4200 | Use a comparable adhesive if needed |
| 200 | Use a comparable adhesive if needed |
| 1500 | Use a comparable adhesive if needed |
- Always follow the instructions on the adhesive label.
- Install your flooring into wet adhesive for the best bond.
- Leave a 1/4” space around the edges for expansion.
- Check the label for moisture limits.
Choosing the right vinyl adhesive ensures your skspcflooring products perform their best in kitchens and bathrooms.
Application Tips for Construction Adhesive in Wet Areas
Preparing the Subfloor for Vinyl Plank Flooring
You want your new floor to last. Start by preparing the subfloor the right way. Follow these steps to get the best results:
- Inspect the subfloor. Look for cracks, holes, or bumps.
- Clean the surface. Remove dust, dirt, and any sticky residue.
- Level the floor. Fill low spots and sand down high spots.
- Prime the subfloor. Use a primer to help the adhesive stick better.
- Install a moisture barrier. This keeps water from coming up from below.
- Add underlayment if needed. This gives your vinyl planks a smooth base.
Taking time with these steps helps your vinyl floor glue work well and keeps your floor strong in kitchens and bathrooms.
Applying Adhesive Evenly and Effectively
You want your vinyl planks to stay in place. Use these tips for even and effective adhesive application:
- Lay down a moisture barrier or special underlayment to block water.
- Seal the subfloor to make it moisture-resistant.
- Let your vinyl planks sit in the room for a day or two before you start. This helps them adjust to the temperature and humidity.
- Keep the room’s humidity between 40% and 60%.
- Leave a 1/4 inch gap along walls and cabinets. This lets the floor expand and contract.
- Make sure each plank locks tightly into the next one.
These steps help your vinyl floor glue create a strong, lasting bond, even in wet areas.
Allowing Proper Curing Time
You need to let the adhesive cure before using the floor. Curing time depends on several factors. Check this table to see what affects drying:
| Factor | Impact on Curing Time |
|---|---|
| Temperature | Lower temperatures slow drying; takes longer at 50°F vs 70°F |
| Porosity | Non-porous surfaces can extend curing from 24 hours to weeks |
| Moisture | Humidity can prolong drying; some adhesives cure faster with moisture |
| Amount of Adhesive | Larger amounts take longer to cure than smaller amounts |
Wait until the adhesive is fully dry before exposing your floor to water or heavy use. This step protects your floor and helps your installation last for years.
Sealing Edges and Joints for Maximum Protection
You want your vinyl plank flooring to last, especially in kitchens and bathrooms. Sealing the edges and joints gives your floor extra protection against water and steam. Water often tries to sneak in at the seams. If you seal these spots, you block moisture from getting under your planks.
You can use a waterproof sealant or a special edge sealer made for vinyl flooring. These products fill small gaps and create a tight barrier. When you seal the edges, you stop water from causing damage like swelling or mold.
Here is a simple step-by-step guide to sealing edges and joints:
- Clean the edges and joints. Remove dust and dirt with a damp cloth.
- Dry the area. Make sure no water stays on the surface.
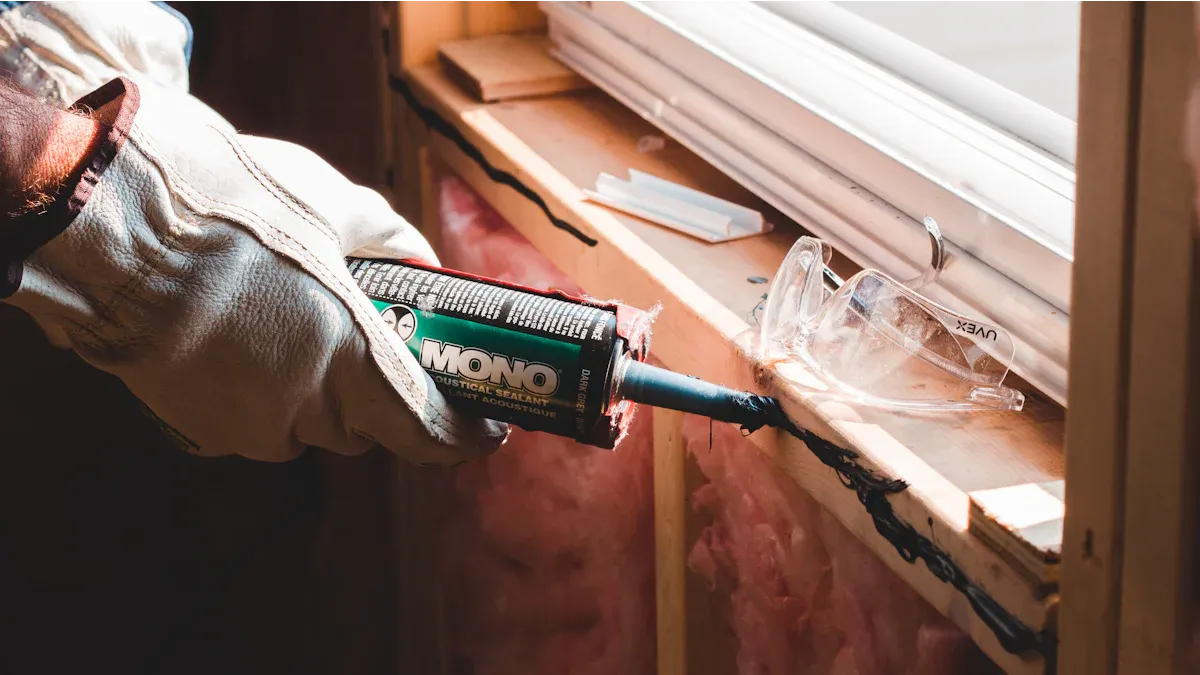
- Apply the sealant. Use a caulking gun or squeeze tube for even coverage.
- Smooth the sealant. Use a small tool or your finger to press the sealant into the gaps.
- Wipe away extra sealant. Use a damp cloth before it dries.
- Let the sealant dry. Check the label for drying time.
Tip: Choose a clear or color-matched sealant for a neat look. This keeps your floor looking great.
Sealing edges and joints helps you avoid costly repairs. You protect your subfloor and keep your vinyl planks in place. You also make cleaning easier because water cannot seep under the floor.
Here is a quick table to show the benefits:
| Benefit | Why It Matters |
|---|---|
| Stops water intrusion | Prevents swelling and mold |
| Increases durability | Keeps planks secure and long-lasting |
| Easier cleaning | Blocks dirt and water from getting in |
You can trust this extra step to give your kitchen and bathroom floors the best defense. Sealing edges and joints is a smart move for any home.
Common Mistakes to Avoid with Vinyl Adhesive
When you install vinyl plank flooring in kitchens or bathrooms, you want to avoid common mistakes. These errors can lead to water damage, loose planks, or even mold. Knowing what to watch for helps you get the best results.
Using the Wrong Adhesive Type
You need to choose the right adhesive for your project. Not all adhesives work well in wet areas. Some adhesives break down when exposed to water or steam. If you use the wrong type, your floor may lift or shift. Always check the label to make sure the adhesive is designed for vinyl plank flooring and wet environments. Many homeowners make the mistake of using carpet glue or wood glue. These products do not offer the water resistance you need.
Tip: Look for vinyl floor adhesives that list waterproof and mold-resistant features on the packaging.
Skipping Surface Preparation
Proper surface preparation is key to a long-lasting floor. If you skip this step, you risk poor adhesion and uneven planks. You should always inspect the subfloor for cracks, bumps, or moisture. Clean the area well and make sure it is dry. Level the surface before you start. Many people rush this step, but it is important for a strong bond.
Here are some common problems caused by poor preparation:
- Planks that do not stick
- Gaps between planks
- Uneven surfaces
Overlooking Moisture Barriers
Moisture barriers protect your floor from water coming up from below. If you forget this step, water can seep into the subfloor and cause damage. You should always install a moisture barrier, especially in kitchens and bathrooms. This extra layer keeps your floor dry and helps prevent mold growth. Many people also forget to check humidity levels before installation. High humidity can slow down adhesive curing and weaken the bond.
A quick checklist for moisture control:
- Install a moisture barrier
- Check subfloor for dampness
- Monitor room humidity
Avoiding these mistakes helps your vinyl plank flooring last longer and look better.
Rushing the Installation Process
You might feel excited to finish your new kitchen or bathroom floor quickly. You want to see the results right away. If you rush the installation process, you risk making mistakes that can lead to costly repairs later. Construction adhesive for vinyl plank flooring needs time to set and cure. You must follow each step carefully to get the best results.
Here are some problems you may face if you rush:
- Adhesive does not bond properly. Planks can shift or lift.
- Moisture sneaks under the planks. Water damage and mold can appear.
- Edges and joints stay unsealed. Dirt and water can get in.
- Floor looks uneven. You may see gaps or bumps.
Tip: Take your time with each step. Read the instructions on the adhesive and flooring package. Patience gives you a stronger, longer-lasting floor.
You should let the adhesive cure for the recommended time. Most adhesives need at least 24 hours before you walk on the floor or clean it. If you skip this waiting period, you weaken the bond. You also risk damaging the planks.
Follow this simple checklist to avoid rushing:
- Prepare the subfloor. Clean and level it.
- Apply adhesive evenly. Use the right tools.
- Place planks carefully. Press them firmly.
- Seal edges and joints. Use a waterproof sealant.
- Wait for curing. Check the label for drying time.
You build a floor that stands up to spills, steam, and humidity when you follow these steps. You protect your investment and enjoy beautiful, durable vinyl plank flooring in your kitchen or bathroom.
Maintenance and Longevity of Adhesive-Bonded Vinyl Plank Flooring
Cleaning and Care for Moisture-Prone Areas
You want your vinyl plank flooring to look great for years. Regular cleaning helps you keep your floors in top shape. Use a soft broom or vacuum to remove dust and dirt. For sticky spots, use a damp mop with a gentle cleaner. Avoid harsh chemicals because they can damage the surface. Do not use too much water when you mop. Too much moisture can seep into the seams.
Tip: Wipe up spills right away. Quick action stops water from reaching the adhesive.
You can place mats near sinks and tubs. Mats catch water and protect your floor. You should also check under rugs for trapped moisture.
Monitoring for Moisture Issues
You need to watch for signs of moisture problems. Early detection helps you prevent damage. Look for these warning signs:
- Edges of planks start to lift.
- You see bubbles or warping.
- The floor feels soft or spongy in spots.
- You notice a musty smell.
If you spot any of these issues, act fast. Dry the area and check for leaks. You may need to reseal edges or joints. You can use a moisture meter to check the subfloor if you suspect hidden water.
Note: Regular checks help you catch problems before they get worse.
How Adhesive Choice Impacts Durability
Your choice of adhesive plays a big role in how long your floor lasts. High-quality construction adhesive resists water and holds planks tight. This keeps your floor stable, even in kitchens and bathrooms. Cheaper adhesives may break down over time. You want an adhesive that stays strong and flexible.
Here is a quick table to show how adhesive affects durability:
| Adhesive Quality | Floor Lifespan | Resistance to Water | Maintenance Needs |
|---|---|---|---|
| High-Quality | 10+ years | Excellent | Low |
| Standard | 5-8 years | Good | Moderate |
| Low-Quality | 2-4 years | Poor | High |
Choose the best adhesive for your skspcflooring vinyl planks. You will enjoy beautiful, long-lasting floors with less worry.
Why Choose skspcflooring for Your Vinyl Plank Flooring Needs
Commitment to Quality and Durability
You want floors that last. skspcflooring focuses on strong, reliable products. The company uses advanced technology and strict quality checks. Every vinyl plank goes through careful testing. You get floors that resist scratches, dents, and daily wear. Your kitchen and bathroom floors stay beautiful for years. When you choose skspcflooring, you invest in flooring that stands up to busy homes and tough conditions.
Certified and Eco-Friendly Flooring Solutions
You care about safety and the environment. skspcflooring meets top international standards like ISO9001, ISO14001, EN, ASTM, and GB. These certifications show that the floors are safe for your family. The company uses eco-friendly materials and processes. You help protect the planet when you pick these floors. The products do not release harmful chemicals. You can feel good about your choice for your home and the earth.
Note: Certified flooring gives you peace of mind. You know your floors meet strict health and safety rules.
Expert Support for Kitchens and Bathrooms
You may have questions about installation or care. skspcflooring offers expert support for every step. The team helps you choose the right product for wet areas. You get advice on using quality adhesives and tips for a smooth installation. If you need help, you can contact their support team by email or phone. You always have someone ready to guide you. This support makes your flooring project easier and more successful.
| Support Service | What You Get |
|---|---|
| Product Selection Help | Find the best floor for rooms |
| Installation Guidance | Step-by-step instructions |
| After-Sales Support | Answers to your questions |
You can trust skspcflooring to help you create safe, stylish, and long-lasting floors in your kitchen and bathroom.
You can count on construction adhesive for vinyl plank flooring to protect your kitchen and bathroom. This solution stands up to spills, steam, and humidity. You get a floor that stays beautiful and strong.
- 100% waterproof core keeps water out.
- Sealed click-lock joints block moisture.
- Steam and humidity proof for bathroom use.
- Spill protection makes cleanup easy.
Choose the right adhesive and follow each step. Trust skspcflooring for high-quality, moisture-resistant flooring that lasts.
FAQ
Can you use construction adhesive for vinyl plank flooring in bathrooms?
Yes, you can use construction adhesive for vinyl plank flooring in bathrooms. This adhesive creates a strong, water-resistant bond. Your floor stays secure, even with steam and humidity.
How long should you wait before walking on newly installed vinyl plank flooring?
You should wait at least 24 hours before walking on your new floor. This gives the adhesive time to cure. Always check the adhesive label for exact drying times.
What makes skspcflooring products suitable for wet areas?
skspcflooring products use high-quality materials. These floors resist water and mold. You get certified, durable flooring that stands up to kitchen spills and bathroom steam.
How do you clean adhesive-bonded vinyl plank flooring?
Use a soft broom or vacuum for dust. Wipe spills with a damp cloth. Avoid harsh chemicals. Quick cleaning keeps your floor looking new and protects the adhesive.
Do you need to seal the edges of vinyl plank flooring in kitchens?
Yes! Sealing the edges helps block water from getting under the planks. This step protects your subfloor and keeps your kitchen floor strong and long-lasting.




