

You need to pay close attention to the thickness of vinyl plank flooring when you install it over existing tile floors. Thicker planks help cover grout lines and imperfections, which keeps your floor looking smooth. Many flooring experts say thicker vinyl reduces clicking sounds and prevents grout lines from showing through. You will notice a difference in comfort and feel with thicker planks. Thicker vinyl plank flooring adds durability, especially in high-traffic areas. It also provides better cushioning, soundproofing, and insulation, making your installation more comfortable. If you plan to install vinyl plank flooring over existing tile, choosing the right thickness gives you a sturdy and long-lasting floor.
- Thicker vinyl plank flooring offers more cushioning for areas with prolonged standing or walking.
- Enhanced soundproofing and insulation are extra benefits of increased thickness.
Thickness of Vinyl Plank Flooring Over Tile Floors

Covering Imperfections and Grout Lines
When you install luxury vinyl flooring over existing floors, especially tile, you often face uneven surfaces and visible grout lines. Thicker planks help you cover these imperfections. If you choose thin vinyl, grout lines and bumps may show through, making your new floor look uneven. Thicker luxury vinyl plank flooring hides these flaws and gives you a smooth, attractive finish.
- Thicker planks provide better coverage over uneven surfaces.
- Thin vinyl may not cover grout lines, so they can become visible.
- Always select flooring that works well over vinyl and tile to prevent problems like telegraphing.
You want your new floor to look flawless. Choosing the right thickness helps you achieve that goal.
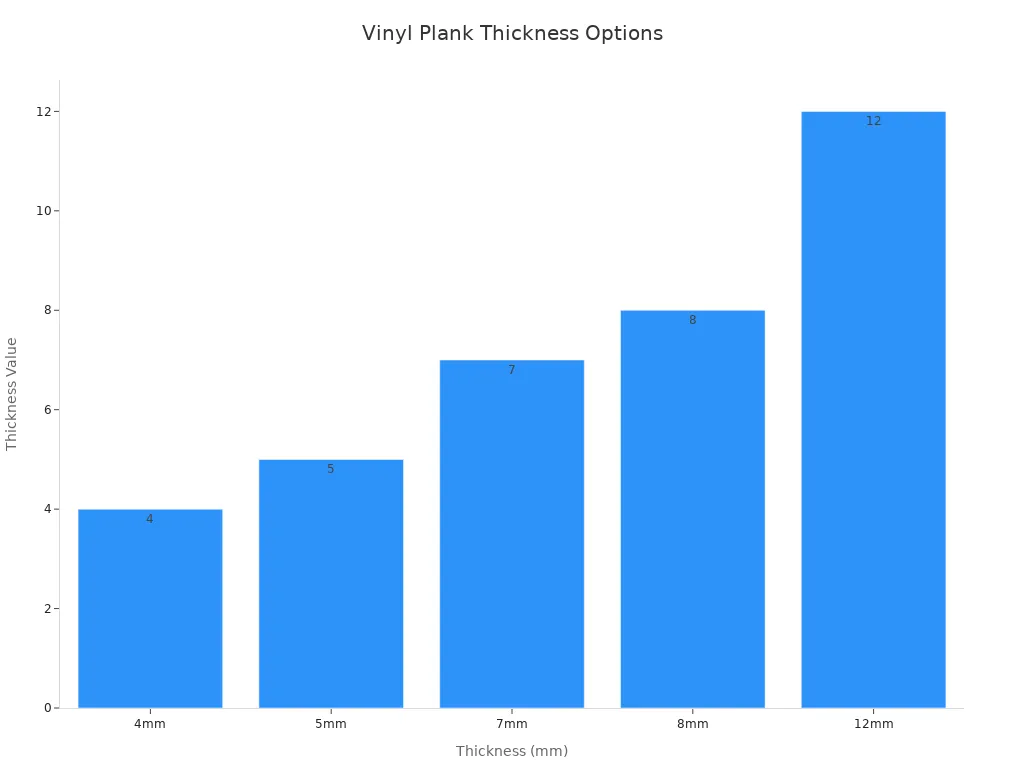
| Thickness | Description |
|---|---|
| 4mm | Starting point for many homeowners, suitable for high-traffic areas. |
| 5mm | Enhanced durability and premium feel, better sound absorption. |
| 7mm | Top-tier choice for durability and luxury, superior sound insulation. |
| 8mm | Entry point to commercial-grade performance, withstands heavy foot traffic. |
| 12mm | Pinnacle of luxury and performance, unmatched stability and comfort. |
Impact on Durability and Longevity
You want your luxury vinyl flooring to last for years, even in busy spaces. Thicker planks give you more protection against scratches and wear. If you install thin planks, you may notice scratches and dents sooner, especially in high-traffic areas. A thicker wear layer means your floor stays beautiful longer.
- Thicker wear layers resist scratches and wear better.
- Thin wear layers can show damage quickly in busy homes.
- Match the thickness to your lifestyle and the amount of foot traffic.
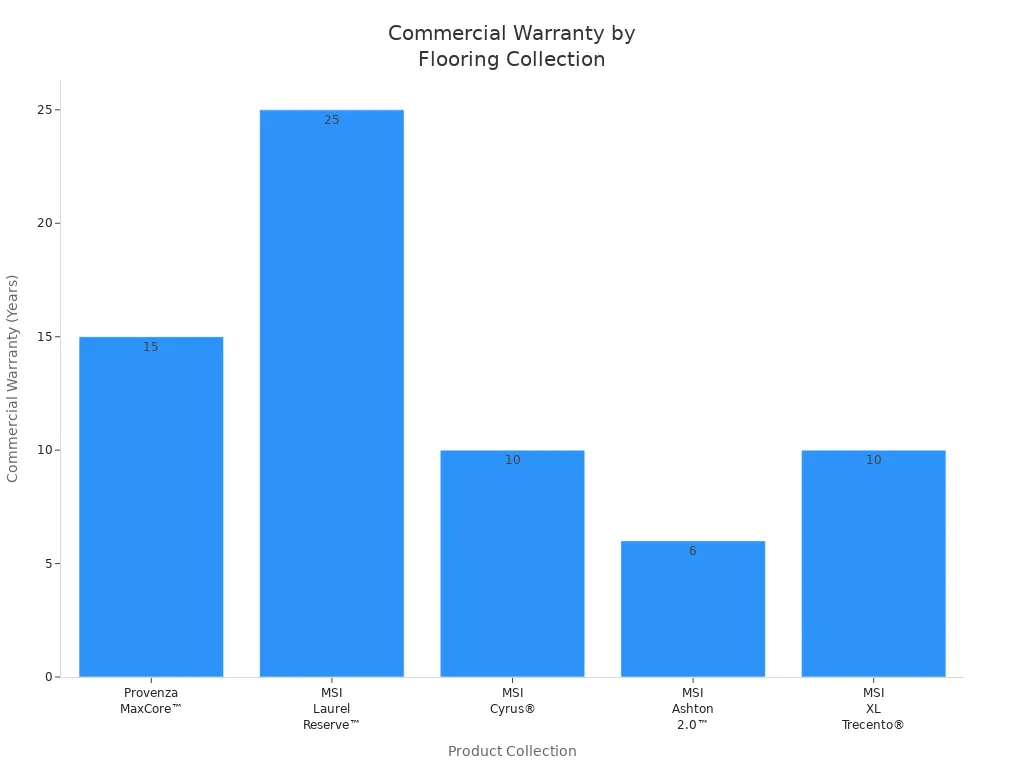
Luxury vinyl plank flooring often comes with different warranty terms based on thickness. Thicker planks usually have longer warranties, which means you get more peace of mind. For example, some collections offer lifetime residential warranties for thicker planks, while thinner options may have shorter coverage.
| Product Collection | Thickness | Residential Warranty | Commercial Warranty | Notes |
|---|---|---|---|---|
| Provenza MaxCore™ | N/A | Lifetime Limited | 15 Year Limited | Must be professionally installed; covers manufacturing defects. |
| MSI Laurel Reserve™ | 8MM | Lifetime Limited | 25 Year Limited | Features a 22MIL protection layer for durability. |
| MSI Cyrus® | 5MM | Lifetime Limited | 10 Year Limited | Includes a 12MIL protection layer; easy-install locking system. |
| MSI Ashton 2.0™ | 4.4MM | Lifetime Limited | 6 Year Limited | Comes with a premium waterproof pad for comfort and moisture protection. |
| MSI XL Trecento® | 5MM | Lifetime Limited | 10 Year Limited | Features “no acclimation” technology for immediate installation. |
Tip: Thicker luxury vinyl flooring may cost more, but it often comes with better warranties and longer-lasting performance. This makes it a smart investment for your home.
Comfort and Sound Underfoot
When you walk on luxury vinyl flooring, you want it to feel comfortable and quiet. Thicker planks give you more cushioning and stability. This makes standing or walking on your floor much more pleasant, especially in rooms where you spend a lot of time.
- Thicker planks provide extra comfort underfoot.
- They absorb more sound, which helps reduce noise and echo.
- This is especially helpful in multi-level homes or apartments.
If you install luxury vinyl flooring over tile floors, you will notice less noise and more comfort with thicker planks. Many homeowners choose flooring that works well over vinyl and tile for these reasons. You get a quieter, softer, and more enjoyable space.
Note: Thicker luxury vinyl flooring is ideal for high-traffic areas and noise-sensitive environments. It helps you create a peaceful and comfortable home.
When you install luxury vinyl flooring over existing floors, always consider the thickness. It affects how your floor looks, feels, and lasts. Choosing the right thickness ensures you get the best results from your installation.
Choosing Luxury Vinyl Flooring Thickness for Uneven Subfloors
Recommended Thickness for Laying Vinyl Planks Over Old Tile
You need to select the right thickness when laying vinyl planks over old tile. The condition of your subfloor plays a big role in this decision. If your tile floor has deep grout lines or uneven spots, thicker vinyl planks help cover these imperfections. You get a smoother surface and a more attractive finish. Many experts recommend a minimum thickness of 4mm for click-and-lock installation. Thicker planks, such as 5mm or 6mm, offer better comfort and durability. You should check for level before you install any flooring. If your subfloor is not flat, thicker planks hide flaws better.
| Factor | Recommendation |
|---|---|
| Wear Layer Thickness | Minimum of 12 mil for residential; 20 mil or more for active families/pets; 28 mil for commercial installations. |
| Click Flooring Thickness | At least 5 mm for easier installation and secure click mechanism. |
| Transition Considerations | Ensure even floors to avoid awkward transitions between rooms. |
You want your new floor to last. Choosing the right thickness helps you achieve that goal.
When to Use Thicker vs. Thinner Planks
You must decide between thicker and thinner planks based on your subfloor and room usage. Thicker vinyl planks perform well in areas with uneven tile or high foot traffic. They provide better comfort, sound insulation, and durability. You should use thicker planks in kitchens, hallways, and living rooms. Thinner planks work best in rooms with less activity or where the subfloor is already flat.
| Type of Vinyl Plank | Performance Characteristics |
|---|---|
| Thicker Vinyl Planks | Better comfort, sound insulation, and durability. Ideal for areas where comfort is prioritized. |
| Thinner Vinyl Planks | Greater dimensional stability, especially in larger open spaces. Better for installations where movement is a concern. |
You need to check for level before you install thinner planks. If you ignore this step, you risk shifting or buckling. Gaps may appear, and imperfections in the subfloor become visible. Thinner vinyl planks can telegraph flaws from the tile, making them more apparent. You should balance thickness with your budget. High-traffic areas require thicker options for increased durability. Thinner options can be more economical for less frequented rooms.
Tip: Assess your subfloor condition and consider the room usage before you choose the thickness. Click-and-lock installation needs a minimum thickness of 4mm.
Subfloor Preparation and Leveling Tips
You must prepare your subfloor before you install luxury vinyl plank flooring. Start by clearing out furniture and removing any old flooring if necessary. Make sure the tile floor is dry, clean, and flat. You need to check for level and make repairs to the subfloor before laying vinyl planks. If you skip these steps, you may face costly repairs later.
- Clear out furniture and remove old flooring if needed.
- Ensure the tile floor is dry, clean, and flat.
- Make repairs to the subfloor before installation.
You get the best results when you follow these steps. Proper preparation prevents shifting, buckling, and visible imperfections. You create a sturdy foundation for your new floor.
Note: Always check for level and fix any uneven spots before you install vinyl planks. This ensures a smooth and long-lasting installation.
How to Install LVP Flooring Over Tile Floors with skspcflooring
Preparing Old Tile for LVP Installation
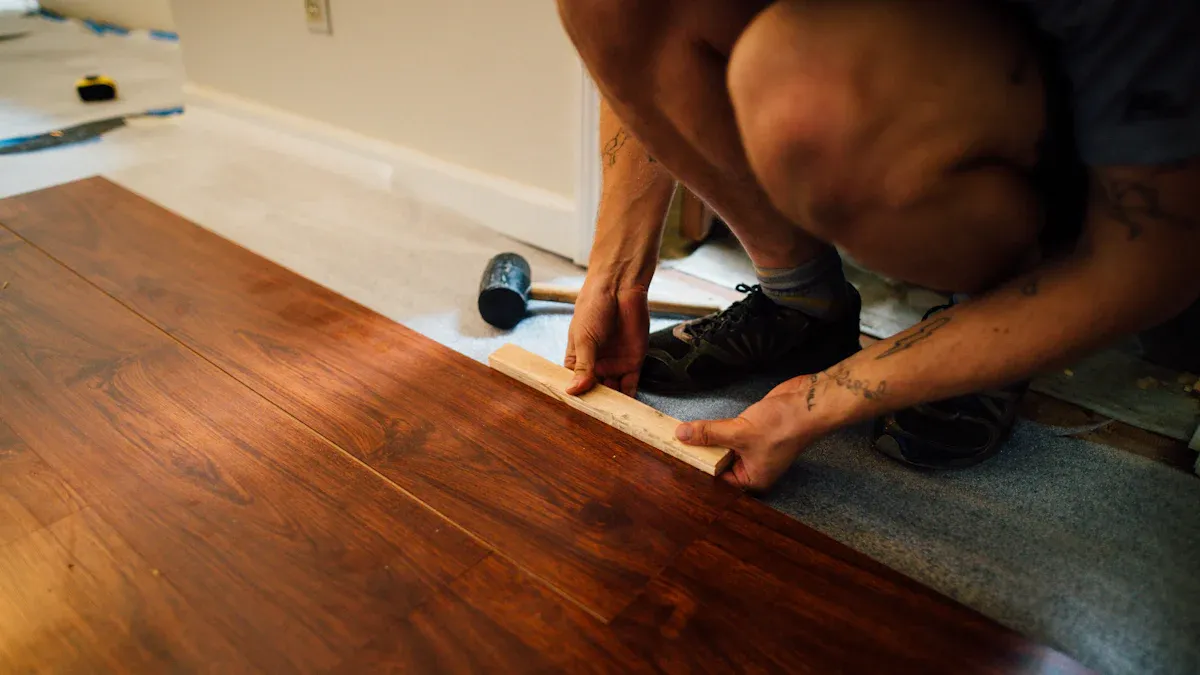
You must start by inspecting the floor for damage. Look for cracks, loose tiles, or soft spots in the existing flooring. If you find any issues, repair them before you install vinyl plank flooring. Clean the tile surface thoroughly. Remove dust, grease, and debris. If the tile is in perfect condition, you can install lvp flooring directly after cleaning. For slightly uneven tile, fill grout lines and dips with a thin self-leveling skim coat. Grind down any high spots. When you see moderate unevenness, remove loose tiles and apply a thicker self-leveling compound. Severe unevenness requires removing the tile and preparing the subfloor.
| Tile Condition | Preparation Steps |
|---|---|
| Perfect Condition | Clean and install lvp flooring with proper underlayment. |
| Slightly Uneven | Fill grout lines, grind high spots, use self-leveling skim coat. |
| Moderate Unevenness | Remove loose tiles, grind high tiles, apply thicker self-leveling compound. |
| Severe Unevenness | Remove tile, inspect the floor for damage, repair subfloor, install lvp flooring. |
Tip: Always inspect the floor for damage before you install vinyl plank flooring. This prevents future problems.
Using Underlayment with Different Thicknesses
Underlayment improves the performance of your new floor. It provides support, sound absorption, and moisture protection. You must install underlayment between the vinyl plank flooring and the existing flooring. The type and thickness of underlayment affect comfort and durability. Thicker planks often need underlayment for extra cushioning and noise reduction. Thinner planks may require firmer underlayment for stability.
Common underlayment materials include:
- Cork
- Foam
- Felt
- Rubber
- Plywood
- OSB
Choose underlayment based on the thickness of your vinyl planks and the needs of your space. Underlayment helps reduce sound, adds thermal insulation, and protects against mold. You get a more comfortable and durable floor when you install underlayment correctly.
Leveling Solutions for Deep Grout Lines
Deep grout lines can cause problems when you lay the planks. You need to fill these lines to create a flat surface. Use a self-leveling compound to fill gaps and smooth the tile. Grout leveling compound works well for deep grout lines. If grout lines are wider than ¼ inch, fill them with a leveling compound before you install vinyl plank flooring. This step ensures the planks sit properly and prevents gaps.
- Self-leveling compound fills gaps and creates a smooth surface.
- Grout leveling compound fills deep grout lines.
- Fill grout lines wider than ¼ inch before you lay the planks.
Note: Proper leveling prevents shifting, creaking, and visible imperfections in your new floor.
Mistakes to Avoid When Laying Vinyl Planks
You want your new floor to look great and last a long time. To get the best results, you need to avoid some common mistakes when you install vinyl planks over tile. Many people make these errors, but you can prevent them with careful planning.
-
Skipping Proper Subfloor Preparation
You must make sure the tile floor is clean, dry, and flat before you install anything. If you skip this step, bumps or gaps can show up under your new floor. Always sweep and mop the tile, then check for uneven spots. -
Ignoring Moisture, Temperature, and Room Suitability
You should test the moisture level of the room. High moisture can damage your floor. Use a vapor barrier if needed. Keep the room at a steady temperature during installation. -
Skipping Acclimation
Let the vinyl planks sit in the room for at least 48 hours before you install them. This helps the planks adjust to the room’s temperature and humidity. If you skip this, the planks might expand or shrink after you install them. -
Poor Planning of Expansion Gaps
Always leave a 1/4 inch gap around walls and fixed objects. This gap lets the floor expand and contract. If you forget this, your floor can buckle or lift. -
Improperly Staggering Seams
Stagger the seams of each row by at least 6 inches. This makes your floor stronger and helps it look better. -
Failing to Clean the Grooves
Check and clean the grooves of each plank before you install them. Dirt or dust can stop the planks from fitting together tightly. -
Using the Wrong Cutting Tool
Use the right tool to cut the planks. A dull or wrong tool can damage the edges and make the floor look uneven.
Tip: Always read the installation instructions for your flooring. Each brand may have special steps you need to follow.
If you avoid these mistakes, you will have a smooth and sturdy floor. Careful work during install means fewer problems later.
Real-World Results with skspcflooring Luxury Vinyl Flooring
Performance of Thicker Planks Over Tile Floors
You notice a clear difference when you install thicker vinyl planks over tile floors. Thicker planks feature a strong wear layer, usually between 12 and 20 mils. This guide shows that thicker vinyl handles everyday wear and tear in busy rooms like kitchens and family spaces. You get better stability and comfort underfoot. Thicker planks absorb sound more effectively, so your rooms stay quieter. You also see fewer imperfections from the tile below. The table below helps guide your choice:
| Attribute | Thicker Planks | Thinner Planks |
|---|---|---|
| Comfort | Better stability and comfort underfoot | Suitable for low-use spaces |
| Sound Absorption | Improved sound insulation | Less effective in noise reduction |
| Suitability | Ideal for high-traffic areas | More appropriate for low-traffic areas |
| Wear Layer Importance | Thicker wear layer enhances durability | Thinner wear layer may reduce longevity |
Tip: Use this guide to select the right plank thickness for your installation.
Homeowner Experiences and Practical Lessons
Homeowners who install thicker vinyl planks report greater durability and comfort. Reviews and case studies guide you to choose thicker planks for high-traffic areas. You see fewer scratches and dents, and the floor feels warmer and softer. Many homeowners guide their decisions by looking at the wear layer. A 20mil wear layer works best for hallways and living rooms. Bedrooms need only a 12mil layer. You learn that balancing durability and comfort is important. This guide helps you match the thickness to your needs.
Note: Always use a guide to check the wear layer and overall thickness before you install vinyl flooring.
Maintenance and Longevity Tips
You want your floor to last. Follow this guide for easy maintenance:
- Sweep or vacuum daily to prevent scratches.
- Damp mop weekly with a pH-neutral cleaner.
- Address spills right away to avoid stains.
- Use felt pads, area rugs, and entry mats to reduce wear.
- Avoid ammonia-based, bleach, abrasive, wax-based, and solvent-based cleaners.
This guide keeps your skspcflooring luxury vinyl flooring looking new. You protect your investment and enjoy a beautiful floor for years.
Tip: Regular care and following this guide help maximize the longevity of your installation.
You need to choose the right thickness when you install vinyl plank flooring over old tile. Thicker planks cover grout lines and imperfections, giving you a smooth finish. Most industry guidelines recommend a thickness between 4mm and 8mm for best results.
| Recommended Thickness | Measurement (inches) |
|---|---|
| Minimum | 4mm (5/32 inch) |
| Maximum | 8mm (5/16 inch) |
To achieve a successful install with skspcflooring products, follow these best practices:
- Measure your room and buy extra flooring.
- Clean the tile before you install.
- Remove baseboards and fill gaps for an even surface.
- Start your install in the middle of the room and stagger the planks.
- Allow the planks to set before moving furniture back.
Tip: Always acclimate your flooring and follow the manufacturer’s guidelines for a smooth install.
FAQ
Can you use floating vinyl plank flooring over old tile?
Yes, you can use floating vinyl plank flooring over old tile. You do not need to glue or nail it down. The floating method lets you install the planks directly on top of the tile, making the process quick and easy.
How does floating vinyl plank flooring handle uneven tile surfaces?
Floating vinyl plank flooring works well on slightly uneven tile. The planks lock together and float above the tile. If you see deep grout lines or bumps, fill them first. This helps the floating floor stay flat and look smooth.
Do you need underlayment for floating vinyl plank flooring over tile?
You should use underlayment when you install floating vinyl plank flooring over tile. Underlayment adds comfort, reduces sound, and helps the floating floor last longer. It also covers small imperfections in the tile, making your new floor feel better underfoot.
How do you install floating vinyl plank flooring over tile?
First, clean the tile. Next, check for level and fill any deep grout lines. Lay down underlayment. Then, install the floating vinyl planks by clicking them together. The floating floor does not need glue or nails, so you finish the install quickly.
What are the benefits of a floating floor system?
A floating floor system is easy to install and remove. You can install it over many surfaces, including tile. The floating design allows the floor to expand and contract. This makes floating vinyl plank flooring a smart choice for many homes.




