

You can install vinyl plank flooring on uneven subfloors if you focus on proper preparation. Many homeowners run into problems like bumps, creaking, or bubbling when they skip important steps. Uneven spots can cause the flooring to wear out quickly or make noises when you walk. Moisture trapped under the planks may lead to bubbling and damage. Choosing the right types of vinyl plank flooring and using the correct underlayment helps you avoid these issues and create a strong, smooth surface.
Types of Vinyl Plank Flooring for Uneven Subfloors
Floating Vinyl Plank Flooring Options
You can choose from several types of vinyl plank flooring when working with uneven subfloors. Floating floors are a popular choice because they do not need glue or nails. Instead, you connect the planks using a click-lock system. This method allows the floor to “float” above the subfloor.
Tip: Floating floors work best for minor uneven spots. If you have small dips or bumps, the floating installation can help hide these imperfections.
Here are some reasons why floating vinyl plank flooring is a good option:
- You can install it over many surfaces, including old tile or wood.
- The planks are easy to replace if one gets damaged.
- Floating floors are quick to install, making them a favorite for DIY projects.
- You can find floating options in luxury vinyl and laminate, which both offer durability and a wide range of styles.
Luxury vinyl and laminate floors are versatile solutions for slightly uneven subfloors. These materials are durable, budget-friendly, and come in many colors and textures that look like hardwood or stone. Floating types of vinyl plank flooring with a click system work well when the subfloor is not perfectly smooth.
Glue-Down Vinyl Plank Flooring Solutions
Glue-down types of vinyl plank flooring offer another solution for uneven subfloors. You use adhesive to secure each plank directly to the subfloor. This method creates a strong bond and helps keep the planks in place.
Luxury vinyl plank is especially adaptable for slightly uneven subfloors. Its flexible design lets it fit over minor dips and waves. However, you should remember that large imperfections can still cause problems like movement or separation. Some preparation may be needed before you install glue-down planks.
Glue-down vinyl plank flooring is known for its stability and durability. The adhesive helps prevent shifting and lifting. If the subfloor has debris or uneven areas, though, these can affect the performance of the floor. Always clean and prepare the subfloor before you start.
Rigid Core and SPC Vinyl Planks by skspcflooring
Rigid core and SPC (Stone Plastic Composite) vinyl planks stand out among the types of vinyl plank flooring for uneven subfloors. These planks have a strong core layer that helps them keep their shape, even on surfaces that are not perfectly flat.
| Feature | Benefit for Uneven Subfloors |
|---|---|
| Rigid core layer | Maintains shape and stability |
| Stone plastic composite (SPC) | Resists dents and remains flat over minor bumps |
| Robust construction | Stays functional and stable on uneven surfaces |
The rigid core made from stone plastic composite materials makes the flooring resilient. You can trust that these planks will remain stable and functional, even if your subfloor has small imperfections. SK-Floor offers a wide range of rigid core and SPC vinyl planks. These products meet international quality standards and provide excellent durability for both homes and businesses.
When you choose rigid core or SPC vinyl plank flooring from skspcflooring, you get a product designed to handle the challenges of uneven subfloors. You also benefit from water resistance, easy maintenance, and a variety of modern designs.
Loose Lay Vinyl Plank Flooring
Loose lay vinyl plank flooring gives you another option when you want a simple installation process. You do not need glue or nails for this method. Instead, you place the planks directly on the subfloor. The weight and special backing of each plank help keep everything in place. This method works well for people who want a quick and easy way to update a room.
Loose lay flooring shares some similarities with floating floors. Both types do not require permanent attachment to the subfloor. You can remove or replace planks easily if you need to. This makes loose lay a good choice for temporary spaces or rooms where you might want to change the floor later.
You should know that loose lay vinyl plank flooring handles minor subfloor imperfections better than some other options. The planks can rest over small bumps or dips without much trouble. Many users say that loose lay flooring stays put on slightly uneven surfaces. The floating nature of the installation helps the planks adjust to small changes in the subfloor.
Note: Loose lay vinyl plank flooring needs a stable and mostly level subfloor. If the floor has large dips or high spots, the planks may shift or buckle over time. Water can also get under the planks if there are big gaps. Always check your subfloor before you start. Fix any major problems to make sure your floating floor lasts a long time.
Loose lay planks work best in rooms with low foot traffic. You might use them in bedrooms, offices, or basements. If you want to install flooring in a busy hallway or kitchen, you may want to look at other floating options with a locking system for extra stability.
Here are some reasons why you might choose loose lay vinyl plank flooring:
- You can install it quickly without special tools.
- The floating design lets you lift and move planks if you need to reach the subfloor.
- You do not have to wait for glue to dry or worry about fumes.
- The planks come in many colors and patterns, so you can match your style.
Loose lay vinyl plank flooring gives you flexibility and convenience. The floating method makes it easy to handle small imperfections in the subfloor. You get a smooth, modern look without a complicated installation process.
How Uneven Is Too Uneven for Vinyl Plank Flooring?
Measuring Subfloor Flatness for Planks
Before you install vinyl plank flooring, you need to check if your subfloor is flat enough. You can use simple tools and methods to measure the level of your floor. Here are some ways to do this:
- Place a long straightedge or level on the subfloor to spot high or low areas.
- Use a tape measure to check for dips or bumps under the straightedge.
- Try a moisture test, such as taping a clear plastic sheet to the floor for 24-48 hours. If you see condensation, your subfloor may have moisture issues.
- Use a calcium chloride test or an electronic moisture meter for more accurate moisture readings.
- For concrete, a relative humidity test with probes can help you check if the level is below 75%.
You want your subfloor to be as flat as possible. If you find spots that are not level, you may need to use a leveling compound to fix them.
Acceptable Tolerance Levels for Install LVP Flooring
Most flooring manufacturers set clear guidelines for how level your subfloor should be. The table below shows the tolerance levels for different flooring types:
| Flooring Type | Tolerance Level |
|---|---|
| Hardwood | No more than 1/8” variation over 6 feet |
| Laminate | Can tolerate small imperfections |
| Vinyl Plank | Can tolerate small imperfections |
For vinyl plank flooring, you should make sure the subfloor does not have large dips or high spots. Small imperfections are usually fine, but you want the floor to be mostly level for the best results.
Risks of Installing Vinyl Plank Flooring on Excessively Uneven Surfaces
If your subfloor is not level, you may face several problems after installation. Planks can shift, separate, or even break if the floor moves under your feet. You might hear creaking or see gaps appear over time. Water can collect in low spots, which may damage the planks. Always check and fix your subfloor before you start. A level surface helps your new floor last longer and look better.
Preparing an Uneven Subfloor to Install Luxury Vinyl Flooring
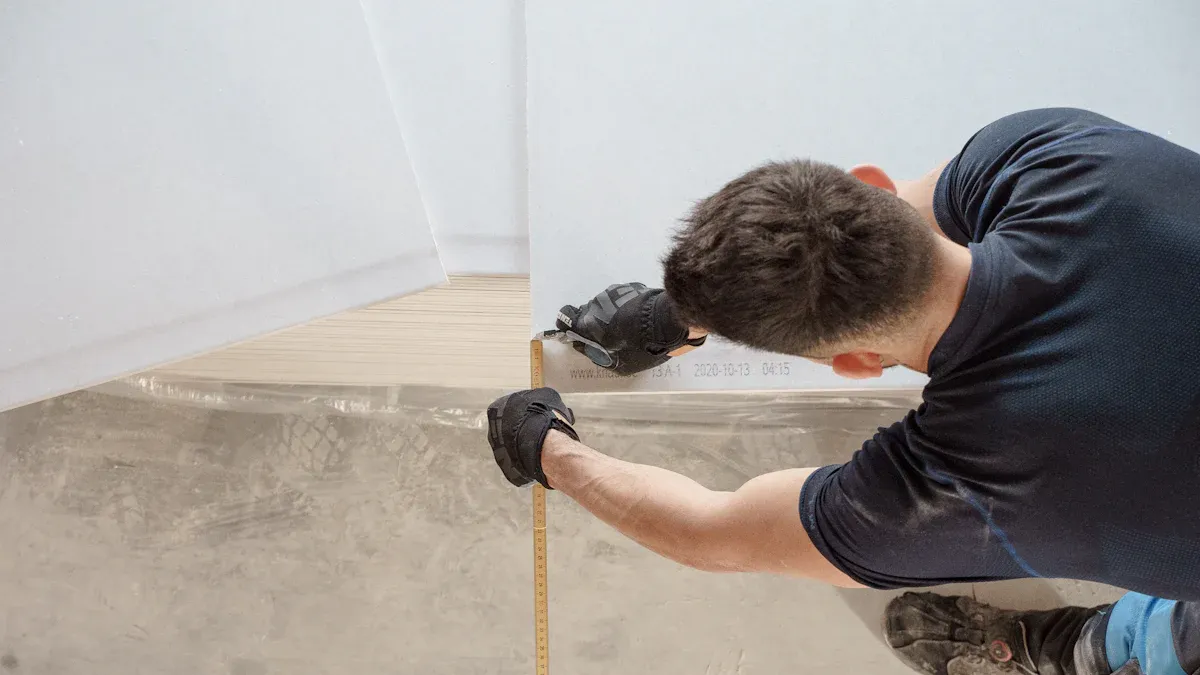
Before you install luxury vinyl flooring, you need to prepare your subfloor. Good preparation helps your planks last longer and look better. You can follow these steps to make sure your floor is ready.
Cleaning and Inspecting the Subfloor
Start by checking the condition of your subfloor. You want a clean, dry, and smooth surface before you install lvp flooring. Here is a simple checklist to guide you:
- Check moisture levels. Use a moisture meter for wood or concrete. For wood, the level should be between 6% and 12%. For concrete, it should be under 75% to 85% relative humidity.
- Look for damage. Search for water stains, soft spots, or cracks. Fix any problems you find.
- Test for flatness. Place a long straightedge or a laser level on the subfloor. Make sure the surface does not have dips or high spots greater than 1/8 inch over six feet.
- Secure loose boards. Tighten any boards that move or squeak.
- Clean the surface. Remove all dust, dirt, old glue, and nails. Vacuum the area to make sure nothing is left behind.
Tip: For concrete subfloors, apply a primer. This step helps the new floor stick better and last longer.
Leveling Methods: Self-Leveling Compound and Patching
If you find uneven spots, you need to fix them before you install luxury vinyl flooring. Self-leveling compounds and patching materials work well for this job.
- Self-leveling compounds are cement-based. They flow into low spots and fill them in, making the surface smooth.
- These compounds harden quickly, often in two to four hours. You can walk on the floor soon after.
- Use patching materials for small cracks or holes. Spread the patching mix with a trowel and let it dry.
- Both methods create a flat base for your planks. This helps the planks stay in place and look even.
Note: Always follow the instructions on the product label. Wear gloves and keep the room well-ventilated.
Using Underlayment for Minor Imperfections
Sometimes, you only need to fix small bumps or dips. Underlayment can help with these minor imperfections when you install lvp flooring.
- Cork underlayment gives good sound insulation. It also resists mold and mildew.
- Foam underlayment is affordable and works well with wood subfloors. It is not the best choice for areas with a lot of moisture.
- Felt underlayment is eco-friendly and helps with sound, but it is usually thin.
- Rubber underlayment protects against moisture and gives extra warmth and quiet.
Lay the underlayment over the subfloor before you install luxury vinyl flooring. The underlayment helps the planks sit flat and feel comfortable under your feet.
Reminder: Underlayment works best for small imperfections. For bigger problems, use a self-leveling compound first.
By following these steps, you can prepare your subfloor for a smooth and lasting installation. Clean, inspect, level, and use underlayment as needed. You will enjoy your new vinyl plank flooring for years to come.
Addressing Old Tile as a Subfloor
You might wonder if you can install new flooring over old tile. Many homeowners face this situation when they want to update their floors without removing the existing tile. You can install vinyl plank flooring over existing tile if you follow the right steps.
Start by checking the condition of your tile floor. Look for loose or cracked tiles. Tap each tile with a rubber mallet. If you hear a hollow sound, the tile may not be secure. Fix or remove any loose tiles before you continue.
Next, clean the tile surface. Sweep away dust and dirt. Use a mop and a mild cleaner to remove grease or sticky spots. Let the floor dry completely. A clean surface helps the new flooring stick and stay flat.
Check the height of your tile floor. Measure the thickness of the tile and grout lines. High grout lines can cause bumps under your new floor. You can use a floor patch or leveling compound to fill in the grout lines and low spots. Spread the compound with a trowel and let it dry. This step creates a smooth surface for your planks.
Here is a simple checklist to help you prepare old tile as a subfloor:
- Inspect for loose or damaged tiles.
- Clean the tile surface.
- Fill grout lines and low spots with leveling compound.
- Let the floor dry and cure.
- Check the height at doorways and transitions.
Tip: If your tile floor has a glossy finish, lightly sand the surface. This helps the underlayment or adhesive grip better.
You can use an underlayment if the tile surface is mostly flat. Underlayment adds a cushion and helps cover small imperfections. Lay the underlayment over the tile before you install the planks. If you use glue-down planks, make sure the adhesive works with tile surfaces.
A table can help you decide if your old tile is ready for new flooring:
| Tile Condition | What To Do |
|---|---|
| Solid, no cracks | Clean and level grout lines |
| Loose or hollow tiles | Repair or remove before installing |
| High grout lines | Fill with leveling compound |
When you follow these steps, you can install vinyl plank flooring over existing tile. You save time and avoid the mess of removing old tile. You also get a smooth, modern floor that looks great and lasts for years.
Step-by-Step Guide to Install LVP Flooring on Uneven Subfloors
Planning Your Layout for Planks
You need a clear plan before you start your vinyl flooring installation. Good planning helps you avoid mistakes and waste. Follow these steps for the best results:
- Measure your room carefully. Write down the length and width. This helps you estimate how many planks you need.
- Place the planks in the room for two days. This lets them adjust to the room’s temperature and humidity.
- Clean the subfloor and check for level. Remove dust and fill any holes.
- Plan your layout. Try to avoid thin strips at the walls. Stagger the seams so the planks stay strong.
- Start the installation. Leave a small gap at the walls for expansion.
- Finish by adding baseboards and transitions. These give your floor a neat look.
Tip: Always inspect the floor for damage before you begin. Fix any problems so your installation goes smoothly.
Choosing the Right Types of Vinyl Plank Flooring
You want flooring that works well over vinyl and other uneven surfaces. Rigid core and SPC planks are strong choices. These planks stay flat and resist dents. Floating vinyl plank flooring also works well for minor bumps. If you need extra stability, glue-down planks can help. Always inspect the floor for damage before you lay the planks. Choose planks that match your style and the needs of your space.
Applying Underlayment or Leveling Compound
You must prepare the subfloor before you lay the planks. Start by cleaning the surface. Remove all debris and fill large holes. Seal the concrete if needed. Use a vapor barrier to keep moisture away from your vinyl plank flooring. Lay the underlayment or vapor barrier flat. Do not attach it to the floor. Just install underlayment over the surface. If you find big dips, use a leveling compound. This helps you check for level and makes the installation easier. Install underlayment for small bumps. This step gives you flooring that works well over vinyl and keeps your planks stable.
Note: Always check for level before you start your vinyl flooring installation. Careful preparation leads to a smooth and long-lasting floor.
Installing the Planks
You can start installing your vinyl planks once you finish preparing the subfloor. Begin in one corner of the room. Work your way across the space. Lay out your planks before you start locking them together. This step helps you plan your pattern and avoid small pieces at the edges.
Use spacers to keep a 1/4 inch gap around the walls, doorways, and fixed objects. This gap allows the floor to expand and contract with changes in temperature. You will cover this gap later with baseboards or molding.
Here are some key steps for proper alignment and stability:
- Inspect the subfloor for damage or uneven spots. Repair cracks or holes. Sand down high areas.
- Lay out your planks to see how they fit. Adjust the layout if needed.
- Start in a corner and move outwards. Lock each plank into place using the click system or adhesive, depending on your flooring type.
- Use spacers to keep a consistent expansion gap around the room.
- Stagger the seams between rows. This makes the floor stronger and looks more natural.
Tip: Press each plank firmly into place. Make sure the edges snap together without gaps.
Take your time during installation. Check each row for straight lines. Adjust the planks if you see any misalignment. A careful approach gives you a smooth and stable floor.
Checking for Gaps and Movement
After you finish installing the planks, check your work. Walk across the floor and listen for any sounds. Look for gaps between the planks or at the edges. Push gently on the planks to see if they move.
If you find a gap, lift the plank and realign it. Press it back into place. For floating floors, make sure the click-lock edges are tight. For glue-down planks, check that the adhesive holds the plank firmly.
If you notice movement, check the subfloor for uneven spots you may have missed. Add extra underlayment or patch material if needed.
A stable floor should not shift or creak. Take time to fix any problems now. This step helps your vinyl plank flooring last longer and look its best.
Floating vs. Glue-Down Vinyl Plank Flooring on Uneven Subfloors
Pros and Cons of Floating Installation
Floating vinyl plank flooring gives you flexibility when dealing with uneven subfloors. You can install these planks using a click-together system. This makes the process quick and easy. You do not need glue or nails. Floating floors can handle small dips and bumps because the underlayment helps mask minor imperfections.
Here are some key points to consider:
- You can install floating floors over many surfaces, even if they are not perfectly flat.
- The installation is simple and does not require special tools.
- Floating floors may shift or make clicking sounds if the subfloor has large bumps or dips.
- If you skip proper preparation, the floor can feel unstable.
Tip: Always use underlayment to help absorb sound and add comfort underfoot.
Pros and Cons of Glue-Down Installation
Glue-down vinyl plank flooring creates a solid, stable surface. You use adhesive to attach each plank directly to the subfloor. This method works well in high-traffic areas and provides better sound absorption.
Here is a table to help you compare:
| Pros | Cons |
|---|---|
| Offers a firm, stable feel | Needs a clean, level subfloor |
| Good for high-moisture areas | Installation takes more time and effort |
| Better sound absorption | Imperfections can show through the planks |
| Durable in busy spaces | Harder to remove or replace planks |
Glue-down floors require careful preparation. If the subfloor has bumps or dips, these flaws can show through the planks. You get a strong bond, but you must make sure the surface is smooth.
When to Choose Each Method
You should choose floating vinyl plank flooring if your subfloor has minor imperfections. The underlayment helps cover small bumps and dips. Floating floors are also a good choice if you want a quick and easy installation.
Glue-down vinyl plank flooring works best when you need extra stability. You might pick this method for kitchens, hallways, or commercial spaces. If your subfloor is very flat and you want a long-lasting floor, glue-down is a strong option.
Remember: Always check your subfloor before you decide. The right method depends on your space, your needs, and the condition of your floor.
Common Mistakes and Troubleshooting Tips for Vinyl Plank Flooring
Skipping Subfloor Preparation
You might feel tempted to install vinyl plank flooring right over existing floors without much prep. This is a common mistake. Many people skip subfloor preparation, but this step is crucial for a smooth and long-lasting floor.
One of the most critical steps in vinyl plank installation is preparing the subfloor. Many DIY enthusiasts skip this step, leading to uneven surfaces that cause the flooring to wear prematurely. An inadequate subfloor can also lead to noticeable imperfections in the final appearance of the flooring, detracting from its overall aesthetic appeal. Ensure the subfloor is clean, dry, and level. Remove any debris or old adhesive, and fill any gaps or holes. A smooth subfloor is essential for the longevity of your vinyl flooring.
If you do not clean, repair, or level the surface before installing over existing floors, you will see bumps, gaps, or an uneven feel underfoot. The table below shows what can happen if you skip this step:
| Mistake | Consequence |
|---|---|
| Failing to clean, repair, or level the subfloor | Leads to visible bumps, gaps, or an uneven feel underfoot. |
| Not conducting a moisture test on concrete subfloors | Can result in mold or adhesion failure due to trapped moisture. |
Not Checking for Moisture Issues
Moisture can hide under existing floors and cause big problems for vinyl plank flooring. You need to check for moisture before you start. Here are some ways to spot and fix moisture issues:
- Conduct visual inspections for signs of moisture such as discoloration, warping, or visible dampness.
- Utilize moisture meters and infrared thermometers to obtain accurate moisture readings.
- Clean the subfloor thoroughly to eliminate debris and old adhesives.
- Measure the moisture content with a moisture meter and apply a moisture barrier if levels are high.
- Use a leveling compound to smooth the surface and reinforce with an appropriate underlayment.
If you ignore moisture, you risk mold, warping, or even floor failure. Always check under existing floors, especially in basements or areas with concrete.
Fixing Problems After Installation
Sometimes, you notice problems after you finish installing vinyl plank flooring over existing floors. You can still fix many issues if you act quickly.
- Check the floor’s flatness using a long level before installation.
- Fill in low spots with a leveling compound.
- Sand down any high spots.
If you see gaps or hear creaks, lift the affected planks and address the problem area. Make sure you always inspect existing floors before and after installation. This helps you catch issues early and keep your new floor looking great.
You can achieve a beautiful floor with luxury vinyl flooring if you prepare your subfloor well. Always check that your subfloor is clean, dry, and level before installing luxury vinyl tile. Use moisture tests for concrete and select the right underlayment for luxury vinyl tile. Transition molding helps with height changes between rooms. When you install luxury vinyl flooring, you want to avoid problems by following these steps:
- Clean, dry, and level the subfloor before laying luxury vinyl tile.
- Test for moisture, especially with concrete, to protect luxury vinyl tile.
- Use transition molding for smooth changes between luxury vinyl tile areas.
- Choose the best underlayment for your luxury vinyl flooring and luxury vinyl tile.
If you want expert advice or high-quality SPC flooring, skspcflooring can help you get the best results with your luxury vinyl tile and luxury vinyl flooring.
FAQ
Can you install vinyl plank flooring over uneven concrete?
You can install vinyl plank flooring over uneven concrete if you follow proper preparation steps. Fill low spots with a leveling compound. Check for moisture before starting. This helps your floor last longer and look smooth.
What are the best options for uneven subfloors?
Rigid core and SPC vinyl planks work well for uneven subfloors. Floating vinyl plank flooring also helps cover small bumps. You should always check the subfloor and fix large dips before installing any type of flooring.
Do you need underlayment for vinyl plank flooring?
You need underlayment if your subfloor has minor imperfections. Underlayment adds comfort and helps the planks stay flat. Always follow flooring installation guidelines for the best results.
Can you put vinyl plank flooring over old tile?
You can put vinyl plank flooring over old tile if the tiles are secure and the surface is clean. Fill grout lines and low spots with a leveling compound. This creates a smooth base for your new floor.
How do you fix gaps in vinyl plank flooring?
You can fix gaps by removing the affected planks and realigning them. Press the planks together tightly. Make sure the subfloor is level and clean before reinstalling the planks.




