
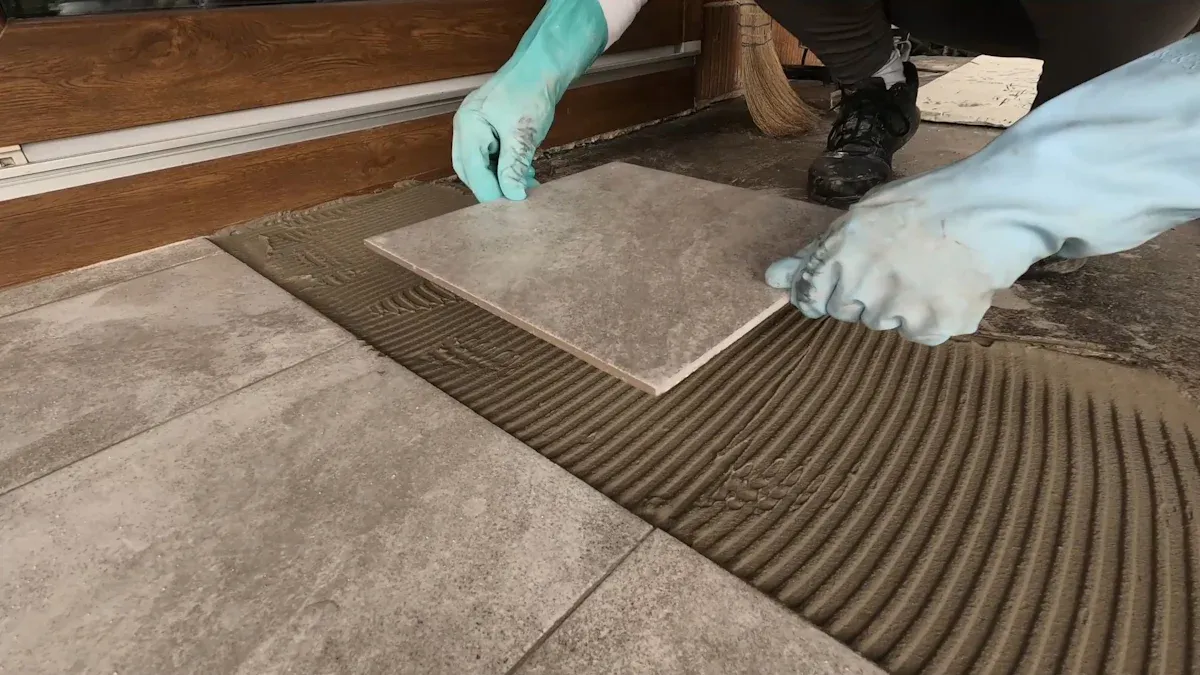
You might think any glue works for vinyl plank flooring, but glue down vinyl plank flooring adhesive needs careful selection and proper use. Many people overlook moisture barriers and skip subfloor preparation. These mistakes often lead to expensive repairs.
Here is a quick look at industry data:
| Issue Type | Consequence | Cost Implication |
|---|---|---|
| Adhesive Failure | Tiles or planks loosen | Expensive repairs or replacements |
| Telegraphing | Subfloor imperfections show on the surface | Aesthetic and structural concerns |
| Bubbling or Blistering | Surface bubbles from trapped moisture | Replacement costs |
| Discoloration | High pH causes discoloration | Long-term replacement costs |
| Overall Degradation | Ignoring moisture can void warranties and lead to extensive repairs | Significant financial loss |
Most glue down vinyl plank flooring problems happen because you ignore moisture management and skip proper steps. Success starts with the right adhesive, moisture control, and thorough preparation.
Glue Down Vinyl Plank Flooring Adhesive: What You Need to Know
Why Not All Adhesives Work for Vinyl Plank Flooring
You cannot use just any glue for glue down vinyl plank flooring. Each type of adhesive has unique properties. Some adhesives work well with vinyl plank flooring, while others do not. If you choose the wrong adhesive, you may see bond failure, hollow spots, or even adhesive bleed-through. These problems often happen when you use an incompatible adhesive or the wrong trowel size. You may also see issues if you add a second underlayment when your luxury vinyl plank flooring already has an attached pad.
Here is a table that shows the main types of adhesives for glue down vinyl plank flooring:
| Type | Description |
|---|---|
| Pressure Sensitive | This adhesive allows for easier replacement and is ideal for retail and hospitality settings. It bonds the flooring with pressure and is suited for vinyl tile and plank flooring. |
| Hard Set | This adhesive is spread on the floor before laying the flooring on top, providing a more permanent bond. |
You need to match the adhesive to your flooring and your space. For example, pressure sensitive adhesives work well in areas where you may need to replace planks often. Hard set adhesives give you a strong, lasting bond for high-traffic spaces.
Tip: Always check if your adhesive is moisture-rated, especially when installing over concrete. Moisture can cause glue down vinyl plank flooring to fail if you do not use the right adhesive.
How to Choose the Right Adhesive for Your Project
You must consider several factors when choosing an adhesive for luxury vinyl plank flooring. The type of space, the expected foot traffic, and the subfloor all matter. For areas with heavy point loads, such as hospital patient rooms, urethane or epoxy adhesives work best. Acrylic adhesives suit hallways where beds or carts move often. Hard-set, two-part adhesives help prevent indentations under stationary loads.
Here is a list of criteria to help you select the right adhesive for your glue down vinyl plank flooring project:
- Check the type of vinyl plank flooring you have.
- Think about the room’s use and the amount of traffic.
- Look at the subfloor material and its moisture level.
- Choose adhesives designed for your specific application.
- Review the pros and cons of glue-down vinyl plank flooring for your needs.
You should also know about different installation methods. Traditional bonding works well for most settings, including retail and healthcare. If you need to install flooring in extreme conditions, such as high humidity or temperature, you must use adhesives made for those environments. Loose-lay installation is best for spaces where you replace flooring often.
Some adhesives, like STIX A340 LVT PROJECT, allow for faster installation and create strong ridges. Others, like STIX A550 POWER ELASTIC, offer high performance and work in many settings. Moisture plays a big role in adhesive selection. If your subfloor has high moisture, you may need a moisture barrier and a special adhesive.
Note: The pros and cons of glue-down vinyl plank flooring depend on your adhesive choice, subfloor, and the room’s conditions.
The Importance of Following Manufacturer Guidelines
You must always follow the manufacturer’s instructions when installing glue down vinyl plank flooring. These instructions tell you which adhesive to use, how to prepare the subfloor, and how to apply the adhesive. If you skip steps or use the wrong product, you risk many problems.
Here are some common consequences of not following the manufacturer’s instructions:
- You may void your warranty.
- The installation may not last as long.
- The flooring may not perform as expected.
You should read all instructions before you start. Pay attention to details like open time, trowel size, and curing time. Each step matters for a successful installation. If you use luxury vinyl plank flooring, you must also check if your product has an attached pad. Never add a second underlayment if it does.
Callout: Following the manufacturer’s instructions protects your investment and ensures your glue down vinyl plank flooring lasts for years.
Common Problems with Glue-Down Vinyl and How to Avoid Them
Glue down vinyl plank flooring offers durability and style, but you can face many problems if you do not follow best practices. You need to understand the most common problems with glue-down vinyl so you can avoid costly mistakes and keep your floor looking great.
Using the Wrong Glue Down Vinyl Plank Flooring Adhesive
You might think any glue works for vinyl plank flooring, but using the wrong adhesive creates serious problems. If you use an incompatible glue down vinyl plank flooring adhesive, you risk adhesive failure. Planks may not stick properly or can lift over time. You may see gaps, curling, or even noise as you walk across the floor. Repairs become more complex and expensive when you use the wrong adhesive.
- Installation failure often happens when you ignore the manufacturer’s recommendations.
- Incompatible adhesives can cause planks to lift at the edges or corners.
- Dust or old adhesive residue can weaken the bond and lead to rapid spread of problems.
Tip: Always use the adhesive recommended by the manufacturer. Premium adhesives prevent loosening and buckling. After installation, use a 100-pound roller to secure the flooring and adhesive to the subfloor.
If you notice buckling, you can peel back the affected area, replace the adhesive, and re-secure the flooring. For click-together vinyl plank flooring, you can cut new pieces to size and replace damaged sections.
Skipping Subfloor Preparation Steps
Subfloor preparation is one of the most important steps in glue down vinyl plank flooring installation. Rushing this step leads to many problems. You need to make sure the subfloor is clean, level, and dry. If you skip preparation, you may see uneven or sloping floors, squeaky or bouncy spots, water damage, or rot. Crumbling or deteriorating materials can cause instability and adhesive failure.
Here are the most frequently reported problems with glue down vinyl plank flooring installations:
- Rushing the prep step causes significant issues.
- Skipping acclimation leads to installation problems.
- Using the wrong adhesive can void warranties and ruin the installation.
- Poor adhesive application results in poor bonding.
- Ignoring expansion gaps causes flooring issues due to temperature and humidity changes.
- Poor plank layout and pattern planning creates an unsatisfactory appearance.
- Poor cutting techniques create gaps and unsightly edges.
- Not confirming levelness during installation leads to uneven flooring.
Industry standards require you to remove old adhesive residue, avoid adhesive removers that leave residues, and ensure the subfloor temperature does not exceed 85°F when installing over radiant-heated substrates. You should not place underlayment over true expansion joints or install flooring over paint or coatings. Replace unsuitable underlayments like particleboard or hardboard. Avoid installing over sleeper-constructed subfloors and do not install new tile over existing tile below grade.
Note: Proper subfloor preparation prevents moisture issues and ensures a strong bond between the vinyl plank flooring and the subfloor.
Ignoring Moisture Levels in the Subfloor
Moisture levels play a huge role in the success of glue down vinyl plank flooring. If you ignore moisture issues, you risk adhesive failure and long-term damage. Excess moisture can cause bubbling, blistering, discoloration, and overall degradation of the flooring.
You need to test moisture levels before installation. The moisture content of a wood subfloor must not exceed 12%. Concrete subfloors, crawl spaces, and floors that emit more than 12% moisture require a vapor barrier. Plywood or OSB should have moisture content between 10% and 14%.
- Moisture issues can void warranties and lead to expensive repairs.
- High moisture levels cause adhesive failure and rapid spread of problems.
- You must use a moisture barrier if the subfloor emits too much moisture.
Callout: Always test moisture levels before installing glue down vinyl plank flooring. If you find moisture issues, use a vapor barrier to protect your floor and prevent problems.
You can avoid common problems with glue-down vinyl by using the right adhesive, preparing the subfloor, and managing moisture levels. These steps help you achieve a durable and beautiful vinyl plank flooring installation.
Mistakes That Lead to Floor Failure
You want your glue down vinyl plank flooring to last for years. Many people make mistakes during installation that cause the floor to fail. You can avoid these problems if you know what to look for and follow best practices.
Here are the most common mistakes that lead to floor failure:
- You use the wrong glue down vinyl plank flooring adhesive. This mistake causes planks to lift, shift, or lose their bond. You need to choose an adhesive that matches your vinyl plank flooring and your subfloor. If you select inferior glue, you risk formaldehyde release and poor air quality.
- You skip subfloor preparation. If you do not clean, level, and dry the base layer, you create weak spots. Moisture trapped under the planks leads to bubbling and blistering. Uneven surfaces cause telegraphing, where imperfections show through the vinyl plank flooring.
- You ignore temperature and humidity. If you install glue down vinyl plank flooring in extreme conditions, you risk color changes and adhesive failure. You must acclimate the flooring and keep the environment stable during installation.
- You rush the installation process. If you do not follow the manufacturer’s guidelines, you void warranties and shorten the life of your permanent installation. You need to use the right trowel size, allow proper curing time, and roll the floor after laying each plank.
- You use poor quality materials. Low-quality vinyl plank flooring or adhesives lead to bubbling, uneven color, and scratches. You need to select stable, certified products for a permanent installation.
Tip: Protect your vinyl plank flooring during construction. Place mats or covers to prevent scratches and damage.
You can see the main causes of floor failure in glue down vinyl plank flooring in the table below:
| Problem | Cause | Solution |
|---|---|---|
| Floor bubbling | Poor quality materials, improper base layer treatment, inappropriate temperature | Use better quality materials, ensure base layer is dry and flat, lay at suitable temperature |
| Uneven color | Instability in material quality, construction issues, environmental factors | Choose stable quality materials, improve construction standards, avoid extreme conditions |
| Scratches | Improper construction or lack of protection during use | Enhance awareness of operating standards, protect floor during construction |
| Formaldehyde release | Use of inferior glue or materials that fail quality inspection | Select high-quality glue and flooring products |
You need to avoid shortcuts. If you want a permanent installation, you must follow every step. You should test moisture levels, use the recommended glue down vinyl plank flooring adhesive, and prepare the subfloor. You must choose quality vinyl plank flooring and install it at the right temperature.
Many installers forget to protect the floor during and after installation. You should cover the vinyl plank flooring to prevent scratches. You need to keep the area clean and free from debris. If you see bubbling or color changes, you must address the issue right away.
You can achieve a permanent installation if you avoid these mistakes. You need to use high-quality glue down vinyl plank flooring adhesive, follow the guidelines, and select stable vinyl plank flooring. You must pay attention to every detail during installation.
Callout: Careful planning and proper materials help you avoid floor failure. You protect your investment and enjoy beautiful glue down vinyl plank flooring for years.
The Role of Moisture Barrier in Glue Down Vinyl Plank Flooring
When a Moisture Barrier Is Essential
You need to use a moisture barrier when you install glue down vinyl plank flooring in areas with high moisture risk. Basements, ground-level slabs, and rooms with high humidity all need extra moisture control. Concrete subfloors can release vapor even when they look dry. This vapor can damage your vinyl plank flooring over time. Installing a flooring moisture barrier helps stop water from moving up through the subfloor. You protect your glue down vinyl plank flooring from bubbling, adhesive failure, and mold.
Here is a table that shows when you must use a vapor barrier:
| Scenario | Reason for Moisture Barrier |
|---|---|
| Concrete Subfloors | Concrete can emit moisture over time, necessitating a barrier to prevent moisture intrusion. |
| High Humidity Environment | Areas with high humidity are prone to moisture issues, making a barrier essential. |
| Installation over Existing Flooring | Existing flooring types that are moisture-prone require a barrier for added protection. |
You should always test the subfloor for moisture before you start. Most manufacturers want vapor emissions below 3 lbs per 1,000 sq. ft. in 24 hours.
Types of Moisture Barriers for Vinyl Plank Flooring
You have many options for flooring moisture barriers. Foam underlayment works well and is lightweight. Felt gives moderate protection and fits dry areas. Cork does not block moisture and can hold water, so you should not use it as a vapor barrier. Rubber underlayment gives excellent moisture control and works best in wet spaces. Plywood and OSB also help, but you must check their moisture resistance.
Here is a table comparing common underlayments:
| Underlayment Type | Moisture Barrier Capability | Additional Notes |
|---|---|---|
| Foam | Good | Lightweight and cost-effective. |
| Felt | Moderate | Can be used in dry areas. |
| Cork | Poor | Retains moisture, not suitable as a barrier. |
| Rubber | Excellent | Highly moisture resistant. |
| Plywood | Good | Provides structural support. |
| OSB | Moderate | Suitable for various applications. |
When choosing a moisture barrier, look for products with antimicrobial properties. These help prevent mold growth under your vinyl plank flooring.
Consequences of Skipping a Moisture Barrier
If you skip the vapor barrier, you risk many problems. Moisture can weaken the adhesive and cause your glue down vinyl plank flooring to lift or curl. You may see bubbling or blistering on the surface. High pH levels can discolor your vinyl plank flooring and cause it to break down. Mold and mildew can grow under the planks if you do not use proper moisture control.
Here are the main risks of missing flooring moisture barriers:
- Adhesive failure and loose planks
- Bubbling or blistering on the floor
- Discoloration and surface damage
- Mold and mildew growth
You can avoid these problems by installing a vapor barrier before you lay your glue down vinyl plank flooring. Good moisture control keeps your floor strong and beautiful for years.
Subfloor Preparation for Vinyl Plank Flooring Success
Cleaning, Leveling, and Testing for Moisture
You need to start every glue down vinyl plank flooring project with proper subfloor preparation. Cleaning the subfloor removes dust, dirt, and debris. Use a vacuum or damp mop for best results. Remove adhesive residues by sanding or scraping. If you see paint or coatings, use a chemical stripper. Different cleaning methods work for different subfloor materials.
Leveling the subfloor is the next step. Use a straight edge or laser level to check for dips or high spots. Apply a leveling compound to fill low spots. Sand down high areas or use shims to achieve a flat surface. A level subfloor helps you create a smooth layout for your vinyl plank flooring.
Moisture testing is essential. Tape a plastic sheet to the concrete and check for condensation after 24-48 hours. Use a calcium chloride dish to measure moisture vapor emission rate. An electronic moisture meter gives immediate readings. These tests help you confirm that moisture levels are safe for glue down vinyl plank flooring.
How Subfloor Issues Affect Adhesive Performance
Subfloor imperfections can cause problems with glue down vinyl plank flooring. Debris, uneven areas, or excess moisture weaken the adhesive bond. You may see planks lifting or shifting. Uneven surfaces make the layout look poor. Moisture can cause bubbling or blistering. A flawless subfloor ensures proper adhesive bonding and a lasting vinyl plank flooring installation.
Tip: Always inspect the subfloor before you start the layout. Fix imperfections to avoid future issues.
Best Practices from skspcflooring Installers
skspcflooring installers follow strict guidelines for glue down vinyl plank flooring. They clean the subfloor thoroughly. They check for levelness and use leveling compounds as needed. Moisture testing is part of every project. Installers plan the layout carefully to avoid waste and ensure a professional finish. They use high-quality adhesives and follow manufacturer instructions. These steps help you achieve a durable and attractive vinyl plank flooring installation.
| Step | Action | Benefit |
|---|---|---|
| Cleaning | Remove dust, debris, and residues | Strong adhesive bond |
| Leveling | Fill low spots, sand high spots | Smooth layout |
| Moisture Testing | Use plastic sheet, meter, or dish | Prevents moisture damage |
| Layout Planning | Arrange planks for best appearance | Professional vinyl plank flooring |
Callout: Careful subfloor preparation and thoughtful layout make glue down vinyl plank flooring last longer and look better.
Practical Tips for Glue Down Vinyl Plank Flooring Installation
Avoiding Common Problems with Glue-Down Vinyl
You want your glue down vinyl plank flooring to last in high-traffic areas. Start by using the correct adhesive for glue down installation. Manufacturers recommend specific adhesives for vinyl plank flooring. This prevents lifting and keeps your floor secure. Prepare the surface before you begin. Clean the subfloor and remove debris. Level the area to avoid unevenness. Use proper underlayment to cushion the floor and reduce noise. Find a good starting point and use chalk lines to keep planks straight. Make clean cuts with a utility knife and straight edge. Follow the guidelines from the manufacturer. This helps you avoid warranty issues and mistakes.
- Use the adhesive recommended for glue down vinyl plank flooring.
- Prepare the subfloor for glue down installation.
- Maintain alignment with chalk lines.
- Make clean cuts for vinyl plank flooring edges.
- Roll the floor with a 100-pound roller after glue down installation.
Tip: Premium adhesive prevents buckling in high-traffic areas. Cheaper options may fail over time.
Fixing Installation Mistakes
Mistakes can happen during glue down installation. If you see planks lifting or gaps in vinyl plank flooring, act quickly. Remove the affected planks and clean the area. Apply new adhesive and press the planks firmly. Use a roller to secure the bond. If you notice uneven color or bubbling, check for moisture under the planks. Replace damaged sections and use a moisture barrier if needed. Always follow the manufacturer’s instructions for glue down vinyl plank flooring. This ensures your floor stays strong in high-traffic areas.
| Mistake | Solution |
|---|---|
| Planks lifting | Reapply adhesive and roll firmly |
| Gaps or uneven edges | Make clean cuts and align planks |
| Bubbling or discoloration | Check moisture and replace planks |
Callout: Fixing mistakes early keeps glue down vinyl plank flooring looking good and performing well in high-traffic areas.
Choosing Quality Products Like skspcflooring
You need quality products for glue down vinyl plank flooring in high-traffic areas. Products from skspcflooring offer durability and stability. These floors withstand constant foot traffic and resist scratches. Lower quality vinyl plank flooring can bubble, show uneven color, or scratch easily. Choose glue down installation with skspcflooring for reliable performance. Their vinyl plank flooring meets international standards and works well in high-traffic areas. You get a floor that lasts and looks great.
- Glue down vinyl plank flooring from skspcflooring is ideal for high-traffic areas.
- Their vinyl plank flooring offers dimensional stability.
- You avoid common problems like bubbling and scratches.
- Glue down installation with quality products ensures long-term success.
Note: Quality matters for glue down vinyl plank flooring. Choose skspcflooring for high-traffic areas and enjoy lasting results.
You can achieve long-lasting glue down vinyl plank flooring by focusing on three essentials: the right glue down vinyl plank flooring adhesive, a proper moisture barrier, and thorough subfloor preparation. Follow these steps for success:
- Inspect and prepare the subfloor for vinyl plank flooring.
- Use the recommended adhesive and apply it correctly.
- Test for moisture and install a moisture barrier if needed.
- Leave expansion gaps and use a 100 lb roller for a strong bond.
- Finish with trim and underlayment for comfort and durability.
Choosing quality products like those from skspcflooring ensures your glue down vinyl plank flooring stays beautiful and strong for years.
FAQ
What is the best adhesive for glue down vinyl plank flooring?
You should use the adhesive recommended by the flooring manufacturer. This ensures a strong bond and prevents issues like lifting or bubbling. Always check the product label and follow instructions for the best results.
How do I test moisture levels before installing vinyl plank flooring?
You can use a moisture meter or tape a plastic sheet to the subfloor for 24 hours. If you see condensation, moisture levels are too high. Testing helps you avoid future problems with your flooring.
Can I install glue down vinyl plank flooring over existing tile?
You can install over existing tile if the surface is clean, level, and dry. Fill grout lines and repair any damage. Always check manufacturer guidelines before starting your project.
What should I do if planks start to lift after installation?
You need to remove the affected planks, clean the area, and reapply adhesive. Press the planks firmly and use a roller to secure them. Quick action prevents further damage and keeps your floor looking good.
Tip: Regularly check your floor for signs of lifting or bubbling. Early repairs save time and money.
How long should I wait before walking on newly installed vinyl plank flooring?
You should wait at least 24 hours before walking on the floor. This gives the adhesive time to cure and ensures a strong bond. Avoid heavy furniture or rolling carts during this period.




