
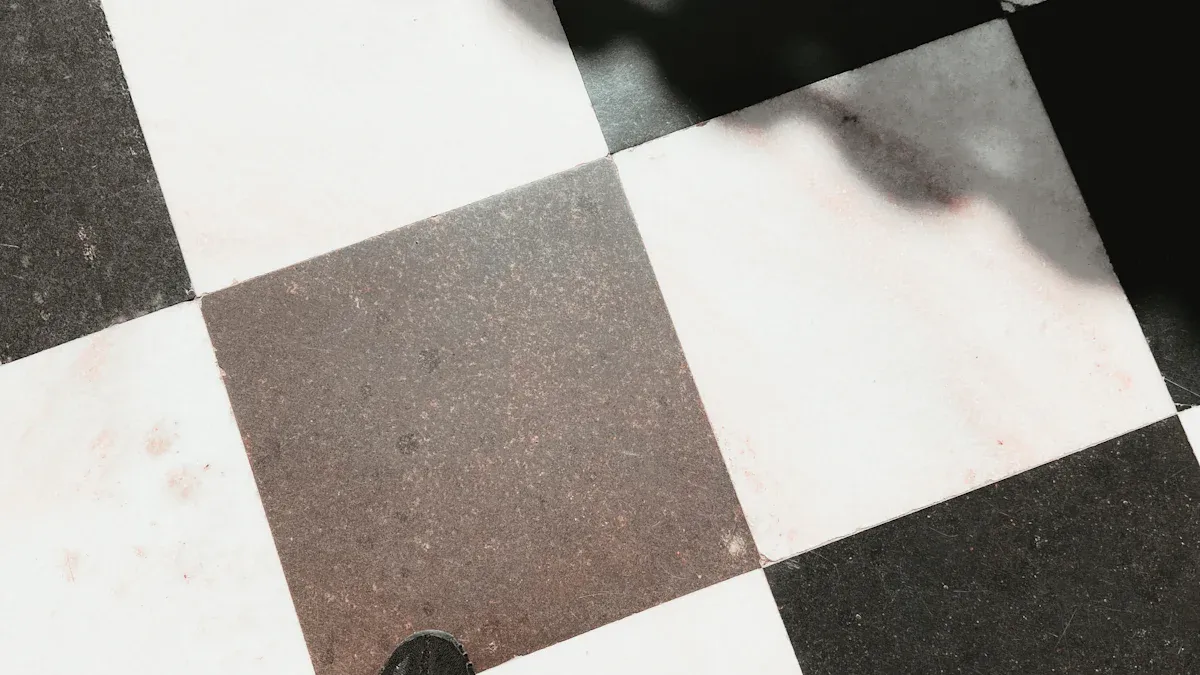
When you install pvc vinyl tile flooring, you choose from several methods and patterns. Each method affects how your flooring looks and lasts. You want a pattern and installation style that fits your space and daily needs.
The right choice helps your floor resist wear and enhances the beauty of any room.
PVC Vinyl Tile Flooring Overview
Benefits of PVC Flooring
You want a floor that stands up to daily life. PVC flooring gives you many advantages. It resists water, so you do not worry about spills or moisture. You clean it easily with a mop or broom. The surface feels comfortable under your feet. You find that it does not scratch or dent easily. This makes it perfect for busy homes or offices.
Tip: Waterproof vinyl flooring works well in kitchens, bathrooms, and basements. You can install it in places where other floors might get damaged by water.
PVC vinyl tile flooring also helps you save money. You do not need expensive cleaners or special treatments. The material lasts for years, so you do not replace it often. You enjoy a quiet space because the tiles absorb sound. If you want a stylish look, you find many colors and patterns to match your taste.
Types of PVC Vinyl Tile Flooring
You see several types of vinyl flooring when you shop for new floors. Each type offers unique features.
- Vinyl plank flooring: These planks look like wood. You get the beauty of hardwood without the high cost.
- Luxury vinyl plank: This type feels thicker and more durable. You notice realistic textures and designs.
- Luxury vinyl flooring: You find tiles or planks with extra layers for strength. These work well in high-traffic areas.
- Waterproof vinyl flooring: You choose this for rooms with lots of moisture. It keeps water out and prevents damage.
- Vinyl tiles: These tiles come in many shapes and sizes. You can create patterns like checkerboard or herringbone.
You select the type that fits your needs and style. Each option gives you a strong, attractive floor that lasts.
Preparing for Installation
Subfloor Assessment for Vinyl Plank Flooring
You want your PVC vinyl tile flooring to last. Start with a careful subfloor assessment. Check if the surface is clean, dry, and level. Look for cracks, bumps, or holes. If you find any, fill or sand them before you move forward. Uneven spots can cause tiles to shift or break. Use a straightedge or level to spot high or low areas. You need a smooth base for the best results.
Tip: Good surface preparation helps your vinyl tiles stick well and stay flat. Take your time with this step.
Tools and Materials Needed for Installation
Gather your tools and materials before you begin. This makes the job easier and faster. Here is a simple table to help you organize:
| Tool/Material | Purpose |
|---|---|
| Tape measure | Measure room and tiles |
| Utility knife | Cut tiles to fit edges |
| Straightedge | Guide for straight cuts |
| Spacers | Keep tiles evenly spaced |
| Adhesive (if needed) | Secure tiles to subfloor |
| Rubber mallet | Tap tiles into place |
| Safety gear | Protect hands and eyes |
You may need extra items based on your chosen installation method. Always read the manufacturer’s instructions.
Room Preparation for PVC Flooring
Prep the floor and the room before you lay any tiles. Move furniture out of the way. Sweep or vacuum to remove dust and debris. Make sure the room stays dry during installation. If you install in a kitchen or bathroom, check for leaks. You want a clean and safe workspace. Open windows for fresh air if you use glue or adhesive.
Note: Proper prep keeps your new floor looking great and helps prevent problems later.
Installation Methods for PVC Vinyl Tile Flooring
When you choose how to install vinyl flooring, you see several methods. Each installation technique gives you different benefits. You want to pick the best way for your space and needs. Good surface preparation helps every method work well.
Glue-Down Installation
Glue-down installation uses adhesive to secure vinyl plank flooring to the subfloor. You spread adhesive on the surface, then press each tile or plank into place. This method works well for high-traffic areas. You get a strong bond that keeps the flooring flat. You need to pay attention to adhesive selection. Some adhesives work better with luxury vinyl flooring or pvc flooring. Always follow the manufacturer’s instructions for laying vinyl flooring.
Tip: Use a notched trowel to spread adhesive evenly. This helps each plank stick firmly.
Interlocking (Click-Lock) Installation
Interlocking installation, also called click-lock, lets you snap vinyl planks together. You do not need glue or nails. Each plank has edges that fit tightly with the next. You slide and click each piece into place. This easy installation method works well for DIY projects. You can install vinyl flooring quickly. You can remove or replace planks if needed. Many people like this method for installing new vinyl flooring in bedrooms or living rooms.
- You do not need special tools.
- You can walk on the floor right after installation.
- You get a smooth, seamless look.
Loose Lay Installation
Loose lay installation uses the weight and backing of vinyl plank flooring to keep it in place. You lay each plank or tile on the subfloor without adhesive. The flooring stays put because of its design. You can lift and move planks if you want to change the layout. This method works best in small rooms or spaces where you might need to access the subfloor. You get flexibility and easy installation.
Note: Loose lay vinyl flooring is great for temporary spaces or quick updates.
You see that each installation method has its own advantages. You should think about your room, traffic, and style before you choose. Good installation techniques help your pvc vinyl tile flooring last longer and look better.
Selecting the Best Installation Method
You want your new floor to last and look great. Choosing the best way to install your PVC vinyl tile flooring makes a big difference. Each method works best in certain situations. You should think about your room, your lifestyle, and your skill level before you decide.
Start by asking yourself a few questions:
- Do you have a high-traffic area, like a hallway or kitchen?
- Do you want to install the floor yourself?
- Will you need to remove or replace tiles in the future?
- Is your subfloor smooth and level?
If you have a busy space, glue-down might be the best choice. This method holds tiles firmly in place. You get a strong, stable floor that stands up to lots of foot traffic. You may need more time and effort, but the results last for years.
If you want a quick and easy project, try interlocking or click-lock tiles. You snap the pieces together without glue. You can finish the job faster and walk on the floor right away. This method works well for bedrooms, living rooms, or any space where you want a smooth look.
Loose lay tiles give you flexibility. You can lift and move them if you need to reach the subfloor. This method fits small rooms or spaces where you might want to change the layout later.
Tip: Always check the manufacturer’s instructions before you start. Some floors need special tools or steps for proper installation.
You make the best choice when you match the method to your needs. Think about your space, your skills, and how you use the room. The right method helps your floor look beautiful and last longer.
How to Install Vinyl Plank Flooring: Step-by-Step Guide
Measuring and Planning Your Layout
You start your project by measuring your room. Use a tape measure to find the length and width of the space. Write down these numbers. You want to know how many boxes of vinyl plank flooring you need. Always add extra for mistakes or future repairs.
Draw a simple sketch of your room. Mark doors, closets, and any obstacles. Plan your layout before you begin. Decide which direction you want the planks to run. Most people lay planks parallel to the longest wall. This makes the room look bigger.
Tip: Lay out a few planks on the floor without attaching them. This helps you see how the pattern will look.
Check if your walls are straight. If you see curves or bumps, adjust your layout. You want the first row to look neat. Use spacers to keep a small gap between the planks and the wall. This gap lets the flooring expand and contract.
Cutting and Fitting PVC Vinyl Tiles
You need to cut some planks to fit your space. Use a utility knife and a straightedge for clean cuts. Measure each plank before you cut. Mark the spot with a pencil. Score the plank with the knife, then snap it along the line.
If you have corners or odd shapes, trace the outline on the plank. Cut slowly to avoid mistakes. Always double-check your measurements. You want each piece to fit snugly.
For doorways and edges, use a jigsaw for curved cuts. Wear safety gear when you cut. Clean up dust and scraps as you work. This keeps your workspace safe.
Note: Cut planks in a well-lit area. Good lighting helps you see your lines and avoid errors.
Arrange the cut pieces at the edges and corners. Make sure the pattern matches your layout. You want a smooth look across the whole floor.
Securing Tiles During Installation
You begin installing the planks row by row. For click-lock vinyl plank flooring, angle the tongue of one plank into the groove of the next. Press down until you hear a click. This easy installation method helps you finish faster.
If you use glue-down pvc vinyl tile flooring, spread adhesive on the subfloor with a notched trowel. Press each plank firmly into the glue. Wipe away any extra adhesive right away. You want a clean finish.
For loose lay flooring, place each plank tightly against the next. The weight and backing keep the planks in place. You do not need glue or nails.
Use a rubber mallet to tap planks into position. Check each row for gaps. Adjust as needed. Keep the planks straight and tight. You want a smooth, even surface.
Tip: Walk on the installed planks to check for movement. Secure any loose pieces before you finish.
Finish the last row by cutting planks to fit. Install trim or molding around the edges. This covers the expansion gap and gives your flooring a polished look.
You now know how to install vinyl plank flooring step by step. Careful measuring, cutting, and securing help your floor last for years.
Finishing Touches and Edges
You have installed most of your PVC vinyl tile flooring. Now you need to focus on the finishing touches and edges. These steps help your floor look professional and last longer.
1. Install Edge Trim and Molding
Edge trim covers the gaps between your flooring and the walls. You use molding to hide expansion spaces and give your floor a clean look. Choose trim that matches your vinyl tiles. You can pick from quarter round, baseboard, or T-molding.
- Measure each wall and cut the trim to fit.
- Attach the trim using finishing nails or adhesive.
- Make sure the trim sits flush against the wall and floor.
Tip: Paint or stain your trim before you install it. This saves time and keeps your workspace neat.
2. Add Transition Strips
Transition strips connect your vinyl flooring to other surfaces. You use them at doorways or where your floor meets carpet, tile, or wood. These strips prevent tripping and protect the edges of your tiles.
| Transition Strip Type | Best Use Case |
|---|---|
| T-molding | Between two hard floors |
| Reducer | From vinyl to carpet |
| Threshold | At entryways |
You measure the doorway or transition area. Cut the strip to size. Secure it with screws or adhesive. Check that the strip sits flat and does not move.
3. Seal Gaps and Corners
You may see small gaps at corners or around pipes. Use caulk or flexible sealant to fill these spaces. This keeps water and dirt out. Choose a color that matches your flooring.
- Clean the area before you apply sealant.
- Squeeze a thin line of caulk into the gap.
- Smooth it with your finger or a caulk tool.
Note: Sealing gaps helps prevent damage and keeps your floor looking new.
4. Final Inspection and Cleaning
Walk across your new floor. Check for loose tiles, raised edges, or gaps. Press down any tiles that move. Sweep or vacuum the surface to remove dust and scraps. Wipe the floor with a damp cloth to finish.
- Look for adhesive spills and clean them right away.
- Make sure all trim and strips are secure.
- Inspect corners and edges for a smooth finish.
5. Enjoy Your New Floor
You have completed your PVC vinyl tile flooring installation. The finishing touches and edges make your floor look polished and professional. You can now move furniture back and enjoy your updated space.
🎉 Congratulations! You have created a durable and stylish floor that will last for years.
Installation Patterns for PVC Vinyl Tile Flooring
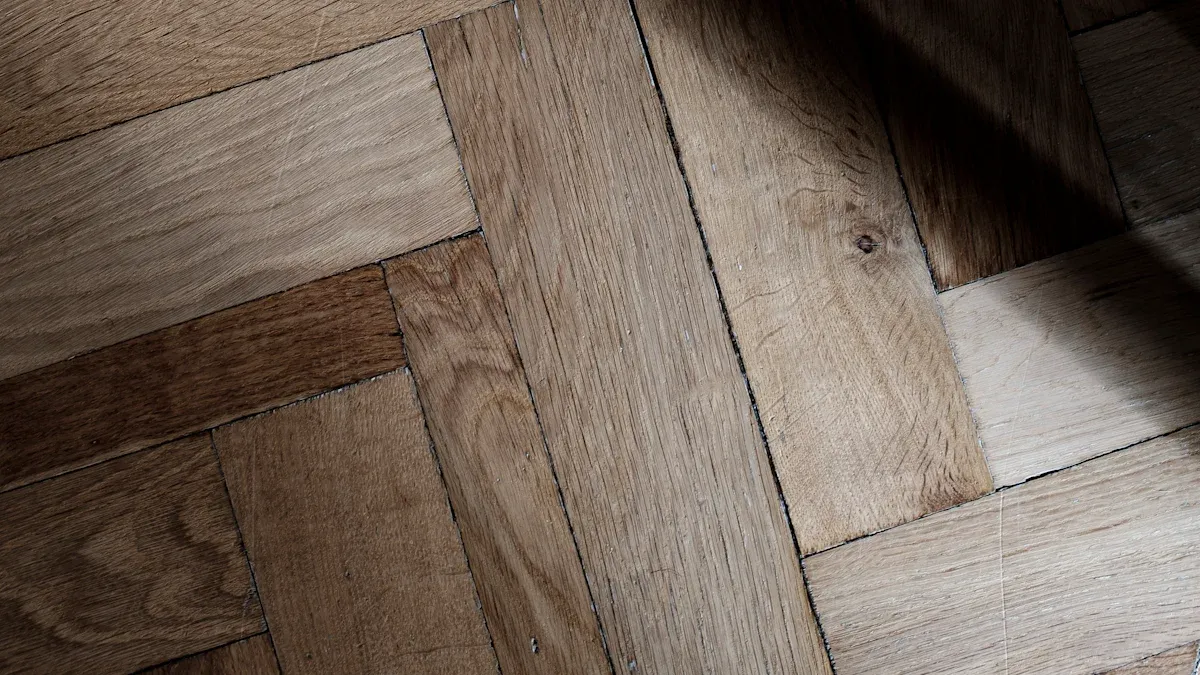
When you install pvc vinyl tile flooring, you can choose from several installation patterns. The pattern you select changes the look and feel of your room. Each layout offers a unique style and can make your space appear larger or more interesting. You should think about your room shape and your personal taste before you decide.
Straight Lay Pattern
You see the straight lay pattern in many homes and offices. This pattern lines up each tile or plank side by side, running parallel to the walls. You get a clean and simple look. The straight lay works well if you want a classic style that fits any room. You can install this pattern quickly, which makes it a good choice for beginners.
Tip: Use the straight lay pattern in small rooms to make the space feel open and neat.
Diagonal Pattern
The diagonal pattern adds a creative touch to your floor. You place the tiles at a 45-degree angle to the walls. This layout draws the eye across the room and can make a narrow space look wider. You may need to cut more tiles to fit the edges, but the result stands out. The diagonal pattern works well in entryways, hallways, or any area where you want a bold look.
- Diagonal layouts can hide uneven walls.
- You create a sense of movement in the room.
Herringbone Pattern
The herringbone pattern uses rectangular tiles or planks arranged in a zigzag design. You lay each piece at a right angle to the next, forming a V shape. This pattern gives your floor a stylish and modern feel. The herringbone layout works best in larger rooms where you want to make a statement. You may spend more time on this installation, but the finished floor looks impressive.
Note: The herringbone pattern can add value and visual interest to your home.
You can choose any of these patterns to match your style and space. The right installation pattern helps your pvc vinyl tile flooring stand out and last for years.
Checkerboard Pattern
You can create a bold look with the checkerboard pattern. This installation pattern uses two different colors of PVC vinyl tiles. You place the tiles in an alternating sequence, like a chessboard. The result gives your floor a classic and playful style.
Many people choose black and white tiles for a traditional checkerboard. You can also use other colors to match your room. This pattern works well in kitchens, entryways, or playrooms. You make the space feel lively and organized.
Tip: Lay out your tiles before you start. This helps you see the pattern and make adjustments.
You need to measure your room and plan the layout. Start in the center and work outward. Use a tape measure to keep the lines straight. Cut tiles for the edges so the pattern stays even. You get a neat finish when you take your time.
A checkerboard pattern hides dirt and scuffs. You spend less time cleaning. The design also makes small rooms look bigger. You can use this pattern to add personality to any space.
Choosing the Right Pattern for Your Space
You want your floor to match your style and needs. Each installation pattern offers a different look. You should think about your room size, shape, and how you use the space.
- Straight lay patterns make rooms feel open.
- Diagonal layouts add movement.
- Herringbone gives a modern touch.
- Checkerboard brings energy and fun.
Ask yourself what mood you want. Do you like simple designs or bold statements? Look at your furniture and wall colors. Choose a pattern that fits your taste and makes your room comfortable.
Note: Try laying out a few tiles before you decide. This helps you see how the pattern will look in your space.
You make the best choice when you match the pattern to your lifestyle. The right installation pattern helps your PVC vinyl tile flooring stand out and last.
Design Possibilities with PVC Flooring
Mixing Colors and Textures
You can create a unique look by mixing colors and textures with pvc flooring. Many brands offer a wide range of shades and finishes. You might choose light and dark tiles to add contrast. Some vinyl plank flooring has a wood grain texture, while others look like stone or ceramic. You can combine these styles to make your floor stand out. Try using textured tiles in high-traffic areas for extra grip. You can use smooth tiles in places where you want a sleek finish.
Tip: Lay out sample tiles before you install them. This helps you see how the colors and textures work together.
Creating Borders and Accents
You can add borders and accents to your luxury vinyl flooring for a custom touch. Borders frame your room and draw attention to the edges. You might use a different color or pattern for the border. Accents highlight special areas, such as under a dining table or near an entryway. You can use small tiles or planks to create these features. Many people use geometric shapes or contrasting colors for a bold effect.
Here are some design options for borders and accents:
- Use a darker shade around the room’s edge.
- Place accent tiles in the center of the floor.
- Create a pattern with alternating colors.
A simple border can make your flooring look more finished and stylish.
Customizing Your Vinyl Plank Flooring
You have many ways to customize your vinyl plank flooring. You can cut tiles into different shapes to fit your space. You might create a mosaic or a special pattern. Some people add inlays or mix materials for a creative design. You can match your floor to your furniture or wall colors. Customizing lets you express your style and make your home unique.
Note: Always plan your design before you start installing. This helps you avoid mistakes and get the look you want.
A custom floor gives your room personality. You can choose from many design options to fit your taste.
Maintenance Tips for PVC Vinyl Tile Flooring
Routine Cleaning and Care
You want your flooring to look new for years. Start with regular cleaning. Sweep or vacuum the surface every few days. This removes dust and dirt before it can scratch the vinyl. Use a damp mop with warm water for deeper cleaning. Choose a mild cleaner that works well with waterproof vinyl flooring. Avoid harsh chemicals because they can damage the finish. Dry the floor with a soft towel after mopping. This step helps prevent water spots.
Tip: Place doormats at entrances. Mats catch dirt and keep your pvc flooring cleaner.
Preventing Damage to PVC Flooring
You can protect your floor with simple habits. Lift furniture instead of dragging it. Use felt pads under chair and table legs. Heavy objects can leave dents, so move them carefully. Keep pet nails trimmed to avoid scratches. If you spill something, wipe it up right away. Water and sticky liquids can stain luxury vinyl flooring if left too long. Avoid using adhesive tape on the surface because it may leave marks.
You should also check your adhesive selection during installation. The right adhesive keeps tiles secure and helps prevent shifting. Good installation protects your floor from future problems.
Repairing Minor Issues
Small problems can happen even with careful use. If you see a scratch, use a vinyl repair kit. These kits match the color and texture of your vinyl plank flooring. For loose tiles, apply a small amount of adhesive under the edge and press down. Always follow the instructions for your specific flooring type. If you notice a gap, fill it with a matching sealant. You can find many design options for repair products, so your floor stays beautiful.
Note: Quick repairs stop small issues from becoming big problems.
You have learned the key steps for a successful installation of pvc vinyl tile flooring. Choose the right method and pattern to match your space. Try mixing colors or adding borders for a custom look.
Start your project with confidence. Your creativity will help you build a floor that lasts and stands out.
FAQ
How long does PVC vinyl tile flooring last?
You can expect your PVC vinyl tile flooring to last 10–20 years with proper care. High-quality tiles and good installation help your floor last even longer.
Tip: Clean your floor regularly and fix small issues quickly to extend its life.
Can you install PVC vinyl tile flooring over existing floors?
Yes, you can install PVC vinyl tile flooring over many surfaces, such as concrete, wood, or old vinyl. Make sure the surface is clean, dry, and level before you start.
- Remove loose tiles or carpet first.
- Fill any holes or cracks.
Is PVC vinyl tile flooring safe for pets?
PVC vinyl tile flooring works well for homes with pets. The surface resists scratches and stains. You can clean up accidents easily. Keep your pet’s nails trimmed to protect the floor.
What rooms work best for PVC vinyl tile flooring?
You can use PVC vinyl tile flooring in almost any room. It works best in kitchens, bathrooms, basements, and entryways. The waterproof surface handles spills and moisture well.
Note: Avoid using it outdoors or in areas with extreme temperatures.




