

When you start changing direction of vinyl plank flooring between rooms, you want the result to look smooth and professional. You can use a transition strip to help the flooring flow from one space to another. Many people choose T-molding or threshold strips as their main transition tools. Careful planning lets you decide where the transition will happen. You also need to measure for a perfect fit. Vinyl plank flooring between rooms needs a clean transition for the best appearance.
Tip: Always check the alignment before you install any transition piece. This step helps you avoid mistakes and keeps the vinyl plank flooring looking even.
Deciding When to Change Direction of Vinyl Plank Flooring Between Rooms
Common Reasons for Changing Direction
You might wonder why changing direction of vinyl plank flooring between rooms is important. Many homeowners do this to create smooth transitions or to highlight certain features in their homes. Here are some common reasons:
- You want to match or contrast the plank direction with adjoining rooms for a unique look.
- Running planks lengthwise in narrow rooms can make the space feel longer.
- Laying planks perpendicular to entrances creates a welcoming path and natural flow.
- Transition strips help mark boundaries in open floor plans.
- Changing direction of vinyl plank flooring between rooms can define different areas and add visual interest.
- Sometimes, you need to align planks with natural light or traffic flow for the best effect.
- Personal style and room layout also play a big role in your decision.
Note: Changing direction of vinyl plank flooring between rooms can signal a change in space or function, especially in areas like mudrooms or hallways.
Assessing Room Layout and Flow
Before you start installing vinyl plank flooring between rooms, you need to look at the shape and size of each space. The way people move through your home, or the traffic flow, affects how you should lay the planks. The table below shows how different room types and features influence plank direction:
| Room Type/Feature | Recommended Plank Direction | Reason |
|---|---|---|
| Narrow or Rectangular | Parallel to longest wall | Makes space look longer and matches traffic flow. |
| Square Rooms | Diagonal or parallel/perpendicular | Adds energy or balance, fits furniture layout. |
| Open-Plan/Large Spaces | Parallel to main wall or natural light source | Unifies zones and creates seamless flow. |
| Odd-Shaped Rooms | Parallel to dominant wall or light source | Ties irregular spaces together for better flow. |
| Rooms with Large Windows | Parallel to natural light | Hides seams and enhances visual impact. |
| High-Traffic Areas | Parallel to main path | Guides movement and increases durability. |
You should measure each room, check the natural pathways, and look at where the light comes in. This helps you plan the best direction for vinyl plank flooring between rooms.
Visual Impact and Design Choices
The way you lay vinyl plank flooring between rooms changes the look and feel of your home. Laying planks parallel to the longest wall can make a room look bigger and speed up installation. If you install planks perpendicular to doorways, you create smooth transitions and keep each room’s style unique. Diagonal or angled layouts add visual interest, especially in square or oddly shaped rooms. Aligning plank direction with sunlight makes the floor look brighter and more inviting.
Maintaining a consistent direction and using transition pieces can help you achieve a seamless aesthetic flow with plank direction. This approach ensures harmony and visual unity throughout your home, especially when changing direction of vinyl plank flooring between rooms.
Choosing the Right Transition for Vinyl Plank Flooring Between Rooms

Using T-Molding and Transition Strips
T-moldings help you create smooth transitions between rooms with the same floor height. You use t-moldings when you want to connect two areas without a step or drop. T-moldings fit into a small gap between the floors and cover the seam. This keeps the edge safe and gives your floor a finished look. You can find t-moldings in many colors and styles, so you can match them to your vinyl plank flooring. When you use t-moldings, you make transitioning vinyl plank flooring easy and neat. T-moldings also help with expansion gaps, which protect your floor from changes in temperature.
Tip: Always measure the width of your doorway before you buy t-moldings. This ensures a perfect fit for your transitions between rooms.
Reducer Strips for Height Differences
Sometimes, you need to handle transitions between different rooms with floors at different heights. Reducer strips work best in these cases. They create a gentle slope between the two surfaces. This slope makes walking safer and smoother. You avoid tripping and keep your floor edges from damage. When you install reducer strips, you also help your vinyl plank flooring last longer. These strips allow for expansion and movement, which stops warping or buckling. Proper installation on a level subfloor keeps the transition stable and strong. You improve safety and stability by using reducer strips for transitions between rooms.
Seamless Transitions Without Strips
You can create seamless transitions between rooms if your floors are level and you want a continuous look. To do this, you align the planks carefully at the doorway or opening. This method works well when you want your vinyl plank flooring between rooms to look like one large space. You need to plan the layout and measure the transition point. Make sure the planks line up perfectly. This approach works best when transitioning vinyl plank flooring in open-concept homes. You avoid visible breaks and keep the design flowing. Handling transitions between different rooms without strips gives your home a modern and unified style.
Planning the Direction to Lay Vinyl Plank Flooring
Measuring and Marking Transition Points
You need to measure and mark transition points before you lay vinyl plank flooring. This step helps you plan the direction to lay vinyl plank flooring and avoid mistakes. Use a tape measure for small rooms or a laser measuring tool for larger spaces. These tools give you accurate results. You can also use graph paper to draw your room and plan the transition. Many people use a chalk line or laser level to mark the starting row. This keeps your first row straight and helps with achieving a seamless fit between planks.
Here are some helpful tips for measuring and marking:
- Measure the room from one end of the longest wall to the other. This helps you see how many full planks will fit.
- Always measure twice and cut once to avoid errors.
- Use a sharp utility knife for clean cuts.
- Let the planks sit in the room for at least 48 hours before you start. This step helps with expansion and prevents problems later.
- Plan the transition location before you begin. Walk through the space and visualize where the transition will look best.
- Buy all transition pieces before you start. This prevents delays.
| Layout Consideration | Measurement Tool | Purpose |
|---|---|---|
| Room Shape | Measuring Tape | Record width accurately |
| Light Direction | Laser Level | Record length and ensure level measurements |
| Traffic Flow | Graph Paper | Draw detailed room diagrams for planning |
| Plank Direction | Calculator | Plan cuts and layout calculations |
Subfloor Preparation and Expansion Gaps
You must prepare the subfloor before you lay vinyl plank flooring. The subfloor should be smooth, clean, and strong. Remove any dirt or old glue. Use APA trademarked plywood if you need an underlayment. This type of plywood works well for vinyl plank flooring.
Expansion is very important. Always leave an expansion gap of about ¼ inch between the planks and the wall. This gap lets the floor move when the temperature changes. If you skip this step, the floor can buckle or warp. If you have concrete with true expansion joints, do not cover them. Use special covers to keep the floor safe. Expansion joint covers help your floor last longer and keep the transition strong.
Tip: Expansion gaps are not just for the edges. You should also leave them at every transition point between rooms.
Aligning Planks for a Professional Look
You want your floor to look smooth and even. Start by aligning the first row of planks with your marked line. Keep each plank snug against the next. This helps with expansion and keeps the floor flat. When you reach a transition, make sure the planks line up with the transition piece. Use a fine-tooth saw for clean cuts on transition moldings.
Advanced tools like laser measuring devices or AI-powered software can help you get perfect alignment. These tools reduce mistakes and save time. Always check your work as you go. If you plan the direction to lay vinyl plank flooring carefully, you will get a professional finish. Remember to keep expansion in mind at every step. This approach helps you avoid gaps and keeps your floor looking great for years.
Step-by-Step Guide to Installing Vinyl Plank Flooring Between Rooms
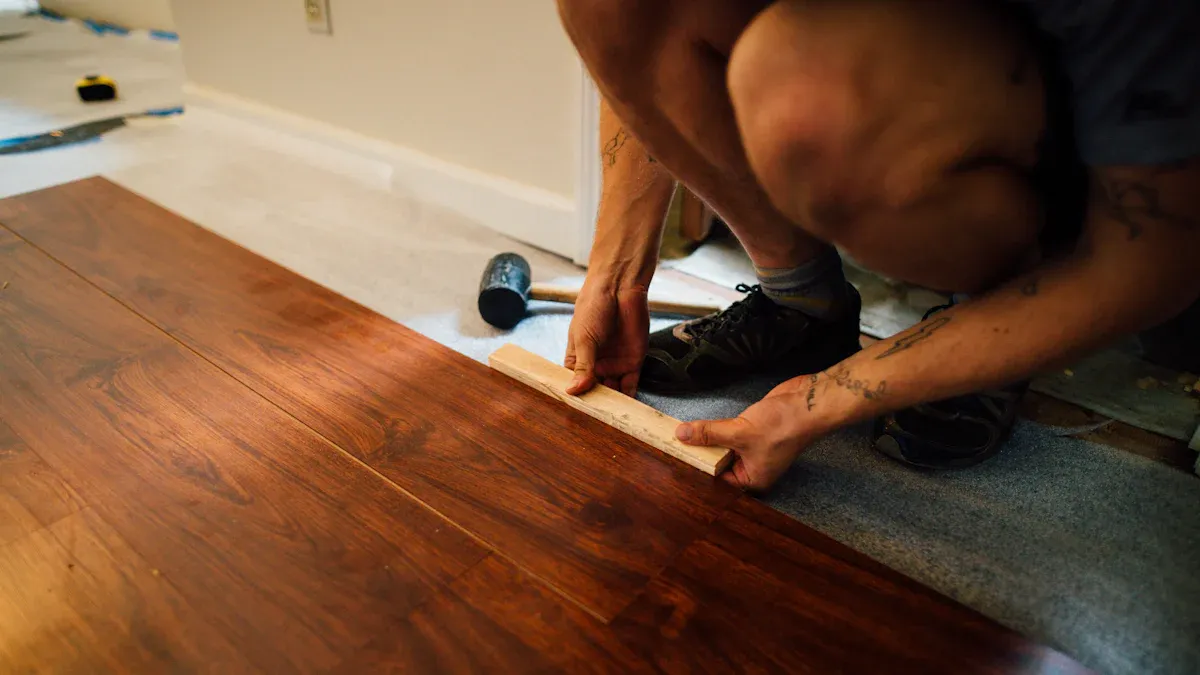
Installing Transition Pieces
You need to start by preparing the area where you want to place the transition. Clean the subfloor and make sure it is dry and level. Measure the width of the doorway or opening. Cut the transition strip and its metal mounting rail to fit this space. Most transition strips need a gap of about one inch to fit the metal rail. Secure the mounting rail to the subfloor using screws or expansion anchors. This step keeps the transition stable and safe.
If you have not installed the baseboards yet, you can place the transition piece under them for a cleaner look. If the baseboards are already in place, butt the transition against them. Sometimes, you may need to remove or undercut the baseboards to fit the transition properly. Using transition pieces helps each room’s floor expand and contract on its own. This prevents damage like buckling or warping. You also avoid pinning the floor in two places, which can cause problems with expansion.
Tip: Start installing vinyl plank flooring at the doorway transition. This makes it easier to fit the planks under door jambs and ensures a neat finish.
Transition pieces such as T-molding, reducers, and ramps help manage height differences between rooms. They protect the edges of your vinyl plank flooring and create a smooth, safe connection. These pieces also reduce tripping hazards and improve the look of your floors. You can choose from different materials and styles to match your home.
Laying Planks in the New Direction
After you install the transition, you can begin laying planks in the new direction. Always lay vinyl planks perpendicular to the subfloor joists. This method gives your floor more strength and stops it from sagging or bouncing. When you change direction at a doorway, use the transition strip as your starting point. Place the first row of planks snug against the transition.
You should also think about the flow of traffic in your home. Lay the planks parallel to the main path people walk. This makes the space look longer and helps prevent tripping. In open areas or wide doorways, transition pieces help define each space and keep the floor stable.
To get a professional finish, prepare a straight wall before you start. Measure and mark a reference line for your first row of planks. Use a chalk line to keep your rows straight. Lay out the planks according to your pattern and check your measurements often. If you need to cut planks to fit around door jambs or other obstacles, use a cheater board or a sharp utility knife for clean cuts.
Note: Always follow the manufacturer’s instructions when installing vinyl plank flooring. This ensures your floor stays strong and looks great.
Securing and Finishing the Transition
Once you have finished laying the planks in the new direction, you need to secure and finish the transition. Snap or press the transition strip onto the metal rail you installed earlier. Make sure it fits tightly and covers the seam between the two rooms. This step keeps the edges safe and gives your floor a polished look.
Check that the transition is level with both floors. If you notice any gaps, adjust the strip or add a small amount of adhesive if the manufacturer allows it. Properly installed transitions let each section of your floor move as needed. This prevents cracking, warping, or other damage over time.
You can add finishing touches to make the transition blend in with your décor. Place a rug or use an accent border to highlight the area. Align the transition with natural start and stop points in your home, such as doorways or room dividers. This creates a smooth and attractive change between spaces.
Safety Alert: Always make sure the transition strip is secure. Loose strips can cause trips and falls.
Transitioning vinyl plank flooring between rooms with these steps helps you achieve a seamless and durable result. When you follow these best practices, you protect your investment and enjoy a beautiful floor for years.
Tips for a Seamless Vinyl Plank Flooring Transition
Color Matching and Style Consistency
You create a seamless transition with vinyl plank flooring by matching colors and styles across rooms. When you select planks, look for shades and textures that complement each other. This approach helps your floors look unified and professional. Design studies show that consistent color patterns help people move through spaces more easily. Hospitals use color and style to guide visitors, and you can use the same idea at home. If you combine vinyl with other flooring types, choose transition strips that match both materials. This step keeps your space visually cohesive and makes navigation easier.
Tip: Always bring a sample plank when shopping for transition strips or new flooring. This helps you find the best match.
Handling Open-Concept Spaces
Open-concept spaces need careful planning for seamless transitions. You can use patterns like herringbone, chevron, or basketweave to define different zones. These patterns add movement and depth, making large areas feel more interesting. Start by marking a straight line with a chalk line or laser level. Lay planks in the same direction to create flow. If you want to highlight a special area, use geometric borders or inlays. Stagger the end joints by at least six inches for strength and style. Always leave an expansion gap along walls and at every transition point. This gap lets your floor move with temperature changes and prevents buckling.
| Pattern Type | Effect on Space |
|---|---|
| Herringbone | Adds movement and depth |
| Chevron | Defines zones |
| Basketweave | Creates elegance |
| Diagonal | Makes rooms look larger |
Avoiding Common Mistakes
You avoid problems by planning ahead and following best practices. Do not skip the expansion gap. This gap is important at every edge, around obstacles, and at transitions. Without it, your floor can warp or crack. Use the right transition strip for each situation. T-molding works for floors of the same height. Reducer strips help with height differences. Always check that your subfloor is clean and level before you start. Use proper tools like tapping blocks and pull bars to keep seams tight. Measure twice before cutting planks. If you rush, you might miss a step and lose the seamless transitions you want.
Note: Expansion is not just for the edges. You need it at every transition and around every fixed object.
Plan your transitions early for the best results. Choose the right method for your space and measure each area carefully. When you use the right tools and techniques, you create a smooth, safe floor. You can see quality in these ways:
- Precise measurements prevent gaps and tripping hazards.
- Level subfloors keep transitions smooth.
- Clean cuts and secure fastening give a polished look.
- Regular cleaning and quick repairs help your floor last.
With thoughtful planning, you can achieve a seamless, professional finish in every room.
FAQ
Can you change the direction of vinyl plank flooring in different rooms?
Yes, you can change the direction of vinyl plank flooring between rooms. Use transition strips or careful alignment at doorways. This method helps you create a smooth and professional look.
What is the best tool for cutting vinyl planks at transitions?
A sharp utility knife works best for most vinyl planks. For thicker planks, you can use a fine-tooth saw. Always measure and mark your cuts before you start.
Do you need a transition strip when changing direction?
You usually need a transition strip when you change direction between rooms. Transition strips cover seams and allow for expansion. They also help prevent tripping and protect the edges of your flooring.
How do you keep the transition area level?
Make sure the subfloor is clean and flat before you install planks. Use the correct transition piece for any height difference. This step keeps the transition area safe and smooth.
Can you install vinyl plank flooring without removing baseboards?
Yes, you can install vinyl plank flooring without removing baseboards. Use a pull bar to fit planks under the baseboard. You may need to trim the bottom of the baseboard for a better fit.




