
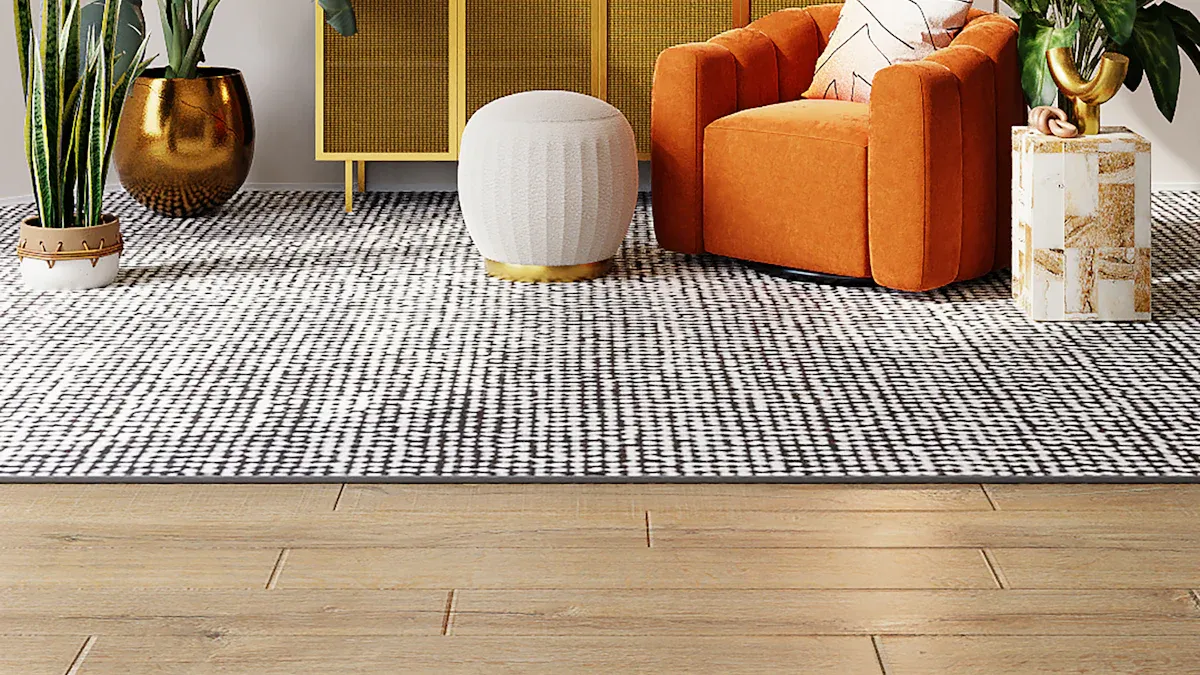
Creative vinyl plank layout patterns can truly transform the look and feel of your home. By using unique vinyl plank layout patterns, you add visual interest that elevates your space. The right vinyl plank flooring can enhance the overall design and make a lasting impression. Vinyl offers versatility, allowing you to use it in various settings, from cozy living rooms to stylish kitchens. With options like luxury vinyl flooring, you can achieve high-end looks without sacrificing functionality.
Common Vinyl Plank Layout Patterns
When choosing vinyl plank flooring, understanding common layout patterns can help you maximize your space. Here are three popular styles:
Straight Lay
The straight lay pattern is the most straightforward and widely used layout. You install planks parallel to the walls, creating a clean and timeless look. This pattern works well in various settings, including living rooms, bedrooms, and offices.
-
Advantages:
- Easy installation, making it perfect for DIY projects.
- Offers a classic appearance that complements many design styles.
- Creates the illusion of a larger space, especially in smaller rooms.
-
Disadvantages:
- It may highlight imperfections in the subfloor.
- Requires extra cutting for irregular room shapes.
| Pattern Name | Best Use Cases | Visual Appearance | Pros | Cons |
|---|---|---|---|---|
| Straight Lay | Living rooms, bedrooms, offices | Clean, simple, timeless | Easy to install, low waste, visually balanced | None significant |
Diagonal Lay
The diagonal lay pattern involves installing planks at a 45-degree angle to the walls. This layout adds a dynamic feel to your space and can make narrow rooms appear wider.
-
Advantages:
- Breaks up rigid lines, creating a more inviting atmosphere.
- Visually expands the space, making it ideal for small or awkwardly shaped rooms.
-
Disadvantages:
- Requires precise cutting and layout planning.
- May result in more waste due to angled cuts.
The diagonal layout draws the eye outward, enhancing the overall openness of the room. This technique is particularly effective in kitchens, bathrooms, and hallways.
Herringbone
The herringbone pattern is known for its elegant and sophisticated look. It consists of planks arranged in a zigzag pattern, creating a visually striking effect.
-
Advantages:
- Adds depth and texture to your flooring.
- Works well in entryways and formal living spaces, making them feel more luxurious.
-
Disadvantages:
- Requires skilled installation due to its complexity.
- More labor-intensive than simpler layouts.
The herringbone pattern has historical roots, originating from ancient Roman road construction. Its timeless appeal continues to make it a popular choice in modern vinyl flooring designs.
Chevron
The chevron pattern offers a bold and stylish option for your flooring. This layout features planks arranged in a continuous V-shape, creating a dynamic flow that adds elegance to any space. You can use this pattern to make a statement in your home.
-
Advantages:
- Creates a smooth, energetic visual effect.
- Works well in larger rooms, enhancing their openness.
-
Disadvantages:
- Installation can be complex due to the precise angled cuts required.
- Higher material waste occurs because of these cuts.
| Feature | Chevron Pattern |
|---|---|
| Visual Effect | Creates continuous V-shaped patterns with a smooth, dynamic flow that adds elegance and energy to spaces. |
| Installation Angle | Requires precise 45° or 60° angled cuts, increasing complexity and material waste. |
| Installation Complexity | High – demands precise cuts and alignment, leading to higher labor costs. |
| Material Waste | Higher due to angled cuts. |
| Visual Impact | Evokes luxury and openness, suitable for formal or luxury settings. |
| Best Applications | Formal patios, luxury spaces. |
| Durability | Good if installed precisely. |
The chevron pattern is perfect for those looking to elevate their interior design. It works well in formal settings, such as dining rooms or entryways, where you want to impress guests.
Basketweave
The basketweave pattern is another versatile option for vinyl flooring. This layout interweaves planks to create a textured, basket-like effect. It adds charm and character to any room, making it suitable for both residential and commercial spaces.
You can use the basketweave pattern in various settings, from cozy living rooms to bustling cafes. It complements a wide range of furniture styles and decorations. The unique woven visual effect enhances the aesthetic appeal of your space, especially when you choose contrasting colors or finishes.
The basketweave pattern provides a traditional and luxurious look. It works well in both large and small rooms, making it a popular choice across diverse interior settings. Whether you want to create a warm atmosphere in your home or a stylish vibe in a business, this pattern delivers.
Choosing the Right Vinyl Plank Layout for Your Space
Selecting the right vinyl plank layout for your space involves careful consideration of several factors. Each decision you make can significantly impact the overall look and functionality of your home. Here are some key aspects to keep in mind.
Consider Room Functionality
Understanding how you use each room is crucial when choosing a vinyl plank layout. Different areas of your home have unique requirements. For example:
-
Living Room: This space often experiences high foot traffic. Choose layouts that complement your furniture and allow for easy movement. Long, wide planks can create a modern look while enhancing the room’s spacious feel.
-
Kitchen: Opt for waterproof and stain-resistant vinyl planks. A practical layout with neutral or bold tones can add style while ensuring durability against spills and heavy use.
-
Bedroom: Focus on comfort and sound insulation. Soft tones and plush layering can create a cozy atmosphere, making it a perfect retreat.
-
Bathroom: Moisture resistance is essential here. Select waterproof planks with tight seams to prevent water damage. Light or deep tones can enhance the ambiance.
-
Dining Room: Durability is key due to spills and chair movement. Elegant patterns like herringbone or chevron can add sophistication while being practical.
-
Basement: Choose moisture-resistant planks to handle humidity. Darker or lighter tones can set the desired mood for this often-overlooked space.
Assessing Room Size and Shape
The size and shape of your room play a significant role in determining the best layout for vinyl plank flooring. Here are some tips to maximize your space:
- Use lighter colors, such as pale oak or light gray, to reflect natural light and make small rooms appear larger.
- Choose larger flooring planks to create a seamless look, minimizing seams that can disrupt visual flow.
- Maintain consistent flooring throughout your home to create visual continuity and enhance the overall design.
- Align flooring planks parallel to the longest wall to elongate the room visually.
- For small spaces, consider unique patterns like herringbone or chevron to add depth without overwhelming the area.
Matching with Existing Decor
Coordinating your vinyl plank layout with your existing decor is vital for a cohesive look. Start by considering the style of your furniture and decor. Here are some strategies:
- For vintage or classic furniture, select luxury vinyl flooring that mimics hardwood. This choice enhances the traditional charm of your space.
- For modern furniture, opt for sleek and contemporary vinyl designs. This alignment creates a harmonious aesthetic.
- Use transition strips to connect different flooring styles seamlessly. This approach avoids abrupt changes and maintains a polished appearance.
- Ensure that the colors and textures of your vinyl planks complement your wall colors and overall home style. Lighter floors can make rooms feel larger, while darker tones add warmth.
By thoughtfully considering room functionality, size, shape, and existing decor, you can choose the best layout for vinyl plank flooring that enhances the aesthetics of your home while maximizing your space.
Color and Texture Considerations
When selecting vinyl plank flooring, color and texture play crucial roles in shaping the atmosphere of your space. They influence not only the visual appeal but also the functionality of your home. Here are some key points to consider:
-
Mood and Feel: Color significantly impacts the mood of a room. For example, warm colors like reds and yellows can create a cozy and inviting atmosphere. In contrast, cool colors like blues and greens promote calmness and relaxation. You can use color to help with wayfinding and zoning, guiding people through your space.
-
Spatial Perception: The right color can make a room feel larger or smaller. Light colors tend to open up a space, while darker shades can create a more intimate feel. If you want to make a small room appear larger, opt for lighter tones in your vinyl plank layout.
-
Texture and Depth: Texture adds depth to your flooring. It can mask wear and dirt, making it practical for high-traffic areas. Textures that mimic real wood or stone enhance the authenticity of your design. For instance, embossed or hand-scraped textures create richness and dimensionality.
-
Combining Color and Texture: By combining different colors and textures, you can create distinct zones within your home. This approach helps guide traffic flow and highlights key areas. For example, using contrasting textures in an open floor plan can delineate spaces effectively.
-
Lighting Considerations: Lighting plays a vital role in how color and texture appear. Natural light can enhance the beauty of your flooring, while artificial lighting can create different moods. Always consider how your chosen colors and textures will look under various lighting conditions.
-
Practicality and Maintenance: When selecting colors and textures, think about maintenance needs. Darker textures can hide dirt better than lighter ones, making them suitable for busy areas. Choose finishes that align with your lifestyle to ensure longevity and ease of care.
Tips for Installing Vinyl Plank Flooring
Preparing the Subfloor
Before you install vinyl plank flooring, you must prepare the subfloor properly. A well-prepared subfloor ensures a smooth and durable finish. Here are some common issues you might encounter and how to address them:
- Moisture Problems: Moisture in the subfloor can cause your vinyl planks to buckle or peel. Always check for moisture sources before installation. If you find any, resolve them first.
- Uneven Surfaces: An uneven subfloor can lead to adhesive failures. Make sure the surface is clean, level, and dry. Fill any cracks and sand down high spots.
- Debris Removal: Remove all debris, dust, and old flooring materials. A clean surface allows for better adhesion and a more professional look.
Tip: Conduct a moisture test on concrete subfloors to ensure they meet the manufacturer’s specifications. This step is crucial for preventing future issues.
Tools and Materials Needed
Having the right tools and materials is essential for a successful installation. Here’s a list of what you will need:
-
Tools:
- Cutting tools (utility knife, saw)
- Rollers for pressing down seams
- Seam welders for joining planks
- Spatula knives for applying adhesive
- Hot air guns for finishing touches
-
Materials:
- Vinyl planks
- Underlayment (if required)
- High-quality adhesive (for glue-down installations)
- Transition strips and baseboards
Planning ahead by reviewing installation instructions and creating a checklist ensures you have everything ready. Using the correct tools and materials guarantees precision and efficiency during the installation process.
Step-by-Step Installation Guide
Follow these steps for a successful vinyl plank flooring installation:
- Remove Existing Flooring: Clear the area of any old flooring and debris.
- Assess and Prepare the Subfloor: Check for moisture and level the surface.
- Install Underlayment: If needed, lay down underlayment for added cushioning and sound insulation.
- Conduct Moisture Testing: Test concrete subfloors for moisture levels.
- Plan Your Layout: Decide on the plank direction and layout to minimize waste.
- Choose Your Installation Method: Decide between floating floor (interlocking) or glue-down (adhesive).
- Maintain Proper Spacing: Leave a ¼ inch expansion gap around the perimeter.
- Cut and Fit Planks: Use a utility knife to cut planks for doorways and corners.
- Finish with Baseboards: Reinstall or add new baseboards and transition strips.
- Clean Up: Remove any debris and provide care instructions for the new flooring.
Note: Always follow the manufacturer’s installation guidelines closely. This ensures that your vinyl plank flooring performs well and lasts for years.
By following these tips and steps, you can achieve a beautiful and durable vinyl plank flooring installation that enhances your space.
Common Mistakes to Avoid
When installing vinyl plank flooring, avoiding common mistakes can save you time and money. Here are some pitfalls to watch out for:
-
Not Maintaining Proper Expansion Gaps: Always leave a 1/4-inch gap around the edges of the room. This space allows the planks to expand and contract with temperature changes. Use spacers to help maintain this gap during installation.
-
Skipping Subfloor Preparation: A clean and level subfloor is essential. Remove any debris and ensure the surface is smooth. This step prevents issues like buckling or uneven surfaces later on.
-
Failing to Acclimate Planks: Before installation, allow your vinyl planks to acclimate to the room’s temperature. This process helps prevent expansion or contraction after installation.
-
Ignoring Manufacturer Instructions: Each brand may have specific guidelines for installation. Always read and follow these instructions to ensure proper fit and warranty compliance.
-
Using Wrong Tools: Make sure you have the right tools ready. A sharp utility knife, tape measure, spacers, and a tapping block are essential for a successful installation.
-
Not Staggering Plank Joints: Staggering the seams at least 6 inches apart strengthens the floor and improves its appearance. Avoid creating H-joints, which can weaken the structure.
-
Installing Planks Backwards: Follow the manufacturer’s recommended installation direction. Installing planks incorrectly can lead to poor locking and alignment issues.
-
Rushing the Job: Take your time during installation. Double-check your measurements and cuts to avoid mistakes that could lead to costly repairs.
-
Not Removing Baseboards: Remove baseboards before installation to maintain the necessary expansion gap. This step also ensures clean edges for a polished look.
-
Using the Floor Immediately: After installation, wait at least 24 hours before placing furniture or allowing heavy traffic. This waiting period allows the floor to settle properly.
By avoiding these common mistakes, you can achieve a beautiful and durable vinyl plank flooring installation that enhances your space.
Creative Vinyl Flooring Patterns and Design Ideas
Accent Walls with Vinyl Planks
You can create stunning accent walls using vinyl planks to add character to your space. Here are some layout ideas to consider:
- Use vertical vinyl plank layouts to elongate ceilings and open up tight spaces like hallways or entryways.
- Mix different plank widths, such as 3″, 5″, and 7″, in a random pattern. This approach adds texture and dimension without overwhelming the room.
- Apply vinyl planks in water-prone areas like kitchens and bathrooms. Their water resistance makes them a practical choice.
- Consider unconventional locations for accent walls, such as ceilings, to make a unique design impact.
You can also create rustic shiplap or modern slatted wall effects using wood-look luxury vinyl planks. This design choice offers a warm, organic look with low maintenance.
Mixing Patterns for Unique Looks
Mixing different vinyl plank patterns can enhance the uniqueness of your room’s design. Here are some effective strategies:
- Combine wider and narrower planks to introduce natural rhythm and balance. Wider planks open up spaces, while narrower ones add intimacy and texture.
- Popular mixed-width patterns, like staggered mix and gradient flow, guide movement and enhance spatial perception.
- Maintain a consistent color palette to ensure harmony despite varying plank sizes. This approach allows you to create a stunning floor plan that feels cohesive.
By mixing patterns, you can transform ordinary rooms into personalized spaces that reflect your style. The waterproof nature of luxury vinyl plank flooring adds practical benefits, making these designs suitable for diverse home areas.
Using Planks in Unexpected Areas
Vinyl planks can serve as a creative solution in unconventional areas. Here are some innovative ideas:
- Boutique hotels have installed vinyl planks on ceilings to create chic lounges with textured patterns that reflect lighting.
- Homeowners have used wood-look vinyl planks overhead in basement living rooms, adding inviting details.
- Coastal cottages applied whitewashed vinyl planks on ceilings to brighten small, windowless hallways.
- Trendy restaurants incorporated graphic, geometric vinyl plank patterns on ceilings to make bold design statements.
Vinyl planks are favored for ceilings due to their durability and moisture resistance. They offer a cost-effective alternative to high-end materials, enabling creative expression without high expense.
Seasonal Decor Changes
Seasonal decor changes can breathe new life into your home. With vinyl plank flooring, you have a stable and reliable base for these transformations. Vinyl flooring is resistant to heat and humidity, making it suitable for various climates. It does not easily warp, fade, expand, contract, or crack with temperature fluctuations. This stability allows you to change your decor without worrying about damaging your flooring.
Here are some ideas for seasonal decor changes that work well with vinyl plank flooring:
- Spring: Brighten your space with pastel colors and floral patterns. Use light area rugs to complement the fresh look.
- Summer: Incorporate vibrant colors and beach-themed decor. Add lightweight curtains to let in natural light.
- Fall: Embrace warm tones like oranges and browns. Use cozy textiles and earthy decorations to create a welcoming atmosphere.
- Winter: Opt for rich colors and textures. Layer rugs for warmth and add festive decorations to enhance the seasonal spirit.
Luxury vinyl flooring undergoes slight expansion and contraction due to seasonal humidity and temperature changes. It contracts in dry winter months and expands in humid summer months. Proper acclimation before installation allows the flooring to adjust to these seasonal variations. This preparation reduces the risk of damage, such as warping or gaps, ensuring your vinyl plank flooring remains stable and durable throughout the year.
By choosing vinyl plank flooring, you can confidently embrace seasonal decor changes. Its resilience and adaptability make it an excellent choice for any home. Enjoy the freedom to refresh your space with each season while maintaining a beautiful and functional foundation.
Creative vinyl plank layouts offer numerous benefits for your home. They enhance both aesthetics and functionality, allowing you to express your style while enjoying practical advantages. Here are some key points to consider:
- Vinyl plank flooring resists scratches, dents, and water damage, ensuring long-lasting beauty.
- Maintenance is simple, requiring only basic cleaning methods.
- Unique patterns like herringbone and chevron not only add visual interest but also help define spaces within open floor plans.
Experimenting with different layouts can transform your home into a stylish and functional haven. Embrace the versatility of vinyl planks and discover how they can elevate your living spaces.
FAQ
What are vinyl planks made of?
Vinyl planks consist of multiple layers, including a wear layer, design layer, and backing layer. These materials provide durability, water resistance, and a realistic appearance that mimics wood or stone.
How do I clean vinyl plank flooring?
To clean vinyl plank flooring, use a damp mop with a mild detergent. Avoid harsh chemicals and abrasive tools. Regular sweeping or vacuuming helps remove dirt and debris.
Can I install vinyl planks over existing flooring?
Yes, you can install vinyl planks over existing flooring, provided the surface is clean, dry, and level. Ensure that the current flooring does not have any significant damage.
How long do vinyl planks last?
Vinyl planks typically last 10 to 20 years, depending on the quality and maintenance. High-quality options with proper care can extend their lifespan significantly.
Are vinyl planks waterproof?
Many vinyl planks are waterproof, making them suitable for areas like kitchens and bathrooms. Always check the manufacturer’s specifications to confirm water resistance.




