
You often find that installing vinyl plank flooring works best when you lay vinyl parallel to the longest wall or toward the main light source. Before you start, check the subfloor for levelness and moisture. Uneven floors can cause creaking or shifting during installation. Loose tiles or damaged areas need repair, and you should use a patching compound to smooth the surface. Many people who lay vinyl over existing flooring face uneven subfloors, so leveling compounds or underlayment help create a solid base. When you decide which direction to lay vinyl plank flooring, consider the shape of the room and traffic flow. Lvp gives you durable results if you prepare the subfloor and clean the old tile thoroughly. Vinyl plank flooring stays strong and looks great when you address these issues before installing lvp.
Which Direction to Lay Vinyl Plank Flooring
Parallel to the Longest Wall
When you decide which direction to lay vinyl plank flooring, you should look at the longest wall in your room. Most flooring manufacturers recommend starting with their installation instructions. Some products need special methods, while others give you more freedom. For example, glue-down floors let you choose different patterns, but click systems need careful alignment.
Laying planks parallel to the longest wall can make your space feel bigger. This direction stretches the look of the room and creates a smooth, continuous flow. You also get fewer seams, which helps the floor stay strong over time. The table below shows why this method works well:
| Advantage Type | Description |
|---|---|
| Aesthetics | Laying planks parallel to the longest wall creates a sense of spaciousness and continuity in the room. |
| Durability | This orientation reduces seams, enhancing the structural integrity of the flooring. |
You can use this method in narrow rooms to make them look wider. It also gives your home a unified style that feels open and welcoming.
Perpendicular to the Main Light Source
You might wonder which direction to lay vinyl plank flooring if your room has large windows or lots of sunlight. Many experts suggest running planks in the same direction as the main light source. This setup lets natural light bounce off the floor, making the space look brighter and more open.
If you lay planks perpendicular to the light, shadows can form along the seams and joints. These shadows may draw attention to the lines between planks. To get the best look, match the plank direction with the main light source. This trick helps hide seams and gives your floor a clean, polished finish.
- Laying planks parallel to the main light source improves the floor’s appearance.
- Natural light should complement the flooring layout for a more pleasing result.
Considering Room Shape and Traffic Flow
You should always think about the shape of your room and how people move through it. The direction you choose affects how big or small the room feels. In long, narrow spaces, laying planks along the length can make the area seem larger. In square or oddly shaped rooms, you can use the plank direction to guide the eye and highlight special features.
Lighting also plays a big role. It can show off the texture of your vinyl and draw attention to certain spots. When you plan which direction to lay vinyl plank flooring, look at how people walk through the room. You want the planks to lead the way and connect different spaces. This approach creates a smooth transition from one area to another.
Tip: Always check the manufacturer’s instructions before you start. Some types of lvp need special installation steps for the best results.
Adjusting for Uneven Subfloors
You may face challenges when you want to install vinyl plank flooring over an uneven subfloor. Uneven spots can cause problems like gaps, noise, or planks that do not lock together. Before you start your installation, you need to check the subfloor carefully. Walk across the floor and feel for dips or bumps. Use a long level or a straight board to spot high and low areas.
If you find small dips or cracks, you can fix them with a patching compound. This material fills in holes and smooths out rough spots. For larger uneven areas, you should use a self-leveling compound. This product spreads out and creates a flat surface for your vinyl. Always follow the instructions on the package for the best results.
Tip: Let the patching or leveling compound dry completely before you lay any vinyl. This step helps prevent future movement or damage.
Here are some steps you can follow to prepare an uneven subfloor for lvp:
- Sweep and clean the subfloor to remove dust and debris.
- Mark the uneven spots with chalk or tape.
- Apply patching compound to small dips or cracks.
- Use self-leveling compound for bigger uneven areas.
- Allow all repairs to dry fully.
- Check the surface again to make sure it feels flat and solid.
You should always check the manufacturer’s guidelines for your lvp. Some products need a special underlayment to help with minor uneven spots. Underlayment can also add comfort and reduce noise. If your subfloor has moisture issues, choose an underlayment that blocks water to protect your vinyl.
A smooth subfloor gives your vinyl flooring a strong base. You will get a better finish and longer-lasting results. Taking time to fix an uneven subfloor makes your installation easier and helps your lvp look great for years.
Assessing and Preparing the Existing Floor
Checking for Levelness and Flatness
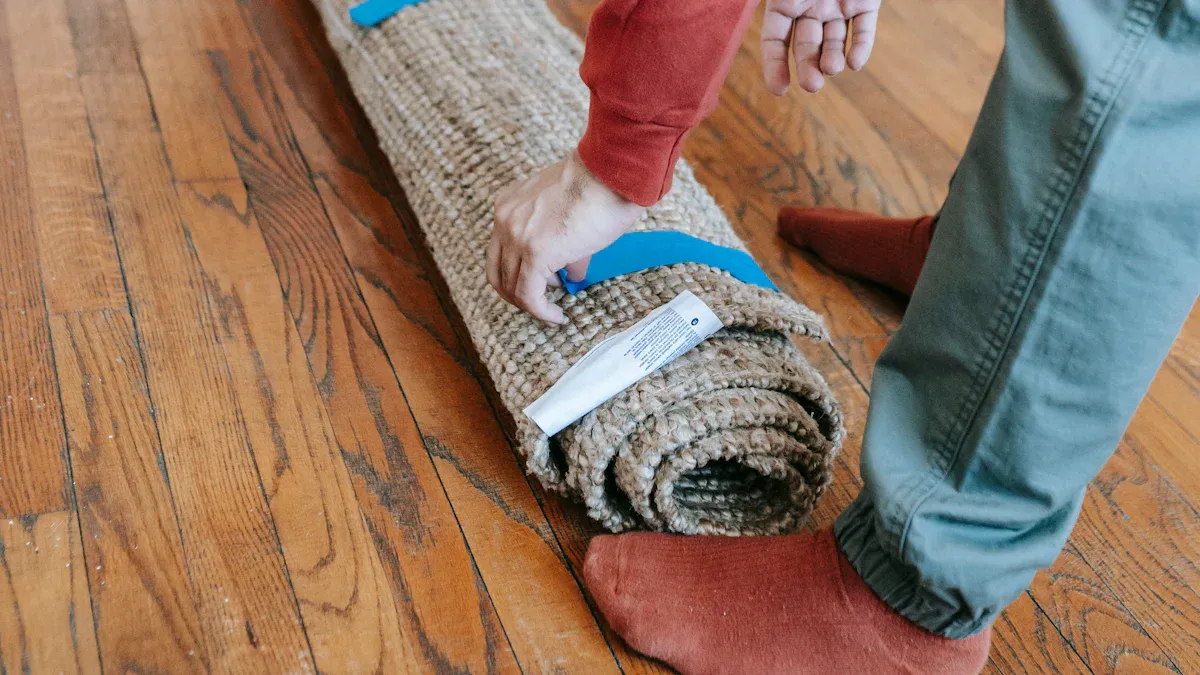
You need to check if your floor is flat before laying lvp over tile. A flat surface helps your vinyl planks lock together and last longer. You can use a straightedge to find low spots. Place the straightedge on the floor and look for gaps underneath. If the straightedge rocks, you have found a high spot. Use a measuring tape to check the size of any gaps. The floor should not have more than 3/16-inch difference over a 10-foot span. A laser level can also help you see if the floor is even. It projects a line across the room, and you can measure from the line to the floor at different points.
Tip: Most manufacturers want the subfloor to be level and flat to 3/16 inch per 10 feet. This helps prevent problems when installing over old flooring.
Cleaning Old Tile Thoroughly
Cleaning is an important step when you start preparing the subfloor. Dirt, dust, and grease can stop the vinyl from sticking or cause bumps under the planks. Sweep the floor well and use a vacuum to pick up small bits. Wash the tile with a mild cleaner and let it dry. Make sure you remove any sticky spots or paint. If you see loose grout or tile pieces, clean them up before you move to the next step. A clean surface helps your lvp look smooth and last longer.
Repairing Cracks and Holes
You must fix cracks and holes in the tile before laying lvp over tile. Fill small cracks with a patching compound. For bigger holes, use a floor repair product that matches the tile. Smooth out the patch so it is level with the rest of the floor. If you find high spots, you may need to grind them down. For deep grout lines, fill them in to make the surface flat. Industry standards say the surface should be flat, with no more than 1/16 inch difference for floating floors like lvp. Taking time to repair these areas gives your vinyl a strong base and helps your installation go smoothly.
Using Leveling Compounds for Uneven Areas
You need a flat surface for a successful vinyl plank floor. If your subfloor has dips or bumps, you should use a leveling compound. This step helps your lvp lock together and last longer. There are different types of leveling compounds you can choose from, depending on the size and location of the uneven spots.
Here is a table to help you pick the right product:
| Type of Leveling Compound | Description | Best Uses |
|---|---|---|
| Self Leveling Compound | Flows easily to correct uneven areas over large spaces. | Concrete slabs, Open commercial areas, Vinyl, tile, and carpet installations |
| Trowel Applied Leveling Compound | Thicker and applied by hand, ideal for smaller repairs and targeted fixes. | Patching low spots, Fixing edges and transitions, Sloped or tight areas |
| Moisture Resistant Leveling Products | Designed for better performance in damp conditions. | Ground level spaces, Entryways, Hospitality and healthcare buildings |
You should sweep and clean the subfloor before applying any product. For small dips, use a trowel-applied compound. For large uneven areas, a self-leveling compound works best. If you expect moisture, pick a moisture-resistant product. Always let the compound dry fully before you start your lvp installation.
Installing Moisture Barriers
Moisture can damage vinyl flooring over time. You should always check for moisture before you lay planks. Here are some best practices for installing moisture barriers:
- Test the subfloor for moisture before you begin.
- Make sure the surface is flat and clean.
- For concrete, grind the surface to help the barrier stick.
- Follow the manufacturer’s instructions for the barrier and the vinyl.
You protect your new floor when you use a moisture barrier. This step keeps your lvp looking good and helps it last for years.
Tools and Materials Checklist for Laying Vinyl Planks
Before you start your vinyl plank flooring project, you need to gather the right tools and materials. Having everything ready makes your work smoother and helps you avoid mistakes. This checklist will guide you through the essentials for a successful installation.
Essential Tools for Installation
You want to use the same tools that professional installers trust. These tools help you measure, cut, and fit your vinyl planks with accuracy and safety.
- Kneepads keep your knees comfortable when you work on hard floors.
- Safety footwear protects your feet and helps prevent slips.
- Tape measure, pencil, and chalk let you mark and measure each plank.
- Spatula knife helps you spread adhesive and smooth out seams.
- Chamfer plane creates smooth edges for better transitions.
- Rollers press the planks down and make sure they stick well.
- Welding gun or welding machine can help with special seam work.
Tip: Always double-check your measurements before you cut any lvp plank.
Recommended Materials
You need the right materials to make your vinyl floor last. The table below lists what you should have on hand:
| Material | Purpose |
|---|---|
| Vinyl planks | Main flooring surface |
| Leveling compound | Smooths out uneven spots |
| Moisture barrier | Protects against water damage |
| Floor patch | Fills cracks and holes in the subfloor |
| Cleaning supplies | Keeps the area dust-free before installation |
Optional Items for Better Results
Some extra items can make your lvp project easier and help your floor look even better.
- Underlayment adds comfort, reduces noise, and hides small bumps.
- Transition pieces give you smooth edges between different floors.
- Flooring adhesive or click lock system keeps your vinyl planks secure.
Note: Using these optional items can improve the quality and life of your new floor.
Step-by-Step Tips for Laying Vinyl Planks
Planning Your Layout
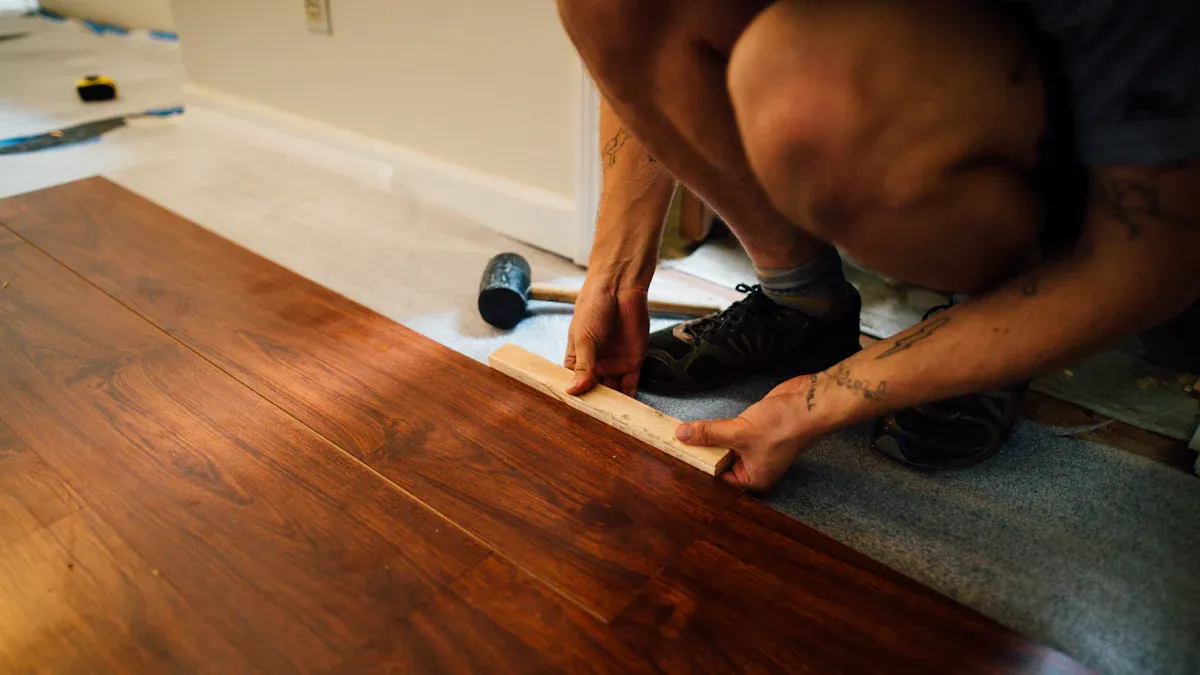
You want to start your project with a clear plan. Begin in a corner of the room and place spacers between the planks and the wall. This step keeps a 1/4-inch expansion gap, which helps your floor adjust to temperature changes. Place the first plank with the tongue side facing the wall. When you add the next plank, insert its tongue into the groove of the previous plank at a slight angle, then press down to lock it in place. Measure the space for the last plank in each row, making sure to leave room for the expansion gap, and cut as needed. Start each new row with the leftover piece from the previous row. This method reduces waste and keeps your pattern looking natural. For the final row, measure and cut the planks so the expansion gap remains.
Tip: Always avoid random placement of planks. Keep about six inches between end joints to prevent unwanted patterns.
Cutting and Fitting Planks
You will need to cut planks to fit around corners and obstacles. For straight cuts, use a utility knife with a fresh blade. Score the vinyl and snap it along the line. If you need to make irregular cuts, such as around pipes or door frames, a jigsaw works best. Some people prefer a flooring saw with a fine-tooth blade for extra precision. For long, straight rip cuts, a table saw gives you clean results. Always measure twice before cutting to avoid mistakes.
Staggering Seams for Strength
When laying vinyl planks, you should stagger the seams. This technique spreads weight and stress across the floor, which helps prevent weak spots. Staggering also lets your lvp adjust to changes in temperature and humidity, keeping the floor stable over time. If you line up the seams, you risk creating straight lines that can lead to warping or buckling. By offsetting the joints, you make your lvp installation stronger and more durable. This approach gives your vinyl floor a professional look and helps it last for years.
Securing the First Row
You want your first row of vinyl planks to stay straight and secure. This step sets the foundation for the rest of your floor. Start by placing spacers between the wall and the planks. These spacers create a small gap for expansion, which helps your floor adjust to temperature changes.
To keep the first row from moving, use temporary boards. You can make these from leftover pieces of vinyl or cut planks. Lock the temporary boards into the ends of your first row using the plank’s locking system. Screw them down gently to the subfloor. Place one board at each end and another at every seam. Always measure before you secure each board. This keeps your row straight and prevents shifting.
Check your alignment often. Use a level or measuring tape to make sure the row stays even. If you see the row drifting, adjust it before moving on. Keep the seams staggered by at least six inches. This pattern makes your lvp floor stronger and helps avoid H-joints, which can weaken the structure.
Tip: Take your time with the first row. A straight start makes the rest of your lvp installation much easier.
Dealing with Obstacles and Corners
You will face obstacles like door frames, pipes, or corners when laying vinyl. Measure each area carefully before you cut. Mark the plank where you need to make a cut. For straight cuts, use a utility knife. For curves or odd shapes, a jigsaw works best.
Work slowly around corners. Test-fit each piece before locking it in place. If you need to fit vinyl under a door jamb, trim the bottom of the jamb so the plank slides underneath. Always leave a small gap for expansion, even around obstacles.
- Measure twice before cutting.
- Dry-fit planks to check the fit.
- Use the right tool for each cut.
You can create a smooth, professional look by taking extra care with these tricky spots. Your lvp floor will look neat and last longer.
Handling Transitions and Edges with skspcflooring
Transition Strips Between Flooring Types
When you move from one room to another, you often see different types of flooring. You need transition strips to connect vinyl to carpet, tile, or hardwood. These strips help you create a smooth and safe step between surfaces. You should select materials that match the function and design of each area. Think about color, texture, and patterns to make your space look balanced.
- Use T-molding or flush transitions for hard floors.
- Choose reducers or threshold strips if the floors have different heights.
- Try a border or patterned blend for a luxury look.
- For carpet, use tack strips or flush edges.
Here is a table to help you pick the right transition strip for your vinyl plank flooring:
| Type of Transition Strip | Pros | Cons |
|---|---|---|
| Rubber/Vinyl Reducer Strip | Affordable, easy to install, soft to the touch, many color options | Less durable than metal, may wear or discolor over time |
| Wooden/Hardwood Transition Strip | Attractive finish, easy to paint or stain, adds warmth | Sensitive to humidity, requires precise cutting |
| Schluter/Edge Profile | Sleek finish, protects tile edges, very durable | More expensive, needs skill to install correctly |
Finishing Edges Against Walls
You want your lvp to look neat where it meets the wall. Flexible trim strips like InstaTrim work well for this job. InstaTrim is a self-adhesive PVC strip that can replace quarter-round molding. It covers small gaps and keeps dust from building up along the edge. This method gives your vinyl floor a clean, finished look.
- Flexible trim strips are easy to install.
- They hide gaps and protect the edge of your flooring.
- You can choose from different colors to match your style.
Managing Doorways and Thresholds
Doorways and thresholds need special care during installation. You should measure the space and cut your lvp to fit tightly. Use a reducer strip if the next room has a lower floor. For even floors, a T-molding works best. Always leave a small gap for expansion, then cover it with the right transition piece. This step keeps your vinyl floor secure and helps it last longer.
Tip: Take your time when working around doorways. Careful cuts and the right transition strips make your flooring look professional.
Addressing Moisture and Subfloor Concerns
Identifying Moisture Issues
You need to check for moisture before you start your vinyl plank flooring project. Moisture can cause many problems under your floor. If water builds up, you might see bubbling, warping, or cupping in your vinyl. Mold can grow if the area stays damp, which can damage your subfloor and even the building. Sometimes, temperature changes cause condensation, making it easier for mold to appear. Watch for these signs before you begin your installation.
- Bubbling or warping in vinyl planks
- Mold growth under the floor
- Soft or spongy spots in the subfloor
- Condensation on the surface
If you notice any of these issues, fix them before you move forward. This step helps your lvp last longer and keeps your home safe.
Choosing the Right Underlayment
Picking the right underlayment is important for a smooth and strong floor. Underlayment helps level uneven tile, adds comfort, and protects against moisture. You have several options to choose from. The table below shows the benefits and drawbacks of each type:
| Underlayment Type | Benefits | Drawbacks |
|---|---|---|
| Particle Board | Inexpensive, provides a level base | Ineffective against moisture, hard to remove |
| Rubber Underlayment | Great for sound absorption, adds warmth, protects against water damage | N/A |
| Plywood/OSB | Provides a level base, durable | Lacks warmth and cushioning, OSB is more durable than plywood |
Rubber underlayment works well if you want extra warmth and moisture protection. Plywood or OSB gives you a solid base for your vinyl. Always use underlayment that matches your needs and the condition of your subfloor.
Protecting Against Future Problems
You can take steps to prevent moisture problems after your lvp installation. Control indoor humidity by using dehumidifiers and exhaust fans. Clean up spills right away and keep your HVAC system running to help manage moisture. Check for leaks in plumbing and make sure water drains away from your home. In bathrooms and kitchens, use exhaust fans to improve airflow. When you install your vinyl, use moisture barriers and underlayment to add extra protection. Remember to leave expansion gaps around the edges of your floor. Leaving expansion gaps lets your vinyl move as temperatures change, which helps prevent buckling or warping.
- Use dehumidifiers to manage humidity
- Clean up spills quickly
- Check for leaks and fix them fast
- Use exhaust fans in high-moisture rooms
- Install moisture barriers and underlayment
- Remember leaving expansion gaps for vinyl movement
By following these steps, you help your vinyl floor stay strong and beautiful for years.
Why Choose skspcflooring for Your Vinyl Plank Installation
Quality and Durability
You want your floor to last and look great. skspcflooring stands out because it offers extra-long planks. These planks give your room a premium look and show more natural wood grain. You see fewer joints, which means fewer weak spots. This makes your floor stronger and helps it stay together over time. In large rooms, longer planks make the space look clean and balanced. You get a smooth finish that feels professional.
- Extra-long planks create a high-end look.
- Fewer joints mean better strength.
- Large spaces look more cohesive.
You can trust skspcflooring to deliver lvp that holds up to daily life. Your floor stays beautiful and strong for years.
Eco-Friendly Flooring Solutions
You care about the environment. skspcflooring uses eco-friendly materials in its vinyl products. The factory follows strict rules to reduce waste and save energy. You help protect nature when you choose lvp from skspcflooring. The company uses safe materials that do not harm your home or the planet. You can feel good about your choice because the products meet high standards for safety.
Choosing eco-friendly vinyl flooring helps you create a healthy space for your family.
International Certifications and Standards
You want to know your floor meets global standards. skspcflooring holds certifications like ISO9001, ISO14001, EN, ASTM, and GB. These show the company cares about quality and safety. You get vinyl flooring that passes tough tests for durability and health. The certifications prove the products are reliable and safe for your home or business.
| Certification | What It Means |
|---|---|
| ISO9001 | Quality management |
| ISO14001 | Environmental responsibility |
| EN, ASTM, GB | International safety standards |
You can trust skspcflooring for your next installation. The company delivers lvp that meets your needs and gives you peace of mind.
You should always choose the direction for your vinyl planks based on the longest wall, the light in the room, and the condition of your subfloor. Careful preparation helps your lvp look smooth and last longer. Clean the surface, fix any uneven spots, and check for moisture before you start your installation. With the right tools and tips, you can install lvp and enjoy a beautiful vinyl floor from skspcflooring.
FAQ
Can you install vinyl plank flooring over old tile?
Yes, you can install vinyl plank flooring over old tile. Make sure the tile is clean, flat, and free of loose pieces. Fill any cracks or holes before starting your project.
What should you do if your floor is uneven before installing lvp?
You should use a leveling compound to fix dips or bumps. This step helps your lvp lock together and last longer. Always check the surface for flatness before you begin.
Do you need underlayment for vinyl plank flooring?
You may need underlayment if your subfloor is uneven or if you want extra comfort. Underlayment can also help reduce noise and protect against moisture. Always follow the manufacturer’s recommendations.
How do you keep lvp seams from separating?
Keep seams tight by staggering the planks and following the correct installation steps. Make sure the subfloor is clean and level. Use spacers to maintain expansion gaps around the edges.




