
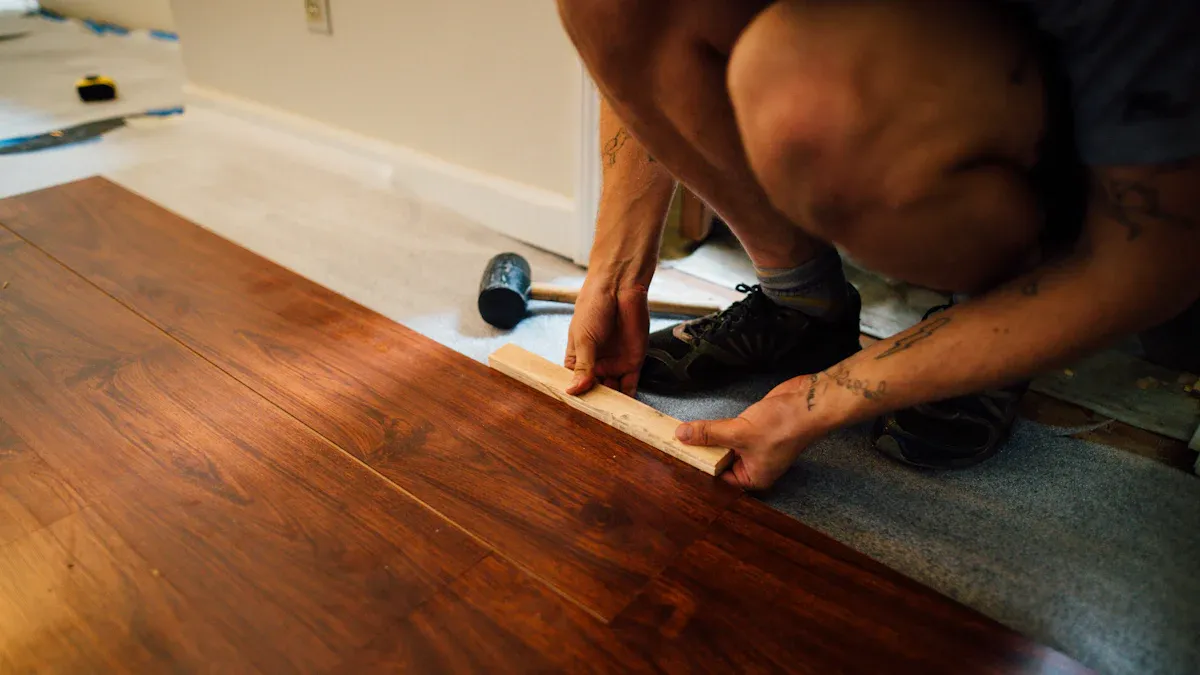
Installing click lock vinyl plank flooring gives you a simple way to upgrade your home. You only need basic tools and a bit of patience. Many people choose this flooring because you can finish the job in a weekend. You will enjoy a floor that looks stylish and feels comfortable underfoot. Some homeowners notice that click-lock flooring works best for areas with moderate foot traffic.
- It is easy to install and remove.
- It offers a good balance between style and function.
Why Installing Click Lock Vinyl Plank Flooring Is Perfect for DIYers
Simple Installation Process
You can start installing click lock vinyl plank flooring with just a few basic tools. The planks snap together without glue or nails. This makes the process much easier than other flooring types. You do not need to worry about messy adhesives or waiting for anything to dry. Many DIYers choose this flooring because it saves time and effort.
- You do not need special skills to get started.
- You can finish a typical 200-square-foot room in one weekend.
- You will not need to buy expensive tools.
If you are new to home improvement, you may need a little more time. First-time installers often take longer than experienced ones. Obstacles like doorways or odd corners can add extra steps. Still, you will find the process straightforward and rewarding.
Durable and Water-Resistant Flooring
When you install click lock vinyl plank flooring, you get a floor that stands up to daily life. The planks resist water, so you can use them in kitchens, bathrooms, and basements. You do not have to worry about spills or moisture damaging your floor. Many brands offer long warranties, sometimes up to 30 years or more. Some even cover wear, stains, and fading. Always check the warranty details for your chosen product.
Tip: Choose a product with a strong warranty for extra peace of mind.
Modern Style for Any Room
You can find click lock vinyl plank flooring in many colors and patterns. This lets you match your floor to any style you like. Whether you want a classic wood look or a modern tile design, you have many options. The planks fit together tightly, giving your room a clean and seamless look. You can upgrade your space without spending a lot of money on labor. By installing click lock vinyl plank flooring yourself, you save on installation costs and get a stylish result.
Tools and Materials Needed for Installing Click Lock Vinyl Plank Flooring
Essential Tools Checklist
Before you start installing click lock vinyl plank flooring, you need to gather the right tools. Having these tools ready will help you work faster and avoid mistakes. Here is a checklist you can follow:
- Rubber mallet
- Tapping block
- Pull bar
- Tape measure
- Combination square
- Plank cutter
You will use the rubber mallet and tapping block to lock the planks together without damaging them. The pull bar helps you fit planks in tight spaces. The tape measure and combination square make sure your cuts are straight and accurate. The plank cutter lets you trim planks to fit around corners or walls.
Tip: Always keep your workspace clean. Dust and debris can make it hard to lock planks together.
Materials and Underlayment Tips
You need more than just planks and tools for a successful installation. Underlayment plays a big role in how your floor feels and sounds. It helps reduce noise from footsteps, adds comfort, and protects against moisture. Underlayment also smooths out small bumps in the subfloor.
Many underlayments offer moisture protection, which is important if you install over concrete. Some underlayments focus on sound dampening, making your home quieter. Choose an underlayment that matches your needs and the type of subfloor you have.
When you buy flooring, look for products with environmental certifications. FloorScore® and GREENGUARD are two common certifications. These labels show that the flooring meets strict standards for indoor air quality and low chemical emissions.
Here is a table of common installation issues and how you can prevent them:
| Issue | Causes | Prevention |
|---|---|---|
| Lifting or Buckling | Not enough expansion gap, moisture, bad install | Leave proper gaps, keep subfloor dry, avoid tight fits |
| Noise (Creaking/Popping) | Missing underlayment, uneven subfloor | Use good underlayment, make subfloor smooth and level |
| Difficulty Locking Planks | Dirt in locks, misalignment | Clean area, check locks, use correct angle |
| Floor Shifting | No transition strips, loose subfloor | Add transition strips, secure and level subfloor |
Note: Wearing gloves and safety glasses can protect your hands and eyes during cutting and installation.
Preparing Your Room for Installation
Clearing the Space and Removing Furniture
You need to start with a clean and open area. Move all furniture, rugs, and personal items out of the room. Take time to remove anything that could get in your way. This step helps you work faster and keeps your new floor safe from scratches. If you have large pieces, ask a friend or family member for help. You want to make sure nothing blocks your path as you lay each plank.
Subfloor Inspection and Preparation
A smooth and solid subfloor is important for a successful installation. You should follow these steps before installing click lock vinyl plank flooring:
- Check that the subfloor is clean, dry, and level. Use a level to make sure the surface does not change more than 1/8 inch over 6 feet.
- Sand down any high spots. Fill low spots with a floor leveling compound.
- If you have a concrete subfloor, use a moisture meter to test for dampness. Add a moisture barrier if needed.
- For wood subfloors, fix or replace any loose or damaged boards.
- Find out if your flooring needs a separate underlayment. Follow the manufacturer’s instructions.
- Make sure your subfloor type is approved for your flooring.
Here is a table of common subfloor issues and how you can solve them:
| Issue | Description | Solution |
|---|---|---|
| Cleanliness | The subfloor must be free of debris and bumps. | Make the subfloor smooth before you start. |
| Levelness | Surface changes should not exceed 1/8 inch over 6 feet. | Use a level, sand high spots, fill low spots. |
| Moisture | High moisture can damage your flooring. | Test for moisture, add a moisture barrier if needed. |
| Structural Integrity | Loose or damaged boards cause problems later. | Repair or replace bad boards in wood subfloors. |
| Expansion Gaps | Not enough gap can cause lifting or buckling. | Keep a 1/4-inch gap around the room. |
Tip: Take your time with this step. A good subfloor means your new floor will last longer.
Removing Baseboards and Trim
You should remove baseboards and trim before you start. Use a pry bar or putty knife to gently lift them away from the wall. Work slowly to avoid breaking the wood. Set the pieces aside so you can reuse them later. Removing baseboards gives your floor a clean edge and makes it easier to add expansion gaps. If you plan to install new trim, measure and cut it after you finish the floor.
Planning and Laying Out Your Flooring
Measuring and Calculating Plank Placement
You need to measure your room before you start installing click lock vinyl plank flooring. Accurate measurements help you avoid waste and make your floor look neat. Start by measuring the length and width of your room. Multiply these numbers to find the total square footage. Always add 10% extra to your order for mistakes and future repairs.
When you plan your layout, begin at the longest, straightest wall. This method gives you a clean starting point and helps your planks line up well. Use a tape measure to check the width of your last row. If the last row will be less than half a plank wide, trim the first row to make both edges even.
- Start planning your layout from the longest, straightest wall to ensure a clean and efficient installation.
- Maintain a 1/4-inch expansion gap along both walls using spacers to accommodate for flooring expansion.
Tip: Lay out a few planks without locking them to see how they fit. This step helps you spot problems before you start.
Acclimating Your Vinyl Planks
You should let your vinyl planks adjust to the room before you install them. This process is called acclimation. It helps prevent warping or gaps after installation. Bring the unopened boxes into the room and let them sit flat.
Before you install anything, bring the unopened boxes of LVP into the room where they’ll be installed and let them sit flat for 48–72 hours.
However, if the temperature in the room has fluctuated a lot, or if your vinyl planks were exposed to cold during transit, giving them 72 hours or more is wise.
- Acclimation Period: Allow the flooring to adjust to the environment by leaving it in the room for at least 48 hours before installation.
- Relative Humidity: It is crucial to maintain stable humidity levels in your home to ensure the long-term performance of the flooring.
Planning for Expansion Gaps
You must leave space around the edges of your floor. This space is called an expansion gap. It lets the planks expand and contract with changes in temperature and humidity. Use spacers to keep the gap even as you work.
- The recommended size for expansion gaps is 1/4 inch around the entire perimeter.
If you skip this step, your floor could buckle or lift over time. Always check the gap before you finish each row. Good planning now means fewer problems later.
Step-by-Step Guide to Installing Click Lock Vinyl Plank Flooring with skspcflooring
Starting with the First Row
You begin your project by preparing the first row of planks. This step sets the foundation for the rest of your floor. Follow these steps for a smooth start:
- Trim the short tongue edge off the first plank. This helps the plank sit flush against the wall.
- Place the first plank about 1/4 inch away from the wall. This gap allows the floor to expand and contract.
- Insert spacers between the plank and the wall to keep the expansion gap even.
- Stagger the end joints of the planks in each row by at least 6 inches. This pattern adds strength and gives your floor a professional look.
Tip: Always start from the left side of the room and work to the right. This method ensures the planks lock together correctly and prevents gaps.
You should check the direction of your planks before you begin. Most people lay planks parallel to the longest wall. This layout makes the room look bigger and more balanced.
Installing Subsequent Rows
After you finish the first row, you move on to the next rows. Each new row should lock tightly with the previous one. Use these techniques to get a snug fit:
| Technique | Description |
|---|---|
| Use Spacers | Place spacers between the planks and the walls to keep a 1/4-inch expansion gap. |
| Angle the Tongue | Angle each plank’s tongue into the groove of the previous row to lock them together. |
| Use a Tapping Block | Gently tap the planks into place with a tapping block and a non-marring hammer. |
| Light Tapping | Use a small piece of plank to lightly tap the locking planks together for a tight lock. |
| Hand or Seam Roller | Roll over the end joints with a hand or seam roller to ensure a tight fit. |
You should stagger the seams between rows. Start each new row with a plank cut to a different length. This pattern makes your floor stronger and more attractive.
Note: If you reach a doorway or transition to another flooring type, use a T-molding or reducer strip. Attach the transition strip to the subfloor, not the vinyl planks. Always leave a 1/4-inch gap between the planks and the transition strip to prevent buckling.
Check each row as you go. Make sure the planks lock tightly and the seams line up well. If you see a gap, use your tapping block to close it.
Cutting Planks to Fit
You will need to cut planks to fit around walls, vents, and other obstacles. Accurate cuts help your floor look neat and professional. Here are some best practices:
- Measure and mark the planks that need to be cut for edges and obstacles.
- Use a utility knife to score and snap the planks for straight cuts.
- For irregular shapes, use a jigsaw.
- Use a carpenter’s square to make sure your cuts are straight.
- Dry fit the planks before locking them in place. This step helps you avoid mistakes and wasted material.
- Measure the size and location of vents carefully. Use a jigsaw for these cuts to keep the floor seamless.
- Undercut door jambs and trims so the planks can slide underneath. This technique gives your floor a clean, finished look.
Tip: Always wear safety glasses and gloves when cutting planks. This keeps your hands and eyes safe from sharp edges.
You should avoid common mistakes during installation. Do not install planks tightly against the wall. Always leave a 1/4-inch gap. Do not ignore uneven spots on the subfloor. Stagger the seams for every row. These steps help your floor last longer and look better.
Working Around Door Frames and Obstacles
You will face door frames, vents, and other obstacles during your flooring project. These areas need careful attention for a neat finish. Start by measuring the space around each obstacle. Mark the plank where you need to cut. Use a jigsaw for curved or detailed cuts. For straight cuts, a utility knife works well.
You can undercut the door jambs. Place a scrap piece of flooring next to the jamb. Use a handsaw to trim the jamb so the plank slides underneath. This method gives your floor a seamless look. Always check the fit before locking the plank in place.
Tip: Dry-fit planks around obstacles before making final cuts. This step helps you avoid mistakes and wasted material.
For vents, measure the opening and transfer the size to your plank. Cut carefully and test the fit. You want the plank to sit flat without gaps. If you find pipes or posts, cut the plank to fit around them. Use a flexible measuring tape for odd shapes.
Here is a quick reference table for common obstacles:
| Obstacle | Tool Needed | Best Practice |
|---|---|---|
| Door Jamb | Handsaw | Undercut jamb, slide plank under |
| Vent | Jigsaw | Measure, cut opening, test fit |
| Pipe/Post | Jigsaw | Trace shape, cut slowly, dry fit |
| Wall Niche | Utility Knife | Score, snap, adjust as needed |
Take your time with these steps. Careful work around obstacles makes your floor look professional.
Achieving a Snug, Professional Finish
You want your new floor to look smooth and tight. Check each plank as you install it. Make sure the edges lock together with no gaps. Use a tapping block and a rubber mallet to close any small spaces. Work row by row and keep seams staggered for strength.
Inspect the expansion gap along the walls. Use spacers to keep the gap even. This gap lets your floor move with changes in temperature and humidity. Remove the spacers only after you finish installing all planks.
Note: Walk across the floor as you work. Listen for any creaks or movement. If you hear noise, check for loose planks or uneven spots.
Clean up dust and debris as you go. A clean workspace helps the planks lock together better. If you see a stubborn gap, use a pull bar to close it. Always check your work before moving to the next row.
You can achieve a professional look by following these steps. Take your time and pay attention to detail. Installing click lock vinyl plank flooring becomes easier when you focus on each part of the process.
Finishing Touches and Final Inspection
Reinstalling Baseboards and Trim
You have finished laying your new floor. Now, you need to put the baseboards and trim back in place. This step gives your room a polished look and covers the expansion gap along the walls. Follow these steps to reinstall baseboards and trim:
- Place the baseboards back against the wall where they were removed.
- Secure the baseboards to the wall using finishing nails or a nail gun.
- Make sure you attach the baseboards only to the wall, not to the floor. This allows your flooring to expand and contract as needed.
- Check that the trim sits flush and covers the edge of the planks.
- Fill any nail holes with wood filler and touch up with paint if needed.
Tip: Take your time with this step. Careful work helps your floor look neat and professional.
Cleaning Up and Inspecting Your Work
After you finish reinstalling the trim, you should clean the floor and check your work. Use safe cleaning products to protect your new surface. The table below shows which cleaners work best and which ones you should avoid:
| Acceptable Cleaners | Cleaners and Tools to Avoid |
|---|---|
| Rejuvenate Luxury Vinyl Tile Floor Cleaner | Vinegar |
| ZEP Neutral Floor Cleaner Concentrate | Mop and Shine products |
| Ammonia and Water Solution (4:1) | Soap-based detergents or oil soaps |
| Abrasive cleaners or compounds | |
| Floor wax | |
| Vacuum with a rotating beater bar | |
| One-step cleaner/polishes | |
| Steam mops | |
| Harsh scouring or buffing pads |
Sweep or vacuum the floor using a soft brush attachment. Wipe away dust and debris with a damp mop and an approved cleaner. Avoid harsh chemicals or tools that could scratch the surface. Walk across the room and look for any gaps or loose planks. Make sure the expansion gap remains clear and the planks fit tightly.
You have now completed installing click lock vinyl plank flooring. Your room looks fresh and modern. Regular cleaning and careful inspection will help your new floor last for years.
When you choose installing click lock vinyl plank flooring, you invest in a project that transforms your home in just a weekend. You save on labor costs and enjoy these long-term benefits:
| Benefit | Description |
|---|---|
| Longevity | Lasts 15–25 years with proper care. |
| Water Resistance | Handles spills and moisture in kitchens and bathrooms. |
| Scratch Resistance | Stands up to pets, kids, and daily life. |
| Low Maintenance | Easy to clean—just sweep and mop. |
| Cost-Effective | Only pay for materials, not professional labor. |
Keep your floor looking new by using felt pads, placing rugs in busy areas, and cleaning with gentle products. Start your DIY journey today and enjoy a beautiful, durable floor for years.
FAQ
How long does it take to install click lock vinyl plank flooring?
You can finish a standard room in one weekend. Most people need 6–8 hours for a 200-square-foot space. Take your time for best results.
Can you install click lock vinyl plank flooring over existing floors?
Yes, you can install over tile, hardwood, or concrete. Make sure the surface is clean, dry, and level before you start.
Do you need to use glue or nails with click lock vinyl plank flooring?
No glue or nails are needed. The planks lock together with a simple click system. This makes installation easy and mess-free.
How do you clean and maintain your new floor?
Sweep or vacuum with a soft brush. Mop with a damp cloth and approved cleaner. Avoid harsh chemicals and steam mops.
Is click lock vinyl plank flooring waterproof?
Yes, most click lock vinyl plank flooring resists water. You can use it in kitchens, bathrooms, and basements without worry.




