

An exceptional loose lay vinyl plank flooring installation hinges on a meticulous four-stage process. You will master preparation, planning, installation, and finishing. This installation guide provides precise, step-by-step instructions for a flawless and durable floor. Following this professional method ensures your new looselay flooring is secure, perfectly aligned, and built to last. You can achieve a professional finish when you properly lay loose flooring.
Prepare Your Space and Materials
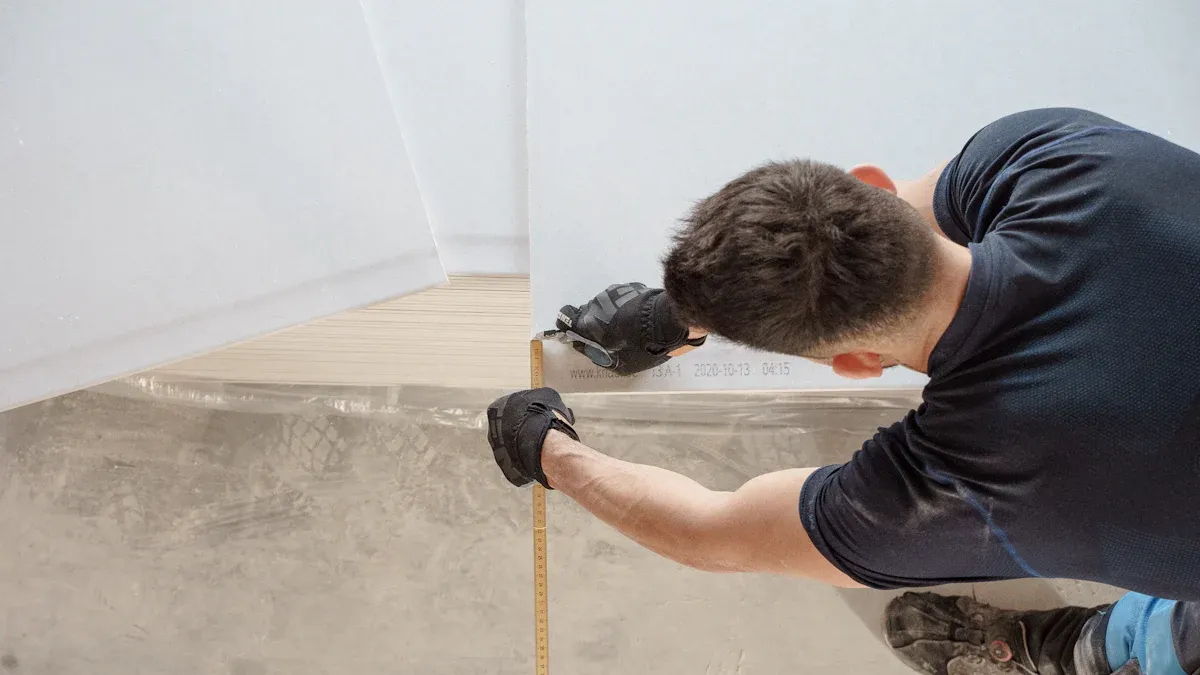
Proper installation preparation is the foundation of a durable and beautiful floor. You must ensure your space and materials are ready before laying the first plank. This stage prevents common issues and guarantees a professional result.
Gather Your Installation Toolkit
You should gather all necessary tools before you begin. Having everything on hand makes the installation process smooth and efficient. Your toolkit ensures you can measure, cut, and fit each plank with precision.
- Tape measure and pencil
- Chalk line and a straight edge or carpenter’s square
- Utility knife for cutting planks
- Pry bar for tight spaces
- Safety equipment, including goggles and knee pads
- Vacuum for cleaning
Prepare the Subfloor for a Flawless Finish
A successful installation depends heavily on proper subfloor preparation. Your subfloor must be clean, flat, and structurally sound. Any debris or old adhesive residue can create uneven spots or prevent a secure fit. You should start the floor preparation by thoroughly vacuuming the entire area. Scrape or sand away any old paint or adhesive.
Pro Tip: Your subfloor must be extremely flat. Check for unevenness using a straight edge. The surface should not have variations greater than 3/16 inch over a 10-foot span. You can use a cement-based patching compound to fill any low spots or cracks in the subfloor.
Test Subfloor Moisture and pH Levels
You must test concrete subfloors for moisture before proceeding. Excess moisture can damage your new flooring over time. The moisture content should not exceed 4.5%, and the in-situ relative humidity should be below 75%. Always check the flooring manufacturer’s specific guidelines.
You also need to test the pH level of a concrete subfloor. A high pH can interfere with the adhesive bond. The ideal pH range is between 9 and 10. It is your responsibility to ensure the concrete is dry and balanced. This step is critical for the long-term success of the adhesive and the overall installation.
Plan Your Installation Strategy
A successful project requires a clear plan. This stage ensures your layout is balanced, you have enough material, and your grid lines are perfectly square. Proper planning makes the entire installation process smoother.
Acclimate Your LVT Loose Lay Flooring
You must let your new flooring adjust to the room’s environment. This process is called acclimation. Place the boxes of lvt loose lay flooring flat in the room where you will install them. You should acclimate the material for at least 48 hours before starting. Keep the room temperature stable, ideally between 65°F and 85°F. This step is crucial because it allows the planks to expand or contract before they are laid. It prevents buckling or gapping after the installation is complete.
Calculate Material Needs and Waste
You need to calculate the correct amount of flooring for your space. First, measure the length and width of your room and multiply them to find the total square footage. Next, you should add 10% to this total. This extra material covers cuts, mistakes, and potential future repairs. Having enough lvt loose lay flooring on hand prevents delays and ensures a consistent look across the entire subfloor.
Establish Your Center Point and Grid Lines
A balanced layout starts from the center of the room. Finding this point ensures your planks look even against all walls. For an irregular room, you can find the center with a few simple steps.
- Choose a main, long wall as your base.
- Snap a chalk line parallel to it, a few inches out.
- Find and mark the center of this line.
- Use a square to draw a perpendicular line from that center mark.
- Snap a second chalk line across the room along this new line.
- The center of this second line is your room’s starting point.
Pro Tip: To ensure your grid lines are perfectly square, use the 3-4-5 rule. Measure 3 feet along one line from the center point and 4 feet along the other. The diagonal distance between these two marks must be exactly 5 feet. If it is, your corner is a perfect 90-degree angle. These lines will guide where you apply grid adhesive and lay your first planks.
How to Properly Lay Loose Flooring

You are now ready for the most rewarding stage: the installation. This is where your careful preparation and planning come together. You will apply adhesive, lay the first row, and make precise cuts. Following these steps ensures your new floor is stable and perfectly aligned.
Apply Perimeter and Grid Adhesive
Your first step is the adhesive installation. Loose lay flooring does not require a full-spread adhesive. Instead, you will use a pressure-sensitive adhesive around the perimeter and in a grid pattern. For spaces 20 feet or less in width or length, applying adhesive only around the perimeter is enough. If your room exceeds 20 feet in either direction, you must use a grid adhesive application for greater stability. A product like ‘Parterre Universal Adhesive’ works well for this method.
You must let the adhesive become tacky before laying any flooring. This waiting period is called “flash time.” For example, some urethane adhesives have a recommended flash time of 30 minutes. The “open time” is the maximum window you have to work with the adhesive before it cures. This can be up to 90 minutes. You should only trowel as much adhesive as you can cover with flooring within that time frame. This prevents the adhesive from drying out too soon.
Laying the First Row of Looselay Flooring
The first row is the most important part of the lvt loose lay installation. It sets the guide for the entire room. You will use the chalk lines you snapped earlier to ensure a perfectly straight start. A straight first row guarantees a professional-looking result for your looselay flooring.
- Begin your installation in a corner along your longest chalk line.
- Align the edge of the first plank perfectly with the chalk line, not the wall. Walls are rarely straight.
- Press the plank firmly into the tacky adhesive.
- Place the next plank tightly against the end of the first one.
- Continue this process until you complete the first row. This row must be flawless, as it dictates the alignment for the rest of the floor.
Pro Tip: 🧐 When you lay loose flooring, always check for directional arrows on the back of the planks. Make sure all arrows point in the same direction for a uniform appearance.
Cutting and Fitting Planks
You will inevitably need to cut planks to fit at the end of rows or around obstacles. The “score and snap” method is the easiest way to cut your lvt loose lay flooring. This technique gives you clean, straight cuts with a basic utility knife.
To make a cut, first measure the length you need for the plank. Mark the measurement on the surface of the loose lay vinyl plank flooring. Use your straight edge and a sharp utility knife to score the line deeply. You do not need to cut all the way through. Simply turn the plank over and bend it along the scored line. The plank will snap cleanly. For complex shapes around door frames or pipes, create a template from paper first. Trace the shape onto the plank and then carefully cut it with your knife. This ensures a precise fit for your installation.
Installing Subsequent Rows
With your first row perfectly straight, you can now build upon that foundation. The key to a professional look is creating a random, staggered pattern. This pattern not only looks better but also adds structural strength to the entire floor. You should maintain a minimum 2-inch stagger between plank joints in adjacent rows. An easy way to achieve this is to use the piece you cut off from the end of the first row to start the second row, as long as it is a reasonable length.
You will start the second row by placing your first plank tightly against the side of the first row. Ensure the end joint is offset from the joint in the first row. Continue this process as you lay loose flooring across the room. Your goal is to keep the seams between planks tight and the rows straight. Your lvt loose lay flooring will look professional and last longer with tight seams.
Pro Tip: 🧐 As you work, periodically step back and look down your rows to check for any gaps or misalignments. It is much easier to fix a small issue immediately than to notice it several rows later.
To ensure a tight, gap-free surface, you can use specific tools. These tools help you nudge the lvt loose lay flooring planks into place without damaging their edges. This is crucial for the rest of your looselay flooring installation.
- Utilize a tapping block to gently close gaps between the long sides of the planks. Place it against the edge of the plank and tap it lightly with a mallet.
- Employ a pull bar for the last plank in a row. Hook it over the end of the plank and tap it to pull the plank tightly against the previous one.
You will repeat this process for each new row. Start the row, lay the planks, ensure a tight fit, and cut the final piece. This methodical approach makes the work go quickly and ensures a high-quality result.
Finish Your Loose Lay Vinyl Plank Flooring Installation
You have reached the final stage of your project. These finishing touches will secure your floor, give it a polished look, and prepare it for years of enjoyment. Completing this stage correctly ensures the longevity and beauty of your new loose lay vinyl plank flooring.
Secure the Floor with a Roller
After laying every plank, you must secure the floor to the adhesive. Use a 100-lb floor roller for this task. Roll the entire surface in both directions, first widthwise and then lengthwise. This process guarantees a strong bond between the flooring and the adhesive. Proper rolling removes any trapped air and ensures each plank makes full contact with the subfloor. This step is essential for a stable, long-lasting installation.
Clean the Newly Installed Surface
You need to clean your new floor, but you must wait for the adhesive to cure. Avoid any deep cleaning or washing for at least 5 to 7 days. This allows the adhesive to set completely. During the installation, you may have gotten some residue on the surface. You can safely remove it.
Pro Tip: 🧼 Always test a cleaning solution on a spare piece of flooring or in a hidden spot first. Use a plastic scraper, not a metal one, to avoid scratching your new floor.
For any stray adhesive, you can use a simple solution.
- Mix warm water with a few drops of mild dish soap.
- Apply the solution with a cloth and let it sit for a few minutes.
- Gently scrub the spot and wipe it clean with a damp cloth.
Install Baseboards and Transitions
The final step of the installation is adding baseboards and transition strips. This covers the expansion gaps you left around the room’s perimeter. You should install the baseboards so they rest slightly above the floor. Nail the baseboards directly to the wall, never into your new lvt loose lay flooring. This creates a “slip joint” that allows the floor to expand and contract naturally with temperature changes. This small detail protects your floor from buckling. Use transition strips in doorways to create a smooth and safe connection between different flooring types.
You have successfully executed a professional-grade installation. By completing all four stages, you mastered the entire installation process. Your new floor is now properly secured, clean, and prepared for years of enjoyment.
Step back and admire the durable, stylish result of your meticulous work. You earned it! 🎉
FAQ
Can you install loose lay over existing flooring?
Yes, you can install loose lay vinyl over most existing hard surfaces. Your old floor must be clean, flat, and structurally sound. You should not install it over soft flooring like carpet. This method saves you time on demolition.
Is loose lay vinyl flooring waterproof?
The vinyl planks are 100% waterproof, making them ideal for kitchens, bathrooms, and basements. You should still clean up large spills quickly. This prevents water from potentially seeping between planks to the subfloor below.
How do you replace a damaged plank?
Replacing a plank is simple and one of the best features of this flooring.
Easy Replacement Steps 🛠️
- Use a household plunger to grip and lift the damaged plank.
- Clean the empty space of any debris.
- Carefully drop a new plank into the opening.
Does loose lay flooring need an underlayment?
No, you do not need an underlayment for loose lay flooring. The planks have a special backing that grips the subfloor and provides cushioning. This built-in feature simplifies your installation process and saves you money on extra materials.




