
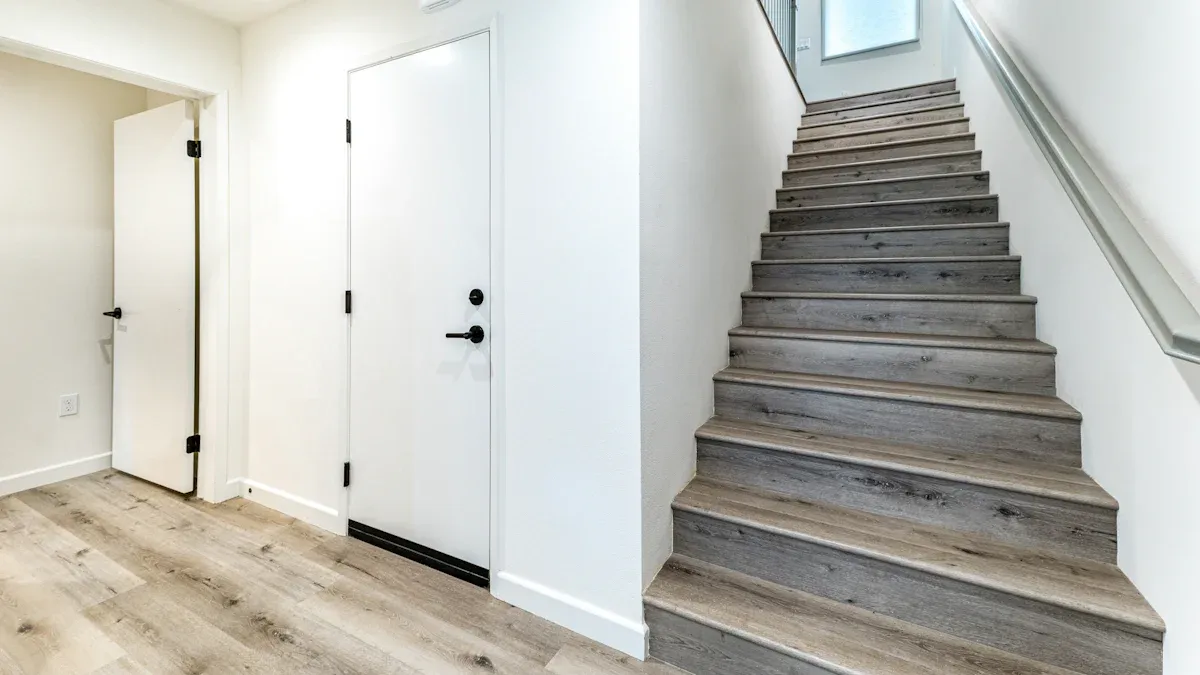
You can follow an easy installation method when you learn how to install vinyl plank flooring on stairs, even if temperatures swing. First, you need to prepare the surface, select the right adhesive, and leave proper expansion gaps. Moisture and temperature changes can affect the vinyl flooring installation instructions. If you install LVP on stairs without careful preparation, you might see bubbling, warping, or gaps. Using high-quality plank and vinyl products from skspcflooring ensures your installation has lasting durability and a great appearance.
Tools and Materials for How to Install Vinyl Plank Flooring on Stairs
Essential Tools for Stairs Installation
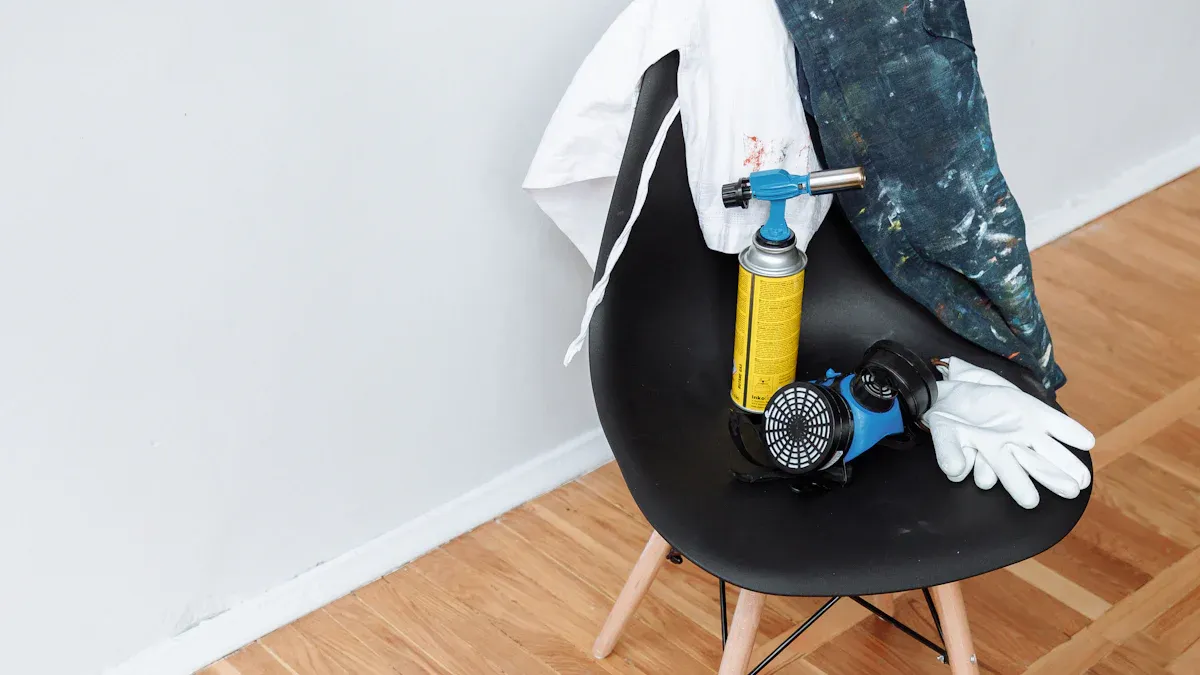
You need the right tools to make your stairs look professional. When you learn how to install vinyl plank flooring on stairs, you should use tools that help you measure, cut, and fit each piece. Professional installers recommend these tools:
| Tool Name | Description |
|---|---|
| Stair Step Scriber | Helps you measure each stair step precisely for a perfect fit. |
| Plank Cutter | Cuts vinyl planks quickly and cleanly. |
| Shark Knife | Handles tough cutting jobs and lets you change blades easily. |
| Linoleum Knife | Works for many cutting tasks and helps shape vinyl around corners. |
You can use these tools to make your installation easier and more accurate.
Materials That Withstand Temperature Swings
You want your vinyl flooring to last, even when temperatures change. Choose materials that resist heat, cold, and moisture. Quality products from brands like skspcflooring offer these features:
| Feature | Description |
|---|---|
| Heat Resistance | Keeps vinyl stable and prevents warping in hot weather. |
| Fade Resistance | Protects color from sunlight so your stairs stay vibrant. |
| Cold Flexibility | Makes vinyl flexible in cold conditions and stops cracking. |
| Moisture Resistance | Blocks water and humidity, perfect for busy stairways. |
These features help your plank flooring stay strong and beautiful.
Safety Gear and Extras
You need to protect yourself during installation. Wear safety gloves to prevent cuts. Use knee pads to stay comfortable while working on stairs. Safety goggles protect your eyes from flying debris. Keep a dust mask handy if you sand or clean surfaces. You can also use a vacuum to clear dust and small particles before you install vinyl. These extras help you work safely and keep your workspace clean.
Preparing Stairs for Install LVP on Stairs
Cleaning and Removing Old Flooring
You need to start with a clean surface before you install new vinyl. Remove any old flooring from your stairs. Pull up carpet, tack strips, nails, or staples. Sweep away dust and dirt. Use a vacuum to pick up small debris. If you see glue or sticky spots, scrape them off. A clean stair surface helps the new plank stick better and last longer.
Leveling and Repairing Stair Surfaces
Check each stair for bumps, dips, or cracks. Use a straightedge to spot uneven areas. If you find holes or cracks, fill them with a patching compound. Sand down high spots until the surface feels smooth. Make sure the stairs are dry before you move on. Flooring experts recommend you plan your layout carefully. Draw a to-scale design and measure each tread. Center the treads for a balanced look. When you prepare your stairs this way, you help prevent problems during installation.
Tip: A level and clean stair surface gives you the best results when learning how to install vinyl plank flooring on stairs.
Acclimating Vinyl Planks to Temperature Changes
Vinyl needs time to adjust to your home’s temperature and humidity. Place the planks in the room where you will install them. Let them sit for at least 48 hours. Keep the room temperature between 65 and 85°F. Make sure the humidity stays between 30% and 60%. This step helps the vinyl expand or contract before you install it. Acclimating the planks prevents gaps or buckling later. You want your stairs to look great and stay strong, even when temperatures swing.
Measuring and Cutting Vinyl Planks for Stairs
Measuring Each Stair for a Custom Fit
You need to measure each stair before you start the installation. Use a measuring tape to check the width and depth of every tread and riser. Write down the numbers for each step. Stairs can vary in size, so you must measure and cut the vinyl planks for a custom fit. If you skip this step, the planks may not line up or cover the surface properly. Always double-check your measurements to avoid mistakes.
Tip: Measure twice and cut once. This habit saves time and prevents wasted material.
Marking and Cutting Planks Accurately
You want your planks to fit perfectly. Start by marking the cut lines on the vinyl using a pencil and a straightedge. This helps you keep your cuts straight. Use a utility knife to score the plank along the marked line. For corners or tricky shapes, use a jigsaw or handsaw. These tools help you make clean cuts and fit the planks around stair edges. Accurate marking and cutting make your installation look professional.
- Tools that help you mark and cut vinyl planks:
- Measuring tape for precise measurements.
- Straightedge for straight lines.
- Utility knife for scoring.
- Jigsaw or handsaw for detailed cuts.
Planning for Expansion Gaps
Vinyl plank flooring needs room to expand and contract. You must leave a 1/4-inch gap between the flooring and the walls or any obstacles. Place spacers between the planks and the wall when you start the installation. This gap prevents buckling and keeps your stairs looking neat. Expansion gaps are important, especially in areas with temperature swings.
Note: Expansion gaps help your flooring last longer and stay in place.
Install the Vinyl Planks: Treads and Risers
Choosing the Right Adhesive for Temperature Swings
You need to select the best adhesive for your vinyl plank flooring install on stairs. Adhesives play a big role in keeping your planks secure, especially when temperatures swing. Some adhesives work better than others for this job. Acrylic-based adhesives handle heat and moisture well. They keep their bond strong even when the weather changes. Rubber-based or solvent-free vinyl adhesives create a flexible bond. This flexibility helps your planks stay in place as they expand and contract. Fast-drying adhesives let you use your stairs sooner and reduce the risk of slipping. Plasticizer-migration-resistant adhesives keep the bond strong for years.
Tip: Always check that your adhesive is designed for vinyl and can handle temperature changes. This step prevents damage and keeps your installation looking great.
Here is a quick guide to adhesive features:
| Adhesive Type | Benefit |
|---|---|
| Acrylic-based | Heat and moisture resistance |
| Rubber-based or solvent-free | Flexible bond for expansion and contraction |
| Fast-drying | Quick use and less slippage |
| Plasticizer-migration-resistant | Long-term bond integrity |
Attaching Planks to Treads
You start by applying adhesive to the stair tread. Spread the adhesive evenly across the surface. Press the vinyl plank firmly onto the tread. Make sure the plank covers the entire tread without gaps. Use a stair step scriber to check the fit. If you see any bubbles, press them out with your hand or a roller. Take your time to line up the plank with the edge of the tread. Accurate placement prevents gaps and overlaps.
Common challenges during installation include skipping surface preparation and improper cutting. You avoid these problems by cleaning and leveling the tread before you install the vinyl planks. Double-check your measurements and cut lines. A thicker wear layer adds durability to your stairs. If you rush, you might miss important steps and create costly mistakes.
Note: Press each plank down firmly and let the adhesive set before moving to the next step. This method ensures a strong bond.
Securing Planks to Risers
You need to secure the vinyl planks to the risers after finishing the treads. Apply adhesive to the riser surface. Place the plank against the riser and press it firmly. Make sure the plank fits snugly from top to bottom. Use a straightedge to check for gaps. If you see any, adjust the plank before the adhesive dries. Accurate measurement and cutting help you avoid overlaps and gaps.
Many installers overlook stair nosing and sealing. Stair nosing adds safety and a finished look. Proper sealing prevents moisture from getting under the planks. Take your time with each riser. Let the adhesive dry fully before using the stairs.
Callout: Careful installation on risers keeps your stairs looking neat and prevents future issues.
You complete the vinyl plank flooring install by attaching planks to both treads and risers. This process gives your stairs a professional appearance and lasting durability.
Dealing with Stair Edges and Corners
You face unique challenges when you install vinyl plank flooring on stair edges and corners. These areas need extra attention for a safe and professional finish. You want your stairs to look neat and last a long time. Follow these steps to handle stair edges and corners with confidence:
- Measure the tread and stair nose carefully. Use a tape measure to check the width and depth. Mark your measurements on the plank and stair nose. Accurate measuring helps you avoid gaps and uneven edges.
- Dry lay the tread and nosing before you install them. Place the pieces on the stair without adhesive. Check the fit and make sure the stair nose lines up with the tread. Adjust the pieces if needed. This step lets you see how everything fits together.
- Spread adhesive on the back of the stair tread. Use a trowel or glue applicator. Lay the tread in place and press it down firmly. Make sure the tread covers the entire surface.
- Apply adhesive to the back of the stair nose. Fit the stair nose over the tread. Press it down and check that it sits flush with the edge. If your stair nose needs a shim, glue the shim in place first. Then fit the nosing over the shim.
- Secure the corners and back edge of the tread with nails or screws. Fasten the stair nose with screws or nails as well. Place fasteners in the corners and along the back edge. This step keeps the planks and nosing from shifting or lifting.
- Snap the stair nose over the plank if your product allows. Some stair noses have a snap-on design. Others need a shim for proper fit. Always follow the manufacturer’s instructions for your stair nose type.
- Check the finished edge. Make sure there are no sharp corners or loose pieces. Smooth out any rough spots. Clean up extra adhesive and dust.
Tip: Take your time with stair edges and corners. Careful work prevents tripping hazards and gives your stairs a polished look.
You create a strong and attractive finish when you follow these steps. You protect your stairs from wear and tear. You also make your home safer for everyone who uses the stairs. Quality products from skspcflooring help you achieve a professional result every time.
Dealing with Temperature Swings When You Install LVP on Stairs
Why Acclimation Matters
Temperature swings can cause big changes in how your flooring behaves. When you bring new vinyl planks into your home, you need to let them sit in the room before you install them. This process is called acclimation. It helps the planks get used to the temperature and humidity in your house. If you skip this step, you might see problems like buckling or warping after you finish your installation.
- Acclimation lets the planks adjust to the room’s temperature and humidity, which helps prevent buckling or warping.
- When you acclimate the planks, the adhesive bonds better, so your flooring stays secure.
- Acclimation also makes it easier to fit the planks together, so you avoid uneven seams.
You should keep the room temperature between 60 and 80°F and the humidity between 30% and 50%. Place the planks in the room for at least 48 hours before you start. This simple step helps your install last longer and look better.
Tip: Always acclimate your vinyl planks before you install lvp on stairs. This step protects your stairs from damage caused by temperature swings.
How to Leave Proper Expansion Gaps
When you install flooring on stairs, you need to leave space for the planks to move. This space is called an expansion gap. Temperature changes make vinyl expand and contract. If you do not leave a gap, the planks can push against each other and cause buckling or gaps.
You should leave an expansion gap of 1/4 to 1/2 inch (6 to 12 mm) along the edges. This gap gives the planks room to move when the temperature or humidity changes. Use spacers to keep the gap even as you work. After you finish, you can cover the gap with trim or stair noses for a clean look.
- Expansion gaps help your flooring last longer.
- Gaps prevent damage from natural movement.
- Proper gaps keep your stairs looking neat and safe.
Note: Never skip the expansion gap. It is a small detail that makes a big difference in the life of your installation.
Selecting Temperature-Resistant Products from skspcflooring
Choosing the right materials is important when you want your stairs to handle temperature swings. Products from skspcflooring offer strong resistance to heat, cold, and moisture. These features help your flooring stay flat and secure, even when the weather changes.
skspcflooring uses advanced technology to make vinyl planks that resist fading, warping, and cracking. Their products meet international standards for quality and safety. You get flooring that looks great and lasts for years. When you install lvp on stairs using skspcflooring, you protect your investment and enjoy peace of mind.
| Feature | Benefit for Stairs |
|---|---|
| Heat Resistance | Prevents warping in hot weather |
| Cold Flexibility | Stops cracking in cold climates |
| Moisture Protection | Blocks water and humidity |
| Fade Resistance | Keeps color bright and fresh |
You can trust skspcflooring to provide the best products for your installation. Their temperature-resistant vinyl helps you avoid common problems and keeps your stairs safe and beautiful.
Preventing Warping and Buckling
You want your vinyl plank stairs to stay flat and strong. Warping and buckling can ruin the look and safety of your stairs. These problems happen when vinyl planks move because of heat, cold, or moisture. You can stop them by following a few simple steps.
Why Do Vinyl Planks Warp or Buckle?
Vinyl planks change shape when they get too hot or cold. Moisture can also make them swell. If you press planks too close together, they have no room to move. When you skip acclimation or use the wrong adhesive, the planks may lift or bend.
Tip: Always check your stairs for signs of moisture before you start. Dry surfaces help vinyl stay flat.
How Can You Prevent Warping and Buckling?
You can use these steps to protect your stairs:
- Acclimate the Planks: Place vinyl planks in the room for at least 48 hours. Let them adjust to the temperature and humidity.
- Leave Expansion Gaps: Use spacers to create a gap along the edges. This space lets planks expand and contract.
- Choose the Right Adhesive: Pick adhesives that work well in hot and cold conditions. Acrylic-based adhesives hold strong even when temperatures swing.
- Seal the Edges: Apply sealant to the edges and joints. This step keeps moisture out and stops swelling.
- Check for Moisture: Test the stairs for dampness. Fix leaks or spills before you install vinyl.
- Install Quality Products: Use vinyl planks from skspcflooring. These planks resist heat, cold, and moisture. They stay flat and strong for years.
Common Mistakes That Cause Warping and Buckling
| Mistake | What Happens | How to Fix It |
|---|---|---|
| No acclimation | Planks buckle or warp | Acclimate for 48 hours |
| No expansion gap | Planks push and lift | Use spacers for gaps |
| Wrong adhesive | Planks lose grip | Pick temperature-resistant |
| Moisture under planks | Planks swell or bend | Dry and seal stairs |
Alert: If you see planks lifting or bending, stop using the stairs. Fix the problem right away to keep your stairs safe.
skspcflooring Products Help Prevent Problems
You can trust skspcflooring vinyl planks. These planks use advanced technology to resist warping and buckling. They meet strict international standards. You get stairs that look great and stay strong, even when temperatures swing.
Quick Checklist for Preventing Warping and Buckling:
- Acclimate planks for 48 hours
- Leave expansion gaps
- Use the right adhesive
- Seal edges and joints
- Check for moisture
- Choose skspcflooring products
You can follow these steps to keep your stairs safe and beautiful. You protect your investment and enjoy worry-free flooring.
Finishing Touches for How to Install Vinyl Plank Flooring on Stairs
Installing Stair Noses and Trims
You finish your stair project by adding stair nosing and trims. Stair noses protect the edge of each step and give your stairs a neat look. You match the color and style to your vinyl planks. Many stair noses are made for high foot traffic and can be glued or nailed down. The table below shows a recommended stair nose type:
| Type of Stair Nose | Features | Installation Method |
|---|---|---|
| Allure Stair Nose | Color matched, made to order, designed for high foot traffic | Glue down or nail down |
You secure the stair nose firmly. You check that it sits flush with the tread. Trims cover expansion gaps and make the installation look finished.
Sealing Edges and Joints
You seal the edges and joints to keep water out. Moisture can damage vinyl if it gets under the planks. You use silicone caulk to create a waterproof seal. You apply a bead of caulk along the edges before you install baseboards. This step helps prevent water from seeping under the flooring.
- Apply silicone caulk along edges in moisture-prone areas.
- Seal before installing baseboards for extra protection.
Tip: Sealing edges and joints keeps your stairs safe from water damage.
Final Inspection and Clean-Up
You check your installation for any problems. You look for gaps, misalignments, or loose edges. You fix any issues you find. You remove dust, debris, and extra adhesive. You wipe down the steps with a soft cloth or mop. You use a cleaner that works well with vinyl.
- Inspect for gaps, misalignments, or loose edges.
- Adjust any issues found.
- Clean up debris and dust.
- Wipe steps with a suitable cleaner.
Callout: Careful inspection and clean-up help your stairs stay beautiful and safe.
You achieve a professional result when you follow each step for how to install vinyl plank flooring on stairs. Careful preparation and acclimation help your stairs stay strong. Quality vinyl and proper installation protect your investment. Take your time and check your work. Enjoy the process and create beautiful stairs for your home.
Remember, using trusted products from skspcflooring gives you lasting durability and peace of mind.
FAQ
Can you install vinyl plank flooring on stairs with temperature swings?
Yes, you can install vinyl plank flooring on stairs in areas with temperature swings. You need to acclimate the planks, use temperature-resistant adhesives, and leave expansion gaps. Quality products like those from skspcflooring help your stairs stay durable and beautiful.
How long should you acclimate vinyl planks before installation?
You should acclimate vinyl planks for at least 48 hours in the room where you plan to install them. Keep the temperature between 65°F and 85°F. This step helps prevent warping and buckling.
What adhesive works best for stairs with changing temperatures?
Choose acrylic-based or solvent-free adhesives. These adhesives resist heat and moisture. They keep your vinyl planks secure even when temperatures change. Always check the label for temperature resistance.
Why do you need expansion gaps when installing vinyl plank flooring?
Expansion gaps let vinyl planks expand and contract as temperatures change.
Without gaps, planks may buckle or lift.
You should leave a 1/4-inch gap along the edges for best results.




