
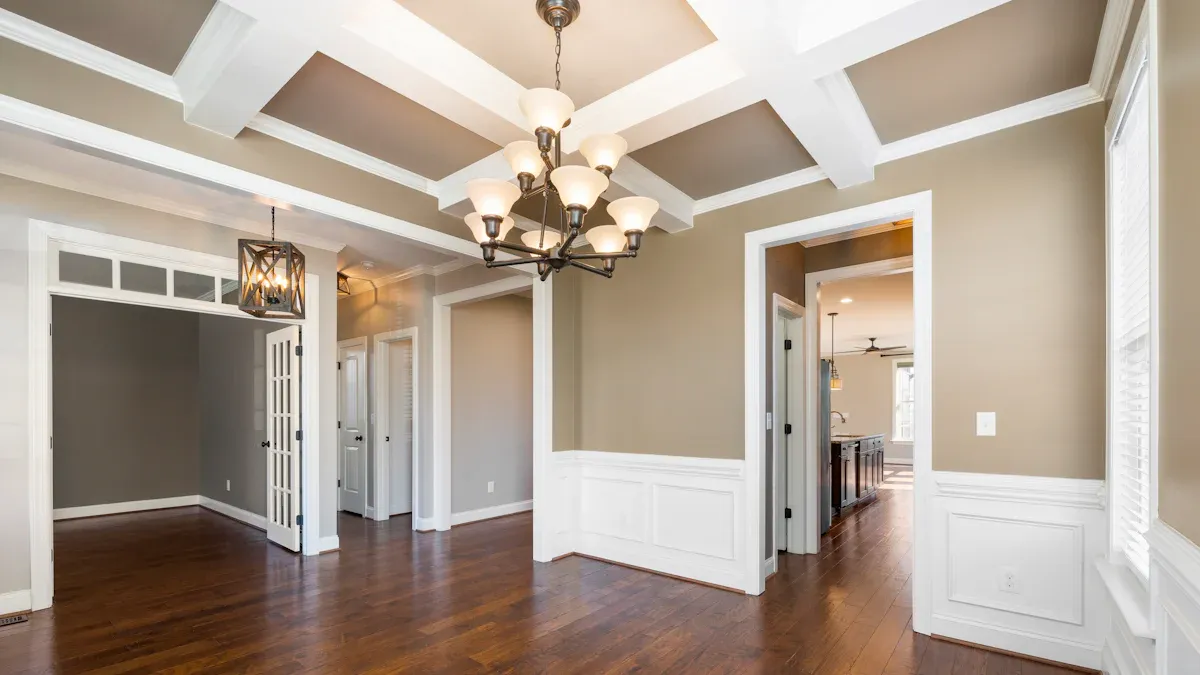
You have installed beautiful new flooring. Now you need the perfect finish for the edges. A flooring bridge, or t-molding, connects two sections of flooring that are the same height. You often see this piece in a doorway. An end cap is the molding you use to finish the flooring against a vertical surface like a sliding door. With the global flooring market projected to grow by nearly $85 billion by 2028, these finishing touches are essential to protect your investment.
Why the Right Flooring Transition Matters
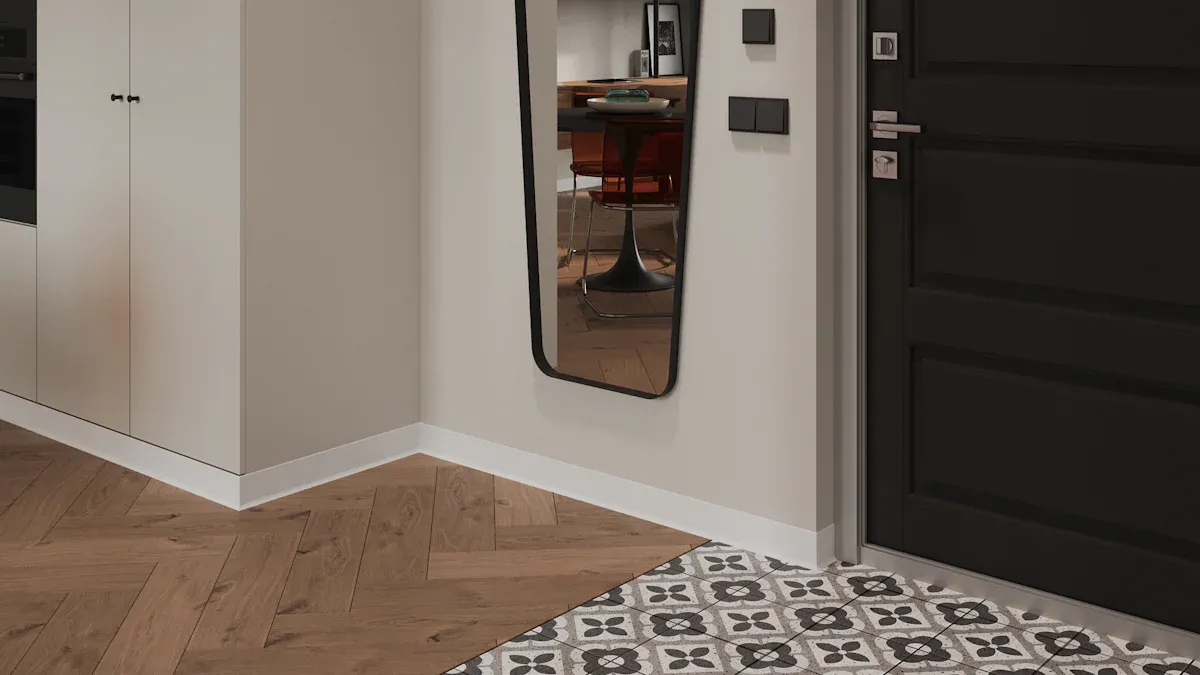
You might see a transition strip as a minor detail. However, choosing the right one is crucial. Proper transitions protect your floor, ensure safety, and are essential for a long-lasting, beautiful result.
Protecting Your Flooring Investment
Your new flooring is a significant investment. Transition moldings protect the vulnerable edges of your planks from chips, cracks, and wear. Without this protection, daily foot traffic and cleaning can quickly damage the edges. This damage can make your beautiful new floor look old and worn. A simple molding piece preserves the look and value of your flooring for years.
Ensuring a Safe and Professional Finish
An uneven edge between rooms is a serious trip hazard. Hazardous floors, including those with loose or uneven edges, cause over 1 million emergency room visits each year. Exposed flooring edges can easily cause falls, especially for older adults.
- An estimated 37,991 adults aged 65+ are treated in emergency rooms annually for falls involving carpets and rugs.
- The majority of these falls (72.8%) happen at home.
- Loose rugs and curled carpet edges are common hazards found in homes.
Pro Tip: Most building codes follow the Americans with Disabilities Act (ADA). The maximum height difference allowed for a floor transition is 1/2 inch. Any change of this size requires a beveled edge. Using a different color for the transition piece can also help people see the height change.
Proper installation of these pieces is key to achieving a professional finish and creating safe, seamless transitions between spaces.
Allowing for Natural Expansion and Contraction
Many flooring materials are not static. They expand in warm, humid weather and shrink in cool, dry air. Your installer leaves a small space around the perimeter of the room, called an expansion gap, to allow for this natural movement. A transition piece covers this gap. It lets the flooring move freely without buckling or separating. Different materials need different gap sizes.
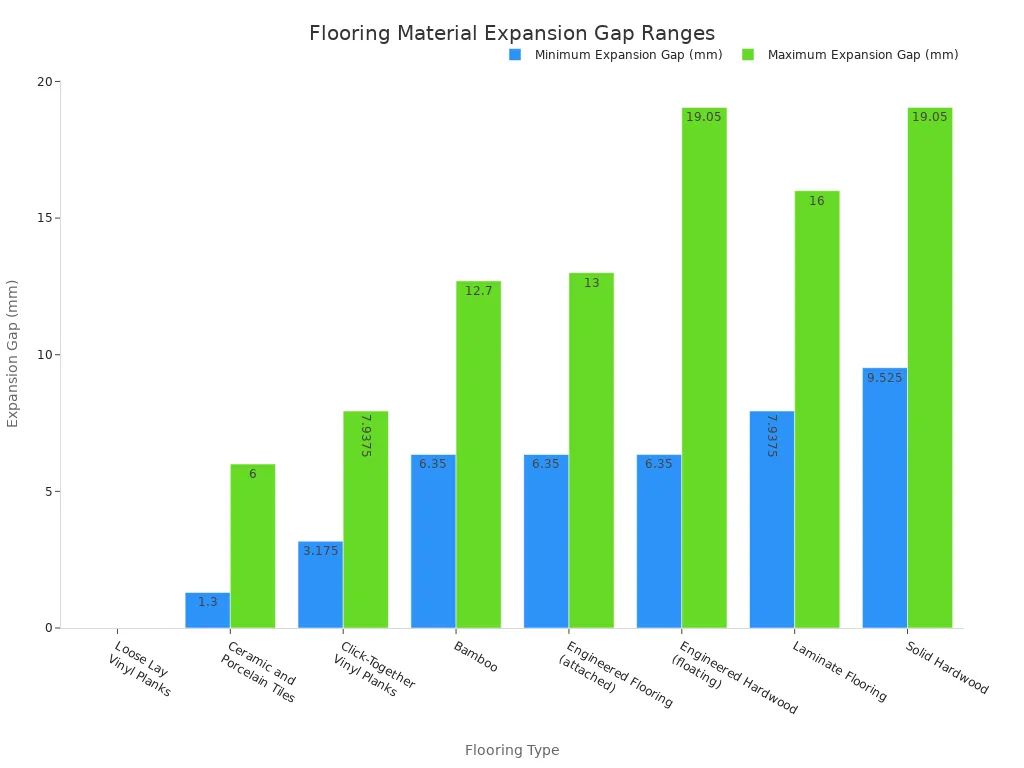
Without the correct transition, this movement could cause your beautiful flooring to warp and get damaged.
Mastering the Flooring Bridge (T-Molding)
An elegant transition piece is essential for a polished look. It bridges the gap between different flooring areas. This creates a seamless and professional finish.
What is a Flooring Bridge?
A flooring bridge, also known as a T-molding, is a transition strip shaped like the letter ‘T’. You use it to connect two hard surface floors of the same height. The top of the ‘T’ overlaps the edges of both floors. This covers the expansion gap. The vertical part of the ‘T’ fits into the gap itself. This design allows the flooring to expand and contract naturally without buckling.
Did You Know? T-moldings come in various styles and materials. A common vinyl T-molding is about 3 inches wide and comes in 12-foot lengths. It often uses a separate track base for installation, which can be plastic or metal.
When to Use a Flooring Bridge
You should use a T-molding in specific situations to protect your flooring and ensure a clean look. These transitions are perfect for connecting two floors that are the same height.
- Doorways: Use a T-molding to create a smooth transition between rooms, like from a hardwood hallway to a tiled kitchen.
- Large Rooms: Floating floors like laminate sometimes have limits on how long or wide they can be. You can use a T-molding to create a break. This allows for proper expansion in large, open-concept spaces.
- Material Changes: A flooring bridge is ideal when you switch from one flooring material to another of equal height, such as from hardwood to laminate.
How to Install a T-Molding
A proper flooring installation requires careful attention to the final details, including the T-molding. You can install this molding using a track system, which can be either glued down or screwed down.
Tools You Might Need:
- Tape Measure
- Miter Saw or Power Saw
- Construction Adhesive
- Caulking Gun
- Tin Snips (for metal tracks)
- Drill and Screws (for screw-down method)
- Painter’s Tape
Installation Steps (Screw-Down Method):
- Measure the width of the space and cut the metal track to fit. Use tin snips for this.
- Measure and cut your T-molding to the same length. A miter saw gives you the cleanest cut. Always measure twice!
- Place the track in the center of the gap between the two floors. Use the pre-drilled holes as a guide to screw the track securely to the subfloor.
- Snap the T-molding into the track. Start at one end and press down firmly along its length. The top of the molding should rest flat on both flooring surfaces.
If the molding feels loose, you can add a small amount of construction adhesive inside the track before snapping the piece in place. This ensures a secure and lasting fit for your fabulous new flooring.
Perfecting Edges with an End Cap (Square Nose)
Sometimes your flooring does not meet another floor. It stops at a wall, a sliding door, or a fireplace. You need a clean, finished edge in these situations. An end cap, also called a square nose molding, provides the perfect solution for a professional look.
What is a Flooring End Cap?
A flooring end cap is a molding piece that finishes the edge of your flooring. It creates a clean, straight line where the floor stops. One side of the molding sits on top of the flooring plank, covering the cut edge. The other side drops down to meet the subfloor, neatly hiding the expansion gap. This piece protects the edge of your flooring from damage.
You can find this molding in many materials and finishes to match your floor.
- Common Materials: Enduracor™ Digital Print, Enduracor™ Wood Veneer, and various Wood Species.
- Popular Finishes: Oil Finish, Stained, Natural, Unfinished, and Top Coat.
When to Use an End Cap
You use an end cap to terminate your flooring against a vertical surface or a drop-off. It provides a safe and attractive border.
Use an end cap in these key areas:
- Against sliding glass door tracks.
- Next to a fireplace hearth.
- At the top of a staircase or a sunken room.
- Where the flooring meets a doormat well or an exterior door threshold.
How to Install an End Cap
The installation process for an end cap is straightforward. You typically glue it directly to the subfloor. This creates a strong, permanent bond.
Installation Steps (Glue-Down Method):
- Measure the length of the edge you need to cover.
- Cut the end cap to the correct length using a miter saw for a clean cut.
- Apply a bead of construction adhesive to the subfloor in the expansion gap.
- Press the molding firmly into place. The top lip should rest on the flooring, and the vertical edge should be tight against the plank.
- Use painter’s tape or place heavy objects on the molding for a few hours. This holds it down while the adhesive cures.
This simple process ensures your flooring edge is secure and looks fantastic.
Key Scenarios for Transitioning Between Rooms

You need to know where to use specific transition pieces. Proper placement is key when transitioning between rooms or finishing an edge. Let’s look at the most common scenarios you will face.
Doorways: Connecting Same-Height Floors
Doorways are the most common place you will need a transition. When you have the same type of flooring flowing from one room to another, you still need to cover the expansion gap. This is the perfect job for a flooring bridge, also called a t-molding.
This piece creates a gentle, finished connection. It allows both sections of flooring to move independently.
- It protects the edges of the planks from damage.
- It prevents a dangerous trip hazard in a high-traffic area.
- It provides a clean, professional look between spaces.
Using a t-molding ensures your flooring has a seamless appearance as you move from one space to the next.
Against Sliding Doors and Exterior Thresholds
Your flooring needs a clean stopping point against a sliding glass door or an exterior door. An end cap molding creates this finished edge. However, you must also protect your subfloor from moisture. Water can easily get in from outside.
Pro Tip: To waterproof this area, you need to seal the expansion gap between your flooring and the door threshold.
- Apply a flexible, color-matched caulk in the gap before you install the molding.
- You can also install a special molding called a baby threshold. It sits flush against the metal door track. If you cannot find a matching one, you can change a T-mold. You carefully cut off one of the “wings” of the T-shape. You then place the cut side tightly against the door’s threshold.
This extra step is critical. It protects your flooring investment from water damage and rot.
Finishing an Edge at a Fireplace Hearth
A fireplace hearth creates a unique challenge for your flooring installation. Fire codes are very strict about safety. You cannot run combustible materials, like wood or vinyl flooring, directly to the firebox opening.
Your flooring must stop at the edge of the hearth extension. This extension is the noncombustible surface in front of and around the fireplace.
- Fire codes require this hearth to be made of materials like brick, stone, or concrete.
- For a standard fireplace, the hearth must extend at least 16 inches in front of the opening and 8 inches to each side.
- Your flooring can meet the edge of this noncombustible zone, but not go past it.
You will use an end cap to finish the flooring edge against the hearth. However, many hearths made of stone or brick have uneven surfaces. This can make it difficult to get a tight fit. You may see small gaps between the molding and the hearth. These gaps can look unprofessional and even affect the fireplace’s draft. You must carefully scribe the molding or use a flexible sealant to create the best possible seal against the uneven surface.
At the Top of Stairs or a Drop-Off
You need a special piece for the top of your stairs. This area can also be a drop-off into a sunken room. This edge sees heavy foot traffic and poses a significant safety risk. You cannot use a simple end cap here. You must use a specific molding called a stair nosing.
A stair nosing is a strong transition piece. It provides a durable, finished edge for your flooring at a ledge.
- It wraps over the edge of the subfloor.
- It creates a rounded, safe corner.
- It protects the flooring plank from cracking under pressure.
This piece is essential for safety. The rounded edge helps prevent trips and falls. It also clearly defines the edge of the step for better visibility. The stair nosing is designed to handle the direct impact of feet stepping on the edge of the landing. A standard end cap is not strong enough for this job and would quickly fail.
Safety First! ⚠️ You must install the stair nosing securely. It should be glued and nailed directly to the subfloor. Never attach it only to the floating floor. A loose nosing at the top of a staircase is extremely dangerous.
Proper installation ensures the transition is stable and can withstand years of use. It is the only correct way to finish a flooring edge at a drop-off.
Choosing the Correct Transition Moldings
You have many choices for transition moldings. Selecting the right one is key for a beautiful and durable result. You should consider the color, material, and size to get the perfect finish for your new flooring.
Matching Color and Texture
A good transition should blend with your floor. You want the molding to complement the look and feel of your spaces. For floors with multiple tones, finding an exact match can be hard.
Here are some tips for a great match:
- Choose a molding with a color and finish that works with both flooring surfaces.
- Consider a wood-look or metallic transition for a polished appearance.
- Use minimalist strips in neutral colors for modern designs to create an uninterrupted flow.
Understanding Material Options
The material of your molding affects its look, cost, and lifespan. The common types of transition moldings are made from wood, MDF, or PVC. Each has its own benefits and drawbacks.
| Material | Pros | Cons |
|---|---|---|
| Wood | Has natural beauty. It is durable and adds value to your home. | It is expensive and needs regular maintenance. |
| MDF | It is affordable and easy to cut. It has a smooth surface for painting. | It can be damaged by moisture and is not as durable as wood. |
| PVC | It is waterproof and low maintenance. It is very durable and easy to install. | It looks less natural than wood and can become brittle in the cold. |
Measuring for the Perfect Fit
Accurate measurements are essential for a professional installation. A poorly fitting molding can ruin the look of your flooring. You must measure the length and height difference correctly.
To get the right height for your transition moldings:
- Check if your floors are the same height or different heights.
- Measure the height of the flooring on both sides of the gap.
The gap needed for the transition piece is usually about one inch wide. However, you should always check the instructions that come with your specific molding. This ensures you have the correct space for the track and a secure fit.
What About Other Transitions? Reducers and More
Sometimes you need to connect floors of different heights or finish an edge in a wet area. The common types of transition moldings like T-moldings will not work in these cases. You need to explore other options for a safe and complete installation.
Transitioning to Lower Floors with a Reducer
You use a reducer when your new hard flooring meets a lower floor, like vinyl or tile. A reducer molding creates a smooth, sloped transition between the two surfaces. This piece is specifically designed to handle a height difference. You should use a reducer for any height change of at least 1/4 inch. The reducer covers the edge of the higher floor and slopes down to meet the lower one. This prevents a trip hazard and protects the flooring edge. A reducer is a key part of your set of transition moldings.
Connecting to Carpet
Connecting a hard floor to a high-pile carpet requires a specific method. You will use an end cap molding for this job.
- First, you install a carpet tack strip about 1/2 inch away from the hard flooring.
- Next, you glue the end cap molding into place.
- Finally, you use a knee kicker to stretch the carpet over the tack strip and tuck the edge into the gap next to the molding.
This process creates a clean, tight transition. It keeps the carpet from pulling away from the hard surface over time.
When a Simple Caulk Line is Enough
In some areas, you do not need a traditional molding. A simple line of caulk is the best choice, especially in bathrooms. You must seal the gap where your flooring meets a bathtub or toilet.
Pro Tip: You should use 100% silicone caulk in these wet areas. It is flexible and waterproof. This prevents water damage, stops leaks, and keeps odors from escaping around the base of a toilet. Other caulks are not durable enough for this important job.
This simple step provides a necessary seal that other transition moldings cannot offer.
You now know the key differences between finishing pieces. A flooring bridge connects two floors of the same height. An end cap creates a clean border against a wall or hearth. Many homeowners overlook these details in DIY projects. This mistake can cause problems.
- It creates a less clean look for your flooring.
- It leaves the edges of your flooring unprotected from damage.
Always remember to leave the manufacturer-recommended expansion gap. The right transition is not just a final touch. It is essential for the durability and beauty of your fabulous floors.
FAQ
What if my floors are not the same height?
You should use a reducer molding for floors with different heights. This piece creates a smooth slope between the two surfaces. It prevents a trip hazard and protects the edge of the higher floor from damage.
Do I really need an expansion gap for my floor?
Yes, you must leave an expansion gap. Your flooring needs space to expand and contract with changes in temperature and humidity. The gap prevents your floor from buckling. The transition molding then covers this necessary space.
Can I glue down a T-molding instead of using a track?
You can glue some T-moldings directly to the subfloor. However, the track system is often the recommended method. The track allows the flooring on both sides to move freely underneath the molding as designed.
How do I choose the right color molding?
You should look for a molding that is an exact match to your flooring. If you cannot find one, choose a color that blends with the main tones in your floor. A neutral metallic finish is also a great option for a modern look.




