

You can achieve a seamless look in your home by planning your vinyl plank flooring carefully. When you focus on smooth transitions, you create a unified style for every space. Luxury vinyl flooring offers durability and style, making it a smart choice for modern interiors. By changing direction of vinyl plank flooring between rooms, you add visual interest while keeping the design seamless. Expert guidance helps you avoid mistakes and ensures professional results.
Planning for a Seamless Look with Vinyl Plank Flooring

Assessing Room Layouts and Flow
You start by looking at each room’s shape and size. Lay planks parallel to the longest wall to make the space feel bigger. Check where the windows are because natural light can change how your floor looks. Aligning planks with the light source makes your rooms brighter. Notice doorways and how people move from one room to another. This helps you plan a layout that feels natural. Think about your own style and how you want your home to look. When you keep the same direction across rooms, you create a cohesive look and a seamless flow. This approach makes transitioning between spaces feel smooth and connected.
Tip: Walk through your home and imagine how the flooring will guide your steps from one room to the next. This helps you see where the flow matters most.
Deciding on Plank Direction Before Installation
Choosing the right direction for your planks is important for a seamless look. Try laying planks perpendicular to the main light source to highlight the colors and details of your luxury vinyl flooring. In open areas, lay the planks from the front door to the back of the house. This creates a sense of space and continuity. You can also direct planks toward a fireplace or another focal point to draw attention. Before you start, test different directions in each room. This helps you see which layout gives the most cohesive look and best flow.
Mapping Transition Points Between Rooms
When you plan a multi-room flooring installation, you need to map out where one room ends and another begins. Use transition strips to connect different flooring types or to cover expansion gaps. T-molding works well when floors are the same height. If you have a height difference, use ramps or reducers for a smooth change. End bars or multi-function moldings help in tricky spots. Planning these points keeps your vinyl plank flooring looking seamless and maintains continuity throughout your home.
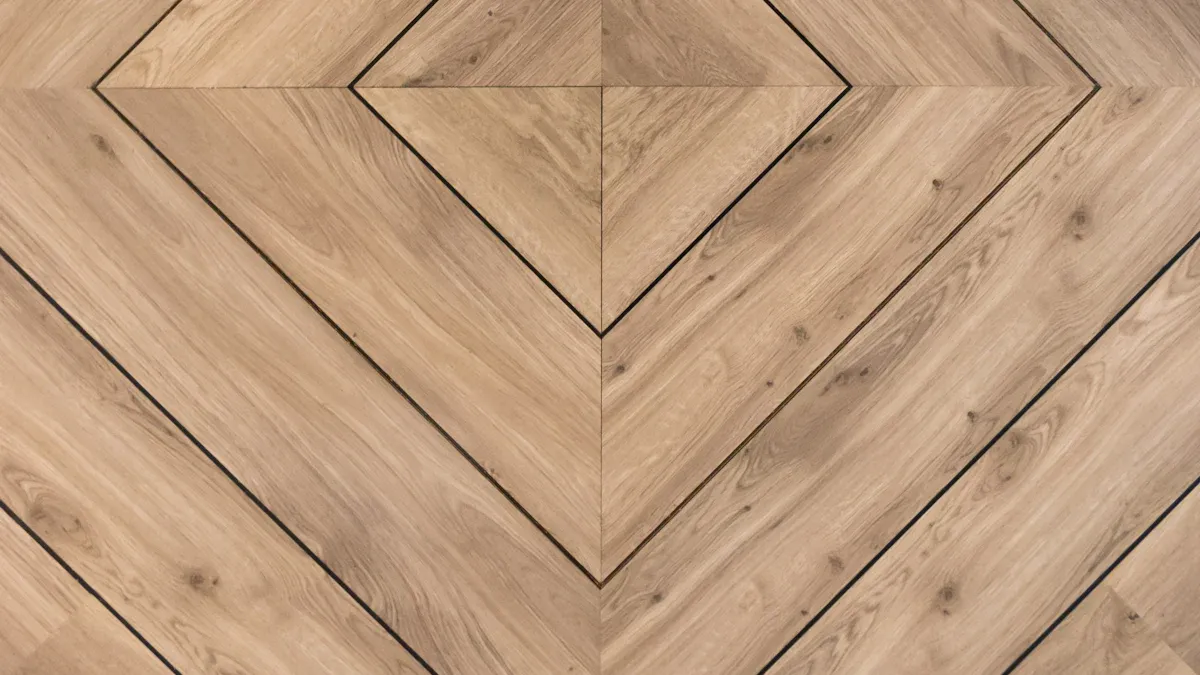
Changing Direction of Vinyl Plank Flooring Between Rooms
Aligning Planks at Doorways and Openings
When you start changing direction of vinyl plank flooring between rooms, you need to pay close attention to doorways and openings. These spots can make or break the seamless look you want. You should always check the lighting and color flow before you install anything. Try making a small mock-up section at the doorway. This helps you see how the planks will look under different lights and ensures the color and profile match.
A flat and even subfloor is important. Use a straightedge to find any high spots and fix them before you lay the planks. When you reach a threshold, measure carefully. Cut the planks to the right length, predrill holes if needed, and use construction adhesive for a strong hold. If you have corners, use a compound miter saw to make tight joints. Seal any exposed end grains to keep the floor looking neat.
Here is a table to help you remember the best practices:
| Best Practice | Description |
|---|---|
| Mock-up sections | Validate color and profile choice under different lighting to ensure flow. |
| Accurate subfloor preparation | Ensure a flat surface for secure attachment, using a straightedge. |
| Precise measurement | Cut to length, predrill holes, and use adhesive for durability. |
| Miter cuts at corners | Use a compound miter saw for tight joints and seal exposed end grains. |
You should also avoid common mistakes. For example, do not pick transition strips just because they match the color. Choose them for their function. Always leave an expansion gap of about ¼ inch to prevent buckling. If your subfloor changes height, use a digital leveling tool to match it. Never skip moisture protection at entryways. For heavy traffic areas, use durable materials like aluminum or high-impact PVC for your transition strips. Clean cuts matter, so use the right tools to avoid splinters.
| Mistake | Explanation |
|---|---|
| Choosing a Transition Based on Color Instead of Function | Can cause plank lift and buckling. |
| Ignoring Expansion Gaps | Can cause buckling and void warranties; always leave a ¼ inch gap. |
| Using Adhesive When You Need a Track System | Adhesive can lock planks, leading to lift and cracking; use a U-channel track instead. |
| Not Accounting for Subfloor Height Changes | Uneven subfloors create hazards; use digital leveling tools. |
| Skipping Moisture Protections at Entryways | Moisture can cause swelling and damage; use moisture-resistant materials. |
| Not Matching the Wear Layer for Heavy Traffic | Use durable materials for transition strips in busy areas. |
| Forgetting About ADA Requirements | Commercial spaces must meet ADA slope requirements. |
| DIY Cuts That Splinter or Chip | Use proper tools for clean cuts and alignment. |
Tip: Always double-check your measurements and test-fit planks before final installation at doorways.
When to Use Transition Strips for a Seamless Effect
Transition strips play a key role when you are changing direction of vinyl plank flooring between rooms. You need them when you move from one flooring type to another, when there is a change in height, or when you enter a new room. Transition strips help you achieve a seamless effect and reduce the risk of buckling or other defects. Even if the manufacturer says you can skip them, using transition strips is still a good idea for most projects.
- Use transition strips when you change from vinyl plank flooring to carpet, tile, or another material.
- Install them at thresholds where the floor height changes.
- Place them at room entries to help with expansion and contraction.
- Choose transition strips that match the function and traffic level of the area.
- Follow the manufacturer’s instructions for the best results.
Transition strips come in many types, such as T-molding, reducers, and end caps. Pick the right one for your situation. For example, T-molding works well when both floors are the same height. Reducers help when one floor is higher than the other. End caps finish the edge where the flooring meets a wall or sliding door.
Note: Transition strips not only make your floor look better, but they also protect the edges and help your floor last longer.
Techniques to Avoid Visible Seams
You want your floor to look smooth and professional, especially when changing direction of vinyl plank flooring between rooms. Careful planning is the first step. Lay out your planks so the patterns meet at thresholds. This keeps the design continuous and avoids drift. Plan your rows so you do not end up with narrow pieces at the edges. Wide planks look modern, but you need to stagger seams and place them carefully.
Professional installers use laser guides and detailed mapping to make sure every plank lines up. They pay close attention to edge treatments, which helps create a seamless look. When you glue down planks, use a heavy roller to press out air bubbles and ensure even adhesion. Clean up any adhesive around the edges right away. This prevents residue from showing once the floor settles.
Here is a table of helpful techniques:
| Technique | Explanation |
|---|---|
| Careful layout planning | Patterns meet at thresholds, keeping continuity between rooms. |
| Balanced row planning | Avoids narrow end pieces and uneven walls. |
| Proper adhesive application | Rolling with a heavy roller removes air and ensures strong adhesion. |
| Cleanup around perimeters | Prevents visible residue and keeps transitions looking clean. |
| Proper staggering and seam placement | Essential for a clean, modern appearance with wide-format planks. |
| Use of laser guides and mapping | Ensures accurate placement and alignment of larger planks. |
| Attention to edge treatment | Enhances the overall seamless look of the flooring. |
You should never skip underlayment if the manufacturer recommends it. The right underlayment protects against moisture and reduces sound. Roll it out smoothly and seal the seams to avoid problems later.
Callout: Changing direction of vinyl plank flooring between rooms takes patience and planning. When you use the right techniques and transition strips, you get a seamless result that looks great and lasts for years.
Material and Design Choices for Seamless Transitions
Selecting Compatible Vinyl Plank Styles and Colors
You can create a seamless look by choosing vinyl plank flooring styles and colors that work together. When you use a consistent color scheme in open spaces, you help connect different areas visually. Luxury vinyl flooring gives you many color options, so you can pick shades that blend well from room to room. This makes your home feel unified and welcoming.
- A consistent color palette ties spaces together.
- Wide color choices in luxury vinyl flooring support cohesive design.
- Matching tones across rooms enhances the sense of flow.
Tip: Hold samples next to each other in natural light to see how they look together before making your final choice.
Matching Patterns and Textures for Cohesion
Patterns and textures play a big role in how your floors look and feel. You should select materials that fit the needs of each space. For example, use more durable textures in busy areas and softer ones in quiet rooms. When you match patterns and textures, you help your home look harmonious.
- Flooring forms the base of your interior design.
- Well-matched patterns and textures add depth and interest.
- Mixing smooth and textured planks can create a stylish contrast.
- Using a transition piece can help blend different flooring types and prevent tripping.
Understanding the function of each room helps you choose the right pattern and texture. This way, you keep your home both practical and beautiful.
Considering Plank Size and Orientation
Plank size and direction affect how your rooms look and feel. Laying planks parallel to the longest wall can make a room appear larger. Aligning planks with natural light sources brightens the space. Keeping the same direction across connected rooms creates a seamless flow.
| Guideline | Description |
|---|---|
| Align with Longer Walls | Place planks along the longest wall for a more open feel. |
| Maintain Direction Across Rooms | Use the same direction in adjoining rooms for a unified look. |
| Consider Room Features | Let features and lighting guide your plank orientation. |
When you continue the same plank direction from one room to the next, you help your floors look connected and pleasing to the eye.
Installation Tips for Seamless Vinyl Plank Flooring by skspcflooring
Maintaining Proper Expansion Gaps
You need to keep expansion gaps around the edges of every room. These gaps let your vinyl plank flooring expand and contract when the temperature or humidity changes. Place 1/4-inch spacers along the walls during installation. This space helps prevent planks from pressing against walls or fixtures, which can cause warping or buckling. Always check the perimeter and at transitions to make sure you have enough room for movement. If you skip this step, you might see visible flaws or lose durability over time.
Expansion Gap Checklist:
- Use 1/4-inch spacers around the room.
- Check gaps at doorways and transitions.
- Remove spacers after installation is complete.
Tip: Expansion gaps are essential for a floating floor to function properly and stay seamless for years.
Using the Right Tools and Techniques
You should gather all the necessary tools before you start. A utility knife, tape measure, spacers, rubber mallet, straightedge, pry bar, and carpenter’s square help you achieve precise cuts and alignment. Safety glasses protect your eyes. Clean the subfloor with a broom and vacuum. Make sure the surface is dry and level. If you install over concrete, use a moisture barrier to protect your luxury vinyl flooring.
| Tool | Purpose |
|---|---|
| Utility knife | Cutting planks |
| Tape measure | Accurate measurements |
| Rubber mallet | Securing planks |
| Spacers | Maintaining expansion gaps |
| Straightedge | Checking levelness |
Choose transition pieces like T-molding, surface reducers, or end caps for smooth changes between rooms. The right underlayment improves water resistance and reduces sound. Good adhesive ensures long-term performance and supports meticulous installation.
Securing Planks for Stability and Longevity
You want your flooring to last and look great. Start with a clean, flat, and dry subfloor. Use a moisture barrier in damp areas. Follow the manufacturer’s guidelines for expansion gaps. Decide between a click-lock system or glue-down method based on your needs. Select durable planks with a strong wear layer. Secure planks tightly to prevent gaps and tripping hazards. This creates a seamless flow between rooms and lets different flooring materials work well together.
Note: Proper securing of planks not only enhances safety but also improves the overall aesthetic of your layout and installation techniques.
You can achieve a seamless look in your home by planning plank direction and layout. Align planks with the longest wall or main light source for a seamless appearance. Consider room shape and size before you start. Use transitions carefully to keep lasting seamlessness. Follow a checklist to prepare each space and prevent problems like warping or misalignment. This approach helps you create seamless transitions that look professional and stay beautiful.
- Plank direction changes how a room feels.
- Preparation leads to a seamless result.
- Careful transitions keep your design unified.
FAQ
How do you keep vinyl plank flooring transitions smooth between rooms?
You plan the layout before starting. You align planks at doorways and use transition strips when needed. You check for level subfloors and use proper tools. This helps you create a seamless look throughout your home.
Can you change the direction of vinyl plank flooring in different rooms?
Yes, you can change the direction. You use transition strips or careful alignment at thresholds. This adds visual interest and helps each room stand out while keeping the overall design unified.
What tools do you need for installing vinyl plank flooring transitions?
You need a utility knife, tape measure, spacers, rubber mallet, straightedge, and a carpenter’s square. You also use a broom and vacuum to clean the subfloor. These tools help you achieve accurate cuts and secure installation.
Do you need to leave gaps at transitions?
Yes, you must leave expansion gaps at transitions and along walls. These gaps allow the flooring to expand and contract with temperature changes. This prevents buckling and keeps your floor looking good for years.
How do you choose the right transition strip?
You select a transition strip based on the height and type of flooring in each room. T-molding works for floors of equal height. Reducers help when one floor is higher than the other. Always match the strip to the function and location.




