
You may wonder if underlayment is necessary when installing vinyl floor tiles. Most beginners want a clear answer before starting. Underlayment can improve comfort and reduce noise, but the right type depends on your flooring and subfloor. Many people new to this project worry about how to cut vinyl floor tiles, especially making straight and curved cuts. You should also prepare your surface well. Make sure the subfloor stays clean, dry, and level for the best results.
Underlayment for Vinyl Floor Tiles: What You Need to Know
When Is Underlayment Required?
You need to know when to use underlayment before you start your vinyl tile project. Flooring experts recommend underlayment in several situations:
- You want to improve the long-term durability and appearance of your floor.
- You need to distribute weight evenly and support the bonding of the tiles.
- You want to protect your floor from moisture and movement in the subfloor.
- You want to avoid problems like cracked tiles or water damage.
Most building codes and manufacturer guidelines require underlayment for vinyl flooring. These rules help you get the best results and keep your warranty valid. Always check your local building codes because they may have special requirements. Manufacturers also set limits on how thick the underlayment can be, usually between 1mm and 3mm. Following these rules helps you avoid damage and keeps your floor looking great.
Tip: Skipping underlayment can lead to costly repairs later. Take time to read the installation guide for your specific vinyl tiles.
Benefits of Using Underlayment
Using underlayment gives you many benefits. You will notice a big difference in comfort and performance. Here are some of the main advantages:
- Sound reduction: Underlayment helps make your home quieter by reducing noise from footsteps and impacts.
- Moisture protection: Many types of underlayment have built-in moisture barriers. These barriers protect your floor from water damage, especially over concrete.
- Smoother surface: Underlayment fills in small dips and bumps in the subfloor. This helps prevent noise and damage to your tiles.
- Extra comfort: Underlayment adds cushioning, making your floor feel softer and warmer underfoot.
- Better insulation: It helps keep your floors warmer during cold months and improves energy efficiency.
A high-quality underlayment can also increase the lifespan of your vinyl floor tiles. You will enjoy a more comfortable and durable floor for years to come.
Common Underlayment Materials
You can choose from several popular underlayment materials for vinyl floor tiles. Each type has its own features and benefits. The table below shows some of the most common options:
| Underlayment Material | Characteristics and Benefits |
|---|---|
| Foam | Good moisture barrier; moderate sound control; effective insulation. |
| Felt | Good sound control; can include a vapor barrier; provides better insulation. |
| Particle Board | Inexpensive; not effective against moisture; hard to install and remove. |
| Rubber | Excellent sound absorption; adds warmth; protects against water damage. |
| Plywood/OSB | Provides a level base; lacks warmth and cushioning; OSB is more durable than plywood. |
| Cork | Excellent sound control and insulation; not a moisture barrier. |
You should pick the underlayment that matches your needs and the type of subfloor you have. For example, if you install vinyl tiles over concrete, choose an underlayment with a strong moisture barrier. If you want a quieter room, rubber or cork may work best.
Note: Always follow the manufacturer’s recommendations for underlayment to ensure the best results and protect your warranty.
skspcflooring’s Recommendations for Underlayment
When you choose underlayment for your vinyl floor tiles, you want to make sure you get the best results. At skspcflooring, we believe that the right underlayment can make your floor last longer and feel more comfortable. You should always match your underlayment to your subfloor and the type of vinyl tile you plan to use.
Here are our top recommendations for underlayment:
-
Choose High-Quality Materials
You should select underlayment that meets international standards. Look for products with certifications like ISO9001 and ISO14001. These certifications show that the material is safe, durable, and eco-friendly. At skspcflooring, we only recommend underlayment that passes strict quality checks. -
Pick the Right Thickness
Most vinyl floor tiles work best with underlayment between 1mm and 3mm thick. Thicker underlayment can cause problems with locking systems or door clearance. Always check the tile manufacturer’s guide before you buy. -
Use Moisture Barriers on Concrete
If you install vinyl tiles over concrete, you need an underlayment with a built-in moisture barrier. This layer protects your floor from water damage and mold. Foam or rubber underlayment with a vapor barrier works well for these situations. -
Focus on Sound and Comfort
For rooms where you want less noise, like bedrooms or living rooms, choose underlayment with good sound absorption. Rubber and cork underlayment help reduce footsteps and make your floor feel softer. -
Follow Manufacturer Instructions
Always read the installation instructions for both your vinyl tiles and underlayment. This step helps you avoid mistakes and keeps your warranty valid.
Tip: If you feel unsure about which underlayment to use, contact skspcflooring’s support team. Our experts can help you pick the best option for your project.
Recommended Underlayment Types by skspcflooring
| Room Type | Subfloor Type | Recommended Underlayment | Key Benefit |
|---|---|---|---|
| Living Room | Wood | Foam or Cork | Comfort and sound control |
| Basement | Concrete | Foam with Moisture Barrier | Moisture protection |
| Bedroom | Wood/OSB | Cork or Felt | Warmth and quiet |
| Kitchen | Concrete | Rubber with Vapor Barrier | Water resistance |
You should always match the underlayment to your room’s needs. For example, a basement needs strong moisture protection, while a bedroom benefits from extra warmth and quiet.
skspcflooring stands for quality and reliability. We test all our recommended underlayment materials to make sure they meet global standards. You can trust our advice to help you create a floor that looks great and lasts for years.
If you have questions or need help choosing the right underlayment, visit skspcflooring’s official website or contact our team. We are here to support you every step of the way. 🏡
Tools and Materials for How to Cut Vinyl Floor Tiles
Essential Tools for Cutting Vinyl Flooring
You need the right tools to make clean and accurate cuts in vinyl floor tiles. Using the correct tool helps you avoid rough edges and wasted material. Here are the essential tools you should have before you start:
- Sharp utility cutter
- Straightedge
- Tape measure
- Spacers
- Roller
- Hammer or rubber mallet
A sharp utility cutter lets you score and cut vinyl tiles with ease. The straightedge helps you guide your cutter for straight lines. You use the tape measure to mark where to cut each tile. Spacers keep your tiles evenly spaced during installation. A roller presses the tiles down for a secure fit. The hammer or rubber mallet helps you tap tiles into place without damage.
Some professional installers use specialized tools like the Sigma 64S Vinyl Kit. This tool can cut vinyl tiles up to 6mm thick. It gives you deep scoring and very clean cuts. Many tradespeople say that using the right tool makes a big difference in the quality of each cut.
Tip: Always use a sharp blade for every cut. Dull blades can tear the vinyl and leave rough edges.
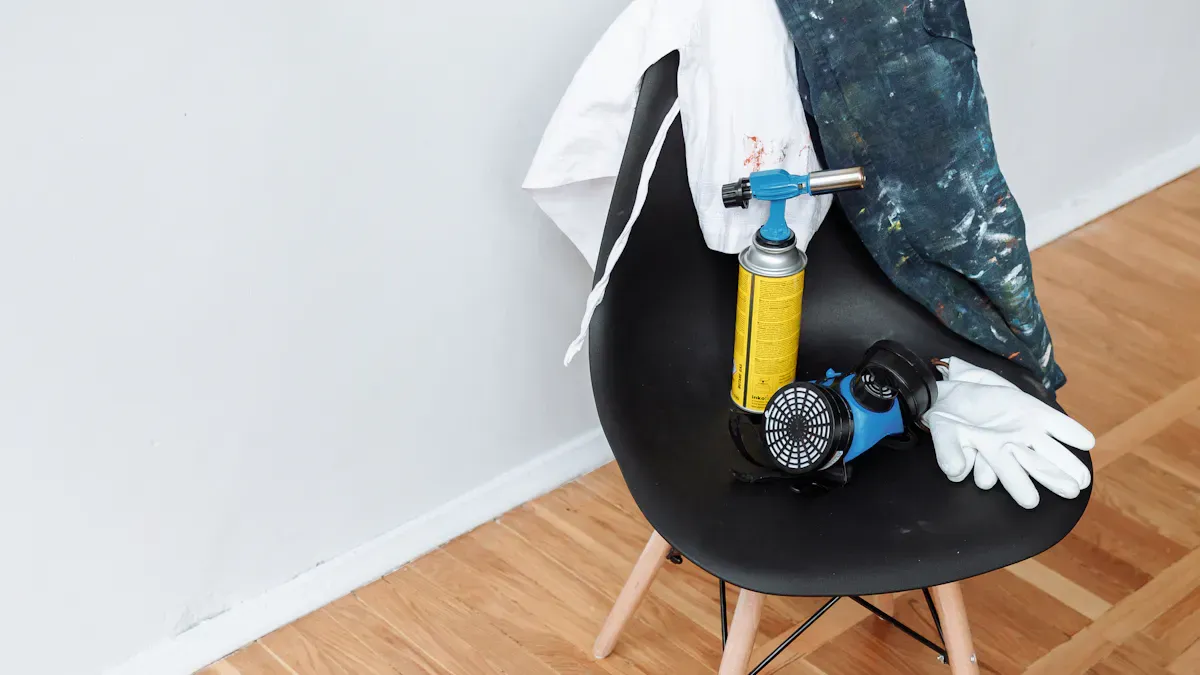
Safety Equipment for Cutting Vinyl Tiles
Safety should always come first when you cut vinyl floor tiles. You protect yourself and make your work area safer by using the right equipment. Here is what you need:
- Safety glasses to shield your eyes from debris
- Cut-resistant gloves to protect your hands
- Knee pads for comfort while working on the floor
- Dust mask if you work in a space with poor ventilation
You should always keep your work area clean and free of clutter. Mark your cutting area clearly so you avoid accidents. Never rush when you cut tiles. Take your time and check your measurements before each cut.
Materials Needed for Underlayment Installation
You need the right materials to install underlayment beneath your vinyl floor tiles. Underlayment smooths and strengthens the subfloor. It can also add sound dampening, moisture control, and comfort. Some vinyl flooring comes with pre-attached underlayment, often made of cork or foam. You should choose your underlayment based on your subfloor and the type of vinyl tile you use.
Here are the materials you may need:
- Underlayment rolls or sheets (foam, cork, or felt)
- Vapor barrier for moisture control
- Tape for sealing seams
- Utility knife or scissors to cut underlayment to size
- Measuring tape to check room dimensions
- Thin plywood if your subfloor is uneven
Professional installers always inspect their materials before starting. They measure the space, cut the underlayment to fit, and follow the manufacturer’s instructions for fastening. You should make sure your subfloor is clean and dry before you lay down any underlayment. This step helps you get the best results and a long-lasting floor.
Preparing to Cut Vinyl Flooring and Install Underlayment
Measuring Your Space Accurately
You start every vinyl tile project by measuring your space. This step helps you avoid mistakes and wasted materials. Gather a tape measure, paper, pencil, and calculator. Sketch your room, including closets and doorways. Use graph paper for better accuracy. Measure in feet and inches, rounding up to the next foot. For rectangular rooms, multiply the lengths of two walls to find the area. Divide irregular rooms into rectangles and sum their areas. For semicircular spaces, measure the diameter and radius, then use the formula for a semicircle. Triangular spaces require the base and height, then divide by two. Add all areas together and convert to square feet if needed. Always add 10% to your total for overage and mistakes.
| Evidence | Explanation |
|---|---|
| Accurate measurements minimize waste | You buy the right amount of tiles and reduce unused material. |
| Facilitates proper layout planning | You achieve a professional look and a successful project. |
| Prevents costly installation errors | You avoid mistakes that waste time and money. |
Cleaning and Leveling the Subfloor
Subfloor preparation is essential for a smooth installation. Remove existing flooring, including carpet, padding, and tack strips. Sweep and vacuum the subfloor to remove dirt and debris. Inspect for imperfections using a straightedge. Mark any low or high spots. Sand down high spots and fill low spots with floor patching compound. Moisture testing is important, especially for concrete subfloors. Prep your subfloor carefully to prevent problems.
If you skip subfloor preparation, you may see deformation, gaps, increased noise, bubbling, cracking, and safety hazards. Uneven adhesive distribution leads to stress points, visible imperfections, discomfort, and moisture issues.
Planning Your Tile Layout
You plan your tile layout to minimize waste and create a beautiful floor. Measure the room and create a scaled layout plan. Select a focal starting line along the longest sight line. Snap chalk lines to keep tiles aligned. Plan tile runs so a single cut yields multiple usable edge pieces. Use consistent stagger offsets to avoid small leftover strips. Dry lay several rows in the most visible area before applying adhesive. Keep a waste log to track repeat cuts. Start from the focal sight line to prevent small edge cuts near primary views. Template around fixed obstacles using cardboard or paper.
- Aligning flooring with the longest wall creates spaciousness.
- Installing planks in the direction of natural light enhances visual appeal.
- Layout can emphasize features and draw attention to focal points.
You ensure your vinyl floor looks professional and lasts longer by following these steps for subfloor preparation and layout planning.
How to Cut Vinyl Floor Tiles: Step-by-Step Guide
Marking and Measuring Tiles for Cutting
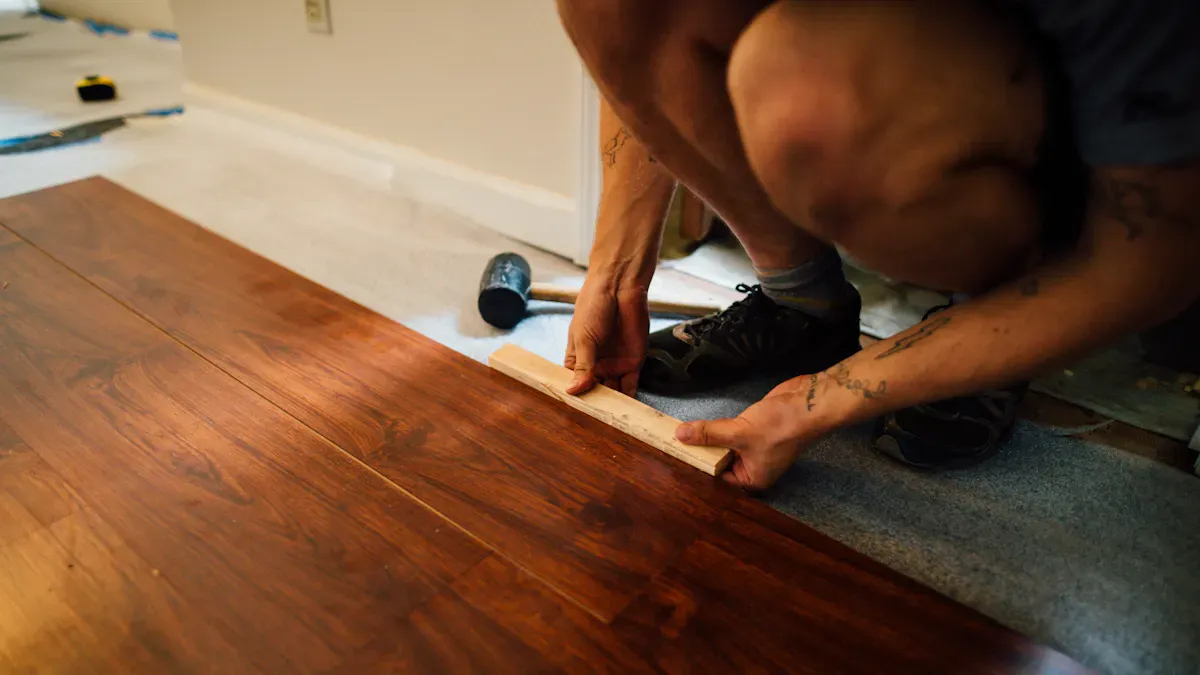
You need to start every flooring project by marking and measuring your vinyl tiles carefully. This step helps you avoid mistakes and wasted material. When you learn how to cut vinyl floor tiles, you should always focus on accuracy.
- Take measurements of the area where you want to place each tile. Use a measuring tape to note the length and width.
- Mark the vinyl tile with a pencil or chalk. Use a framing square to make sure your lines are straight and your angles are correct.
- Double-check your measurements before you cut. Professionals often add 2 to 3 extra inches to allow for trimming and to avoid errors.
- Draw complete lines on the tile to guide your cuts. This makes it easier to follow the line with your cutting tool.
- Score the tile along the marked line with a utility knife. Secure the tile and snap off the smaller section for a clean edge.
Tip: Always measure twice and cut once. This habit saves you time and prevents costly mistakes.
Professionals always plan their cuts based on the room layout. They take their time and use patience to master how to cut vinyl floor tiles with precision. You can achieve professional results by following these steps and practicing careful measurement.
How to Cut Vinyl Flooring in Straight Lines
Cutting straight lines is one of the most important skills when you learn how to cut vinyl floor tiles. You want your floor to look neat and fit perfectly in your space. Here are some best practices for making straight cuts:
- Measure the length and width of the area you need to cover.
- Transfer these measurements onto the back of the vinyl tile using a pencil.
- Leave a small overlap at the edges for adjustments if needed.
- Place a straightedge or speed square along your marked line.
- Use a sharp utility knife to score the tile deeply along the straightedge.
- Snap the tile along the scored line for a clean break.
You can use different tools to get the cleanest straight cuts. The table below shows some common tools and their purposes:
| Tool | Purpose |
|---|---|
| Utility Knife | For scoring and snapping planks for clean cuts |
| Vinyl Plank Cutter | For making clean, dust-free cuts quickly |
| Speed Square | Ensures straight cuts and accurate layout |
Note: Always use a sharp blade. Dull blades can tear the vinyl and leave rough edges.
When you follow these steps, you will see how to cut vinyl floor tiles in straight lines with confidence. Practice on a scrap piece first if you feel unsure.
Cutting Around Obstacles and Corners
Rooms often have obstacles like pipes, door frames, or corners. You need special techniques to cut vinyl tiles so they fit perfectly around these shapes. Learning how to cut vinyl floor tiles for tricky spots helps you get a professional finish.
- Create a template using cardboard or paper for any complex shapes or obstacles.
- Place the template over the area and trace the shape onto your vinyl tile.
- Use a utility knife to cut along the traced lines. Take your time and make small, careful cuts.
- For tight corners, make small relief cuts. These are short, straight cuts that help the vinyl fold and fit snugly.
- Trim away any extra material slowly until the tile fits perfectly.
Tip: Always test the fit before you secure the tile in place. Adjust as needed for a snug and seamless look.
When you use templates and relief cuts, you make it much easier to handle corners and obstacles. This method helps you avoid gaps and gives your floor a clean, finished appearance. With practice, you will master how to cut vinyl floor tiles for any room shape.
Safety Tips for Cutting Vinyl Tiles
Cutting vinyl floor tiles can be safe if you follow the right steps. You need to protect yourself and use the correct techniques. Many experts agree that safety starts before you even pick up a tool.
Essential Safety Gear
You should always wear the right safety gear when you cut vinyl tiles. This gear keeps you safe from sharp edges and flying debris.
- Safety goggles protect your eyes from small pieces that can fly up during cutting.
- Gloves keep your hands safe from sharp tile edges and blades.
- Dust masks or respirators help you avoid breathing in dust, especially in rooms with poor airflow.
- Knee pads give you comfort and protect your knees when you work on the floor.
Tip: Always check your safety gear before you start. Replace any damaged items right away.
Safe Cutting Practices
You need to use the right techniques to avoid accidents. Experts recommend these steps to keep you safe:
- Learn how to use each tool before you start. Practice on scrap pieces if you feel unsure.
- Watch your hands and fingers at all times. Keep them away from the cutting path.
- Use a sharp blade for every cut. Dull blades can slip and cause injuries.
- Cut on a stable, flat surface. This helps you control the tool and the tile.
- Keep your work area clean. Remove scraps and dust often to prevent slips and trips.
- Invest in high-quality tools. Good tools make cutting easier and safer.
Note: If you work with others, watch each other’s techniques. Help each other correct mistakes to stay safe.
Reducing Dust and Debris
Vinyl tile cutting can create dust. You should take steps to keep the air clean.
- Use a dust extractor or a wet saw if you have one. These tools help reduce airborne dust.
- Open windows or use fans to improve ventilation.
- Sweep up dust and scraps as you work.
Callout: Breathing in dust can harm your lungs. Always wear a dust mask and keep your workspace clean.
Monitoring and Training
If you work with a team, make sure everyone knows how to use the tools safely. You should:
- Teach new team members the right way to cut tiles.
- Watch each other and give feedback if you see unsafe habits.
- Remind everyone to use safety gear every time.
| Safety Tip | Why It Matters |
|---|---|
| Wear goggles and gloves | Prevents eye and hand injuries |
| Use sharp blades | Reduces slips and rough cuts |
| Keep area clean | Prevents trips and accidents |
| Use dust control methods | Protects your lungs |
You can avoid most injuries by following these safety tips. Take your time, use the right gear, and always pay attention to your work. Safety helps you finish your project with confidence and success. 🛡️
Installing Underlayment and Vinyl Tiles with skspcflooring
Laying Underlayment Step-by-Step
You start every vinyl flooring installation by preparing the subfloor. Sweep and clean the area to remove dirt and debris. Fix any nails or imperfections. If you have a concrete subfloor, install a vapor barrier to protect against moisture. Lay out the underlayment roll or tiles over the vapor barrier or directly on a dry, firm subfloor. Secure the underlayment by gluing, taping, or tacking, depending on the material and foot traffic. Sometimes, you can dry lay the underlayment. Lay the underlayment up to the walls. Remove baseboards if you need to fit the flooring underneath. Cut the underlayment to fit tightly against the walls using scissors or a utility knife and straightedge. Tape the seams lengthwise for rolls, making sure edges do not overlap. This step prevents thickness issues during vinyl flooring installation.
Tip: Proper underlayment helps your vinyl peel-and-stick tile stay flat and last longer.
Placing and Securing Vinyl Floor Tiles
You begin the next step of flooring installation by planning your layout. Start with a focal line and dry lay several rows of vinyl peel-and-stick tile. Peel-and-stick tiles make vinyl flooring installation easy. Remove the backing and press each tile firmly onto the underlayment. Use spacers to keep tiles evenly spaced. Press tiles with a roller for a secure fit. Cut tiles as needed to fit around corners and obstacles. Always check your alignment as you work. Peel-and-stick tiles allow you to adjust placement before final pressing. This method gives you a smooth and professional finish for your vinyl flooring installation.
Callout: Take your time with peel-and-stick tiles. Careful placement prevents gaps and uneven edges.
Finishing Touches and Maintenance Tips
You finish your vinyl flooring installation by adding baseboards and cleaning the surface. Sweep and vacuum regularly to prevent dirt and grit from scratching your vinyl peel-and-stick tile. Use pH-neutral detergents designed for vinyl flooring. Avoid harsh chemicals and abrasive pads. Clean up spills immediately to prevent moisture damage. Test cleaning solutions on a small area before full application. Use protective floor coatings or sealants to enhance durability. Dust or vacuum daily using a suction-only setting. Damp mop with a mild, pH-neutral detergent. These steps help your peel-and-stick tiles stay beautiful and strong.
| Maintenance Tip | Benefit |
|---|---|
| Sweep and vacuum regularly | Prevents scratches |
| Use pH-neutral detergents | Protects finish |
| Clean spills immediately | Prevents moisture damage |
| Apply protective coatings | Enhances durability |
Emoji: 🧹 Regular care keeps your vinyl flooring installation looking new for years.
You learned the basics of using underlayment and cutting vinyl floor tiles. Remember these key points:
- Choose the right underlayment for your subfloor.
- Measure your space carefully.
- Use sharp tools and safety gear.
- Plan your tile layout before cutting.
Beginner’s Checklist:
- Clean and level your subfloor
- Mark and measure tiles
- Cut tiles with care
- Install underlayment and tiles step by step
You can install vinyl flooring with confidence. If you need help, reach out to skspcflooring’s team. 👍
FAQ
What makes luxury vinyl flooring different from regular vinyl tiles?
Luxury vinyl flooring uses advanced materials and technology. You get a thicker, more durable surface. The design layer looks like real wood or stone. You enjoy better comfort and sound control. Many people choose luxury vinyl flooring for its realistic look and long-lasting performance.
Can you install luxury vinyl flooring in bathrooms and kitchens?
Yes, you can install luxury vinyl flooring in bathrooms and kitchens. This flooring resists water and stains. You get a surface that handles spills and moisture well. Many homeowners pick luxury vinyl flooring for these rooms because it stays beautiful and easy to clean.
Do you need underlayment for luxury vinyl flooring?
You often need underlayment for luxury vinyl flooring. Underlayment adds comfort and reduces noise. It also helps protect against moisture. Always check the manufacturer’s instructions. Some luxury vinyl flooring comes with attached underlayment, so you may not need extra layers.
How do you clean and maintain luxury vinyl flooring?
You should sweep or vacuum luxury vinyl flooring often. Use a damp mop with a pH-neutral cleaner. Avoid harsh chemicals and abrasive pads. Clean spills right away. Regular care keeps your luxury vinyl flooring looking new and helps it last longer.
Can you cut luxury vinyl flooring yourself?
Yes, you can cut luxury vinyl flooring at home. Use a sharp utility knife and a straightedge. Mark your lines carefully. Always wear safety gear. Many people find luxury vinyl flooring easy to cut and install with basic tools.
Tip: Practice on a scrap piece before making final cuts. This helps you get clean edges and a perfect fit.
| Task | Tool Needed | Safety Gear |
|---|---|---|
| Cutting straight lines | Utility knife | Gloves, goggles |
| Measuring and marking | Tape measure | None |
| Cleaning after installation | Soft broom, mop | None |




