
You can install vinyl flooring yourself and enjoy results that last for years. When you start a diy project, you take control of your space and your budget. Vinyl flooring stands out because it resists water, stains, and scratches. If you follow each step with care, your flooring installation will look professional. Take time to measure, plan, and check every detail. This attention will help maximize the lifespan of vinyl flooring. Trust your skills, and your project will add value to your home. Vinyl flooring gives you the chance to create a fresh look with lasting beauty. You will see that diy projects can be simple and rewarding when you choose vinyl flooring for your next project.
Essential Tools and Materials for Vinyl Flooring Installation
Must-Have Tools for Install Vinyl Plank Flooring
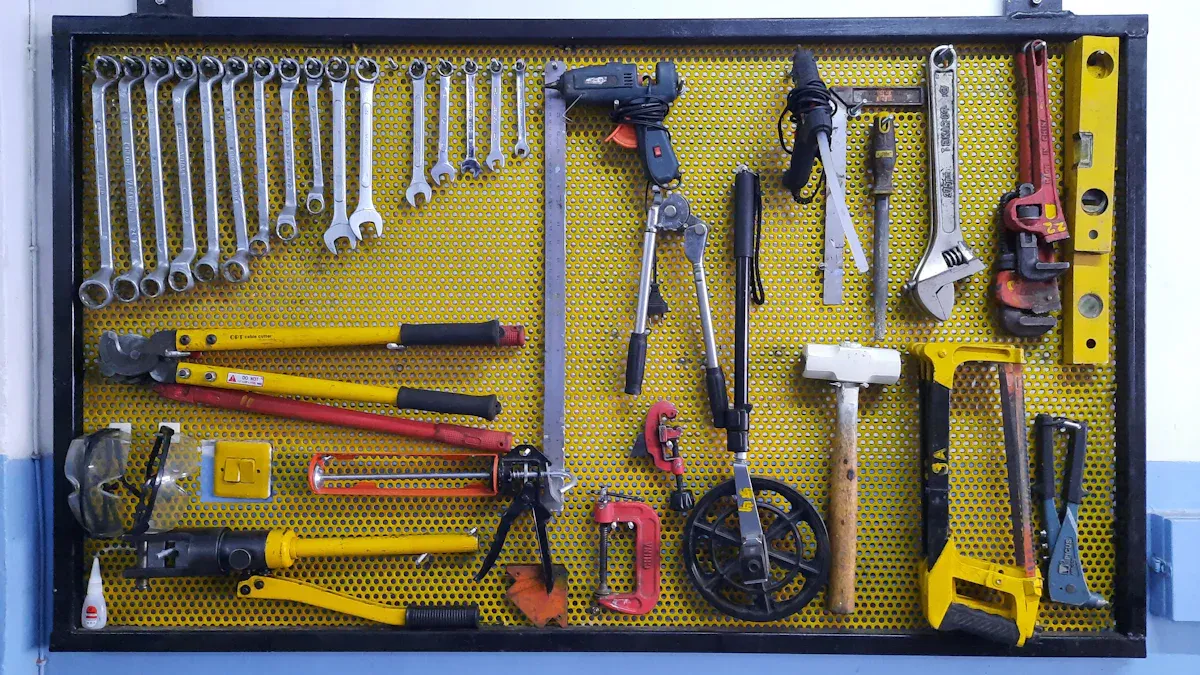
You need the right tools for installing vinyl plank flooring to achieve a smooth and lasting result. Many industry experts recommend a set of basic tools for this job. Here is a list you should gather before you start:
- Tape measure and chalk line
- Utility knife with straight and hook blades
- Kneepads for comfort
- Pry bar and pull bar
- Rubber mallet
- Moisture meter
- Tapping block set
- Vinyl cutter or shear
- Seam roller
- Pressure-sensitive adhesive and notched trowel
These tools for installing vinyl plank flooring help you measure, cut, and fit each plank with precision. You can also use a broom and a good-quality vacuum cleaner to keep your workspace clean.
Tip: Always double-check your measurements before making any cuts. This step saves you time and reduces waste.
Choosing Quality Vinyl Flooring from skspcflooring
When you choose vinyl flooring, you want a product that lasts. Lifeproof vinyl flooring stands out because it resists water, stains, and scratches. You can find many types of vinyl flooring, such as planks, tiles, and sheets. Each type offers a unique look, including styles that mimic wood or stone. Independent testing shows that lifeproof vinyl flooring provides excellent durability and a wide range of design options.
SK-Floor offers high-quality lifeproof vinyl flooring that meets strict international standards. Their products include Chevron SPC Flooring, Rigid Core SPC Flooring, and EIR SPC Flooring. You get the advantages of vinyl plank flooring, such as easy maintenance and long-lasting beauty, when you select from their range.
Additional Supplies for a Lasting Finish
You need more than just planks and tools for a successful vinyl flooring installation. Gather these extra supplies to ensure your floor looks great for years:
- Underlayment for added comfort and sound reduction
- Transition strips for smooth edges between rooms
- Adhesive or double-sided tape for secure placement
- Cleaning supplies for post-installation care
Lifeproof vinyl flooring needs proper support and finishing touches. These materials help you achieve a professional look and extend the life of your new floor. When you prepare with the right supplies, you set yourself up for a successful project.
Preparing Your Floor for a Long Lifespan of Vinyl Flooring
Cleaning and Clearing the Space
You want your new vinyl flooring to last for many years. Start by cleaning and clearing the space. Remove all furniture, rugs, and other items from the room. Sweep the floor to get rid of dust and dirt. Use a vacuum to pick up small particles. If you see any sticky spots, wipe them with a damp cloth. A clean surface helps the vinyl flooring stick better and prevents bumps. You should also check for nails or staples left behind from old flooring. Pull them out so the surface stays smooth. When you take time to clean, you help protect the lifespan of vinyl flooring.
Leveling and Repairing the Subfloor
A flat subfloor is important for the lifespan of vinyl flooring. Walk across the room and feel for any bumps or dips. Use a straightedge or level to check the floor. If you find low spots, fill them with a floor patch. Sand down any high spots until the surface feels even. Cracks or holes in the subfloor can cause problems later. Fill these areas and let them dry. You should also check for moisture. A dry subfloor keeps the vinyl flooring in good shape. If you skip this step, the floor may wear out faster. Careful repairs help you get the most out of the lifespan of vinyl flooring.
Tip: Always measure the room before you start repairs. This helps you know how much material you need and where to focus your work.
Acclimating Vinyl Flooring for Best Results
Vinyl flooring needs time to adjust to the room before you install it. This step helps prevent gaps or warping later. Place the unopened boxes of vinyl flooring in the room where you plan to install them. Let them sit for 48 hours. This gives the material time to match the room’s temperature and humidity. When you follow this step, you help extend the lifespan of vinyl flooring.
- Place vinyl flooring in the installation room for 48 hours before starting.
- Keep the boxes flat and away from direct sunlight or heat.
- Do not open the boxes until you are ready to install.
You should also measure the room again after acclimation. This ensures the vinyl flooring fits well and covers the space. Careful planning and patience at this stage make a big difference in the lifespan of vinyl flooring.
Removing Baseboards and Obstacles
You want your vinyl flooring to fit perfectly and last for many years. Start by removing the baseboards along the walls. Use a pry bar or a flat tool to gently lift each piece. Work slowly so you do not crack or break the wood. Place each baseboard in a safe spot. You can reuse them after you finish installing the vinyl flooring.
Obstacles like doors, vents, and floor registers can get in the way. Take off any doors that swing into the room. Remove vent covers and set them aside. If you see nails or screws sticking out, pull them out with pliers. This step gives you a clear space to work and helps your vinyl flooring lay flat.
Tip: Label each baseboard with painter’s tape. Write the wall or corner where it belongs. This makes it easy to put them back in the right place after you finish.
Check the floor for any leftover glue, staples, or debris. Sweep and vacuum the area again. A clean and open space helps you install vinyl flooring without bumps or gaps. You want every plank to fit tight against the wall. Removing obstacles now saves you time and trouble later.
If you have heavy furniture, move it out of the room. Ask a friend or family member to help with large items. Never drag furniture across the floor. Lifting protects both your old floor and your new vinyl flooring.
Here is a quick checklist to help you prepare:
- Remove all baseboards and label them.
- Take off doors that open into the room.
- Remove vent covers and floor registers.
- Pull out nails, screws, and staples.
- Sweep and vacuum the floor.
- Move all furniture out of the space.
You set yourself up for success when you clear the area before installing vinyl flooring. This step helps you get a smooth, professional finish that will last for years.
Step-by-Step Vinyl Plank Flooring Installation Guide
Planning Your Layout and Patterns
You want your vinyl flooring to look professional and last for years. Good planning helps you use your materials wisely and avoid waste. Before you install vinyl plank flooring, take time to decide how you want the planks to look in your room. Follow these steps to plan your layout:
- Decide on the pattern you want for your vinyl plank flooring installation. You can choose a straight lay, diagonal, or herringbone pattern.
- Map out the layout on paper or use a chalk line on the floor. This helps you see where each plank will go and ensures you stagger the planks for a natural look.
- Make sure the end of the first row’s plank is at least six inches long. For the second row, keep the seam six to eight inches away from the seam in the first row. This creates a strong and attractive floor.
Tip: Start your layout along the longest wall or the main source of light. This makes the room look bigger and the flooring installation more appealing.
Installing Click-Lock Vinyl Plank Flooring
Click-lock vinyl plank flooring is easy to install and does not need glue or nails. You can finish your project quickly with this method. Start by gathering all your tools and materials. Make sure your subfloor is clean and level.
Begin by laying the first row along the longest wall. Use spacers to leave a ¼-inch gap between the planks and the wall. This gap lets the floor expand and contract with changes in temperature. Connect the planks by angling and snapping them together. Stagger the seams in each row to avoid a repeating pattern.
Many people make mistakes during vinyl plank flooring installation. Here is a table that shows common mistakes and how you can avoid them:
| Common Mistakes | Solutions |
|---|---|
| Not Levelling the Subfloor | Use a long level to check the floor’s flatness and fill in low spots with a leveling compound. |
| Using the Wrong Underlayment | Refer to the manufacturer’s manual to choose the correct underlayment. |
| Not Planning for Expansion Gaps | Leave about ¼ inches around the edges for expansion and use spacers during installation. |
| Not Ensuring Proper Alignment and Fit | Stagger seams between rows to avoid H-joints and create a professional look. |
| Not Using the Right Tools | Ensure you have the correct tools to avoid costly mistakes. |
| Installing Vinyl Plank Flooring Backwards | Start from the left side of the room to ensure proper locking of planks. |
| Not Calculating Width of Last Row | Measure the last row’s width to avoid awkward and difficult installations. |
| Improper Cuts and Obstacles | Use a carpenter’s square for precise cuts and dry fit planks before securing them. |
| Not Removing Baseboards | Remove baseboards for a cleaner edge and to maintain the expansion gap. |
| Ending Rows with Small Boards | Avoid very short boards at the end of rows to prevent them from coming loose. |
Note: Always measure the width of the last row before you start. This helps you avoid having to cut very thin pieces, which can come loose over time.
After you finish each row, tap the planks gently with a rubber mallet and tapping block. This ensures a tight fit. Continue until you reach the last row. Cut the planks to fit, making sure you keep the expansion gap. Click-lock vinyl plank flooring is easy to install, making it a popular choice for DIY projects.
Installing Peel-and-Stick Vinyl Flooring
Peel-and-stick vinyl flooring offers easy installation and works well in small rooms or areas with lots of corners. You do not need special tools or glue. Start by making sure your subfloor is clean, dry, and smooth.
Lay out the planks in the pattern you planned. Dry-fit the first few rows to check your layout. When you are ready, peel off the backing from the first plank and press it firmly onto the floor. Start in one corner of the room and work your way out. Use a roller to press each plank down and remove air bubbles.
Stagger the seams as you go, just like with click-lock vinyl plank flooring installation. This gives your floor a natural look and adds strength. If you need to cut a plank, use a utility knife and a straightedge for a clean edge.
Tip: Work slowly and check your alignment often. If you make a mistake, lift the plank right away and reposition it before the adhesive sets.
Peel-and-stick vinyl flooring is easy to install and lets you finish your project quickly. You can enjoy a new floor with minimal mess and effort.
Installing Glue-Down Vinyl Flooring
You can achieve a strong and lasting floor by using the glue-down method. Start by making sure your subfloor is clean, dry, and level. Lay out your planks in the order you want before you begin. This step helps you see how the finished floor will look.
Choose the right adhesive for your project. Many installers trust these adhesives for their durability and safety:
- GREEN POINT: Eco-friendly and great for large projects.
- XL Brands Stix 5900: Dries quickly and resists moisture.
- STAUF UVF-867: Offers strong bonds and works in many conditions.
- Bostik Vinyl Grip: Easy to use and certified for low emissions.
- SikaBond T-17: Delivers industrial strength for tough jobs.
Each adhesive has special features. For example, XL Brands Stix 5900 dries fast, which helps you finish your project sooner. STAUF UVF-867 gives you a strong hold and lasts a long time, even in busy areas. These adhesives help your floor stay in place and look good for years.
To install, spread the adhesive with a notched trowel. Work in small sections so the glue does not dry before you lay the planks. Press each plank firmly into the adhesive. Use a roller to remove air bubbles and make sure the planks stick well. Wipe away any glue that squeezes out at the edges.
Let the floor set for the time listed on the adhesive label. Avoid walking on the floor until it is fully dry. This step keeps your new floor smooth and secure.
Tip: Always follow the adhesive manufacturer’s instructions for the best results.
Cutting and Fitting Around Edges and Corners
You want your floor to look neat and fit every space. Measure the area where you need to cut a plank. Use a pencil to mark the cut line. Place the plank on a firm surface and score it with a utility knife. Snap the plank along the line for a clean edge.
Corners and doorways need special attention. For tricky shapes, make a paper template first. Trace the shape onto the plank and cut along the lines. Dry-fit the piece before you glue it down. This step helps you avoid mistakes.
When installing the last row, measure the gap between the wall and the last full plank. Cut the planks to fit, leaving a small gap for expansion. Use a pull bar to fit the last pieces tightly in place.
Note: Take your time with cuts around pipes, vents, and corners. Careful work here makes your vinyl flooring look professional.
A sharp utility knife and a steady hand help you get the best results. Always wear safety gloves when cutting planks. Clean up dust and scraps as you go to keep your workspace safe.
Finishing Touches for Durable Vinyl Flooring
Reinstalling Baseboards and Trim
You have finished laying your vinyl flooring. Now, you need to reinstall the baseboards and trim. Start by checking each piece for damage. If you see cracks or chips, repair them before putting them back. Use a nail gun or finishing nails to secure the baseboards. Make sure you press them tightly against the wall. This step covers the expansion gap and gives your floor a clean look. If you labeled each baseboard earlier, you can match them to their original spots. You protect the edges of your vinyl flooring and help prevent moisture from seeping underneath.
Tip: Use a caulking gun to fill small gaps between the trim and wall. This keeps dust and water out.
Sealing Edges and Transitions
You want your vinyl flooring to last as long as possible. Sealing the edges and transitions is important. Apply a high-quality sealant along the edges where vinyl meets other flooring types. This prevents water from getting under the planks. Choose a moisture-resistant adhesive for areas near kitchens or bathrooms. Always check the manufacturer’s recommendations for compatibility. In moisture-prone rooms, consider using a vapor barrier under the vinyl. Special sealants around seams and edges help protect your floor from warping or buckling.
- Prevents water intrusion and moisture problems
- Protects the finish from scratches and dents
- Extends the lifespan of your flooring
Cleaning Up After Vinyl Flooring Installation
After you finish installing and sealing your floor, you need to clean up. Sweep or vacuum daily to remove dirt and dust. This prevents scratches on the surface. Use a damp mop with a pH-neutral cleaner once a week. Wait at least a week before wet cleaning glued-down floors. For floating floors, allow a day for settling before heavy cleaning. These steps keep your floor looking new and make cleaning easier.
- Simplifies and speeds up cleaning processes
- Maintains cleanliness and shine
- Helps your vinyl flooring last longer
Note: Regular cleaning and careful maintenance protect your investment and keep your floor beautiful for years.
Troubleshooting and Longevity Tips for Vinyl Flooring
Common Mistakes to Avoid
You can prevent problems by learning about common mistakes when installing vinyl plank flooring. Many installers see these issues often:
- Ignoring moisture in the subfloor causes buckling or warping. Always test moisture levels before you start.
- Skipping acclimation leads to gaps or tight joints. Let your flooring adjust to room temperature and humidity for at least 48 hours.
- Not leaving expansion gaps makes the floor peak or squeak. Use spacers to keep a 1/4-inch gap around the edges.
- Installing over uneven subfloors causes planks to separate or rock. Check for dips and fill them before laying planks.
- Using the wrong adhesive or underlayment can cause bond failure. Follow the manufacturer’s instructions for materials.
- Poor jobsite conditions, like painting or drywall work, can lead to warping or discoloration. Wait until the environment is stable before installing.
Tip: Careful planning and preparation help you avoid these mistakes and keep your floor looking great.
Maintenance Tips for the Lifespan of Vinyl Flooring
You can make your vinyl flooring last longer with simple maintenance steps. Manufacturers recommend these tips:
- Place entry mats at doors to trap dirt and moisture.
- Use felt pads under furniture legs to prevent scratches.
- Lift heavy items or use sliders instead of dragging them.
- Clean up spills right away to stop stains.
- Use cleaning solutions recommended by the manufacturer.
- Sweep or vacuum often to keep dirt from building up.
- Rotate rugs and furniture to spread out wear.
- Schedule a yearly inspection to catch damage early.
- Protect your floor from direct sunlight to avoid fading.
Note: Regular care keeps your vinyl flooring looking new and helps it last for many years.
What to Do If Issues Arise
You might see bubbling or lifting in your vinyl flooring. You can fix these problems with a few steps:
- Check for expansion gaps between the flooring and the wall.
- Remove the damaged section of vinyl.
- Cut a new piece slightly larger than the damaged area.
- Use a hairdryer to soften leftover adhesive and scrape it off.
- Apply new glue and press the replacement vinyl down.
- For loose-lay flooring, use a rubber mallet to secure the new piece.
Callout: Quick repairs help prevent bigger problems and keep your floor strong.
You can keep your vinyl flooring in top shape by avoiding mistakes, following maintenance tips, and fixing issues right away.
You can achieve a lifetime of use from vinyl flooring with careful diy preparation and installation. Industry research shows that features like a vapor barrier and peel-and-stick tape system protect your floor from moisture and drafts. You create a strong foundation for your diy project when you follow these steps. Trust skspcflooring for quality products and support. Your diy flooring will stand the test of time.
| Feature | Description |
|---|---|
| Vapor Barrier | Integrated 6 mil barrier eliminates need for separate moisture protection. |
| Peel-and-Stick System | Continuous barrier with overlap keeps your floor safe from water damage. |
| Breathability | Tape left unengaged on wood subfloors improves energy efficiency. |
FAQ
How long does vinyl flooring last?
You can expect vinyl flooring to last 15 to 20 years with proper care. Regular cleaning and quick repairs help extend its lifespan. High-quality products from trusted brands offer even greater durability.
Can you install vinyl flooring over existing floors?
You can install vinyl flooring over many surfaces, including tile and hardwood. Make sure the old floor is clean, dry, and level. Remove any loose pieces before starting your project.
What tools do you need for vinyl plank flooring installation?
You need a tape measure, utility knife, rubber mallet, spacers, and a vacuum. These tools help you cut, fit, and secure each plank. Having the right tools makes the job easier and faster.
Do you need underlayment for vinyl flooring?
You may need underlayment for added comfort and sound reduction. Some vinyl flooring comes with attached underlayment. Check the manufacturer’s instructions to see what works best for your space.
Where can you find vinyl plank flooring installation faqs?
You can find vinyl plank flooring installation faqs on the official website of skspcflooring or in their product guides. These resources answer common questions and help you complete your project with confidence.




