

You should install vinyl plank flooring parallel to the longest wall for the best results. This direction can make your room look bigger and brighter. When you align planks with natural light, you boost the open feeling of the space. Consistent plank direction across connected rooms helps create a smooth flow. Choosing the right direction improves how your room looks and feels, so think carefully about which direction to install vinyl plank flooring.
Key Factors for Which Direction to Install Vinyl Plank Flooring

Room Shape and Size
You need to look at the shape of the room before you decide which direction to install vinyl plank flooring. If your room is long and narrow, laying planks parallel to the longest wall makes the space feel larger. In square rooms, you can lay planks to create the illusion of more space. For rooms with corners or angled walls, diagonal installation adds a unique touch.
Tip: Test different plank arrangements in your space. Move a few planks around and see how they look before you start the full installation.
Here are some simple guidelines:
- Lay planks parallel to the longest wall for a bigger feel.
- In square rooms, choose a direction that stretches the space visually.
- For unusual shapes, consider diagonal layouts for a modern effect.
Natural Light and Windows
The flow of the light in your room changes how vinyl plank flooring looks. When you align planks with the direction of incoming light, you boost brightness and highlight natural textures. Planks installed parallel to the main light source create a smooth reflection and make seams less visible.
- The direction of light from windows can enhance the visual appeal of your flooring.
- Positioning planks to follow the light makes the room feel more open and inviting.
- Morning and evening light can change the appearance of your floor, so think about how sunlight enters your space.
Note: Aligning planks with natural light helps you achieve a cohesive look and brings out the best colors and details in your flooring.
Entryways and Traffic Flow
Entryways and main traffic paths play a big role in which direction to install vinyl plank flooring. You want the flooring to guide movement and create a seamless transition between rooms. If you have multiple rooms, keep the plank direction consistent for visual harmony.
- Align flooring in adjacent rooms for a smooth flow.
- Follow the same direction as existing flooring in connected spaces.
- For stairs, install planks lengthwise to maintain a unified look.
A clean, flat, and dry subfloor helps prevent gaps and uneven wear in high-traffic areas. Use a moisture barrier if you install over concrete. Always follow manufacturer guidelines for expansion gaps.
Tip: Consistent plank direction across entryways and hallways makes your home feel more connected and professional.
Stairs and Transitions
You need to pay close attention to stairs and room transitions when you install vinyl plank flooring. These areas often connect different rooms and levels, so the direction of your planks can affect both appearance and durability. Here are some important points to consider:
- Use transitions to handle expansion and contraction. This is especially important in spaces with multiple doorways or bathrooms.
- Start your flooring installation at a doorway transition. This makes it easier to fit planks under door jambs and creates a cleaner look.
- Plan where joints will be located if you lay flooring through a doorway without a transition. Careful planning helps you avoid uneven seams and keeps the floor looking professional.
Tip: Transitions help your flooring last longer and look better. They also make it easier to move from one room to another without tripping or seeing gaps.
Architectural Features
Architectural features like fireplaces, columns, or large windows can guide your decision about plank direction. You should orient your vinyl plank flooring to highlight these elements. This approach draws attention to the most attractive parts of your room and creates a welcoming atmosphere. When you lay planks toward a fireplace or along a row of windows, you make the space feel more balanced. You also improve furniture arrangement and make the room easier to decorate.
Note: Flooring direction can help you showcase the best parts of your home. Think about which features you want to stand out and lay your planks to support that vision.
Personal Style and Preference
Your personal style matters when you choose the direction for vinyl plank flooring. You can use plank direction to set the mood and atmosphere in your room. There is no single correct way to lay the planks. The choice reflects your taste and what feels natural for your space. Here are some ways your style can influence the decision:
- The direction of the planks changes how the room feels. You can make a space feel cozy or open depending on your choice.
- You decide what looks best. The direction you pick shows your personality and design preferences.
- Choose a direction that fits the room and feels right to you. Trust your instincts and create a space you enjoy.
Block Quote: “The best flooring direction is the one that matches your vision for the room. Let your style lead the way.”
Expert Recommendations for Direction to Lay Vinyl Plank Flooring by Room Layout
Long, Narrow Rooms
You often see long, narrow rooms in homes and offices. Choosing which direction to install vinyl plank flooring in these spaces can change how the room feels. Flooring experts recommend installing planks lengthwise. This method stretches the room visually and makes it feel more connected. You avoid a choppy look that happens when planks run across the short side.
- Install planks parallel to the longest walls to enhance openness.
- Laying planks lengthwise increases the sense of space and flow.
- If you want a cozy atmosphere, align planks with the shorter walls.
- Light interacts with the flooring and can make the room look even larger.
Tip: Place a few planks on the floor before you start. Stand at the entrance and see how the direction affects the room’s appearance.
Open Concept Spaces
Open concept spaces combine living, dining, and kitchen areas. You need to plan the direction to lay vinyl plank flooring carefully to keep the space unified. Experts suggest keeping the plank direction consistent across the entire open area. This approach avoids a choppy look and helps the space feel seamless.
- Match plank directions across open rooms for a smooth transition.
- Use transition strips or T-mouldings at doorways if you change direction in closed rooms.
- Plan your layout in advance to avoid mismatched directions.
- Consistent plank direction in open floor plans prevents visual breaks.
You can also use plank orientation to define different zones. For example, switching between horizontal and vertical planks can separate the kitchen from the living room. The direction of the planks creates visual cues that help you identify each area. Installing planks perpendicular to an entrance can make a narrow space appear longer. A parallel arrangement can enhance the sense of width. If you want to achieve visual separation, consider changing the direction of the flooring in specific zones, even if you use the same material.
Block Quote: “The right plank direction in open concept spaces helps you create a unified look and define each area with style.”
Hallways and Corridors
Hallways and corridors connect rooms and guide movement through your home. You should run the flooring from the front door through to the back of the house. This direction makes the space appear larger and leads visitors naturally. Maintaining the same direction throughout interconnected rooms is important for a cohesive look.
- Run planks lengthwise along the hallway to enhance flow.
- Keep the direction consistent in connected rooms for harmony.
- This approach guides visitors and makes your home feel more spacious.
Note: When you decide which direction to install vinyl plank flooring in hallways, you create a welcoming path and improve the overall appearance of your home.
Small Rooms and Bathrooms
You can make small rooms and bathrooms feel bigger by choosing the right direction for your vinyl plank flooring. The way you lay the planks changes how people see the space. If you run planks parallel to the longest wall, you stretch the room visually. This trick works well in narrow bathrooms or compact bedrooms.
Here is a table that shows how plank direction affects the look of small spaces:
| Aspect | Effect on Perception of Space |
|---|---|
| Plank Direction | Aligning planks parallel to the longest wall elongates the room, making it feel larger. |
| Visual Flow | Consistent direction minimizes visual breaks, enhancing the sense of space. |
| Light Reflection | Planks aligned with the main light source improve brightness and highlight textures. |
You can also use these tips to get the best results:
- Run planks lengthwise in narrow bathrooms to make them feel less cramped.
- Long lines draw the eye, making the room seem longer or wider.
- Keep the same direction in connected spaces for a smooth look.
If you want to make a room look longer, lay the planks lengthwise. If you want to make it look wider, lay them horizontally. The installation direction of your flooring can create an optical illusion that makes the space feel larger than it is.
Tip: Place a few planks on the floor before you start. Stand back and see how the direction changes the room’s appearance.
Connecting Multiple Rooms
You can connect multiple rooms with vinyl plank flooring by keeping the direction consistent. This method creates a seamless flow from one space to another. When you lay planks parallel to the longest wall, you make each room feel bigger and more open.
Follow these best practices for connecting rooms:
- Lay planks in the same direction across all connected spaces to support natural movement.
- Align planks with the main light source to boost brightness and highlight the floor’s texture.
- Use transition strips if you need to change direction between rooms.
- Follow the natural pathways of foot traffic for a comfortable flow.
- Change direction only if you want to define different zones or room functions.
Keeping the same direction to lay vinyl plank flooring helps you achieve a unified look. You avoid visual breaks and make your home feel more spacious. If you want to highlight a special area, you can switch directions, but use transition strips for a smooth change.
Note: Consistent plank direction across rooms gives your home a professional and polished finish.
Visual Patterns and How You Lay Vinyl Plank Flooring
Creating the Illusion of Space
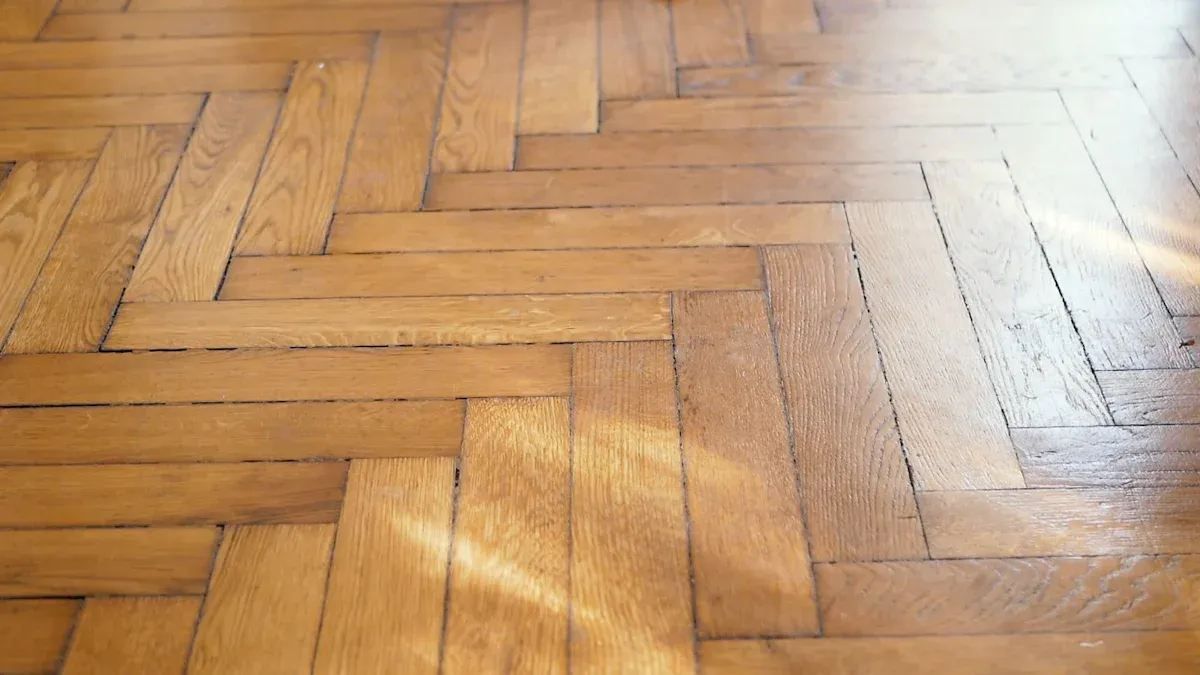
You can use vinyl plank flooring to change how a room feels. The direction of your planks affects the size and shape you see. When you lay planks parallel to the longest wall, you make the room look bigger. If you align planks with natural light, you boost brightness and make the space feel open. You can also choose a diagonal pattern to add movement and depth. This layout draws attention to corners and makes small rooms appear larger.
- Lay planks parallel to the longest wall to create the illusion of a larger room.
- Align planks with natural light sources to enhance brightness and visual appeal.
- Keep plank direction consistent across connected spaces for a seamless flow.
Tip: Diagonal patterns add drama and make any space feel more dynamic.
Highlighting Room Features
You can highlight special features in your room with the right plank direction. If you want to draw attention to a fireplace or a row of windows, lay planks toward these features. Planks perpendicular to the entrance stretch the room and reduce a cramped feeling. Aligning planks with the main light source creates a clean, modern look.
| Design Principle | Description |
|---|---|
| Maximizing Length and Width | Laying planks parallel to the longest wall creates unbroken lines that enhance the perception of depth. |
| The Vertical Stretch | Planks perpendicular to the entrance can create a stretching effect, reducing a cramped feeling. |
| Following the Light | Aligning planks with the main light source minimizes shadows and creates a cleaner, modern look. |
Note: Use plank direction to showcase architectural features and improve your room’s design.
Consistency Across Floors
You create a unified look by keeping plank direction consistent across multiple rooms or floors. This approach helps your home feel connected and spacious. When you align planks parallel to the longest wall, you make each area look larger. Positioning planks to follow natural light sources enhances brightness. Consistent direction across connected rooms fosters seamless transitions and a cohesive style.
- Room size perception improves with parallel plank alignment.
- Light distribution increases when planks follow natural light.
- Flow and cohesion grow with consistent plank direction.
Block Quote: “Consistency in plank direction brings harmony to your home and makes every space feel inviting.”
Step-by-Step Guide to Lay Vinyl Plank Flooring with skspcflooring
Assessing Your Room
You start by looking at your room’s shape, size, and features. Measure the length and width of the space. Check for obstacles like doorways, closets, or built-in furniture. Notice where the windows are and how light enters the room. Think about how people move through the space. You want to choose a direction that makes the room feel open and highlights its best features. If you see uneven spots on the floor, mark them for repair. Clean the area so you have a clear view of the surface.
Tip: Take your time to inspect every corner. A careful assessment helps you avoid problems later.
Mapping Out the Plank Layout
You need to plan your layout before you lay vinyl plank flooring. Place a few planks on the floor to see how they look. Avoid the ‘H’ pattern by staggering the seams. Keep at least six inches between joints in each row. Start the second row with an offcut from the first row. This creates a natural, seamless look. For wider planks, leave 8-10 inches between seams. Make sure the spacing matches the plank width. Careful mapping reduces waste and gives your floor a professional finish.
- Stagger planks to prevent a stepped appearance.
- Keep seams spaced out to avoid distinct shapes.
- Use offcuts to start new rows for proper staggering.
Note: Planning your layout helps you achieve a smooth, attractive floor.
Considering Practical Challenges
You may face some challenges during installation. Prepare the subfloor by vacuuming, patching, and sanding it until flat and dry. Let the planks acclimate in the room for at least 48 hours. Stack the boxes flat and open them slightly for air circulation. Check for moisture and use a barrier if needed. Always leave a ¼-inch gap around the perimeter for expansion. Use spacers to keep the gap consistent. These steps prevent soft spots, misalignment, mold, and buckling.
| Challenge | Solution |
|---|---|
| Uneven or dirty subfloor | Clean and level before installation |
| Skipping acclimation | Acclimate planks for 48 hours |
| Moisture issues | Use a moisture barrier and check humidity |
| No expansion gap | Leave a ¼-inch gap with spacers |
Block Quote: “Proper preparation and planning make your flooring project easier and help your floor last longer.”
Making the Final Decision
You have looked at your room, mapped out your layout, and thought about practical challenges. Now, you need to make the final choice on which direction to lay vinyl plank flooring. This decision shapes how your space looks and feels for years to come.
Start by reviewing the main criteria. The table below shows what you should consider:
| Criteria | Description |
|---|---|
| Room Shape | Align planks with longer walls to create an open feel. Think about room size for cozy or spacious effects. |
| Light Direction | Position planks to follow the flow of light. Notice how sunlight interacts with your flooring. |
| Structural Features | Design around stairs and features. Planks can focus attention on elements like fireplaces. |
Look at your room from the entrance. Imagine how the planks will guide your eyes. If you want a bigger feel, run the planks along the longest wall. If you want to highlight a fireplace or a row of windows, point the planks toward those features. Sunlight can change the look of your floor during the day. Try to match the plank direction with the main light source for a bright and welcoming space.
Ask yourself these questions:
- Does the direction make the room feel larger or more comfortable?
- Will the planks draw attention to special features?
- Does the layout match the way people move through the space?
Tip: Place a few planks on the floor in different directions. Stand back and see which way looks best to you.
Trust your instincts. You know your space better than anyone. When you lay vinyl plank flooring, your final decision should fit your style and the needs of your home. Once you choose, you can move forward with confidence and enjoy your new floor for years.
Quick Tips and Mistakes to Avoid When You Lay Vinyl Plank Flooring
Common Installation Errors
You want your vinyl plank flooring to last and look great. Avoiding common mistakes helps you achieve the best results. Here are some errors you should watch out for:
- Forgetting to leave expansion gaps can cause your planks to buckle or warp. Always leave about a 1/4 inch gap along the edges.
- Placing planks too close to walls or fixtures can press them together. This pressure may lead to damage as the floor expands and contracts.
- Skipping the expansion space at transitions can create tight spots. These spots may cause the flooring to lift or separate over time.
Tip: Use spacers during installation to keep your expansion gaps even and consistent.
Tips for Seamless Transitions
You can make your flooring flow smoothly from room to room with a few smart choices. Seamless transitions help your home feel connected and stylish.
- Choose complementary colors for each space. This creates a natural flow between rooms.
- Use transition strips when you change flooring types or heights. These strips help manage uneven surfaces and prevent tripping.
- Plan your layout before you start. Careful planning ensures that planks line up and transitions look neat.
- Try T-molding or flush transitions for hard floors. These options keep the look clean and modern.
- Consider a border or patterned blend for a unique touch. This adds a luxurious feel to your space.
Note: A well-planned transition not only looks good but also protects your flooring from wear.
When to Consult a Professional
Sometimes, you may need expert help to get the best results. Here are situations where calling a professional makes sense:
- You notice subfloor problems like moisture or structural damage.
- Your room has a complex layout with many angles or unusual shapes.
- The project covers a large area and feels overwhelming.
- You see gaps, lifting, or damage after installation.
- Water damage occurs from leaks or floods.
Block Quote: “A professional can solve tough problems and make sure your flooring stays beautiful and strong.”
You can make your space look bigger and brighter by installing vinyl plank flooring parallel to the longest wall. You should check room shape, light, and features before you start. Experts recommend planning your layout and avoiding common mistakes.
- Choose the direction that fits your style and needs.
- Trust your eye and test plank placement.
Ready to upgrade your floors? Visit skspcflooring for quality products and expert support.
FAQ
What is the best direction to install vinyl plank flooring?
You should lay vinyl plank flooring parallel to the longest wall. This direction makes your room look bigger and more open. It also helps natural light flow across the floor.
Can I change the direction of planks between rooms?
You can change the direction if you want to define different spaces. Use a transition strip where the direction changes. This keeps your flooring looking neat and professional.
Do I need to leave a gap around the edges?
Yes, you need to leave a 1/4-inch gap around all edges. This gap lets the flooring expand and contract. Use spacers during installation to keep the gap even.
How do I handle flooring around doorways?
You should plan your layout before you start. Cut planks to fit under door jambs. Use transition strips if the flooring changes direction or type at the doorway.




