
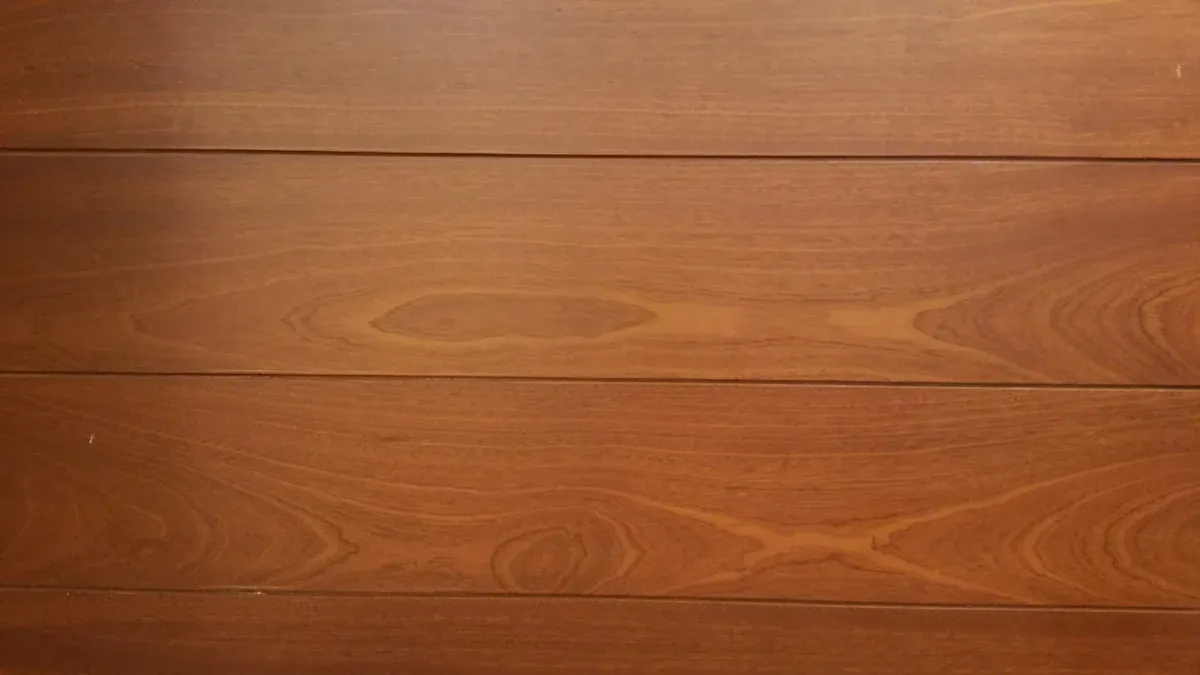
You made a great choice with a wpc floor. This flooring type is very popular. Experts predict its market will grow by 6-10% annually over the next decade. Success in your project starts with good preparation. You must gather the right tools and materials first. This simple step ensures your installation goes smoothly from the very beginning.
Your Tool & Material Checklist 🛠️
| Category | Items |
|---|---|
| Tools | Tape measure, pencil, utility knife, safety glasses, gloves, tapping block, pull bar, rubber mallet, and a miter or circular saw. |
| Materials | WPC flooring planks, quarter round molding, transition strips, and optional underlayment (if not pre-attached). |
Step 1: Subfloor Preparation
A great floor starts with a great foundation. Taking the time to properly prepare your subfloor is the most critical step for a professional-looking, long-lasting WPC installation. A clean, flat, and dry subfloor prevents future problems like squeaks, gaps, or buckling.
Clear and Clean the Area
First, you need to completely empty the room. Remove all furniture, rugs, and decorations. Next, take out the old flooring. This might mean pulling up carpet, prying up old tile, or removing existing vinyl. Once the old flooring is gone, sweep and vacuum the subfloor thoroughly. You want to get rid of all dust, dirt, and debris. A clean surface ensures your new planks will lay flat and connect properly.
Check for a Level Surface
Your subfloor must be very flat for WPC flooring to lock together correctly. An uneven surface can cause the planks to separate or break over time. To check for flatness, you will need a long, straight edge, like a 6-foot or 10-foot level.
- Lay the straightedge across different parts of the floor.
- Look for any gaps between the straightedge and the floor.
- The floor should not have any dips or bumps greater than 1/8 inch over a 6-foot span.
- It also must be flat to within 3/16 inch over a 10-foot span.
Mark any high or low spots you find with a pencil. This will help you identify the areas that need fixing.
Address Subfloor Imperfections
Now you can fix the uneven spots you marked. You can grind down any high spots using a concrete grinder. For any low spots or dips, you will need to use a cement-based leveling compound.
Pro Tip: If you are working with a concrete subfloor, it is a good idea to apply a moisture barrier before using any leveling compound. This protects your new floor from any dampness coming up through the concrete.
To apply the leveling compound:
- Make sure the concrete is clean and free of any grease or old adhesive.
- Mix the self-leveling compound with water according to the package directions. You want it to have a consistency like thick pancake batter.
- Pour the compound onto the low spots and use a trowel to spread it evenly. The compound will fill the dips and create a smooth, level surface as it dries.
Ensure the Subfloor is Dry
Moisture is the biggest enemy of any new floor. WPC flooring is waterproof, but moisture trapped underneath can cause mold and mildew. You must test your subfloor to make sure it is completely dry before you begin. The acceptable moisture levels depend on your subfloor type.
- Wood Subfloors: The moisture content should stay between 6% and 10%. You can check this using a wood moisture meter.
- Concrete Subfloors: You can use a calcium chloride test. The moisture level should not exceed 3 lbs. If you have a radiant heat system, the maximum is 1.5 lbs.
Another common test for concrete slabs measures relative humidity. The reading should not be higher than 90% relative humidity. If your concrete subfloor has high moisture readings, you must install a 6-mil polyethylene film as a moisture barrier. This step is crucial for protecting your investment.
Remove Baseboards and Trim
You need to create space for your new flooring to expand and contract with temperature changes. This requires removing the baseboards and any door casing trim that touches the floor.
Quick Tip: Use a utility knife to score the caulk line where the top of the baseboard meets the wall. This prevents the paint from peeling off the wall when you pry the trim away.
To remove the trim, gently insert a pry bar between the baseboard and the wall. Place a small piece of scrap wood behind the pry bar to protect your wall from damage. Work your way down the length of the baseboard, prying it away slowly. Number the back of each piece of trim and the corresponding wall area with a pencil. This simple trick makes reinstallation much easier later.
Step 2: Essential Pre-Installation Checks
You have prepared the subfloor perfectly. Now, you must complete a few final checks before laying the first plank. These pre-installation steps ensure your new wpc floor performs beautifully for years. Skipping them can lead to problems later.
Acclimate Your WPC Planks
Your new flooring planks need time to adjust to your home’s environment. This process is called acclimation. It helps prevent the planks from expanding or shrinking after installation. WPC vinyl flooring is very stable, so it usually needs only 1 to 2 days to acclimate.
Important Note: Always read the manufacturer’s instructions for your specific product. Some brands may have different requirements. When in doubt, letting the planks acclimate for a longer period is always a safe bet.
To acclimate the flooring, open the boxes in the room where you will install them. Stack the boxes flat, leaving space between them for air to circulate. Do not stack them against a wall or in direct sunlight.
Inspect Every Plank for Defects
Before you install a plank, you should inspect it carefully. Check each one for any damage that may have happened during shipping.
- Look for chips, cracks, or scratches on the surface.
- Check the tongue and groove locking system on the edges.
- Make sure the color and pattern match your expectations.
Set aside any planks with visible defects. You can often use these for cuts at the end of a row or in a closet where the damage will not be noticeable. Most manufacturers will not cover visible defects under warranty once the plank is installed.
Confirm Job Site Conditions
The temperature and humidity in the room can affect your installation. You must make sure the room’s climate is stable and within the recommended range. For best results, the room temperature should be between 68°F and 77°F (20°C – 25°C). The humidity level should stay between 35% and 55%. You should maintain these normal living conditions for at least 48 hours before and during the entire installation process.
Step 3: Planning Your Layout
A good plan is your roadmap to a professional-looking floor. You should take a few minutes to map out your installation. This planning prevents common mistakes, like ending up with a very thin plank against the final wall. Proper layout ensures a balanced and beautiful result.
Decide Your Plank Direction
You need to choose the direction your planks will run. This choice can make a room feel larger or wider. Here are two popular options:
- Lay the planks parallel to the longest wall in the room. This is the most common method and usually looks the best.
- Run the planks toward the room’s main light source, like a large window or glass door. This can highlight the flooring’s texture.
There is no single right answer. You can lay a few loose planks on the floor in each direction. This helps you see which look you prefer before you commit.
Measure for the First and Last Rows
You want to avoid having a very narrow strip as your last row. To prevent this, you should measure the width of the room. Divide that number by the width of one plank. If the final row will be less than half the width of a plank, you should cut your first row narrower. This makes the first and last rows a similar, balanced width.
Example Calculation: If your room is 120 inches wide and your planks are 7 inches wide, you get 17.14 rows. That last row would be very skinny. Instead, you can make the first and last rows each about 4 inches wide for a more balanced look.
Plan for Expansion Gaps
Your WPC floor needs space to expand and contract with changes in temperature and humidity. This space is called an expansion gap. You must leave this gap around the entire perimeter of the room.
- For rooms under 20 feet long, you need a 1/4 inch (6.35 mm) gap.
- For rooms over 20 feet, you should add 1/16 inch (1.59 mm) for every extra 5 feet.
- You must leave a 1/2 inch (12.7 mm) gap around walls, tubs, plumbing, and large appliances.
This gap will be hidden later by your baseboards and trim, so you will not see it.
Map Out Your Stagger Pattern
You should not line up the seams of your planks. This creates a weak and unnatural-looking floor. Staggering the end joints gives your floor strength and a professional, random appearance. A good stagger pattern helps distribute weight evenly across the floor.
The goal is to make the end joints of your planks appear random. You can achieve this by following a few simple rules for spacing. The distance between the end joints in adjacent rows is key.
- Your planks that are 2–3 inches wide need end joints at least six inches apart.
- Your planks wider than 3 inches should have end joints spaced 8–10 inches apart.
Watch Out for Bad Patterns! ⚠️ You must avoid creating undesirable patterns. H-joints, where the seams of two rows line up with the seam in the middle of a plank between them, weaken the floor. A step pattern creates a predictable, stair-like look that defeats the purpose of a random stagger. Both of these can increase the risk of your planks becoming loose over time.
A great way to create a random stagger is to use the piece you cut from the end of a row to start the next row. Just make sure this leftover piece is long enough to meet the minimum stagger distance (6-10 inches). This method reduces waste and naturally creates a beautiful, varied pattern. Before you start locking planks, lay out the first three rows dry to see how your pattern looks.
Step 4: How to Install Your WPC Floor
You have done the hard work of preparation and planning. Now comes the exciting part: bringing your new floor to life. This section provides a step-by-step installation guide to help you lay your planks like a professional. Following these installation methods carefully will ensure your beautiful new wpc floor is secure and stable.
Laying the First Row
The first row is the foundation for your entire floor. A straight and secure first row makes the rest of the job much easier. You will typically start along the longest exterior wall, as it is usually the straightest reference point in the room.
Quick Prep: If your first row does not need to be cut for width, you must still prepare the planks. Use a utility knife or saw to carefully cut the small tongue off the long side of the planks that will face the wall. This creates a clean, solid edge against your spacers.
Follow these steps to lay your first row perfectly:
- Begin in the left corner of the room. Place spacers between the short and long sides of the first plank and the walls. This maintains your required 1/4-inch expansion gap.
- Lay the plank with its trimmed edge facing the wall.
- Take your second plank. Align its short-end tongue over the first plank’s short-end groove.
- Apply light pressure to lock the two planks together. You can gently tap the end joint with a rubber mallet and tapping block to ensure it is flush and tight.
- Continue this process, connecting planks end-to-end until you reach the end of the wall. You will need to cut the last plank to fit.
Cutting Planks for a Perfect Fit
You will need to make two types of cuts during your installation: crosscuts and rip cuts. Crosscuts go across the plank’s width, while rip cuts go along its length. A clean cut is essential for a professional finish.
For the best results, use a miter saw for crosscuts at the end of a row. When choosing a blade, match it to the plank’s core material. WPC flooring often has a plastic composite core, so a fine-toothed blade designed for plastics or aluminum will give you the cleanest cut. For a quiet and dust-free option, you can also use a guillotine-style plank cutter.
To measure and cut a plank for the end of a row:
- Place the plank you need to cut next to the last full plank you installed.
- Flip it over so the tongue is facing the correct direction and slide it until it touches the wall spacer.
- Use a pencil to mark where the previous plank ends. This mark shows you where to cut.
- Draw a straight line across the plank at your mark.
- Make your cut with the miter saw.
Pro Tip: Always cut just to the outside of your marked line. This technique removes the line itself and accounts for the saw blade’s thickness. You can always trim a tiny bit more off if needed, but you can never add material back to a plank that was cut too short.
Connecting Subsequent Rows
With the first row complete, the rest of the installation will move quickly. You can often use the leftover piece from the last plank of the first row to start your second row. Just make sure the piece is at least 6-8 inches long to maintain a strong stagger pattern.
The key to connecting rows is using the correct angle. These installation guidelines will help you lock the planks without damaging them.
- Take your first plank for the new row. Hold it at a 20° to 30° angle.
- Insert its long-side tongue into the groove of the plank in the previous row.
- Gently lower the plank to the floor. It should click into place.
- Take the next plank. First, connect its long side to the previous row at an angle. Before you lower it, slide it close to the previous plank in the same row.
- Lower the plank and use a tapping block and mallet to gently tap the short-end joint closed. You should feel and hear it lock.
Watch Out! Avoid Damaging the Locks ⚠️ Never force a plank into place. If it does not lock easily, pull it out and check the tongue and groove for any debris. Forcing the connection can break the locking mechanism and create a weak spot in your floor. Always use a tapping block to protect the edges of the planks when using a mallet.
Tapping Planks into Place
Properly seating your planks ensures a tight, gap-free finish. You will use a tapping block and rubber mallet for this task. However, you must use the correct technique to avoid damaging the planks.
- Place the tapping block against the edge of the plank you are installing.
- Gently tap the block with your rubber mallet until the plank locks securely with the adjacent one.
- You should not use too much force. Excessive force can break the locking profile.
- Never strike the plank directly with the mallet. This can leave a “burn” mark on the finish that you cannot repair.
- You should also never hit the locking profile itself, as this will cause damage.
Remember: A light, firm tap is all you need. The goal is to close the gap, not to force the connection. If a plank resists, check the locking mechanism for debris before trying again.
Working Around Doorways and Vents
You will almost certainly encounter obstacles like door frames, vents, or pipes. Cutting your planks to fit around these areas is a key skill for a professional result. Undercutting door casings allows you to slide the plank underneath for a clean, seamless look.
You can use several tools for this, but an oscillating multi-tool is often the preferred choice for its control and clean cut.
- Take a scrap piece of your flooring and lay it on the subfloor next to the door casing. This acts as a height guide.
- Rest your saw blade flat on top of the scrap plank.
- Carefully score the door casing with the tool to prevent the wood from splintering.
- Plunge the saw into the scored line and cut straight across the casing. This creates a space for your new wpc floor to slide into.
- After cutting, test the fit. Slide a piece of flooring under the casing to make sure it moves freely without pinching.
For floor vents, you will measure and mark the vent’s location on a plank. You can then use a jigsaw to cut out the opening. Always cut slightly larger than your measurements to allow for the expansion gap. The vent cover will hide the cut edges.
Installing the Final Row
You have almost reached the finish line. Installing the final row requires some patience, as the limited space near the wall makes it tricky. You will need a pull bar for this step.
First, you will likely need to cut the last row of planks lengthwise (a rip cut). Measure the distance from the last installed row to the wall. Remember to subtract your 1/4-inch expansion gap from this measurement. Mark this width on your planks and cut them with a circular saw or jigsaw.
Patience is Key: This final row can be challenging. Take your time, as the board will eventually lock into place with persistent effort.
To lock the final plank:
- Position the cut plank.
- Hook the pull bar over the far edge of the plank.
- Gently tap the other end of the pull bar with your mallet. This will pull the plank toward you and lock it into the previous row.
- Continue this process until the entire last row is installed and secure.
Step 5: Adding the Finishing Touches

Your new floor is installed, but the job is not quite done. These final steps will hide the expansion gaps and give your room a clean, professional look. Finishing touches are what separate a good DIY job from a great one.
Reinstall Baseboards and Trim
You can now put your baseboards and door trim back in place. This step covers the expansion gap you left around the room’s perimeter.
- Find the numbered pieces of trim you removed earlier.
- Match each piece to its corresponding number on the wall.
- Place the baseboard against the wall. It should rest on top of the new flooring.
- Use a brad nailer or a hammer and finish nails to secure the baseboard to the wall studs.
- You should never nail the baseboard into the floor. This allows the floor to move freely underneath.
Install Quarter Round Molding
Sometimes, a small gap may still be visible between the baseboard and the new floor. Quarter round molding is the perfect solution to hide it. This small, curved trim creates a seamless transition.
Pro Tip: 💡 Paint or stain your quarter round molding before you install it. This saves you from the difficult task of painting a thin line next to your brand-new floor.
To install quarter round, you will cut the pieces to fit along the baseboards. You need to make 45-degree miter cuts at the corners for a tight fit. Then, nail the quarter round directly into the baseboard, not into the WPC flooring.
Place Transition Strips
Transition strips create a safe and attractive bridge between your new WPC floor and other flooring surfaces. You will use them in doorways or where your new floor meets carpet, tile, or a different type of vinyl.
- T-Molding: You use this strip to connect two floors of the same height.
- Reducer: This strip connects your WPC floor to a lower floor, like sheet vinyl.
- End Cap: You use this to finish the flooring edge against a sliding door or fireplace.
Most transition strips come with a metal track. You screw the track to the subfloor and then snap the transition strip into place. Always follow the specific instructions included with your transition pieces.
Final Cleanup and Inspection
You have completed the installation. Now it is time for the final, rewarding step. A thorough cleanup and inspection will make your new floor shine and ensure everything is perfect. This last part protects your hard work.
First, you need to clean the entire area.
- Remove all your tools, leftover planks, and installation debris from the room.
- Sweep the new floor carefully with a soft-bristle broom to pick up any large particles.
- Follow up with a vacuum. Use a hard floor setting or a vacuum without a beater bar to avoid scratching the surface.
- Finally, you can give the floor its first mopping. Use a pH-neutral cleaner designed for vinyl flooring. Mix it with water according to the product’s directions. You should never use harsh chemicals, wax, or steam mops on your WPC floor.
After cleaning, you can perform your final inspection. Walk around the room and look closely at your work. You want to check for a few key things.
- Make sure there are no visible gaps between any of the planks.
- Press down on various planks to feel for any movement or looseness.
- Check that all your baseboards and transition strips are secure.
- Look for any scuffs or marks that may have happened during installation. You can often remove these with a soft cloth.
Protect Your New Floor! ✨ You can now move your furniture back into the room. You must place felt pads on the bottom of all furniture legs. This simple action prevents scratches and keeps your beautiful new floor looking its best for years to come.
Congratulations on your beautiful new floor! You successfully completed a major home improvement project. 🎉
Your success came from following a few key steps.
- You prepared a clean, flat, and dry subfloor.
- You acclimated the planks to your home’s environment.
- You left the correct expansion gaps for a stable floor.
You can keep your new wpc floor looking great for years. Proper care helps it last 15 to 25 years. For cleaning, use a pH-neutral cleaner. You can also make a simple solution with warm water, a little white vinegar, and a drop of mild dish soap.
FAQ
Can I install WPC over my existing floor?
You can often install WPC over existing hard surfaces. The old floor must be clean, flat, and well-secured. You should not install it over soft floors like carpet. Always check the manufacturer’s guidelines for your specific product to be sure.
Do I really need an expansion gap?
Yes, the expansion gap is essential. Your floor needs room to expand and contract with temperature changes. Skipping this step can cause your floor to buckle or separate over time. The gap will be hidden by your baseboards and trim.
Is WPC flooring truly waterproof? 💧
The planks themselves are 100% waterproof. This means spills on the surface will not damage them. However, your subfloor is not waterproof. You must clean up spills quickly to prevent water from seeping through the seams and causing mold underneath.
Can I use a steam mop on my new floor?
You should never use a steam mop on WPC flooring. The high heat and moisture can damage the wear layer and the locking system. This could also void your warranty. Stick to a damp mop and a pH-neutral cleaner for safe cleaning.




