
Choosing the best cutting tool for vinyl plank flooring helps you work faster and get clean results. You want the best tools to cut vinyl plank flooring so your project looks professional. Many DIYers make mistakes when they cut vinyl plank flooring, such as skipping underlayment, not planning the layout, or using the wrong tools. Common mistakes include:
- Not prepping the subfloor
- Skipping the underlayment
- Not planning the layout
- Using the wrong tools
You can avoid these problems and keep your cool.
How to Choose the Best Cutting Tool for Vinyl Plank Flooring
Selecting the best cutting tool for vinyl plank flooring helps you work smarter and finish your diy installation project with confidence. You want to match your tool to your project, your skill level, and your budget. Let’s break down what you need to consider before you start installing vinyl plank flooring.
Project Size and Scope
You need to think about how big your project is and what kind of cuts you will make. If you plan to cover a large area, you want a tool that works quickly and gives you clean results. For small rooms or simple layouts, you can use basic tools. If you need to make detailed cuts or work around door jambs, you need a tool that handles curves and tight spaces.
Here’s a table to help you choose the right cutting tool for different flooring types and tasks:
| Flooring Type | Recommended Cutting Tool |
|---|---|
| Laminate/Vinyl | Laminate cutter or miter saw |
| Hardwood | Circular saw or table saw |
| Detailed Cuts | Jigsaw or coping saw |
| Undercutting Jambs | Jamb saw or oscillating multi-tool |
Tip: For most vinyl plank flooring projects, a laminate cutter or miter saw gives you fast, straight cuts. If you need to cut curves or shapes, use a jigsaw.
The thickness and brand of your vinyl plank flooring also matter. Some planks are tougher and need special blades. Here are some things to keep in mind:
- Hand cutting works for thin planks, but you might make mistakes. A flooring cutter helps you cut faster and more accurately.
- Jigsaw blades work for most WPC planks. For SPC planks, use blades made for tough materials.
- Specialty flooring cutters handle many types of vinyl and give you precise cuts with less risk of damage.
Skill Level and Experience
Your experience with tools affects your choice. If you are new to flooring, you want a simple tool that is easy to use. If you have done flooring before, you can use advanced tools for better speed and accuracy.
Check this table to see which cutting tool fits your skill level:
| Tool Type | Recommended For | Key Features |
|---|---|---|
| Utility Knife | Beginners | Simple, low cost, requires a sharp blade for clean scoring, ideal for small projects. |
| Vinyl Plank Cutter | Experienced DIYers | Offers cleaner, faster cuts, safe, dust-free, and efficient for repetitive straight cuts. |
| Oscillating Multi-Tool | Experienced DIYers | Best for detailed cuts and trimming, requires specific blades for wood and plastics. |
| Jigsaw | Experienced DIYers | Essential for curves and intricate shapes, fine-toothed blade minimizes chipping. |
| Circular Saw | Experienced DIYers | Efficient for large projects, ensures quick and accurate straight cuts, requires safety precautions. |
Note: If you are a beginner, start with a utility knife for small jobs. If you have more experience, try a vinyl plank cutter or a jigsaw for better results.
Budget Considerations
You want to pick a cutting tool that fits your budget. Some tools cost more but save you time and effort. Others are affordable and work well for small projects. Prices can range from under $20 for a utility knife to over $800 for a professional flooring cutter.
Here is a chart that shows the price range for popular cutting tools:
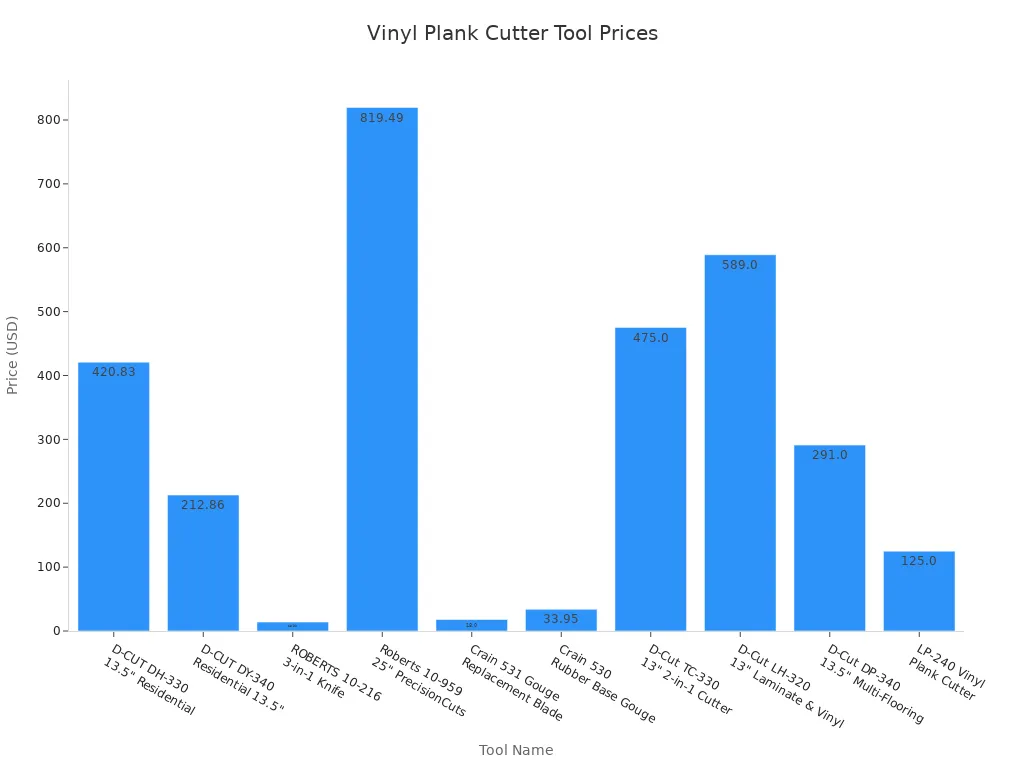
If you want to save money, choose a utility knife or a basic cutter. If you plan to do many projects or want the best cutting tool for vinyl plank flooring, invest in a specialty cutter. Always check the price and features before you buy.
Tip: Spending a little more on a good cutting tool can make installing vinyl plank flooring easier and help you avoid mistakes.
Utility Knife: Simple Way to Cut Vinyl Plank Flooring
How It Works
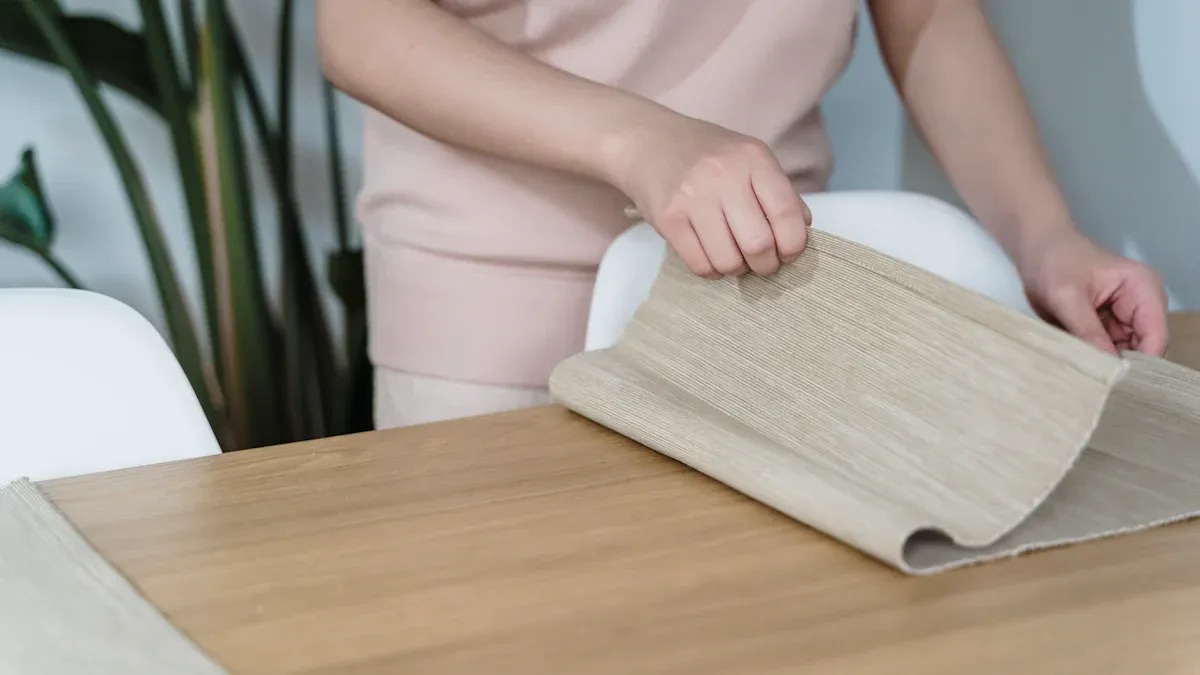
You can use a utility knife as a simple cutting tool for vinyl plank flooring. Start by marking the spot where you want to cut. Place a straight edge along the line. Score the plank several times with the knife, following the straight edge. Make sure you do not press too hard at first. The goal is to create a deep groove. Move the plank so the scored line sits at the edge of a table. Hold the plank steady and push down on the part hanging over the edge. The plank will snap cleanly along the scored line. This score and snap method helps you get a straight edge that fits well with other planks.
Tip: Always use a sharp blade. Dull blades can make rough cuts and damage the plank.
Pros and Cons
Using a utility knife for cutting vinyl planks has benefits and drawbacks. You do not need expensive equipment. The knife is easy to handle and works well for straight cuts. You can use it in tight spaces where larger tools do not fit. However, you may face some problems. Dull blades can cause poor cuts. It can be hard to keep the cut straight if the plank moves. Sometimes, you may not score deep enough, making it tough to snap the plank.
| Issue Description | Recommendation |
|---|---|
| Blade dullness leading to poor cuts | Replace the blade to ensure clean cuts and minimize material loss. |
| Difficulty in maintaining straight cuts | Use carpentry clamps to stabilize the material and tools for better accuracy. |
| Insufficient cut depth making it hard to break pieces | Apply more pressure while cutting, but avoid over-cutting to prevent further issues. |
Best-Use Scenarios
You should use a utility knife for small rooms or simple layouts. The knife works best when you need straight cuts and do not have many planks to cut. If you want to save money or work in a tight space, this tool is a good choice. You can also use it for quick fixes or trimming edges. For large projects or thick planks, you may want to try another cutting tool.
Vinyl Plank Cutter: Fast and Clean Cuts for Vinyl Flooring
How It Works
You use a vinyl plank cutter by placing the plank on the cutter’s base. Line up the spot where you want to cut. Pull down the handle to slice through the plank. The blade moves straight down and creates a clean edge. You do not need electricity or special skills. The cutter works quickly and does not make dust. You can repeat this process for each plank. Many people find this tool easy to use for cutting vinyl planks.
Tip: Always check that the plank sits flat on the base before you cut. This helps you get a straight edge every time.
Pros and Cons
Vinyl plank cutters offer several advantages. You get fast, straight cuts with little effort. The tool does not create dust, so you keep your workspace clean. You do not need to worry about noise or safety risks from power tools. Professional installers often rate the cleanliness of cuts from vinyl plank cutters higher than cuts from saws or knives. You save time and avoid rough edges.
However, you may notice some drawbacks. Vinyl plank cutters work best for straight cuts. You cannot use them for curves or detailed shapes. The tool can cost more than a utility knife. Some cutters may not handle very thick planks.
| Pros | Cons |
|---|---|
| Fast, clean cuts | Not for curved cuts |
| No dust or noise | Higher cost than knives |
| Safe and easy to use | May not cut thick planks |
Best-Use Scenarios
You should use a vinyl plank cutter for medium to large rooms. The tool works well when you need to make many straight cuts. If you want to finish your vinyl plank flooring project quickly and keep your area clean, this cutting tool is a smart choice. You can use it for living rooms, hallways, or offices. If you need to cut around corners or pipes, you may need another tool for those shapes.
Note: If you plan to install a lot of flooring, investing in a vinyl plank cutter can save you time and help you get professional results.
Oscillating Multi-Tool: Versatile Cutting for Vinyl Plank Flooring
How It Works
You can use an oscillating multi-tool as a flexible cutting tool for many flooring tasks. The tool has a blade that moves back and forth very quickly. You attach the right blade for your job, then guide the tool along the area you want to cut. The rapid motion helps you make precise cuts. You hold the tool steady and let the blade do the work. You can trim planks, cut shapes, or make small adjustments. The multi-tool works well in tight spaces, such as near walls or around pipes.
Tip: Always choose a blade designed for vinyl or wood. This helps you get smoother cuts and protects your tool.
Pros and Cons
You get many benefits when you use an oscillating multi-tool for cutting. The tool gives you control and accuracy. You can make detailed cuts and trim planks to fit around obstacles. The multi-tool works for many tasks, not just straight cuts. You can use it for notches, curves, and even undercutting door jambs. The blade moves quickly, so you finish jobs faster.
However, you may notice some drawbacks. The tool can make noise and create dust. You need to buy special blades for different materials. The multi-tool may cost more than basic tools. You must use care to avoid rough edges or mistakes.
| Pros | Cons |
|---|---|
| Precise for intricate cuts | Can be noisy |
| Versatile for many tasks | Creates dust |
| Works in tight spaces | Needs special blades |
Best-Use Scenarios
You should use an oscillating multi-tool when you work with complex layouts. The tool helps you cut vinyl plank flooring around corners, pipes, or door frames. You get clean results when you need to trim planks or make small adjustments. The multi-tool works best for jobs that need precision and flexibility. You can use it for repairs, detailed cuts, or finishing touches.
- Precision for intricate cuts and trimming around obstacles
- Versatility for various cutting tasks, especially in complex layouts
- Rapid back-and-forth blade motion enhances cutting accuracy
Note: If you want a cutting tool that handles many jobs and helps you work in tight spaces, the oscillating multi-tool is a smart choice.
Jigsaw: Making Curved and Detailed Cuts in Vinyl Plank Flooring
How It Works
You can use a jigsaw when you need to make curved or detailed cuts in vinyl plank flooring. First, choose a fine-toothed blade designed for plastics. This blade helps you avoid chipping and gives you a smooth edge. Mark the shape or curve you want to cut on the plank. Clamp the plank to a workbench to keep it steady. Hold the jigsaw with a light touch and guide it slowly along your line. If you use a jigsaw guide, you get even more control. The jigsaw moves up and down quickly, letting you follow curves, angles, or intricate shapes with ease.
- A jigsaw is essential for:
- Curves around pipes or corners
- Angled cuts for tricky layouts
- Intricate shapes for custom designs
Tip: Always keep your hands away from the blade and wear safety glasses to protect your eyes from flying chips.
Pros and Cons
A jigsaw gives you flexibility and precision. You can cut shapes that other tools cannot handle. You work faster on detailed tasks and get clean results. The jigsaw works well as a cutting tool for both small and large projects. You can use it for repairs or new installations.
However, you need to watch out for safety. The biggest risk comes from kickback when the blade grabs the plank. If the plank is light, the blade can throw the piece back at you. You should wear gloves and keep your workspace clear. Replace blades often to avoid slipping or tearing.
| Pros | Cons |
|---|---|
| Cuts curves and shapes | Kickback risk |
| Works on detailed projects | Can create rough edges |
| Fast for intricate cuts | Needs steady hand and control |
Always work on a stable, flat surface. Keep kids and pets away from your workspace.
Best-Use Scenarios
You should use a jigsaw when you need to cut vinyl plank flooring around obstacles. The jigsaw works best for:
- Making curved cuts near pipes or corners
- Creating custom shapes for unique layouts
- Trimming planks for detailed repairs
You get the most benefit from a jigsaw when your project has lots of angles or curves. If you want a cutting tool that handles tricky shapes, the jigsaw is your best choice.
Circular Saw: Quick Cuts for Large Vinyl Plank Flooring Projects
How It Works
A circular saw uses a fast-spinning blade to slice through planks in a straight line. You place the plank on a stable surface and mark your cut line. Hold the saw firmly and guide it along the mark. The blade moves quickly, so you finish each cut in seconds. You can cut several planks in a row, which saves time. This method works well when you need to cover a big area with new flooring.
Using a circular saw for large vinyl plank flooring projects allows you to make rapid and precise straight cuts across several planks at once. This speed is important when you want to finish a big room quickly. Manual tools take longer and require more effort, so they are not as good for large jobs.
Tip: Always wear safety glasses and keep your hands away from the blade while cutting.
Pros and Cons
A circular saw gives you speed and power. You can cut many planks in a short time. The saw makes straight cuts that look clean and professional. You do not need to use much force, so you feel less tired after working.
However, a circular saw can be loud and create dust. You need to use the right blade to avoid rough edges. The saw is heavier than other tools, so you must keep a steady hand. If you do not have experience, practice on scrap pieces first.
| Pros | Cons |
|---|---|
| Fast for large projects | Can be noisy |
| Clean, straight cuts | Makes dust |
| Cuts multiple planks quickly | Needs correct blade |
Best-Use Scenarios
You should use a circular saw when you have a big room or a whole house to floor. This cutting tool works best for long, straight cuts and when you need to finish quickly. If you want the cleanest results, choose the right blade for your saw:
- For clean cuts in vinyl plank flooring, use a fine-toothed blade.
- A utility knife works for straight cuts, but a circular saw is faster for big jobs.
- For angled or tricky cuts, a miter saw with a carbide-tipped blade helps prevent chipping.
- Do not use blades made for wood or metal, as they can leave rough edges or melt the material.
A circular saw is not the best choice for small rooms or detailed shapes. For those jobs, pick a different cutting tool.
Miter Saw: Precise Cross Cuts for Vinyl Plank Flooring
How It Works
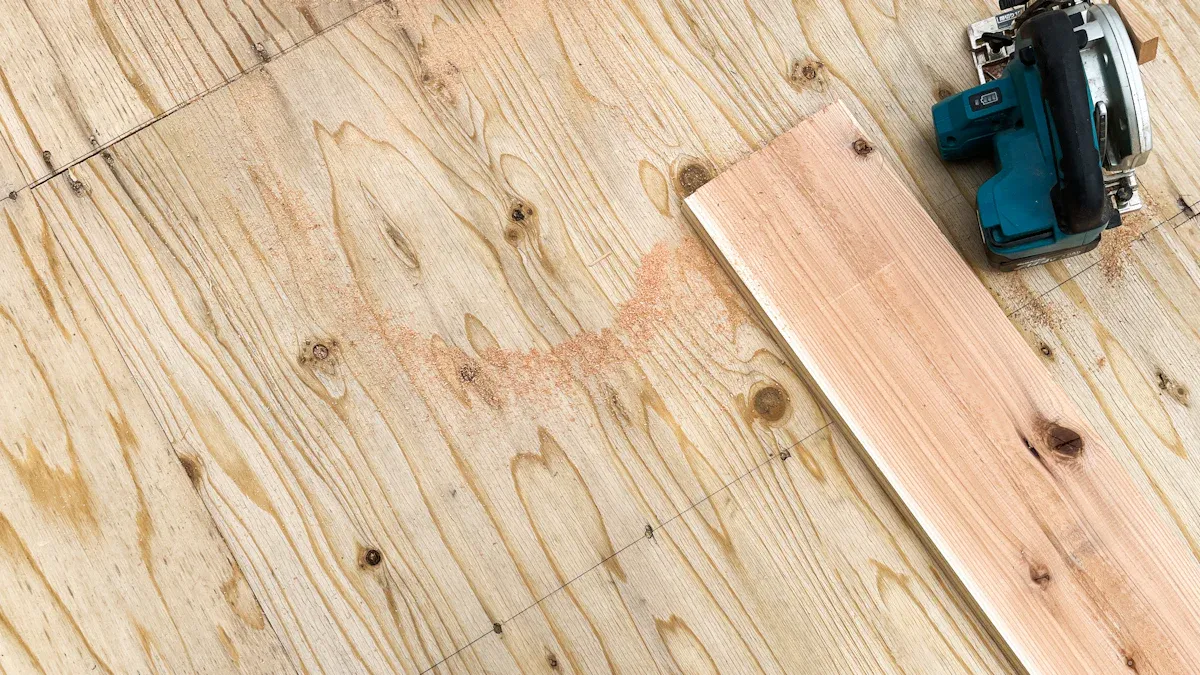
You use a miter saw to make straight and angled cuts in vinyl plank flooring. Place the plank on the saw’s base and line up your mark with the blade. Hold the plank steady and lower the blade through the material. The saw moves quickly and creates a clean edge. You can adjust the angle of the blade to make precise cross cuts or mitered edges. This method works well when you need accuracy and speed.
Tip: Always measure twice before you cut. This helps you avoid mistakes and wasted planks.
Pros and Cons
A miter saw gives you several advantages. You get clean, straight cuts every time. The saw works fast and saves you effort. You can set the blade to different angles for special cuts. The saw keeps your workspace tidy because it creates less dust than other power tools.
However, you need to watch out for a few drawbacks. The saw is heavy and takes up space. You must use the right blade for vinyl plank flooring to prevent chipping. The saw works best for straight or angled cuts, not for curves or detailed shapes.
| Pros | Cons |
|---|---|
| Precise cross cuts | Not for curved cuts |
| Fast and efficient | Bulky and heavy |
| Adjustable angles | Needs correct blade |
Best-Use Scenarios
You should use a miter saw when you want perfect cross cuts in your vinyl plank flooring. The saw works best for rooms with lots of corners or when you need to fit planks against walls. You get the most benefit from this cutting tool during large projects or when you want a professional finish. Use the miter saw for baseboards, transitions, and trim pieces. If you need to make curved or detailed cuts, choose another tool.
Note: Always wear safety glasses and keep your hands away from the blade while cutting.
Tips to Cut Vinyl Flooring Safely and Stress-Free
Safety First
When you cut vinyl plank flooring, safety should always come first. You protect yourself by wearing the right gear. Here are some items you should use:
- Safety goggles keep dust and debris out of your eyes.
- Gloves protect your hands from sharp tools and edges.
- A dust mask helps you avoid breathing in small particles.
- Knee pads cushion your knees when you work on hard floors.
- Sturdy, closed-toe shoes prevent injuries from dropped tools.
Tip: Always keep your workspace clean and free of clutter. This helps you move safely and avoid accidents.
Getting Clean, Straight Cuts
You want your floor to look neat and professional. To get clean, straight cuts, use the right technique for each tool. The score and snap method works well for most planks. Mark your line, score it deeply with a utility knife, and snap the plank. For long or cross cuts, use a miter saw or table saw. Make sure the decorative side faces up for a smooth finish. A flooring cutter gives you silent, dust-free cuts for straight lines.
To cut vinyl flooring without chipping, use sharp, high-quality blades. Cut slowly and support the plank on both sides. If you use a jigsaw, pick a fine-tooth blade and cut from the back side. This keeps the top surface looking good.
Avoiding Common Mistakes
Many people make mistakes when they cut vinyl flooring. You can avoid these problems by following a few simple steps:
- Prep the subfloor. Remove nails and sand rough spots.
- Take off baseboards and trim for a better fit.
- Use underlayment for a smooth, quiet floor.
- Plan your layout to reduce waste.
- Order extra material for trimming and mistakes.
- Stagger seams for a natural look.
- Follow the manufacturer’s guide.
- Plan for vents and corners.
If you notice uneven or jagged cuts, check your blade. Dull blades cause rough edges. Change them often. Make sure your first row is straight. Misaligned planks can make the whole floor look off.
Note: Take your time and double-check each step. Careful planning and the right tools help you cut vinyl plank flooring with confidence.
When you want the best cutting tool for vinyl plank flooring, you have many options. Experts recommend utility knives, vinyl plank cutters, jigsaws, circular saws, and miter saws. Each tool helps you cut vinyl plank flooring based on your project size and skill. A good cutter gives you smooth edges and less waste. Before you cut vinyl plank flooring, remember to remove baseboards, check your subfloor, and let planks acclimate. For more tips, check these helpful resources:
| Resource Title | Link |
|---|---|
| Cutting and Measuring Plank Flooring for Installation | Armstrong Flooring |
| How to Cut Vinyl Plank Flooring | The Tile Shop |
Choose the best cutting tool for vinyl plank flooring for your needs. You can cut vinyl plank flooring with confidence and get great results.
FAQ
What is the easiest tool for beginners to cut vinyl plank flooring?
You can use a utility knife. Mark your line, score the plank, and snap it. This method works well for straight cuts. You do not need power tools or special skills.
Can you cut vinyl plank flooring without power tools?
Yes, you can. Use a utility knife or a vinyl plank cutter. These tools let you make clean cuts by hand. You do not need electricity or batteries.
How do you avoid chipping when cutting vinyl planks?
Use a sharp blade. Cut slowly and support the plank on both sides. For saws, use a fine-tooth blade. Always cut with the decorative side facing up.
What should you do if your cuts are not straight?
Check your blade for sharpness. Use a straight edge or ruler to guide your cut. Clamp the plank to keep it steady. Practice on scrap pieces first.
Do you need to let vinyl planks acclimate before cutting?
Yes, you should. Let the planks sit in the room for at least 48 hours. This helps them adjust to temperature and humidity. You get better results and fewer problems.




