
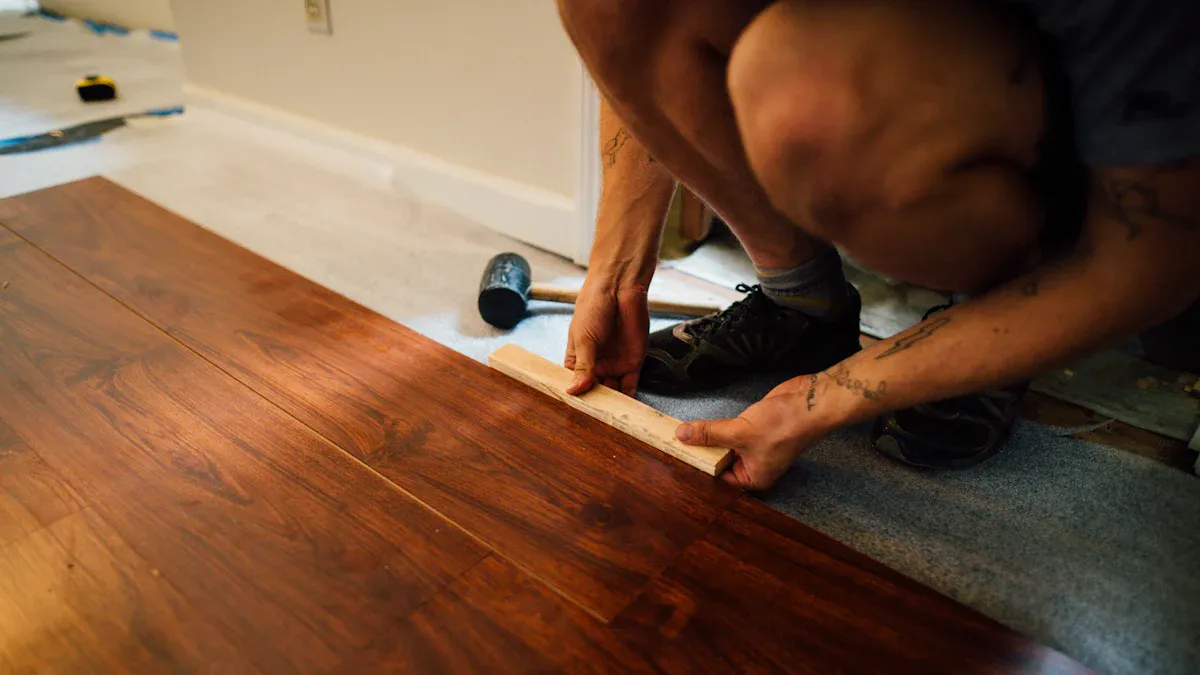
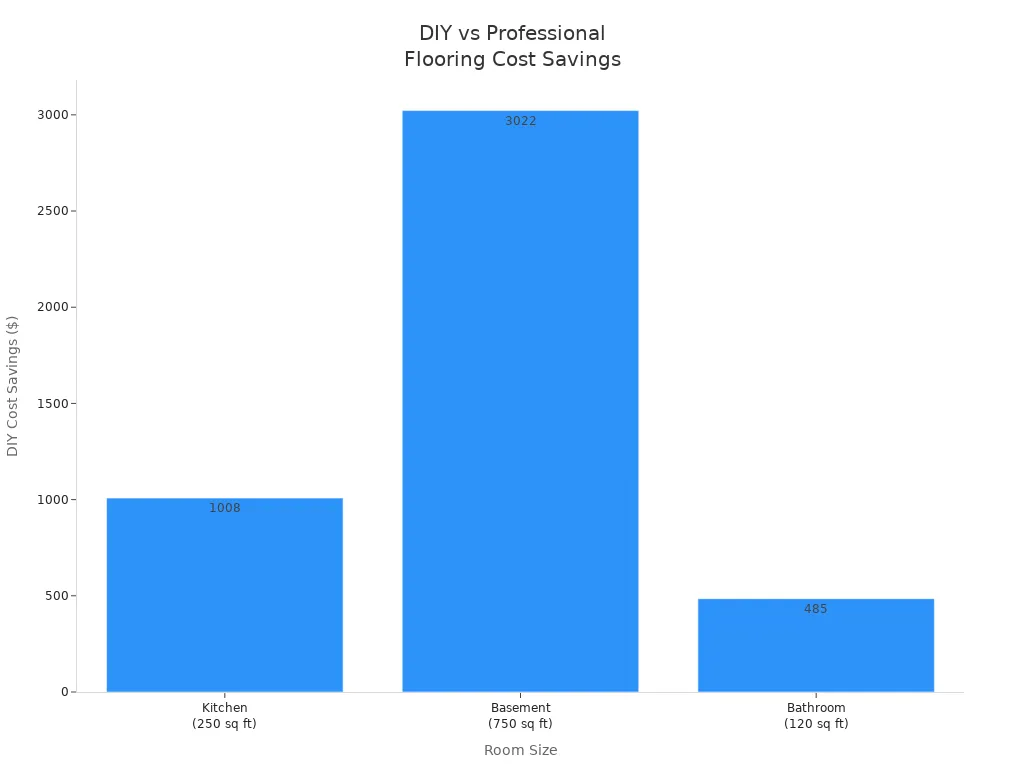
You might wonder how long does it take to lay vinyl plank flooring for a professional finish at home. Most DIYers spend one to three days on a standard room, while professionals often complete the job in less than a day. Your effort pays off with big savings. For example, you can save over $1,000 on a kitchen by doing it yourself.
| Room Size | DIY Cost | Professional Cost | DIY Cost Savings |
|---|---|---|---|
| Kitchen (250 sq ft) | $668 | $1,675 | $1,008 |
| Basement (750 sq ft) | $2,000 | $5,025 | $3,022 |
| Bathroom (120 sq ft) | $320 | $805 | $485 |
How Long Does It Take to Lay Vinyl Plank Flooring?
Average Installation Time for DIY and Professional Projects
You probably want to know how long does it take to lay vinyl plank flooring in your home. The answer depends on your experience and the size of your project. If you are a first-time installer, you might spend 10 to 12 hours on a room up to 300 square feet. You may need two days for a kitchen redesign of about 250 square feet—one day for preparation and one day for installation. If you face a complex layout, you could spend two weekends finishing the job. When you gain experience, you can cut your installation time nearly in half for repeat projects.
Here is a table that shows how long does it take to lay vinyl plank flooring for different scenarios:
| Scenario | Time Required |
|---|---|
| Kitchen redesign (250 sq. ft.) | 2 days (1 for prep, 1 for installation) |
| DIYers with complex layouts | 2 weekends |
| First-time installers (up to 300 sq. ft.) | 10–12 hours |
| Repeat projects | Nearly half the time |
Professional installers work faster. They often finish a standard room in less than a day. You save time and effort by hiring a pro, but you also pay more. The professional vs diy choice depends on your budget, schedule, and confidence in your skills.
Factors That Affect How Long Vinyl Flooring Installation Takes
Many factors can change how long does vinyl flooring installation take. You need to think about these before you start your project.
- Subfloor conditions can slow you down. Squeaky floors or moisture problems may require repairs before you lay any planks.
- Material acclimation is important. You must let your new flooring adjust to the room’s temperature and humidity. This step can take a day or more.
- Scheduling conflicts with other home projects can delay your work.
- Supply delays sometimes happen, especially if you order custom or rare materials.
- Quality control checks take extra time. You want your floor to meet high standards.
You may also face common challenges during installation. Moisture damage can cause warping or peeling. You should test the subfloor for moisture and use a moisture barrier if needed. Uneven subfloors create stress points and visible flaws. You can use a long level or straightedge to check for uneven spots. For concrete subfloors, apply a self-leveling compound or grind down high areas. For wood subfloors, secure loose boards and fill gaps. Always leave a gap of ¼ inch to ½ inch around the edges to allow for expansion. Proper surface preparation and adhesive application help prevent bubbling and peeling.
Tip: Careful preparation and patience help you avoid most delays and mistakes. Take your time with each step for the best results.
When you plan ahead and address these factors, you can answer the question, “how long does it take to lay vinyl plank flooring,” with more confidence. Every project is unique, but good preparation leads to a smooth and professional finish.
Key Factors Influencing Vinyl Flooring Installation Time
Room Size and Layout
When you plan your project, you should look at the size and shape of your room. Larger rooms take more time and effort to finish. If your space has many corners, angles, or obstacles, you will need extra time for careful measuring and cutting. Open-concept areas may require special planning for smooth transitions. On the other hand, small, square rooms with few obstructions are much faster to complete.
- Larger rooms require more time and labor for installation.
- Complex layouts with multiple angles and obstacles can extend the installation duration.
- Open-concept spaces may need careful planning and transitions, adding to the timeline.
- Smaller, square-shaped rooms with minimal obstructions are quicker to install.
Subfloor Condition and Preparation
You need to check your subfloor before you start. Proper subfloor preparation is essential for a successful vinyl flooring installation. If you skip this step, you might face problems like cupping, swelling, or warping. These issues can slow down your project and affect the final look. Always make sure your subfloor is clean, dry, and level. Fix any squeaks or loose boards. This step helps you avoid delays and gives your new floor a smooth, professional finish.
Tip: Take time to prepare your subfloor. This step can save you hours later and helps your floor last longer.
Complexity of the Space
The shape and features of your room can change how long your project takes. If your room has many doors, built-in cabinets, or design features, you will spend more time cutting and fitting each plank. Simple rooms go faster, but complex spaces need patience and attention to detail.
| Room Size (sq ft) | Simple Layout | Complex Layout (with designs/obstructions) |
|---|---|---|
| Up to 1000 | 1 day | 1-2 days |
| 1000-2000 | 1-2 days | 2-3 days |
| Over 2000 | 2-3 days | 3+ days |
You can use this table to estimate how much time you need based on your room’s size and complexity.
Type of Vinyl Plank Flooring
The type of vinyl plank flooring you select plays a big role in how quickly and easily you can finish your project. Each type has its own installation method and features. You should know the main options before you start.
Common Types of Vinyl Plank Flooring:
-
Click-Lock (Floating Floor):
You snap planks together without glue or nails. This method works well for DIY projects. You can install it over most subfloors. Click-lock planks from skspcflooring, like Rigid Core SPC Flooring, offer strong joints and a stable surface. -
Glue-Down:
You use adhesive to secure each plank to the subfloor. This type takes more time and care. It works best in high-traffic areas. You get a very solid feel underfoot. Some SPC Tile Flooring options from skspcflooring use this method. -
Loose Lay:
You lay planks directly on the subfloor. The weight and backing keep them in place. This method is fast and easy. You can lift and replace planks if needed. Loose lay works well for small rooms or temporary spaces.
| Type | Installation Speed | Skill Level | Best For |
|---|---|---|---|
| Click-Lock | Fast | Beginner | Living rooms, bedrooms |
| Glue-Down | Moderate | Intermediate | Kitchens, hallways |
| Loose Lay | Very Fast | Beginner | Offices, small spaces |
Tip: Choose a type that matches your skill level and the room’s needs. Click-lock planks from skspcflooring make installation simple and quick for most homeowners.
You also need to think about plank thickness and design. Thicker planks, like 6mm options from skspcflooring, give you more durability and a premium feel. Chevron and EIR SPC Flooring styles add a modern look to your space. Always check the manufacturer’s instructions for the best results.
Preparing to Lay Vinyl Plank Flooring with skspcflooring
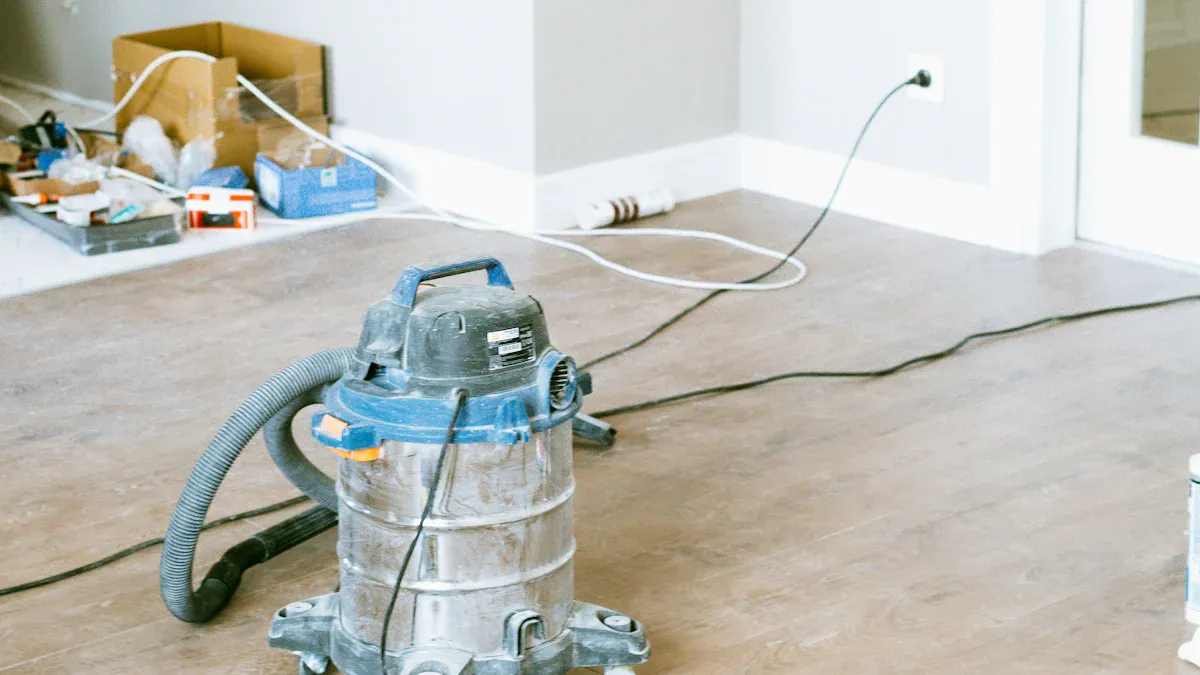
Clearing the Room and Moving Furniture
Start by removing all furniture and personal items from the room. You want a clear space to work safely and efficiently. Take out rugs, electronics, and any décor on the floor. If you have heavy furniture, ask for help or use furniture sliders. This step prevents damage to your belongings and makes it easier to move around. You should also remove baseboards or trim if you plan to reinstall them after the new floor goes in.
Tip: Label baseboards and trim as you remove them. This helps you put them back in the right place later.
Checking and Preparing the Subfloor
Inspect the subfloor for any damage or uneven spots. Sweep or vacuum to remove dust and debris. Make sure the surface is dry and level. If you find squeaky boards, secure them with screws. Fill any gaps or cracks. For concrete subfloors, check for moisture. You can use a moisture meter for this. If you find moisture, let the area dry or use a moisture barrier. Modern vinyl plank flooring, like those from skspcflooring, resists moisture well because of its waterproof core. Still, you should always install in a climate-controlled room. Keep the temperature at least 65°F for two days before and after installation.
- Acclimate your vinyl planks for 24-48 hours in the room where you will install them.
- Acclimation lets the planks adjust to the room’s temperature and humidity.
- Proper acclimation prevents warping, gapping, and buckling.
- This step helps your floor look great and last longer.
Gathering Tools and Materials
Gather all tools and materials before you start. This saves time and reduces stress. You will need a tape measure, utility knife, straightedge, spacers, and a rubber mallet. You may also need a saw for cutting planks and a tapping block. Check the manufacturer’s instructions for any special tools. Make sure you have enough underlayment if your product requires it. Review the warranty details for your flooring. Some warranties require installation by certified professionals. This ensures your new floor stays protected.
You are now ready to lay vinyl plank flooring with confidence. Careful preparation leads to a professional result.
Acclimating the Vinyl Planks
You need to acclimate your vinyl planks before you start installation. This step helps your flooring adjust to the room’s temperature and humidity. If you skip acclimation, you risk problems like warping, gapping, or buckling. You want your floor to look professional and last for years.
Why Acclimation Matters:
- Vinyl planks expand and contract with changes in temperature and humidity.
- Acclimation lets the planks settle so they fit perfectly when installed.
- You avoid future issues like uneven seams or lifted edges.
How to Acclimate Vinyl Planks:
- Place the unopened boxes of vinyl planks in the room where you plan to install them.
- Set the boxes flat on the floor. Do not stack them too high.
- Keep the room at a steady temperature, ideally between 65°F and 80°F.
- Wait at least 24 to 48 hours. Some brands recommend up to 72 hours for best results.
Tip: Check the instructions from skspcflooring. Their products often require 24–48 hours of acclimation. Following the manufacturer’s guidelines ensures your warranty stays valid.
Best Practices for Acclimation:
- Keep the planks away from direct sunlight and heating vents.
- Avoid placing boxes near windows or doors where drafts can change the room’s climate.
- Make sure the room stays dry and climate-controlled.
| Step | Action | Time Needed |
|---|---|---|
| Place boxes | In installation room | Immediate |
| Maintain temperature | 65°F–80°F | 24–48 hours |
| Avoid moisture | Keep room dry | Throughout |
You prepare your vinyl planks for a smooth installation when you acclimate them properly. This step protects your investment and helps you achieve a flawless, professional look.
Step-by-Step Guide to Lay Vinyl Plank Flooring
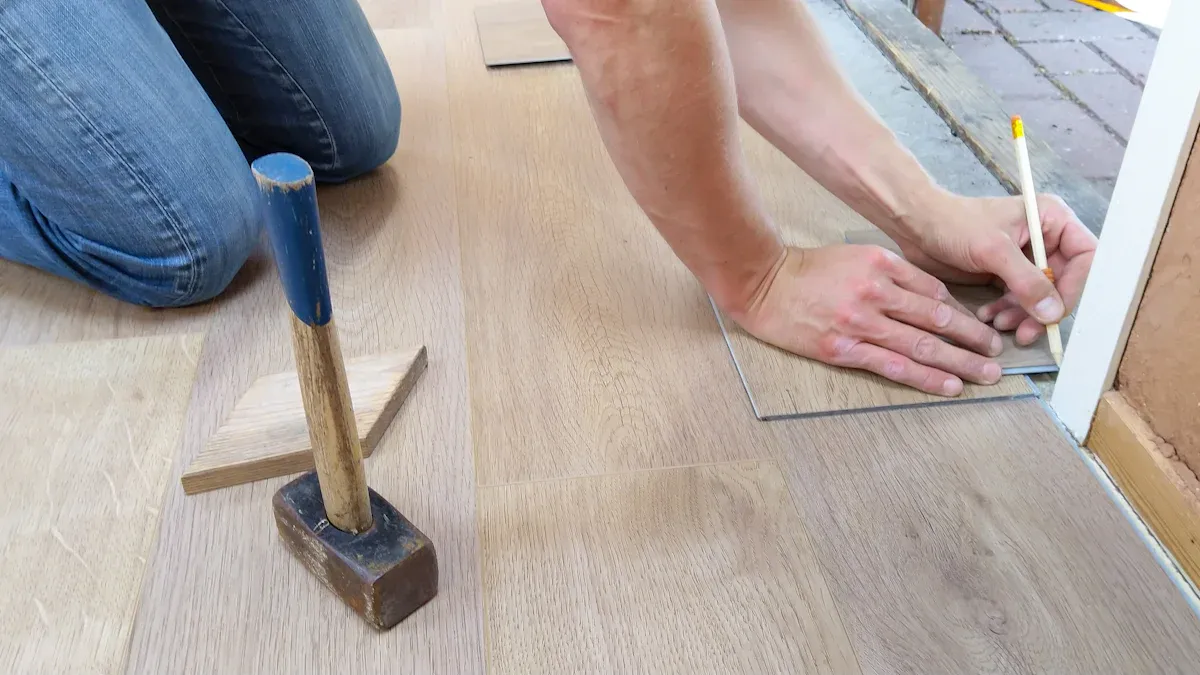
Planning Your Layout
You need a solid plan before you start to lay vinyl plank flooring. Good planning helps you avoid waste and gives your floor a balanced look. Many people make mistakes during this stage. They forget to plan the layout, which leads to wasted material and an uneven appearance. Some do not account for extra planks needed for vents or fixtures. Others overlook the importance of staggering seams, which can affect both the look and strength of your floor.
Start by understanding the shape and layout of your room. Break complex spaces into simple shapes. Measure the width and length of each section. Write down your numbers and add them together to get the total square footage. Always add extra material for waste. This helps you cover mistakes and ensures a professional finish.
Tip: Add 10% to your total square footage for waste. This covers mistakes and tricky cuts around corners or vents.
Here is a simple process you can follow:
- Determine the shape and layout of your room.
- Measure and calculate the total square footage.
- Add a waste factor to your order.
When you plan your layout, you also need to think about where the seams will fall. Staggering seams prevents a predictable pattern and makes your floor look more natural. It also keeps your floor strong and helps prevent problems like loose planks or warping.
Cutting and Fitting Planks
You need the right tools to cut and fit your planks with precision. A grooving machine creates clean grooves for welding, which improves seam quality. A floor welding machine fuses seams with heat, making them watertight. Use a spatula knife to spread adhesive and trim edges for a neat finish. A roller helps press the planks down, removing air bubbles and securing the seams.
For tight, seamless joints, use a vinyl floor seam cutting tool. A wall trimmer or edge cutter gives you clean edges along walls. Always wear safety glasses to protect your eyes from debris. Gloves keep your hands safe from sharp tools and materials.
Note: Make sure your subfloor is clean, flat, and dry before you start. Test for moisture and fix any problems. Work in a climate-controlled room for best results.
When you cut planks for doorways or edges, take your time. If you move from vinyl to carpet, use an end cap if the surfaces are level. If there is a height difference, use a surface reducer to fill the gap. Careful cutting and fitting help your floor look smooth and professional.
Installing the First Row
You set the tone for your whole project with the first row. Start in a corner of the room. Place spacers between the planks and the wall to keep a 1/4-inch expansion gap. This gap lets the floor expand and contract with changes in temperature and humidity.
Position the first plank with the tongue side facing the wall. Check that the row is straight before you continue. Use a level or chalk line if you need help. Keeping the first row straight makes the rest of the installation easier.
Tip: Take your time with the first row. A straight start helps you install vinyl plank flooring with a professional look.
Stagger the seams as you move to the next rows. This prevents weak spots and keeps your floor strong. You avoid patterns that can make the floor look fake. Staggered seams also help prevent warping and loose planks.
| Safety Gear | Description |
|---|---|
| Safety Glasses | Protect your eyes from debris during installation |
| Gloves | Protect your hands from sharp tools and materials |
You now have the basics to lay vinyl plank flooring like a pro. Careful planning, precise cutting, and a straight first row set you up for success.
Staggering Seams for a Professional Look
You want your vinyl plank floor to look just like a professional installed it. Staggering the seams is one of the most important steps. When you stagger the seams, you make the floor stronger and more attractive. You also avoid weak spots that can cause planks to shift or lift over time.
What does staggering seams mean?
Staggering means you do not line up the ends of the planks in each row. Instead, you offset them so the seams fall in different places. This creates a natural, random look, much like real wood floors.
Why should you stagger seams?
- You increase the floor’s strength.
- You prevent long, straight lines that look unnatural.
- You reduce the chance of gaps or lifting planks.
How do you stagger seams?
- Start the first row with a full plank.
- Cut the first plank of the second row so it is shorter than the first plank in the first row. Use the leftover piece from the last plank in the first row if it is at least 8 inches long.
- Place the cut plank at the start of the second row. Continue laying planks, making sure the seams do not line up with the seams in the row before.
- Repeat this process for each new row. Always keep at least 6–8 inches between seams in neighboring rows.
Tip: Use a tape measure to check the distance between seams. If you see seams lining up, cut a new plank to start the next row.
Here is a simple table to help you remember the best practices:
| Row Number | Starting Plank Length | Seam Offset from Previous Row |
|---|---|---|
| 1 | Full plank | N/A |
| 2 | 2/3 plank | 8–12 inches |
| 3 | 1/3 plank | 8–12 inches |
| 4 | Full plank | 8–12 inches |
You can repeat this pattern for the rest of the floor. This method works well with skspcflooring’s click-lock and rigid core planks. You get a floor that looks beautiful and lasts for years.
Dealing with Doorways and Edges
Doorways and edges can make vinyl plank installation tricky. You need to plan carefully to get a clean, professional finish. You want the planks to fit snugly around door frames and along walls.
Steps for Doorways:
- Measure the width of the doorway. Mark the plank where it needs to be cut.
- Use a jigsaw or handsaw to cut the plank to fit the shape of the doorway.
- For a perfect fit, undercut the door jamb. Place a scrap piece of flooring next to the jamb and use a handsaw to trim the bottom. Slide the plank under the jamb for a seamless look.
Steps for Edges:
- Always leave a 1/4-inch gap between the planks and the wall. This gap lets the floor expand and contract.
- Use spacers to keep the gap even as you lay each row.
- When you reach the last row, measure the space. Cut the planks lengthwise to fit. Use a pull bar to snap the last row into place.
Note: After you finish, cover the expansion gap with baseboards or quarter-round molding. This hides the gap and gives your floor a polished look.
Common Tools for Doorways and Edges:
- Jigsaw or handsaw
- Pull bar
- Spacers
- Tape measure
- Pencil
| Task | Tool Needed | Pro Tip |
|---|---|---|
| Cutting for doorway | Jigsaw/handsaw | Undercut door jamb for a seamless finish |
| Fitting last row | Pull bar | Use spacers for even expansion gap |
| Measuring | Tape measure | Double-check before cutting |
You can handle tricky spots with patience and the right tools. Take your time around doorways and edges. Your careful work will make your vinyl plank floor look smooth and professional.
Tips for a Professional Vinyl Flooring Installation
Keeping Planks Straight and Tight
You want your floor to look neat and professional. Start by checking each plank as you lay it. Make sure the edges line up and the seams stay tight. Use a tapping block and a rubber mallet to press planks together. This keeps the joints snug and prevents movement. Place spacers along the walls to maintain a consistent expansion gap. Work row by row, checking for straight lines. If you see a plank out of place, adjust it before moving on. Careful attention helps you avoid crooked rows and loose seams.
Avoiding Gaps and Overlaps
Gaps and overlaps can ruin the look of your floor. You need to measure and cut each plank accurately. Templates and measuring tools help you fit planks around corners and obstacles. Smooth out any wrinkles or bubbles with a roller or heat gun. This keeps the surface flat and durable.
Proper planning is essential when installing vinyl flooring, especially in tricky areas like corners. Using a template or compass for accurate measuring and cutting can prevent gaps and overlaps. Additionally, smoothing out any wrinkles or bubbles with a roller or heat gun is crucial for maintaining the flooring’s appearance and durability.
Check each seam as you go. If you spot a gap, press the planks together or recut the piece. Avoid rushing. Take your time to ensure a flawless vinyl flooring installation.
Using Transition Strips and Trim
Transition strips and trim finish your floor and make it look professional. You use transition strips where two flooring types meet. These strips create a smooth change between surfaces and protect the edges.
- Transition strips provide smooth transitions between different flooring types, enhancing safety by preventing trip hazards.
- They improve the aesthetic appeal by creating a cohesive look between different flooring styles.
- Transition pieces protect exposed edges from wear and tear, especially in high-traffic areas.
Install trim along the walls to cover expansion gaps. Choose trim that matches your floor for a seamless look. Secure the trim with finishing nails or adhesive. This step completes your project and gives your floor a polished appearance.
Cleaning Up After Installation
You have finished laying your vinyl plank flooring. Now, you need to clean up the area to reveal your new professional look. Cleaning up after installation helps protect your floor and keeps your space safe.
Start by removing all tools and leftover materials from the room. Gather scraps, packaging, and any extra planks. Place these items in a box or bag for easy disposal or storage. If you have leftover planks, store them in a dry place. You might need them for future repairs.
Next, sweep the floor with a soft broom. Pick up dust, dirt, and small debris. Use a vacuum with a soft brush attachment for corners and edges. Avoid using a vacuum with a beater bar, as it can scratch the surface.
Wipe the floor with a damp microfiber mop. Do not soak the floor with water. Too much moisture can damage the planks. Use a gentle, pH-neutral cleaner if needed. Avoid harsh chemicals or abrasive pads.
Tip: Always check the cleaning instructions from your flooring manufacturer. skspcflooring recommends using only mild cleaners to keep your floor looking new.
Inspect the floor for any adhesive residue or smudges. Remove sticky spots with a soft cloth and a little warm water. For stubborn marks, use a vinyl-safe cleaner.
Replace baseboards or trim if you removed them earlier. Use finishing nails or adhesive to secure them. This step covers the expansion gap and gives your floor a polished look.
Here is a quick checklist for your cleanup:
- Remove tools and scraps
- Sweep and vacuum
- Mop with a damp microfiber cloth
- Clean sticky spots
- Reinstall trim and baseboards
A clean workspace lets you enjoy your new vinyl plank flooring right away. Your careful cleanup ensures a flawless, professional finish.
You can achieve a professional look with vinyl plank flooring by following a few key steps:
- Plan your project carefully to avoid waste.
- Prepare the subfloor for a smooth finish.
- Choose the right finish for a luxury feel.
- Install with care and attention to detail.
Here is a quick checklist to help you:
| Item | Purpose |
|---|---|
| Knee pads | Protect your knees during installation |
| Spacers | Keep expansion gaps along the wall |
| Tapping block and rubber mallet | Snap planks into place |
| Straight edge or T-square | Make accurate cuts and straight lines |
| Construction adhesive | Use for glue-down planks |
| Underlayment | Use if the manufacturer recommends it |
When you use high-quality products like skspcflooring, you get floors that are waterproof, scratch-resistant, and built to last for years. Take your time and enjoy the process—your new floor will look great and stay beautiful.
FAQ
How do you keep vinyl plank flooring from shifting?
You can use spacers along the walls during installation. Tightly connect each plank. Remove spacers after you finish. Install baseboards or trim to hold the edges in place.
Can you install vinyl plank flooring over existing tile?
Yes, you can lay vinyl plank flooring over tile. Make sure the tile surface is clean, dry, and level. Fill any deep grout lines or cracks before you start.
What is the best way to cut vinyl planks?
Use a sharp utility knife for straight cuts. Score the plank and snap it along the line. For curves or corners, use a jigsaw or handsaw for better control.
How soon can you walk on vinyl plank flooring after installation?
You can walk on click-lock or loose lay vinyl planks right away. For glue-down planks, wait at least 24 hours to let the adhesive set.




