
You can safely install glue down vinyl plank flooring over radiant heated floors when you follow specific steps and use the right materials. Radiant floor heating works well with most luxury vinyl plank options, but you must check the temperature ratings for your chosen product. If you do not allow for proper expansion, the planks may buckle or lift at the edges. Heat can also cause seams to open or speed up the aging of your floor. Learning how to lay glue down vinyl plank flooring the right way helps you avoid these problems and keeps your floor looking great.
Materials and Tools for How to Lay Glue Down Vinyl Plank Flooring
Recommended Vinyl Plank Flooring Types from skspcflooring
Choosing the right vinyl plank flooring is important for radiant heated floors. You want planks that can handle changes in temperature and stay stable. SK-Floor offers several options that work well with heated systems. The table below shows two recommended types:
| Flooring Type | Description |
|---|---|
| Luxury Vinyl Plank (LVP) | Planks that simulate wood or stone, compatible with heated vinyl floors. |
| Engineered Vinyl Plank with Mineral Core | Planks made with a mineral core for added stability, ideal for radiant heat applications. |
These products from skspcflooring meet international standards and provide durability and style. You can find more details about their features on the official website.
Adhesives Compatible with Heating Under Vinyl Tiles
You need to select adhesives that work with radiant heating. Look for heat-resistant adhesives that can handle temperatures up to 80 degrees Fahrenheit (26.6 degrees Celsius). Always check the adhesive label for compatibility with vinyl flooring and heated subfloors. In-floor sensors and a proper thermostat help you control the temperature and protect the adhesive. Different moisture barriers can achieve the same results in various ways. You should consult local building codes and the manufacturer of the radiant heat system for specific recommendations.
Essential Tools for Safe Installation
You must gather the right tools before starting your project. Here is a list of materials and tools you need for installing glue down vinyl plank flooring over radiant heated floors:
- Turn down the heat system at least 4 days before acclimation to a consistent temperature of 65 degrees Fahrenheit (18 degrees Celsius).
- Make sure the heat system sits 7/16 inches (11.3 mm) below the concrete.
- Use in-floor sensors with a proper thermostat.
- Follow installation and care guidelines from system suppliers.
- Prepare a moisture barrier as recommended.
- Use a leveling compound to create a flat, smooth surface.
When it comes to installing vinyl, one of the most important factors to keep in mind is that it necessitates a flat, smooth, and level surface. Laying vinyl over a heated flooring system would be similar to laying it on an uneven subfloor – as a result, a leveling compound must be used over the top of the heating system to provide an even surface.
You also need a trowel, utility knife, measuring tape, and safety gear. These tools help you install the vinyl planks safely and efficiently.
Preparing the Subfloor and Heating Under Vinyl Tiles
Turning Off and Protecting the Radiant Heating System
You need to protect your radiant heating system before you start installing vinyl plank flooring. First, turn off all breakers that control the heating under vinyl tiles. This step keeps you safe and prevents damage to the system. Wear safety gear, such as gloves and goggles, to protect yourself. Use an ohmmeter to check for electrical issues in the heating system. If you find any problems, fix them before moving forward. These steps help you avoid accidents and keep the heating system in good condition.
Checking Moisture and Subfloor Conditions
You must check the moisture levels in the subfloor before installing glue down vinyl plank flooring. Use a moisture meter or conduct a relative humidity (RH) test. An RH test involves drilling a small hole into the concrete and placing a probe to measure moisture. Always test the subfloor directly for accurate readings. High moisture can cause problems with the adhesive and the flooring. Make sure the floor system does not exceed 84 degrees Fahrenheit. Radiant heating under vinyl tiles usually stays at a comfortable temperature, but you should check with the flooring manufacturer for specific recommendations.
Cleaning and Leveling the Subfloor
A clean and level subfloor is important for a successful installation. Remove dust and dirt using a vacuum, broom, or damp mop. Allow the subfloor to dry completely. Eliminate adhesive residue from previous flooring by sanding or scraping. Get rid of paint and coatings with sandpaper or a chemical stripper. Use a straight edge or laser level to check for uneven areas. Apply a leveling compound to fill low spots and create a flat surface. Sand down high spots or use shims for areas that are particularly uneven. These steps help you create a smooth base for your new vinyl plank flooring.
Tip: Take your time during preparation. A well-prepared subfloor ensures your flooring lasts longer and performs better.
Choosing the Right Adhesive for Radiant Heated Floors
Features of Heat-Resistant Adhesives
You need to pick an adhesive that can handle the heat from your radiant floor. Heat-resistant adhesives keep your vinyl plank flooring secure even when the temperature changes. These adhesives work well with luxury vinyl tiles and planks. They also help prevent the floor from lifting or shifting. When you look for an adhesive, check the label for these features:
- Strong bond and shear strength
- Pressure-sensitive formula
- Acrylic latex base
- Safe for use with radiant heated subfloors
- Works on concrete and plywood
One example is the ROBERTS 7350 adhesive. This adhesive is made for resilient flooring and works with radiant heated floors if the surface temperature stays below 85°F. It is suitable for both homes and businesses. You can trust this adhesive to keep your floor in place and protect your heating system.
Tip: Always use an in-floor sensor to monitor the temperature. This helps you avoid overheating and keeps the adhesive strong.
Selecting the Best Adhesive for skspcflooring Products
When you install skspcflooring products, you must follow special guidelines to protect your radiant heating system. The table below shows important requirements for using adhesive with these floors:
| Requirement | Details |
|---|---|
| Minimum Separation | 1/2″ from heating system to flooring |
| Pre-Operational Time | Heating system must run for at least 2 weeks before install |
| Temperature Adjustment | Lower to 65°F three days before installation |
| Maximum Temperature | Should not exceed 85°F |
| Sensor Recommendation | Use an in-floor temperature sensor |
You should choose an adhesive that meets these requirements. Make sure the adhesive is compatible with skspcflooring products and radiant heated floors. Follow the manufacturer’s instructions for best results. This ensures your floor stays beautiful and your heating system works safely.
How to Lay Glue Down Vinyl Plank Flooring Over Radiant Heating
Acclimating Vinyl Planks from skspcflooring
You need to acclimate your vinyl planks before you start the installation. This step helps the planks adjust to the temperature and humidity in your home. Proper acclimation prevents problems like buckling or gaps after you install the floor. Follow these steps to get your planks ready for radiant floor heating:
- Stabilize your house to your usual winter temperature and humidity.
- Run the radiant floor heating system at a lower setting for one or two days.
- Slowly increase the temperature to your normal operating level. Watch the floor sensors as you do this.
- Keep these conditions steady during the entire installation and while the adhesive cures.
This process helps your vinyl planks from skspcflooring adapt to the environment. You will get a better result and a longer-lasting floor.
Tip: Never skip the acclimation step. It is a key part of how to lay glue down vinyl plank flooring over radiant floor heating.
Applying Adhesive Safely
You must use the right adhesive and apply it at the correct temperature. Glue-down vinyl adhesive can react to heat, so you need to control the temperature during installation. The table below shows the best temperature actions for radiant floor heating:
| Temperature Action | Description |
|---|---|
| 65°F | Lower the temperature three days before you start installation. |
| 85°F | Do not let the floor get hotter than this during installation. |
| Gradual Increase | After you finish, raise the temperature in small steps of 5°F. |
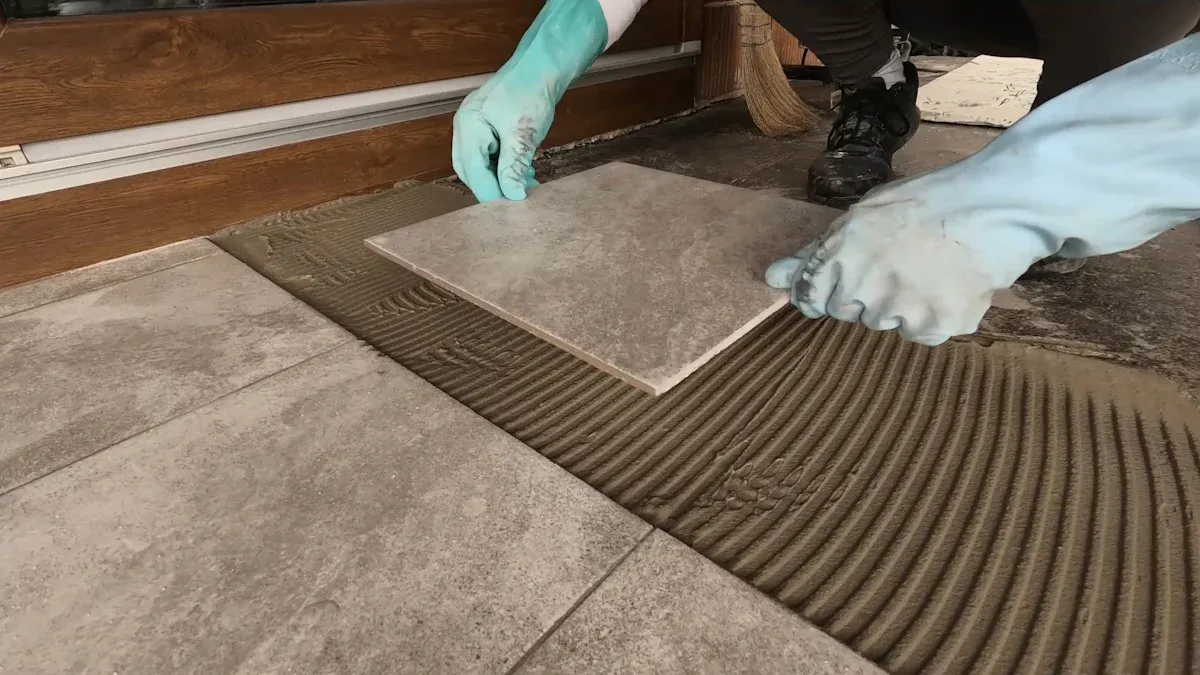
Keep the floor temperature below 85°F when you use radiant floor heating. This protects the adhesive and helps your vinyl planks stick well. Always follow the adhesive instructions from skspcflooring and the adhesive manufacturer. Use a notched trowel to spread the glue evenly. Work in small sections so the adhesive does not dry out before you lay the planks.
Note: Glue-down vinyl adhesive is sensitive to high temperatures. Always use a floor sensor to check the temperature during installation.
Laying Planks Over Radiant Heating Elements
You can now start to lay your vinyl planks over the radiant heating system. Begin in one corner of the room and work your way out. Press each plank firmly into the adhesive. Make sure you do not trap air bubbles under the planks. Use a roller to press the planks down and get a strong bond.
When you work around obstacles or edges, take extra care. Protect the floor with wood panels if you need to move heavy or wheeled objects. This spreads the weight and keeps the planks from shifting or getting damaged. Do not move anything over fresh adhesive. Wait until the glue has cured.
Keep a minimum gap of 3/8 inch between the heating elements and the vinyl flooring. Make sure the radiant floor heating system has run for at least two weeks before you start. Lower the temperature to 65°F five days before you begin. After you finish, increase the temperature slowly—no more than 5°F per hour. Never let the floor get hotter than 85°F. Use an in-floor thermostat to keep the temperature steady.
Tip: Place a wood panel under sharp or heavy objects when you move them across the floor. Slide the object over the panel to avoid scratches or tears.
Learning how to lay glue down vinyl plank flooring over radiant floor heating takes patience and care. If you follow these steps, you will get a smooth, safe, and beautiful floor that works well with your radiant heating system. This process is perfect for diy projects and professional installation alike.
Working Around Obstacles and Edges
You often face challenges when you install glue down vinyl plank flooring over radiant heated floors. Obstacles like pipes, vents, doorways, and corners require careful planning. You must protect the heating system and ensure a smooth finish. You can follow these steps to work around obstacles and edges:
- Measure the area around each obstacle. Use a tape measure to get accurate dimensions.
- Mark the plank where you need to cut. Draw a clear line with a pencil.
- Cut the plank using a utility knife or a vinyl cutter. Make several passes with the knife for a clean edge.
- Dry-fit the plank before you apply adhesive. Check that it fits snugly around the obstacle.
- Apply adhesive only after you confirm the fit. Press the plank firmly into place.
You must avoid damaging the radiant heating elements. When you install radiant floor heating, keep a safe distance between the heating system and the vinyl planks. Use a floor sensor to monitor the temperature near obstacles. If you need to cut around pipes or vents, use a hole saw or a jigsaw. Always check for wires or heating cables before you cut.
Corners and edges need special attention. You can use a straight edge to mark the plank for a precise cut. For doorways, remove the door trim and undercut the frame. Slide the plank under the trim for a seamless look. You can use transition strips at the edge of the room. These strips cover the gap between the vinyl and other flooring types.
Tip: Place a piece of scrap vinyl under the plank when you cut. This protects the subfloor and keeps your workspace clean.
You must keep the adhesive away from the heating elements. When you install, spread the glue only on the subfloor. Avoid getting adhesive on pipes or wires. If you spill adhesive, wipe it up right away. You can use a damp cloth for cleanup.
You can use the table below to see common obstacles and the best tools for each:
| Obstacle | Tool Needed | Safety Step |
|---|---|---|
| Pipe | Hole saw | Check for heating cables |
| Vent | Jigsaw | Mark cut lines clearly |
| Doorway | Utility knife | Remove trim, undercut frame |
| Corner | Straight edge | Dry-fit before gluing |
You can complete a diy project by following these steps. You must plan ahead and use the right tools. When you install radiant floor heating, you need to protect the system at every stage. You can achieve a professional finish even when you work around obstacles and edges.
Note: When installing radiant floor heating, always check the manufacturer’s guidelines. You must follow their instructions to avoid damage and ensure safety.
You can install glue down vinyl plank flooring with confidence. Careful work around obstacles and edges helps you create a durable and attractive floor.
Safety Tips and Post-Installation Care
Temperature Guidelines for Installation
You need to follow strict temperature rules when installing glue down vinyl plank flooring over radiant heated floors. This guide helps you avoid mistakes and keeps your floor safe. Always turn off the heating system 24 hours before you start. Keep the room temperature at least 60°F during installation. Do not let the floor get hotter than 85°F. After you finish, wait another 24 hours before turning the heat back on. Increase the temperature slowly, using 5°F increments each day. This prevents stress on the adhesive and the planks.
Tip: Gradually raising the heat protects your new floor and helps the glue cure properly.
Here is a quick guide for safe heating:
- Turn off heat 24 hours before, during, and after installation.
- Maintain a minimum of 1/2” separation from the radiant heat system.
- Avoid using a 6-mil poly-film vapor barrier with glue down flooring.
- Gradually increase the heating system temperature after installation.
Preventing Damage to Heating Elements
You must protect the radiant heating system during installation. This guide shows common causes of damage and how to avoid them. Always prepare the subfloor carefully. Clean and level the surface to prevent cold spots and cable damage. Do not install heating under fixtures or tiles. This can pinch or break the cables. Never connect power to the heating system before the final floor covering is installed.
| Cause of Damage | Explanation |
|---|---|
| Improper subfloor preparation | Uneven, dirty, or moisture-heavy subfloors can lead to cold spots, poor adhesion, and cable damage. |
| Installing heating under fixtures | Heating cables can get pinched or damaged when fixtures are installed over them. |
| Power connected too early | Connecting power before the final floor covering is installed risks damaging the cable. |
Note: Careful planning and following this guide will help you avoid costly repairs and keep your radiant heating system safe.
Ensuring Proper Adhesive Curing
You need to let the adhesive cure fully before using the floor or turning the heat back on. This guide gives you a safe timeline:
| Step | Action | Duration |
|---|---|---|
| 1 | Turn off heat before installation | 24 hours |
| 2 | Turn off heat during installation | 24 hours |
| 3 | Turn off heat after installation | 24 hours |
| 4 | Gradually increase temperature | 5°F increments |
| 5 | Maximum operating temperature | 85°F |
Wait at least 24 hours after installation before you turn the heating system back on. Raise the temperature slowly. This helps the adhesive cure and keeps your floor strong. If you rush this step, you risk damaging both the floor and the heating system.
Tip: If you want a diy project to last, patience is key. Follow this guide for the best results.
When to Turn the Heating System Back On
You must wait before turning your radiant heating system back on after installing glue down vinyl plank flooring. This step protects both your floor and the adhesive. Wait at least 24 hours after installation. The adhesive needs time to cure and bond the planks to the subfloor. If you turn the heat on too soon, you risk weakening the glue.
Follow these steps to safely restart your heating system:
- Wait 24 hours after installation.
- Set the thermostat to a low temperature, such as 65°F.
- Increase the temperature by 5°F each day until you reach your normal setting.
- Use a floor sensor to monitor the temperature.
Tip: Slow temperature changes help prevent stress on the vinyl planks and keep the adhesive strong.
Check the manufacturer’s guidelines for your radiant heating system and your skspcflooring products. Always keep the floor temperature below 85°F. If you notice any movement or gaps in the planks, lower the temperature and contact a flooring specialist.
Ongoing Maintenance for Longevity
You can keep your glue down vinyl plank flooring looking great for years with simple maintenance. Clean the floor regularly using a soft broom or vacuum. Mop with a damp cloth and mild cleaner. Avoid harsh chemicals or abrasive tools.
Here is a quick maintenance checklist:
- Sweep or vacuum daily.
- Mop weekly with a gentle cleaner.
- Wipe up spills right away.
- Place mats at entryways to catch dirt.
- Use felt pads under furniture legs.
| Maintenance Task | Frequency | Purpose |
|---|---|---|
| Sweep/Vacuum | Daily | Remove dust and debris |
| Mop | Weekly | Clean surface |
| Wipe Spills | As needed | Prevent stains |
| Check for Damage | Monthly | Spot issues early |
Note: Regular care helps your skspcflooring products last longer and keeps your radiant heating system working efficiently.
You can enjoy a beautiful, durable floor by following these easy steps. Proper maintenance protects your investment and ensures comfort in your home.
You achieve a safe and durable floor when you follow proper flooring installation instructions. Using skspcflooring products gives you confidence that your radiant heated floor stays protected. You maintain the right temperature and separation, which prevents damage. The table below shows important installation tips for glue down vinyl plank flooring over radiant heat:
| Step | Details |
|---|---|
| Temperature Control | Keep floor below 85°F |
| System Compatibility | Confirm heating system matches flooring |
| Separation | Maintain at least 1/2″ gap |
You avoid problems by checking compatibility and following guidelines. Careful preparation and attention to detail help your floor last longer.
FAQ
Can you install glue down vinyl plank flooring over any radiant heated floor?
You can install glue down vinyl plank flooring over most radiant heated floors. Always check the compatibility of your heating system and flooring. Follow the manufacturer’s guidelines for temperature limits and installation steps.
How long should you wait before turning the radiant heating system back on?
You should wait at least 24 hours after installation. This gives the adhesive time to cure. Increase the temperature slowly, using 5°F increments each day. Use a floor sensor to monitor the heat.
What tools do you need for a safe installation?
You need a trowel, utility knife, measuring tape, and safety gear. A leveling compound helps create a smooth surface. Always use a floor sensor to check the temperature during installation.
Are diy installation options available for glue down vinyl plank flooring?
You can choose diy installation options if you follow the instructions carefully. Prepare the subfloor, use the right adhesive, and monitor the temperature. Take your time to ensure a safe and durable result.
How do you clean and maintain glue down vinyl plank flooring?
Sweep or vacuum daily. Mop with a damp cloth and mild cleaner weekly. Wipe up spills right away. Place mats at entryways to catch dirt. Use felt pads under furniture legs to prevent scratches.
Tip: Regular cleaning keeps your floor looking new and protects your radiant heating system.




