

An excellent choice for modern homes, SPC (Stone Plastic Composite) flooring offers remarkable durability and a sleek appearance. The SPC flooring market is set to expand significantly, with projections showing a growth rate of 12.98% annually from 2025 to 2033. This guide provides the foundational knowledge for a flawless installation and lasting beauty. You will learn the essential steps, from preparing your subfloor to the final touches of maintenance. Think of this as your SPC 102 course for achieving professional results and keeping your floors looking new for years to come.
Pre-Installation Step 1: Subfloor Preparation
A successful SPC flooring installation starts from the ground up. You must give your subfloor proper attention before laying the first plank. A clean, flat, and dry subfloor prevents future problems and ensures your new floor performs beautifully for years. Think of this step as building a strong foundation for your investment.
Cleaning and Leveling Your Subfloor
First, you need to prepare a clean slate. Remove any existing flooring, like carpet or old vinyl. Sweep and vacuum the subfloor thoroughly to get rid of all dust, dirt, and debris. Next, you must check if the surface is level. Use a long, straight edge or a 10-foot level to find any high or low spots. An uneven subfloor can compromise the click-lock system of your SPC planks.
To meet industry standards, your subfloor must be very flat.
- It should not have dips or bumps greater than 3/16 of an inch over a 10-foot area.
- It should not have variations of more than 1/8 of an inch over a 6-foot area.
You can sand down high spots and use a self-leveling compound to fill in low spots.
Checking for Moisture
Moisture is the enemy of any flooring installation. Excess moisture in your subfloor can cause major damage over time, leading to buckling, swelling, or even adhesive failure. This is true for both concrete and wood subfloors. High moisture can cause vinyl floors to shift and can promote the growth of mold and mildew.
You should always perform a moisture test. For concrete subfloors, a common method is the calcium chloride test or an in-situ relative humidity (RH) test.
Pro Tip 📝: According to ASTM standards, the recommended relative humidity for a concrete subfloor is 75% or below. Always check the SPC manufacturer’s specific guidelines, as they may have different requirements. Ignoring moisture issues can lead to total flooring failure.
Pre-Installation Step 2: Acclimation and Tools
You have prepared your subfloor. Now you can focus on the final steps before installation. You must let your new flooring acclimate to the room. You also need to gather the right tools for the job. These two steps will make your installation process smooth and successful.
Why Acclimation is Crucial
You should not skip the acclimation step. SPC planks need time to adjust to the temperature and humidity of the room where you will install them. This material expands in warm conditions and shrinks in cool conditions. Moving planks from a cold warehouse to a warm home without this adjustment period can cause serious issues.
Important Note 📝: You must acclimate the planks for at least 48 hours in the installation room. Skipping this step often voids your product warranty, leaving you without protection if problems arise.
Failure to acclimate your flooring properly can lead to several problems hours or days after you finish the job.
- Buckling: Planks may expand and push against each other, causing the floor to lift and become uneven.
- Gapping: Planks can shrink and pull apart, creating unsightly gaps between them.
- Warping: The flooring may become uneven or distorted, ruining the flat, smooth finish.
Essential Tools Checklist
Gathering your tools before you begin saves time and prevents frustration. Having everything on hand allows you to work efficiently and achieve a professional finish. You will need a few specific items to cut the planks and lock them together securely.
Here is a checklist of the tools you will need for a successful SPC flooring installation.
| Tool | Purpose |
|---|---|
| Essential Tools | |
| Measuring Tape | Ensures you make accurate measurements for cuts. |
| Utility Knife & Straight Edge | Allows you to score and snap planks for straight cuts. |
| Rubber Mallet & Tapping Block | Helps you gently tap planks together for tight seams without damage. |
| Pull Bar | Used to tighten the joints in the last row or in tight spaces. |
| Spacers (1/4″) | Maintain a consistent expansion gap around the room’s perimeter. |
| Pencil or Chalk Line | Marks your cutting lines clearly on the planks. |
| Helpful Additions | |
| Safety Goggles & Gloves | Protect your eyes and hands during cutting and installation. |
| Jigsaw or Miter Saw | Makes complex cuts around door frames or vents much easier. |
| Knee Pads | Provide comfort and protection during long hours on the floor. |
The Installation Process: Laying Your SPC Planks
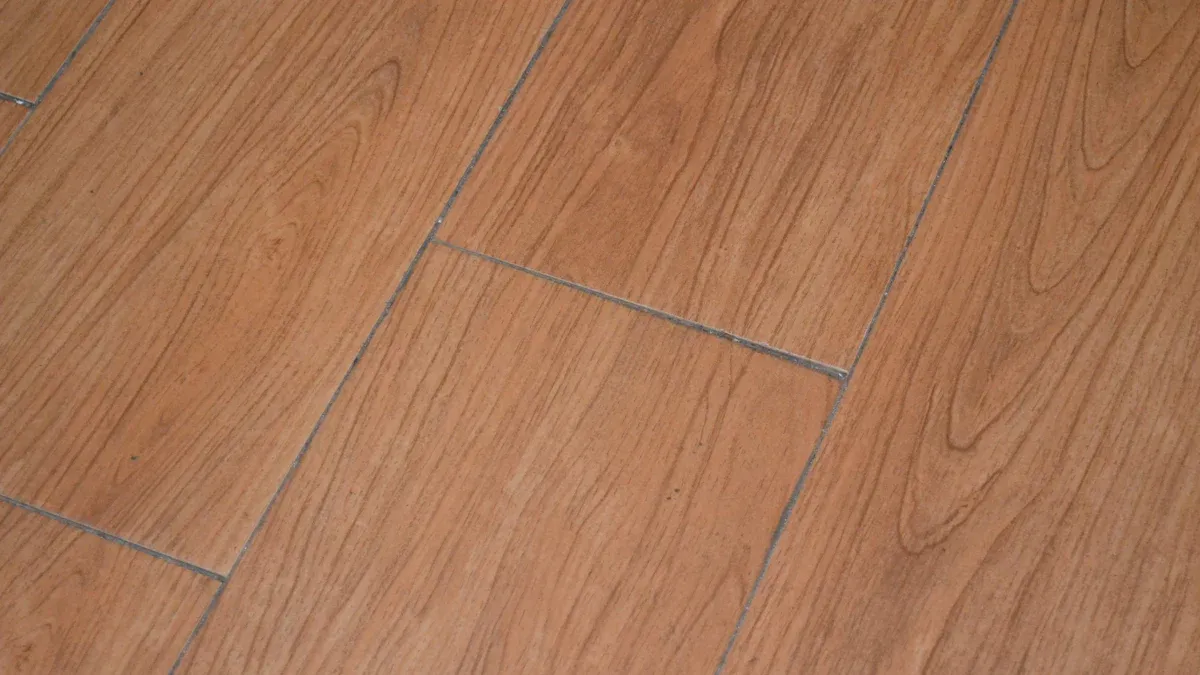
With your subfloor ready and your planks acclimated, you can begin the most rewarding part of the project: the installation. Laying SPC flooring is a straightforward process thanks to its user-friendly click-lock system. A good plan and careful execution will give you a beautiful, professional-looking floor.
Planning Your Layout and First Row
A solid plan is the key to a smooth installation and minimal waste. Before you lay the first plank, you need to decide on the direction and starting point. This initial planning prevents you from ending up with a very narrow, difficult-to-install final row.
First, decide which way the planks will run. Many people position planks lengthwise to make the room appear longer. You can also align them with the main light source, like a large window, for a seamless look.
Next, you should calculate the width of your first and last rows to ensure they are balanced.
- Measure the total width of the room.
- Divide this number by the width of a single plank. This tells you how many full rows you will need.
- If the last row is less than half the width of a plank, you should adjust your first row. Cut the first row of planks narrower so that your first and last rows have a similar, balanced width.
Pro Tip 💡: To minimize waste, you can use the offcut from the end of one row to start the next. Just make sure the piece is long enough for stability. As a rule, the first and last plank in any row should be at least 8 to 12 inches long. Some manufacturers specify a minimum length of twice the plank’s width.
Connecting the Planks
The click-lock mechanism is what makes SPC flooring so popular for DIY projects. The precision-engineered system creates tight seams and reduces waste because you do not need adhesives. However, you must connect the planks correctly to avoid damaging them. Forcing them together can break the locking edges, leading to unstable joints and gaps.
Follow these steps to connect your planks securely:
- Place the first plank in the corner of your room, leaving a 1/4-inch expansion gap between the plank and the walls. Use your spacers to maintain this gap.
- Take your second plank. Hold it at a slight angle and insert its tongue edge into the groove edge of the first plank.
- Gently lower the second plank to the floor. You should feel or hear it click into place as the lock engages.
- To ensure a tight seam, place a tapping block against the edge of the second plank. Lightly tap it with a rubber mallet until the joint is completely closed. Never hit the plank directly with the mallet.
Continue this process for the entire row. When you reach the end, you will use a pull bar to tighten the final plank.
Cutting Planks for Obstacles
Your room will likely have obstacles like door frames, vents, or pipes. You will need to make special cuts to fit the flooring perfectly around them. Using the right tool for the job makes these cuts much easier and more accurate.
Here are the best tools for cutting around obstacles:
- Utility Knife: You can use a sharp utility knife and a straight edge for simple, straight cuts. Score the plank deeply and then snap it along the line.
- Jigsaw: This is your best tool for complex shapes. Use a jigsaw to cut curves for pipes or notches for door frames and vents.
- Pull Saw: A pull saw is perfect for undercutting door jambs. This allows you to slide the flooring plank directly underneath the frame for a clean, professional finish.
- Hole Saw: If you need to cut a perfect circle for a pipe, a hole saw attached to a drill is the ideal tool.
Always measure twice and cut once. Create a cardboard template for tricky shapes to test the fit before you cut your plank. This simple step can save you from costly mistakes.
Installing the Final Row and Transitions
You are now on the home stretch of your installation. Finishing the last row and installing transition strips are the final steps to a polished, complete floor. These details make a big difference in the final look and long-term performance of your SPC flooring.
Your final row will almost always need to be cut lengthwise to fit. This requires careful measurement.
- Lay a full plank directly on top of the last installed row.
- Place another full plank on top of that one, but slide it until it touches the wall.
- Use the edge of the top plank to draw a cutting line on the plank beneath it. This method accounts for your 1/4-inch expansion gap automatically.
- Cut the plank along this line using your utility knife or jigsaw.
Installing this last row can be tricky because you have limited space. You cannot use your tapping block. This is where the pull bar becomes essential.
Installation Tip 🧰: Hook the pull bar over the cut edge of the final plank. Gently tap the other end of the pull bar with your rubber mallet. This will pull the plank into the previous row, locking it tightly in place.
With all the planks laid, your next task is to cover the expansion gaps and create clean edges where the SPC flooring meets other surfaces. This is the job of transition strips. Choosing the correct strip is key to a professional finish.
- T-Transition Strips: You use these to create a smooth bridge between two floors of a similar height. They are perfect for doorways where your SPC floor meets another hard surface like tile or wood.
- End-Transition Strips: These finish the edge of your flooring at an exterior door or against a thick carpet. They provide excellent protection and support for the edge of the SPC plank.
- Slim Trim Multi-Function: This is a versatile, low-profile option. You can use it as a reducer, T-molding, or end cap. It offers a sleek, space-saving solution for various transition needs.
To make it easier, here is a quick guide on where to use each type of transition strip.
| Type of Transition Strip | Best Place to Use It |
|---|---|
| T-Transition | In doorways connecting SPC to another floor of the same height (e.g., tile, hardwood). |
| End-Transition | At sliding glass doors, against fireplaces, or next to high-pile carpet. |
| Slim Trim Multi-Function | When you need a reducer, T-molding, or end cap with a modern, minimal look. |
After installing your transitions, you can reinstall your baseboards or add quarter-round molding. This will hide the expansion gap around the perimeter of the room, giving your new floor a clean and finished appearance.
Daily and Weekly Cleaning Routines
You have successfully installed your beautiful new SPC floor. Now, you can keep it looking pristine with simple daily and weekly cleaning habits. Consistent care is the best way to protect your investment and ensure your floors remain a stunning feature in your home for years.
Sweeping and Dust Mopping
You should make sweeping or dust mopping a part of your daily routine. This simple task removes dirt, dust, and other small particles from the surface. Regular sweeping is one of the most effective ways to protect your floor’s finish.
- It prevents tiny particles from acting like sandpaper underfoot.
- This action stops the gradual wearing down of the floor’s protective top layer.
- It helps keep your SPC floor looking fresh and fabulous for longer.
Vacuuming Without a Beater Bar
You can use a vacuum on your SPC flooring, but you must do it correctly. The most important rule is to avoid using the beater bar. A beater bar is the rotating brush designed to deep clean carpets. Its stiff bristles can easily scratch and dull the finish of your SPC floor.
Cleaning Tip 💡: Always turn off the beater bar or use your vacuum’s ‘hard floor’ setting. A canister vacuum with a soft-bristled floor head attachment is also an excellent choice. This ensures you remove debris without causing any damage.
Immediately Cleaning Spills
Accidents happen, but quick action can prevent permanent damage. You should clean up spills as soon as you see them. SPC flooring is water-resistant, but certain liquids can cause stains if they are left to sit for too long.
Be extra careful with substances that can leave lasting marks. You should immediately wipe up spills such as:
- Juice, coffee, or red wine
- Grease or oily food
- Ink, paint, or permanent marker
- Lipstick
Use a soft, dry cloth to blot the spill. For sticky messes, you can use a damp cloth.
Deep Cleaning Your SPC Floors: SPC 102
Daily cleaning keeps your floors looking good, but periodic deep cleaning is necessary to remove tougher grime. This is your advanced course in floor care, your SPC 102 for deep cleaning. You will learn the correct techniques and products to use. Proper deep cleaning protects your floor’s finish and ensures its longevity. This SPC 102 guide will give you the confidence to tackle the job like a pro.
How to Mop Your Floors Correctly
Mopping is more than just spreading water around. You need the right method to truly clean your floors. A common mistake is using the same dirty water over and over. This just moves dirt from one spot to another and can leave a dingy film. This is a key lesson in SPC 102.
For the best results, you should use a two-bucket mopping system. This method is a cornerstone of proper SPC 102 cleaning. It separates your clean water from the dirty water.
- Fill one bucket with your cleaning solution and the other with clean rinse water.
- Dip your mop into the cleaning solution and mop a small section of the floor.
- Wring the dirty mop into the empty rinse water bucket.
- Dip the mop back into the clean solution to continue cleaning.
This process ensures you are always using a clean mop and fresh solution on your floor. It leads to a significantly cleaner result without leaving a hazy residue. You will also use less cleaning solution over time.
Mopping Tip 💧: Always use a microfiber mop. Its soft, absorbent fibers are excellent for cleaning SPC floors without causing scratches. Wring the mop out thoroughly so it is damp, not soaking wet. Excess water can seep into seams over time.
Choosing a pH-Neutral Cleaner
The type of cleaner you use is extremely important. This is another critical part of your SPC 102 education. You must use a pH-neutral cleaner. The pH scale measures how acidic or alkaline a substance is. A neutral pH is around 7. Cleaners that are too acidic or too alkaline can damage your floor.
Harsh chemicals can react with the materials in your SPC planks. The stone polymer makeup can break down over time with the wrong products. Cleaners with a high pH, like those containing bleach or ammonia, are too reactive for SPC flooring. They can weaken the planks and damage the protective wear layer. Using a pH-neutral cleaner specifically designed for vinyl floors is the safest choice. It effectively cleans the surface without harming the material’s integrity or the beautiful design layer. This is a fundamental rule of SPC 102.
Cleaning Products to Avoid
Knowing what not to use is just as important as knowing what to use. Many common household cleaners are too harsh for your SPC floors. Using the wrong product can cause permanent damage, such as discoloration, dullness, or scratches. This final lesson in SPC 102 will help you protect your investment.
You should avoid any product that is abrasive. This includes scouring powders, steel wool, and stiff-bristled scrub brushes. These items will create fine scratches on the surface and dull the finish. You should also never use wax or polish on your SPC floor, as these products can build up and create a cloudy film that is difficult to remove.
Certain chemicals are especially damaging to the floor’s wear layer.
| Chemical Ingredient | Potential Damage to SPC Floors |
|---|---|
| Bleach | Can cause yellowing or discoloration, especially in high concentrations. |
| Ammonia | Can make the vinyl material brittle over time with repeated use. |
| Acids (Vinegar, Lemon Juice) | Can etch the surface, leading to a dull appearance and making it prone to stains. |
Finally, you should not use a steam mop. The intense heat from a steam mop can weaken the planks, cause them to warp, or damage the click-lock system. Sticking to a simple microfiber mop and a pH-neutral cleaner is the safest and most effective way to deep clean your SPC floors.
Long-Term Protection and Repair
Your SPC floor is tough, but you can take simple steps to protect it for the long haul. Proper care prevents damage and makes repairs easier if they are ever needed. This guide will show you how to protect your floor from daily wear and tear.
Preventing Scratches and Dents
You can easily prevent most scratches and dents with a few smart habits. These proactive measures protect your floor’s beautiful finish.
- Place felt pads on the bottom of all furniture legs. This allows chairs and tables to slide without scratching the surface.
- Avoid dragging heavy appliances or furniture across the floor. Lift these items completely when you need to move them.
- Use doormats at all exterior entrances. Mats trap dirt, grit, and small rocks that can scratch the floor’s wear layer.
- Keep your pet’s nails trimmed to prevent them from scratching the floor as they walk or run.
How to Fix Minor Scratches
You may find a minor scratch on your floor despite your best efforts. Luckily, you can often fix these small imperfections yourself. For light surface scratches, a simple home remedy works well.
Repair Tip 🛠️: You can use baking soda and water to gently buff out a minor scratch.
Follow these steps to address a mild scratch:
- Gather your tools. You will need a soft cloth, baking soda, and warm water.
- Clean the area. Mix a small amount of baking soda with warm water to create a paste. Gently rub this paste over the scratch and then wipe the area clean.
- Dry the surface. Make sure the spot is completely dry before walking on it.
Replacing a Damaged Plank
Sometimes, a plank suffers deep damage that you cannot buff out. In this case, you will need to replace the entire plank. This task requires specific tools and careful work.
You will need several items to perform the replacement. Essential tools include a utility knife, a circular saw, a rubber mallet, and epoxy glue. You should also wear safety glasses and gloves.
The process involves cutting out the center of the damaged plank with a circular saw. You then use a hobby knife to carefully remove the remaining edges. Next, you trim the tongue off the new replacement plank. Finally, you apply epoxy glue to the edges of the new plank and gently tap it into place with a rubber mallet.
You now have the essential knowledge for your SPC flooring project. Remember that proper subfloor preparation and plank acclimation are the foundations of a successful installation. Skipping these steps can void your warranty. Consistent, gentle cleaning with pH-neutral products is key to long-term durability. With proper care, your beautiful SPC flooring can last 15 to 25 years. Following these steps ensures your investment remains functional and attractive for years to come.
FAQ
Do I need underlayment for my SPC flooring?
Many SPC planks include a pre-attached underlayment. You should check your product’s specifications. If your planks do not have one, you might need a separate layer. An underlayment can add comfort and reduce noise. Always follow the manufacturer’s specific installation instructions for your flooring.
Is SPC flooring truly waterproof?
The planks themselves are 100% waterproof. However, the seams between the planks are not completely sealed. You must clean spills quickly to prevent water from reaching the subfloor. Proper installation ensures the best performance and water resistance for your floor.
Can I use a steam mop on my SPC floors?
Warning ⚠️: You should never use a steam mop on SPC flooring. The high heat can cause the planks to warp or bend. It can also damage the locking system and the protective wear layer. Using a steam mop will likely void your product warranty.
Can I install SPC flooring directly over tile?
Yes, you can install SPC over most existing tile floors. You must make sure the tile surface is flat, clean, and in good condition. If the grout lines are deep, you should fill them with a leveling compound to create a smooth, even subfloor.




