

If you live in an apartment, noise from footsteps and movement can be a major concern. Studies show that over 80% of noise complaints in multi-story buildings come from floor impact sounds, with most caused by footsteps. Installing vinyl plank flooring with a soundproof floor underlayment creates quiet flooring that absorbs and blocks noise. Vinyl’s dense, resilient layers help reduce both airborne and impact noise, making your space feel calm. If you wonder how do you put down vinyl plank flooring for a soundproof result, this guide helps you achieve it.
How Do You Put Down Vinyl Plank Flooring for Noise Reduction?
Key Steps for a Quieter Apartment
When you want to know how do you put down vinyl plank flooring for a quieter apartment, you need to follow a few important steps. These steps help you get the best soundproofing results and make your living space more peaceful.
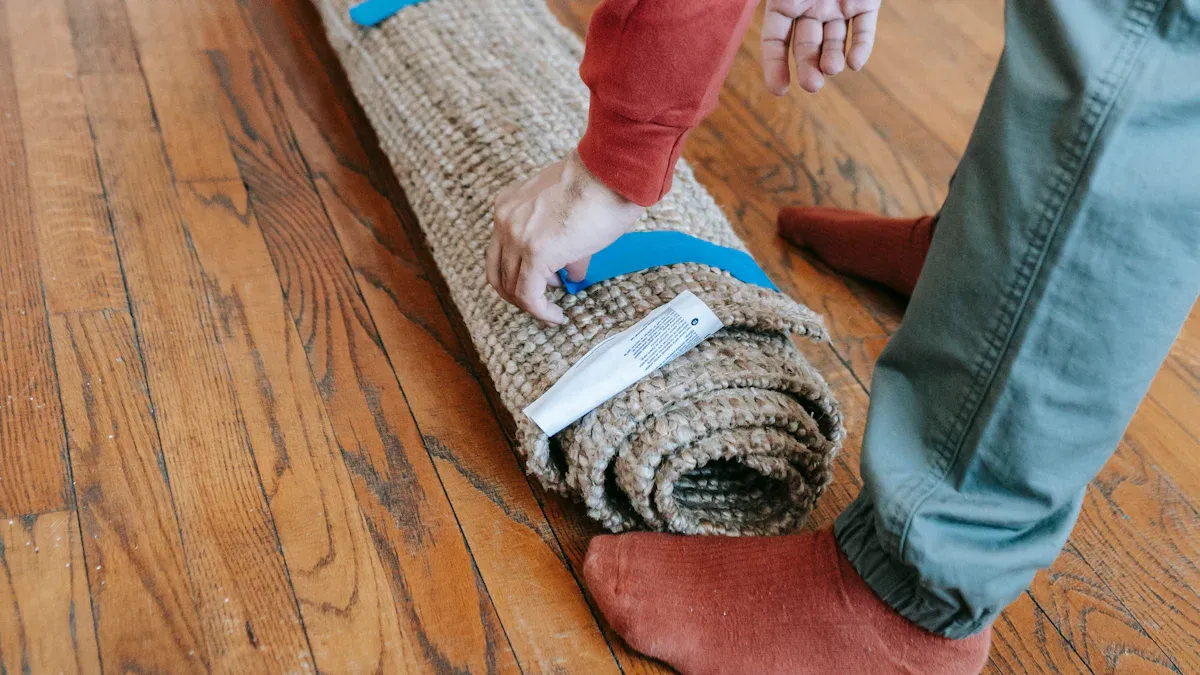
- Remove the existing floor. Take up any old flooring so you can start fresh. If you have carpet, cut it into strips and roll it away. For old vinyl, use a scraper to lift it from the subfloor.
- Clean and level the subfloor. Make sure the surface is smooth and free of dirt. An uneven or dirty subfloor can cause problems like plank lifting and noise leaks.
- Check for moisture. Test the subfloor for moisture and use a barrier if needed. This step helps prevent warping and mold.
- Lay down the floor underlayment. Choose an acoustic underlayment or a mass-loaded vinyl layer. Cut it to fit the room. You do not need to secure it with glue or nails.
- Install the new flooring. Lay the vinyl plank flooring on top of the underlayment. Connect the planks by inserting the tongue of one plank under the edge of another. Use a mallet to secure the seams for a tight fit.
- Leave expansion gaps. Keep small gaps around the edges of the room. This allows the floor to expand and contract with temperature changes.
- Plan your layout. Start with a straight first row and use a chalk line for accuracy. Measure carefully to avoid running out of material.
- Use the right tools. Quality tools help you make precise cuts and ensure a smooth installation.
- Take your time. Do not rush the process. Careful work leads to better noise reduction and a longer-lasting floor.
Tip: Always let your vinyl planks acclimate to the room for at least 48 hours before installation. This helps prevent buckling and keeps your floor flat.
For the most effective soundproofing, experts recommend using these materials:
- Acoustic underlay: Reduces noise transmission and absorbs sound vibrations.
- Mass-loaded vinyl: Blocks both airborne and impact noise, making it ideal for apartments.
- Rubber mats: Absorb impact noise from footsteps and moving furniture.
- Duraquiet vinyl underlayment: Works well with luxury vinyl planks to dampen impact noises.
By following these steps, you create a strong sound barrier and a sound absorbing solution that keeps your apartment quiet.
Why Soundproof Vinyl Flooring Matters
You might wonder why soundproof vinyl flooring is so important in apartment living. The answer lies in the types of noise you face every day. Airborne sound comes from voices, music, and television. Impact noise happens when you walk, move furniture, or drop objects. Both types can travel through floors and walls, disturbing your peace.
Soundproof vinyl flooring helps you control these noises. Luxury vinyl tile and modular acoustic flooring stand out for their noise reduction performance. They minimize both impact and airborne sounds better than many other flooring types. While rubber and carpet tiles also absorb sound, they may not offer the same design variety or reliability as luxury vinyl.
When you ask how do you put down vinyl plank flooring for noise reduction, you choose a product that gives you comfort and quiet. Vinyl’s dense layers and advanced underlayments block sound and reduce vibrations. This makes it a top choice for apartments and commercial spaces.
If you want effective soundproofing, you need to avoid common mistakes. Make sure your subfloor is clean and level. Test for moisture and use the right underlayment. Let your planks adjust to the room before installing. Measure carefully and plan your layout. Leave expansion gaps and use the correct tools. Follow the manufacturer’s instructions for adhesives. Take your time to get the best results.
When you use soundproof vinyl flooring with the right soundproofing solutions, you enjoy a quieter home. You also get a stylish, durable floor that lasts for years. If you want impact soundproofing and noise reduction, vinyl is a smart choice.
Choosing the Best Soundproof Vinyl Flooring and Underlayment
Selecting the Right Sound Barrier Under Vinyl Plank Flooring
You want your apartment to stay quiet. The right sound barrier under vinyl plank flooring makes a big difference. When you choose acoustic underlayment, you add a layer that absorbs footsteps and blocks noise. Look for underlayment with high density and thickness. This helps reduce both impact and airborne sounds. You should check for products that meet IIC and STC standards. These ratings show how well the barrier stops sound from moving between rooms. Acoustic flooring with a quality soundproofing material gives you better results. You can use foam, cork, or rubber underlayment. Each type adds a strong barrier against noise.
Tip: Always select an acoustic underlayment that matches your vinyl flooring choice. This ensures the best sound barrier and keeps your floor stable.
Comparing Underlayment Options for Apartments
You have many choices for underlayment. Each option offers different levels of soundproofing. Here is a quick look at popular types:
- Rubber-based underlays dampen impact noise and vibrations. They work well in busy areas.
- Foam-based underlayments absorb sound and add thermal insulation. They help block noise from footsteps.
- Cork-based underlays are eco-friendly and reduce sound vibrations between rooms.
- Combination underlayments use several materials for extra sound absorption.
You can compare how each barrier performs using ratings. The table below shows how different flooring types and underlayment affect impact insulation class (IIC):
| Flooring Type | IIC Rating (Concrete Slab) | IIC Rating (Wood Floor) |
|---|---|---|
| None (bare) | 29 | 43 to 47 |
| Engineered Hardwood with Underlayment | 53 to 56 | 52 to 53 |
| Solid Parquet with Foam Backing | 55 | N/A |
| Carpet, directly applied | ≥ 55 | ≥ 55 |
| Vinyl with no backing | < 45 | 45 to 49 |
| Rotovinyls (CushionStep) | 50 to 51 | 53 to 54 |
Why skspcflooring Products Stand Out
You want a flooring choice that lasts and keeps your apartment quiet. SK-Floor offers vinyl products with advanced acoustic underlayment. Their soundproofing material meets strict international standards like ISO9001 and ISO14001. The barrier in SK-Floor’s products blocks both impact and airborne noise. You get durable vinyl flooring with a thick wear layer. This means your floor can last up to 25 years. SK-Floor’s acoustic flooring uses a strong sound barrier under vinyl plank flooring. You enjoy a quiet home and a stylish look. Their underlayment options give you the best soundproof results for apartments.
Preparing the Apartment Floor for Installation
Cleaning and Leveling the Subfloor
You need to start with a clean and level subfloor before installing vinyl plank flooring. Dirt, dust, and old adhesive can cause problems later. Use a scraping tool to remove any leftover glue or debris. Sweep the area and vacuum to make sure nothing remains. If you find nails or staples from previous flooring, take them out with a hammer or prybar.
Check the floor for low spots or uneven areas. A tape measure and level help you see if the surface is flat. For larger rooms, use a 2×4 to spot dips across longer distances. If you notice cracks or holes, fill them with cement leveling and patching compound. Apply the compound with a hand trowel and let it dry. A flat subfloor helps your vinyl planks fit tightly and prevents noise leaks.
Here is a quick reference table for tools and materials you may need:
| Tool/Material | Purpose/Use |
|---|---|
| Tape measure and level | Ensure the substrate is level within 3/16 of an inch in a 10-foot radius. |
| 2×4 | Identify low spots over longer distances. |
| Cement leveling and patching compound | Fill large cracks or holes in the substrate. |
| Hand trowel | Apply leveling and patching compound. |
| Scraping tool | Remove old adhesive from the floor. |
| Hammer or prybar | Remove staples or nails from previous flooring. |
Tip: A smooth and level subfloor gives your vinyl flooring the best chance to block noise and last longer.
Checking for Moisture and Irregularities
Moisture can damage your vinyl flooring and reduce soundproofing. Even though vinyl is waterproof, your subfloor is not. You should test for moisture before you begin. Use a calcium chloride test kit for concrete or an invasive moisture meter for wood. If you find high moisture levels, install a waterproof membrane to protect your floor.
Check the pH level of concrete with a pH test kit. High alkalinity can affect the adhesive and cause problems. Look for irregularities like bumps or soft spots. Fix these issues before you lay down vinyl planks. Install acoustic underlayment to absorb noise and seal perimeter gaps to block exterior sounds. Consider mass-loaded vinyl for extra soundproofing.
Note: Proper underlayment treats noise in two ways. It absorbs impact sounds and blocks airborne noise, making your apartment quieter.
Installing Underlayment for Maximum Soundproofing
Laying Out and Securing the Underlayment
You start by choosing underlayment designed for impact noise reduction. This step is important for soundproof vinyl flooring. You need to check the sound rating requirements for your building. You prepare the subfloor carefully before installing flooring underlayment. You make sure the surface is clean and level. You lay out the underlayment across the entire floor, covering every inch. You cut the material to fit the room shape. You avoid overlapping pieces. You place each section edge to edge.
You secure the underlayment according to the manufacturer’s guidelines. You use tape or adhesive if recommended. You press the underlayment flat so it does not bunch up. You assess the whole flooring system, not just individual parts. You select materials like foam, rubber, or cork. Each type provides different levels of sound insulation and support. You follow best practices for adding underlayment to achieve maximum noise reduction.
Modern Luxury Vinyl Plank (LVP) with acoustic underlayment absorbs vibrations from footsteps. This reduces noise and prevents a hollow or echoey feel in your apartment. You create a comfortable space for bedrooms and living rooms.
Sealing Seams and Perimeter Gaps
You need to seal seams and perimeter gaps to prevent sound leaks. You use seam tape over mass loaded vinyl to reduce noise between sheets. You press the tape firmly along every seam. You check for gaps at the edges of the room. Sealing perimeter gaps enhances the sound barrier created by the underlayment and vinyl flooring.
You use acoustical caulk for the perimeter. This material stays flexible and provides a permanent seal. You apply it along the walls where the underlayment meets the baseboard. You use weatherstripping for doors to block mid- and high-frequency sounds. You fill larger openings with backer rod or putty pads. These steps stop sound from escaping through small cracks.
You finish by inspecting the entire floor. You make sure every seam and gap is sealed. You create a strong soundproof barrier that keeps your apartment quiet.
Laying Down the Vinyl Planks with Sound Barrier
Planning the Layout to Minimize Gaps
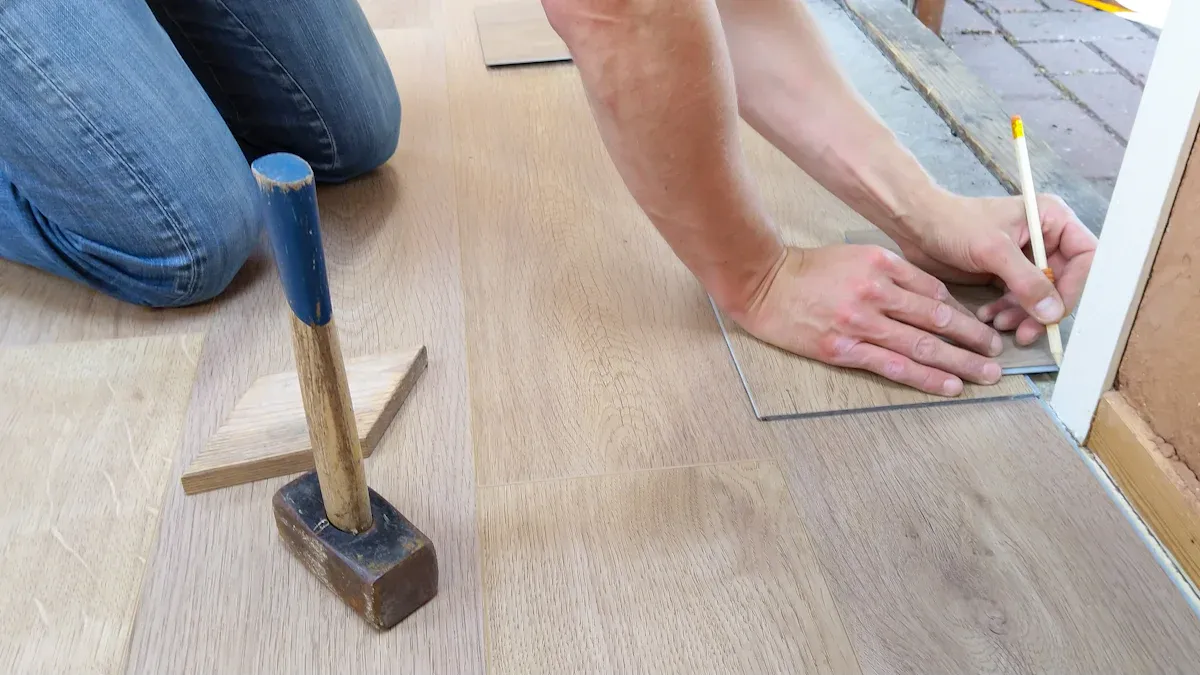
You want your vinyl floor to look great and block noise. Planning the layout helps you avoid gaps that let sound pass through. Start by measuring the room and marking a straight line for your first row. This keeps your planks even and reduces the chance of small gaps. You can choose between floating and glued-down installation methods. Each method affects how well your floor blocks sound.
| Installation Method | Impact on Sound Performance |
|---|---|
| Floating Installation | Can reduce impact sound due to small air gaps. |
| Glued-Down Installation | Creates a solid floor but may worsen impact sound unless acoustic glue or underlayment is used. |
A floating installation often works best for apartments. It uses a layer of underlayment that adds extra soundproof protection.
Installing Planks for a Tight, Quiet Fit
You need to follow the right steps to get a tight fit and a quiet floor. Here is a simple process:
- Use the right underlayment. Pick a high-quality underlayment with strong sound-absorbing features.
- Prepare the subfloor. Make sure it is even and smooth so your vinyl planks fit well.
- Install each plank tightly. Use the tongue-and-groove system to lock planks together. This stops sound from slipping through gaps.
Take your time with each step. A tight fit keeps your vinyl floor quiet and helps the soundproof barrier work better.
Sealing Edges and Transitions
You should seal all edges and transitions to stop sound from leaking out. This step is important for a true soundproof floor.
- Sealing edges and transitions reduces sound leakage through joints and cracks.
- Pay special attention to areas around doors, windows, and vents.
- By sealing these spots, you keep sound from moving between rooms and boost your floor’s soundproof power.
Use acoustic caulk or special tape for the best results. When you finish, check every edge to make sure your vinyl floor is sealed tight. This gives you a quiet, comfortable apartment.
Final Checks and Maintenance for Ongoing Noise Control
Inspecting the Installation for Sound Leaks
You need to check your floor for any spots where noise can escape. Walk across the room and listen for hollow sounds. Look at the seams between planks and along the walls. If you find gaps, fill them with acoustic caulk. Make sure the underlayment stays flat and covers the whole area. You can use a flashlight to spot cracks or spaces that might let noise through. Careful inspection helps you keep your apartment soundproof and comfortable.
Tip: Inspect your floor regularly. Early detection of gaps or loose planks prevents noise problems before they grow.
Cleaning and Caring for Your Soundproof Vinyl Flooring
You protect your floor noise control by using safe cleaning methods. Vinyl flooring acts as a barrier to reflect sound waves. Pairing it with an underlayment enhances sound absorption. You should sweep with a soft-bristled broom or use a microfiber mop. Avoid abrasive scrubbers or scouring pads. Place doormats at entrances to trap dirt and keep your vinyl clean. Do not use wax, polish, or harsh chemicals like ammonia. Steam mops can break down the wear layer and reduce soundproof qualities.
| Do’s | Don’ts |
|---|---|
| Use manufacturers recommended cleaners | Use abrasive scrubbers or scouring pads |
| Use a soft-bristled broom or microfiber mop | Use wax, polish, or harsh chemicals like ammonia |
| Place doormats at entrances to trap dirt | Use steam mops, as heat can break down the wear layer |
To maintain the soundproofing qualities of vinyl plank flooring, you must avoid anything that damages the wear layer. This keeps your floor strong and blocks noise for years.
Tips for Long-Term Quiet Living
You can use several strategies to keep your apartment quiet. Carpet provides impact isolation and reduces noise transfer. Flooring underlay helps isolate impact noise while keeping the look of hard flooring. Acoustic panels work well for reducing noise traveling through walls. Insulating the ceiling minimizes impact noise from above. Paneling walls reduces reverberations and noise transfer. Sealing cracks prevents noise from seeping through gaps.
- Place rugs in high-traffic areas.
- Add acoustic panels to walls.
- Seal cracks and gaps around doors and windows.
- Use thick curtains to block outside noise.
You create a peaceful space by combining these methods with your soundproof vinyl flooring. Regular care and smart upgrades help you enjoy ongoing noise control in your apartment.
When you install soundproof vinyl flooring with the right underlayment, you make your apartment much quieter. You enjoy many benefits, such as:
- Improved quality of life with less noise transmission
- Enhanced privacy between rooms and neighbors
- Better sleep quality because outside sounds stay out
- Increased concentration and productivity in your daily routine
You can trust skspcflooring to provide high-quality vinyl solutions. These products help you create a stylish and peaceful home.
FAQ
How long does it take to install vinyl plank flooring in an apartment?
You can usually install vinyl plank flooring in one or two days. The time depends on the size of your room and your experience. Let the planks adjust to your room for 48 hours before you start.
Can I install vinyl flooring over old tiles?
Yes, you can install vinyl flooring over old tiles if the surface is flat and clean. Make sure you check for loose tiles and fill any gaps. This helps your new floor stay strong and soundproof.
What makes vinyl flooring a good choice for soundproof apartments?
Vinyl flooring has dense layers that block noise. When you add a soundproof underlayment, you reduce both impact and airborne sounds. You get a quiet, comfortable home with easy maintenance.
Do I need special tools to install soundproof vinyl flooring?
You need basic tools like a tape measure, utility knife, and mallet. For soundproof installation, you also need seam tape and acoustic caulk. These tools help you seal gaps and keep your vinyl floor quiet.
How do I keep my vinyl floor looking new and soundproof?
Sweep your vinyl floor often and use a soft mop. Avoid harsh cleaners. Place mats at doors to trap dirt. Check for gaps and reseal edges if needed. This keeps your floor clean and soundproof.




