
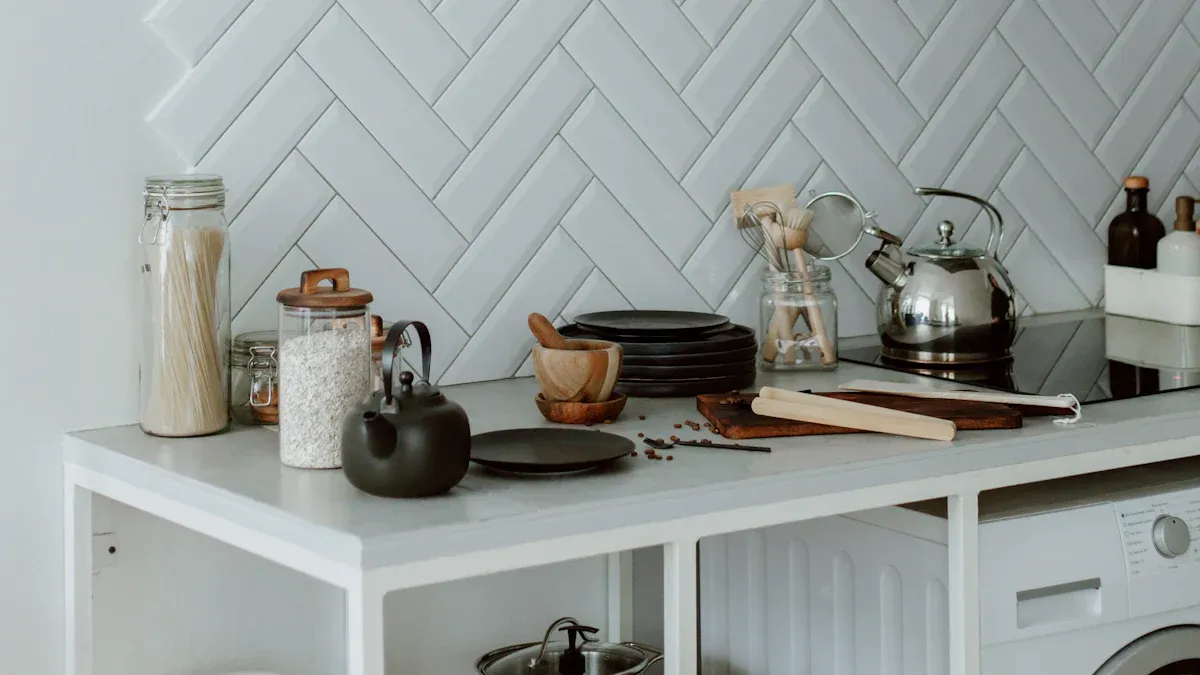
When you choose lvt herringbone flooring, you bring a touch of elegance to any room. This flooring works well in foyers, living rooms, and dining areas, letting the pattern stand out. Many homeowners pick lvt for kitchens, bathrooms, and hallways because it is durable and easy to clean. You can use lvt herringbone flooring in modern apartments, traditional homes, or even industrial spaces. The pattern adds style and makes your flooring a highlight in your home.
Understanding Herringbone LVT Flooring Patterns
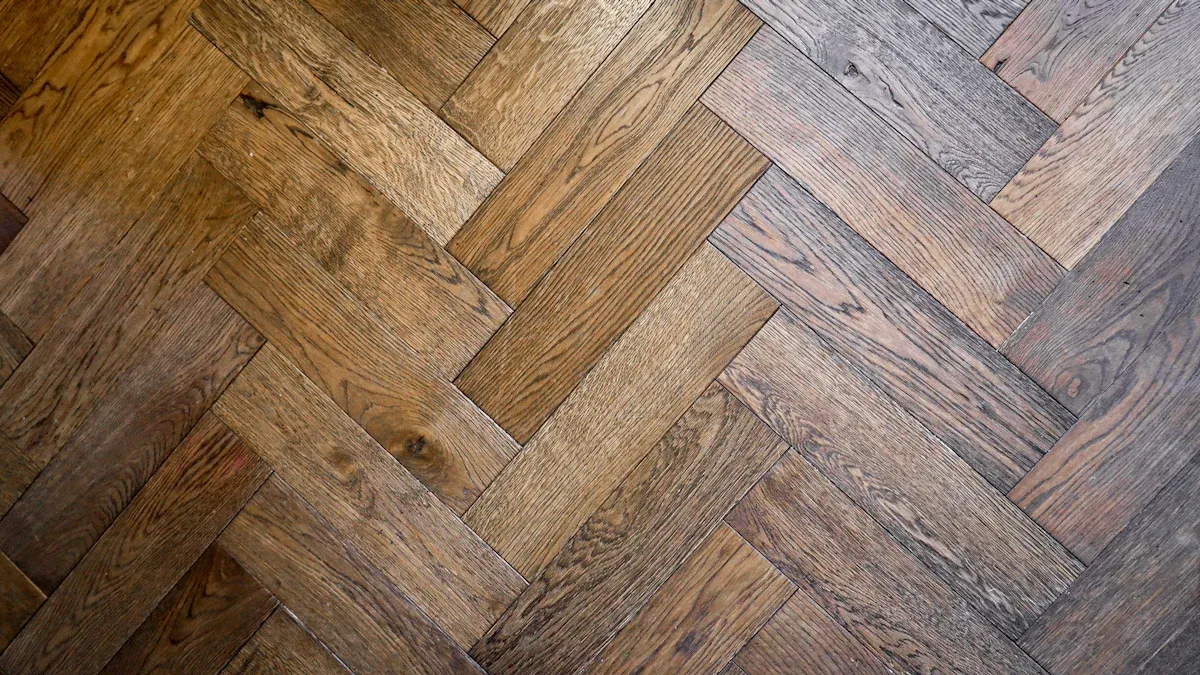
Classic Herringbone
Classic herringbone LVT flooring gives your room a timeless look. You see a zigzag pattern set at a 45-degree angle. This design brings balance and movement to your space. You often find classic herringbone in formal rooms because it adds a touch of sophistication. The pattern works well with both light and dark wood tones. Light colors make small rooms feel bigger and brighter. Darker shades add depth and anchor larger spaces. Classic herringbone fits many styles, from modern to traditional.
Tip: Use classic herringbone in living rooms or dining areas to create a focal point that draws the eye.
Double Herringbone
Double herringbone uses a wider pattern to make a bold statement. You see two planks placed side by side in each zigzag, which creates a larger and more dramatic effect. This style works best in big rooms where you want the flooring to stand out. Double herringbone LVT adds visual interest and can help define open spaces. You can choose from different colors and finishes to match your decor. The pattern’s size and rhythm give your floor a unique look that feels both modern and classic.
- Double herringbone suits open-concept homes.
- It helps break up large spaces and adds warmth.
Diagonal Herringbone
Diagonal herringbone LVT flooring brings energy to your room. You lay the pattern at an angle, not straight with the walls. This direction guides the eye across the floor and makes narrow or small rooms feel larger. Diagonal herringbone creates a dynamic flow and can separate zones in open spaces. Lighting plays a big role here. Shadows and highlights from the pattern add depth and dimension. You can use diagonal herringbone to turn your floor into a true design feature.
Note: Changing the direction of your herringbone pattern can help you define different areas in one large room.
Mixed-Width and Chevron Variations
You can explore even more creative options with herringbone flooring by choosing mixed-width planks or chevron patterns. These styles help you add a unique touch to your space and make your floor stand out.
Mixed-width herringbone uses planks of different sizes in the same pattern. This approach gives your floor a custom look. You might see wide and narrow planks arranged together. The mix creates extra movement and texture. You can use mixed-width herringbone in large rooms to add interest or in small rooms to make the space feel more dynamic.
Tip: Try mixed-width herringbone if you want a floor that feels one-of-a-kind. This pattern works well in both modern and rustic spaces.
Chevron is another popular choice. It looks similar to herringbone, but the ends of the planks are cut at an angle. When you lay them, the planks form a continuous V shape. This pattern creates a clean and sharp look. Chevron works well in hallways, entryways, or any area where you want to draw the eye forward.
Here’s a quick comparison:
| Feature | Mixed-Width Herringbone | Chevron Pattern |
|---|---|---|
| Plank Shape | Straight ends | Angled ends |
| Visual Effect | Varied, textured | Sleek, directional |
| Best For | Unique, lively spaces | Modern, elegant rooms |
You can use both mixed-width herringbone and chevron to highlight your personal style. Both patterns let you play with color and finish. You might choose light tones for a fresh look or dark shades for a dramatic effect. Each herringbone variation brings its own character to your home.
If you want a floor that feels special, consider these herringbone options. They help you create a space that feels both stylish and inviting.
Assessing Your Space for LVT Herringbone Flooring
Room Size and Shape
When you plan to install lvt herringbone flooring, start by looking at your room’s size and shape. Measure your room carefully. This step helps you find the center point, which is important for planning the layout. Use guide lines to keep the pattern balanced. Dry-fit some planks before you begin. This lets you see how the flooring will look and helps you plan border cuts for a neat finish.
- Regular or moderately sized rooms work best for herringbone patterns.
- Narrower planks create a classic look and fit well in most spaces.
- Medium-width planks (4-6 inches) can make small rooms feel bigger, especially with diagonal layouts.
- In narrow or irregular rooms, run the flooring parallel to the longest wall to make the space feel wider.
- Angled or oddly shaped rooms benefit from diagonal or herringbone layouts, which add interest and soften sharp corners.
Tip: Careful planning the layout and starting line will help your herringbone floor look balanced and professional.
Lighting and Ambiance
Lighting changes how your lvt flooring looks. Natural light makes light-colored herringbone patterns feel bright and open. In darker rooms, lighter shades can help reflect light and make the space feel larger. If your room gets lots of sunlight, choose lvt with UV protection to keep colors from fading. Artificial lighting also affects the mood. Warm lights bring out golden or honey tones, while cool lights highlight grey or silver shades. Think about how the light changes during the day. This helps you pick a color and pattern that always looks good.
Existing Decor and Color Scheme
Your current decor and color scheme play a big role in choosing the right herringbone lvt. Classic wood-look herringbone brings elegance and works well with traditional or sophisticated styles. Modern lvt options offer durability and water resistance, making them practical for busy homes. Use the table below to match your decor with the best flooring colors and patterns:
| Color Palette / Undertone | Recommended Herringbone LVT Colors / Patterns | Suggested Decor Styles / Effects |
|---|---|---|
| Warm Palettes | Beige, Brown, Honey tones | Rustic charm, cozy, inviting |
| Cool Palettes | Grey, Taupe, Silver tones | Contemporary, modern, sleek |
| Green Undertones | Olive, Sage hues | Natural, earthy, calming |
| Blue Undertones | Grey, Slate tones | Cool, tranquil, sophisticated |
| Color Intensity | Light: airy; Dark: dramatic; Medium: balanced | Sets room mood and ambiance |
| Contrasting Colors | Bold, statement-making LVT | Dynamic, eye-catching, unique |
Choose a herringbone pattern that matches your style and enhances your space. Light colors make rooms feel open, while dark shades add drama. Contrasting colors can turn your flooring into a focal point.
Matching Herringbone Patterns to Style Preferences
Modern and Minimalist Herringbone Looks
You can create a modern and minimalist space with the right herringbone flooring. Many people choose patterns like traditional herringbone, double herringbone, square herringbone, or broken herringbone for these interiors. Each one brings a unique look and can make your room feel larger and more open.
- Try blending warm oak with cool gray for a soft, balanced effect.
- Layer light and dark wood tones to add depth without clutter.
- Use weathered grays with rich browns for a calm, modern vibe.
- High-contrast blacks and whites make a bold statement in simple spaces.
Pair matte black herringbone with sleek furniture or use gray-washed patterns with modern art. Stone-look LVT, such as marble or slate, adds texture and keeps the design fresh. These choices help you achieve a clean, sophisticated look that feels current and stylish.
Tip: Herringbone patterns in modern spaces often serve as a focal point, especially in entryways or dining rooms.
Traditional and Classic Herringbone Styles
If you love timeless style, classic herringbone LVT works well. You see wood grain looks like oak, maple, beech, pine, and walnut. These patterns focus on natural wood textures and warm tones. Many traditional options include a micro bevel edge, which adds a subtle outline to each plank.
- Choose classic wood colors for a cozy, inviting feel.
- Look for subtle textures that mimic real hardwood.
- Diagonal layouts add depth and make your room feel elegant.
Traditional herringbone patterns fit both formal and casual rooms. You get the beauty of hardwood with the easy care of LVT. This style never goes out of fashion and matches many types of decor.
Rustic and Natural Herringbone Finishes
Rustic herringbone LVT brings warmth and character to your home. You can pick from finishes that look like antique hickory, oak, pine, or barn wood. These floors often show off knots, grain patterns, and color changes, such as caramel or deep chocolate tones.
- Distressed, weathered, or hand-scraped finishes give a farmhouse feel.
- Wire-brushed and whitewashed looks add texture and charm.
- Multi-tonal planks create a natural, lived-in effect.
Rustic herringbone flooring is waterproof and durable, so you can use it in kitchens or bathrooms. The pattern adds geometric interest while keeping the space relaxed and welcoming.
Bold and Statement Herringbone Designs
You can make your floor the star of your room by choosing bold herringbone patterns. Many homeowners now pick wood-look LVT flooring with distressed or weathered styles. These herringbone floors look like reclaimed or aged wood. They add warmth and character to your space. Wide plank herringbone layouts have also become popular. These planks create a rustic and natural feel. You see the texture and grain, which makes the floor look real and inviting.
Some people want even more drama. You can choose geometric or abstract patterns in a herringbone layout. These designs use shapes, lines, or even mosaic effects. They turn your floor into a piece of art. Modern art-inspired herringbone patterns work well in living rooms, entryways, or creative spaces. Textured and embossed surfaces add depth. When you walk across these floors, you notice the details under your feet.
Tip: If you want your floor to stand out, try a bold herringbone pattern with a unique color or texture. This choice can make your room feel special and full of energy.
Here are some ways to create a statement with herringbone LVT:
- Use wide planks with a weathered finish for a rustic look.
- Pick geometric or mosaic patterns for a modern vibe.
- Try high-contrast colors to draw attention to the floor.
- Choose embossed or textured surfaces for extra depth.
You can match these bold herringbone styles with simple furniture. This lets the floor shine as the main feature in your room. A statement herringbone floor can change the whole mood of your home.
Practical Considerations for Herringbone LVT Flooring Installation
Installation Methods: Glue-Down, Click-Lock, and Floating
When you plan to lay herringbone lvt, you need to choose the right installation method. The three main installation techniques are glue-down, click-lock, and floating. Each method has its own benefits and challenges. Before beginning the installation, focus on pre-installation essentials like proper preparation and subfloor preparation. A clean, level subfloor helps your flooring last longer.
| Installation Method | Glue-Down (Dryback) | Click-Lock |
|---|---|---|
| Stability | Very stable, firmly attached to subfloor | May have slight movement, less stable |
| Installation Ease | Requires adhesive and professional installation | Easy, no glue, DIY-friendly |
| Durability | Superior durability, ideal for high-traffic and commercial areas | Suitable for residential and light commercial use |
| Replacement | More effort to replace damaged tiles | Easy to replace individual tiles |
| Comfort | Less comfortable underfoot | More comfortable due to thicker design |
| Acoustic Performance | Excellent for commercial use | Good for residential use |
| Design Flexibility | Allows complex patterns like herringbone and borders | Limited pattern flexibility |
Glue-down herringbone lvt flooring offers strong stability and works well in busy spaces. Click-lock herringbone lvt is easier to install and replace, making it a good choice for DIY projects. Floating floors, which include click-lock, allow you to install over existing floors with minor imperfections. Always check your subfloor before starting.
Tip: Proper preparation and subfloor care help prevent future problems with your flooring.
Durability and Wear Layer
The wear layer is the clear top coating on lvt. It protects your flooring from scratches, stains, and scuffs. Thicker wear layers mean better durability and a longer lifespan. Most herringbone lvt flooring has wear layers between 6 and 20 mils. For bedrooms, a 6 mil layer works well. Living rooms need about 12 mils. Busy homes or light commercial spaces do best with 20 mils. Heavy commercial areas need even thicker layers.
| Wear Layer Thickness (mils) | Recommended Usage | Durability and Lifespan Impact |
|---|---|---|
| 6 | Light residential use (e.g., bedrooms) | Basic protection, shorter lifespan. |
| 12 | Balanced residential use (e.g., living rooms) | Moderate protection, longer durability. |
| 20 | Young families or light commercial use (e.g., offices) | High protection, up to 20 years with care. |
| Above 20 | Heavy commercial applications (e.g., retail stores) | Maximum durability, longest lifespan. |
When you select your flooring, focus on the wear layer more than the total plank thickness. This choice helps your floor stay beautiful for years.
Maintenance and Cleaning Needs
Keeping your herringbone lvt flooring clean is simple if you follow a few steps. Sweep or vacuum daily to remove dust and dirt from the pattern. Use a microfiber mop for regular cleaning. Mop weekly with a damp mop and a pH-neutral cleaner. Clean spills right away to prevent stains or damage. Avoid harsh chemicals, bleach, or abrasive tools. Place mats at entryways to trap dirt and moisture. Put felt pads under furniture legs to stop scratches. For high-traffic areas, use protective mats. Make sure joints and edges are sealed for waterproof performance.
Note: Regular care and the right cleaning products keep your flooring looking new and extend its life.
Budget and Value
When you plan your LVT herringbone flooring project, you want to balance style with cost. The total price depends on the type of installation you choose and the size of your space. Some installation methods cost more because they need extra skill and time. Herringbone patterns also use more material due to extra tile waste.
Here is a quick look at how different installation methods compare:
| Installation Method | Labor Cost Range (per sq.ft.) | Total Cost Range (per sq.ft.) |
|---|---|---|
| Peel-and-Stick | $1 – $3 | $2 – $8 |
| Glue-Down | $1.50 – $6 | $3 – $16 |
| Click-Lock | $1 – $4 | $3 – $16 |
Note: Herringbone installation usually costs about 20% more than standard patterns. This is because you need more precise cuts and extra material.
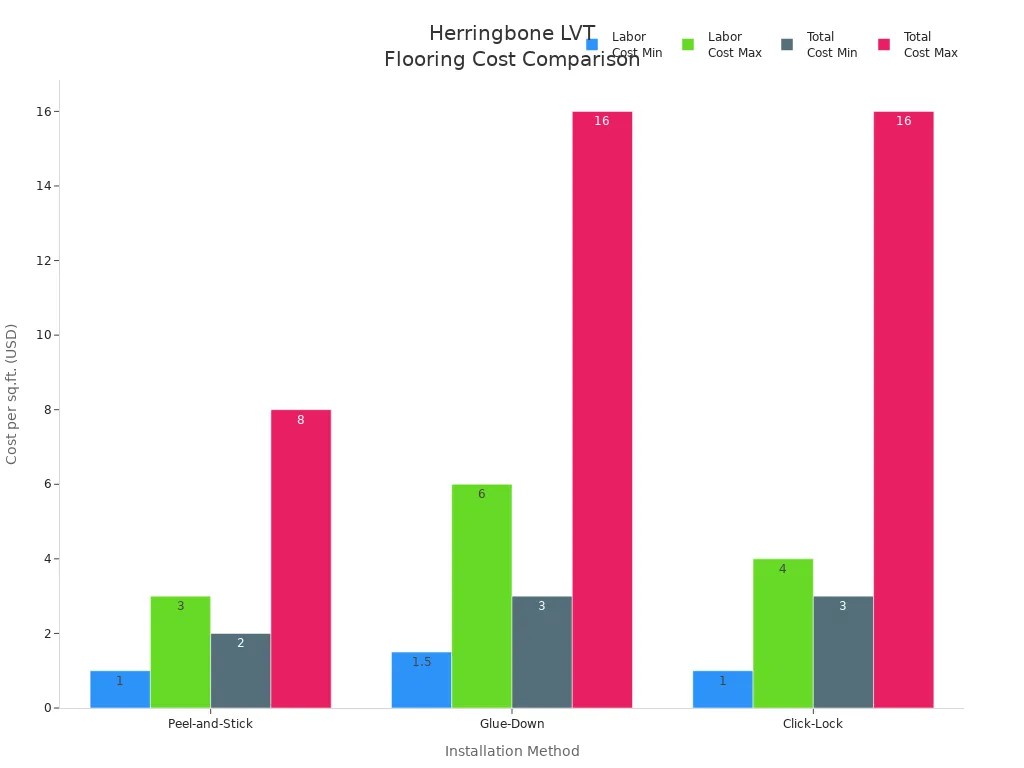
Peel-and-stick installation gives you the lowest price. You can save money if you install the floor yourself. Glue-down installation costs more, but it gives you a strong, long-lasting floor. Click-lock installation sits in the middle for price and works well for many homes. You should also think about the condition of your subfloor. A smooth, level subfloor helps you avoid extra costs during installation.
To get the best value, follow these tips:
- Measure your space carefully to avoid buying too much material.
- Choose the installation method that fits your budget and skill level.
- Ask about warranties and long-term care costs.
- Compare prices from different suppliers.
You can enjoy the beauty of herringbone LVT flooring without overspending. Careful planning helps you get the most for your money.
Step-by-Step Installation Process and Pattern Selection Guide
Define Your Priorities and Needs
Before you start the installation process, you need to set clear goals for your project. Think about how you want your space to look and feel. Ask yourself what matters most: style, durability, or easy cleaning. Each room has different needs, so your priorities may change from one area to another.
Start by measuring your room. Find the center point and mark perpendicular lines. This step helps you with determining the starting point and keeps your layout balanced. If your room is not perfectly square, adjust your layout to keep the herringbone pattern looking even. Always allow for a 15-20% waste factor because herringbone layouts need extra cuts.
Here is a simple guide to help you set your priorities:
- Decide where you want to install the flooring. Kitchens and bathrooms need waterproof LVT.
- Measure the room and mark the center. Use chalk lines for accuracy.
- Choose plank width and thickness based on room size and traffic. Narrow planks work well in small rooms, while wide planks suit large spaces.
- Think about the look you want. Narrow planks give a traditional feel. Wide planks look modern.
- Plan your budget. Thicker boards cost more but last longer.
- Consider the subfloor. Make sure it is clean and level for a smooth installation.
- Pick a premium brand if you want the best fit and finish.
Tip: Always use sharp tools and score planks twice for clean edges. Secure the first tiles with painter’s tape to keep them in place while the adhesive sets.
Compare Herringbone Pattern Options
You have many choices when it comes to herringbone LVT flooring. Each pattern creates a different effect in your room. The direction of the pattern and the color you choose can change how big or small your space feels.
Use this table to compare your options:
| Pattern Type | Best Room Size | Visual Effect | Plank Width Recommendation |
|---|---|---|---|
| Classic Herringbone | Small to Medium | Timeless, elegant, enlarges space | Narrow (70-90mm) |
| Double Herringbone | Large, Open | Bold, dramatic, defines open areas | Wide (100-125mm) |
| Diagonal Herringbone | Narrow, Irregular | Dynamic, expands narrow rooms | Medium (97-100mm) |
| Mixed-Width | Any | Unique, lively, custom look | Mixed |
| Chevron | Hallways, Entry | Sleek, directional, modern | Medium to Wide |
When you compare herringbone patterns, look at how the layout changes the room. Diagonal patterns make a room feel bigger. Classic layouts add style and sophistication. Color also matters. Weathered grays with blue accents give a coastal feel. Rich browns with copper make a space feel warm.
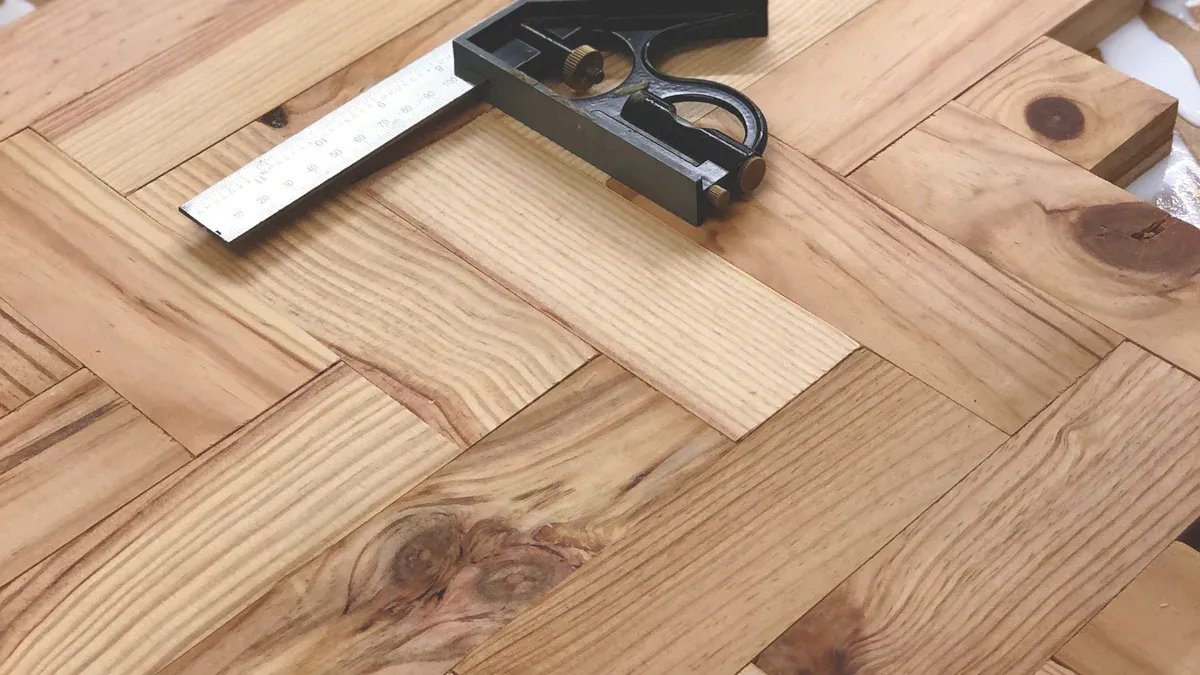
Professional installers recommend starting from the center and working outward. Use chalk lines to keep your layout straight. Always check your angles with a carpenter’s square. If you want a seamless finish, use templates for tricky cuts near walls or pipes.
Note: Lay herringbone LVT slightly tighter than usual. This step helps with continuing the pattern and keeps the layout stable.
Visualize LVT Herringbone Flooring in Your Space
Seeing your new floor before you install it can help you make the best choice. Today, you can use digital tools to preview herringbone LVT flooring in your own room. These tools let you upload a photo and try different patterns, colors, and layouts.
Some popular visualization tools include:
- TilesView Flooring Visualizer: This tool uses AI to show you how different floors will look in your space. You can mix and match floors with wall colors, cabinets, and lighting. It works in your browser and is free to use.
- Karndean Floorstyle Visualizer: This tool lets you try different LVT patterns, change angles, and compare options side by side. You can share your favorite looks with others. For the best results, order free samples to see the real color and texture.
When you use these tools, you can:
- Adjust the angle of the pattern to see how it changes the room.
- Try different lighting to see how the floor looks at different times of day.
- Mix flooring with your current decor to find the best match.
Tip: Digital previews are helpful, but always order samples before making your final decision. This step ensures you get the color and texture you want.
A good installation guide will remind you to plan your layout, check your measurements, and use the right tools. Professional advice can help you avoid mistakes and get the best results. If you feel unsure, ask a professional for help with the installation process.
Consult with Flooring Professionals
When you want your herringbone LVT flooring to look its best, you should talk to a professional. These experts know how to handle every step of the installation. They help you avoid common mistakes and make sure your floor lasts for years.
Here are some reasons to consult with a professional:
- They prepare the subfloor with care. A smooth, level surface is important for a flawless installation.
- Professionals plan the layout from the center of the room. This keeps the herringbone pattern even and balanced.
- They use sharp tools and special adhesives. This helps them make clean 45-degree cuts, which are needed for the herringbone design.
- Experts keep the pattern straight and prevent gaps or misalignment.
- They give you advice on how to let your flooring adjust to the room’s temperature and humidity before installation.
- Professionals teach you how to care for your new floor so it stays beautiful and strong.
- Their work gives you a floor that looks amazing and adds value to your home.
Tip: Brands like Luvanto recommend using trained fitters for their herringbone LVT. These installers know how to work with advanced systems, such as Click+ with Drop Lock technology. They also make sure your floor works well with underfloor heating.
A professional can answer your questions and help you choose the right materials. You get peace of mind knowing your floor will have professional results.
Make Your Final Selection
You have learned about patterns, styles, and installation methods. Now you need to make your final choice. Take your time and follow a step-by-step guide to avoid mistakes.
Here are some common mistakes to watch out for:
- Rushing through layout planning. This can cause the herringbone pattern to look uneven.
- Starting from the wrong spot in the room. This leads to the pattern drifting off-center.
- Leaving uneven spaces between planks. This creates gaps and makes the floor look messy.
- Not taking care with corner and border cuts. These areas need extra attention for a neat finish.
Follow this simple guide to make your final selection:
- Prepare your subfloor. Clean it, check for moisture, and use the right underlay.
- Let your LVT flooring adjust to the room’s temperature and humidity before installation.
- Measure your space carefully. Plan your layout to avoid awkward cuts and wasted material.
- Choose the correct installation method. Know if your LVT is click-lock or glue-down.
- Double-check your pattern and color choices. Use samples and visualization tools to see how they look in your space.
Note: Patience and careful planning help you get the best results. If you feel unsure, ask a professional for help.
When you follow this guide, you set yourself up for a successful project. You enjoy a beautiful herringbone LVT floor that fits your style and needs.
Choosing the best LVT herringbone flooring starts with careful planning.
- Prepare your subfloor and mark the center of your room for perfect pattern alignment.
- Pick a style that matches your taste and meets your needs for durability and easy cleaning.
- Consult a flooring professional for expert advice and a flawless finish.
Remember: Herringbone LVT adds value, comfort, and style to any space.
Ready to transform your home? Start your flooring journey today! 🏡
FAQ
What makes LVT herringbone flooring different from real wood?
LVT herringbone flooring uses vinyl to mimic wood. You get the look of real wood without the high cost or maintenance. LVT resists water and scratches. You can install it in places where real wood may not work, like bathrooms or kitchens.
Can I install LVT herringbone flooring myself?
Yes, you can install many LVT herringbone floors yourself. Click-lock systems make DIY projects easier. Glue-down types may need more skill. Always follow the manufacturer’s instructions. If you feel unsure, ask a professional for help.
How do I clean and maintain my LVT herringbone floor?
Sweep or vacuum your floor every day. Use a damp mop and a pH-neutral cleaner for deeper cleaning. Avoid harsh chemicals and abrasive tools. Place mats at doors to catch dirt. Use felt pads under furniture to prevent scratches.
Will LVT herringbone flooring work with underfloor heating?
Yes, most LVT herringbone floors work with underfloor heating. Check the product label or ask your supplier. Keep the temperature below the recommended limit. Let the flooring adjust to the room before installation for best results.
How long does LVT herringbone flooring last?
LVT herringbone flooring can last 10 to 20 years with proper care. The wear layer protects against scratches and stains. Thicker wear layers give longer life. Regular cleaning and quick spill cleanup help your floor stay beautiful.




