
You see lvt flooring everywhere today because lvt flooring production uses advanced materials and technology to make surfaces that last. Vinyl flooring stands out for its durability and water resistance. Lvt flooring resists chips, cracks, stains, and dents, making it perfect for kitchens and bathrooms. You get comfort underfoot and a design that looks like real wood or stone. The production process creates layers that stop moisture and make cleaning easy. Lvt flooring offers many designs, so you can match any style. The global market keeps growing, showing how much people trust luxury vinyl tile.
| Source | Current Market Size (USD Billion) | Projection Year | Projected Market Size (USD Billion) | CAGR (%) |
|---|---|---|---|---|
| Verified Market Research | 25.1 (2024) | 2031 | 66.2 | 10.9 |
| MarketsandMarkets | 17.74 (2025) | 2030 | 21.12 | 3.56 |
| The Insight Partners | N/A | 2031 | 43.74 | N/A |
Lvt flooring production gives you a floor that is easy to install, affordable, and simple to maintain.
- Lvt flooring is durable and water-resistant.
- Vinyl flooring mimics natural materials.
- Lvt needs little maintenance and absorbs sound.
- The production process ensures quality and comfort.
Essential Materials in LVT Flooring Production
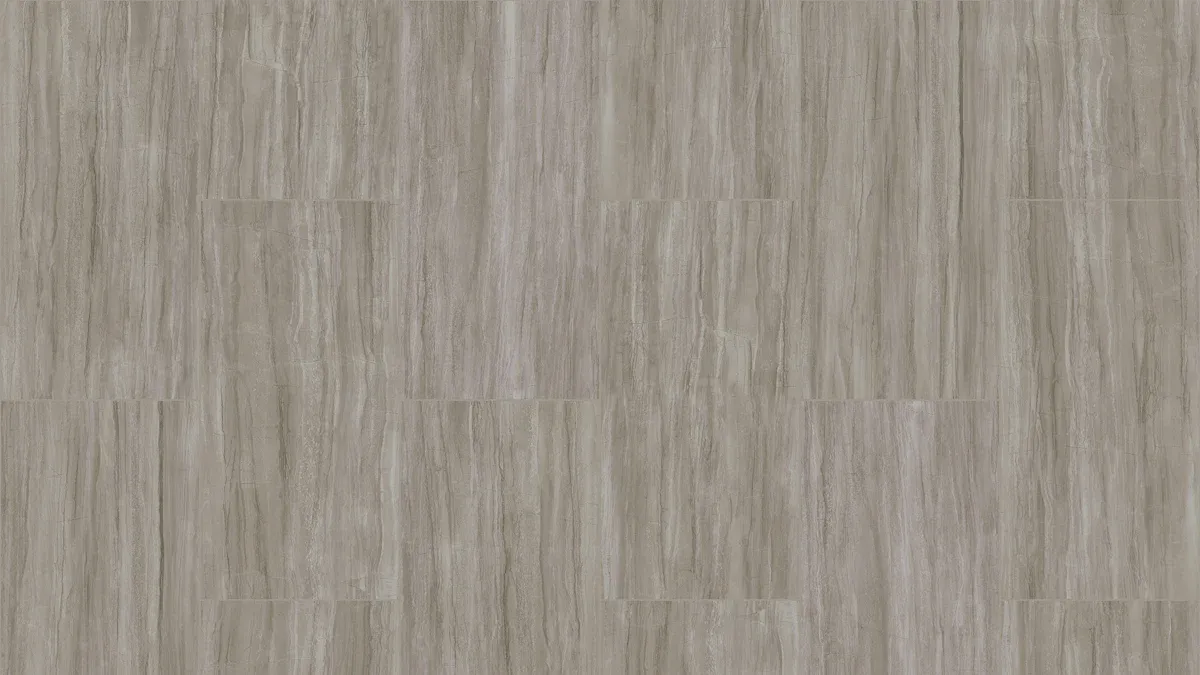
When you look at LVT flooring, you see more than just a pretty surface. The materials inside each tile make a big difference in how the floor feels, looks, and lasts. Let’s explore what goes into lvt flooring production and why these materials matter.
Polyvinyl Chloride (PVC) Resins and Additives
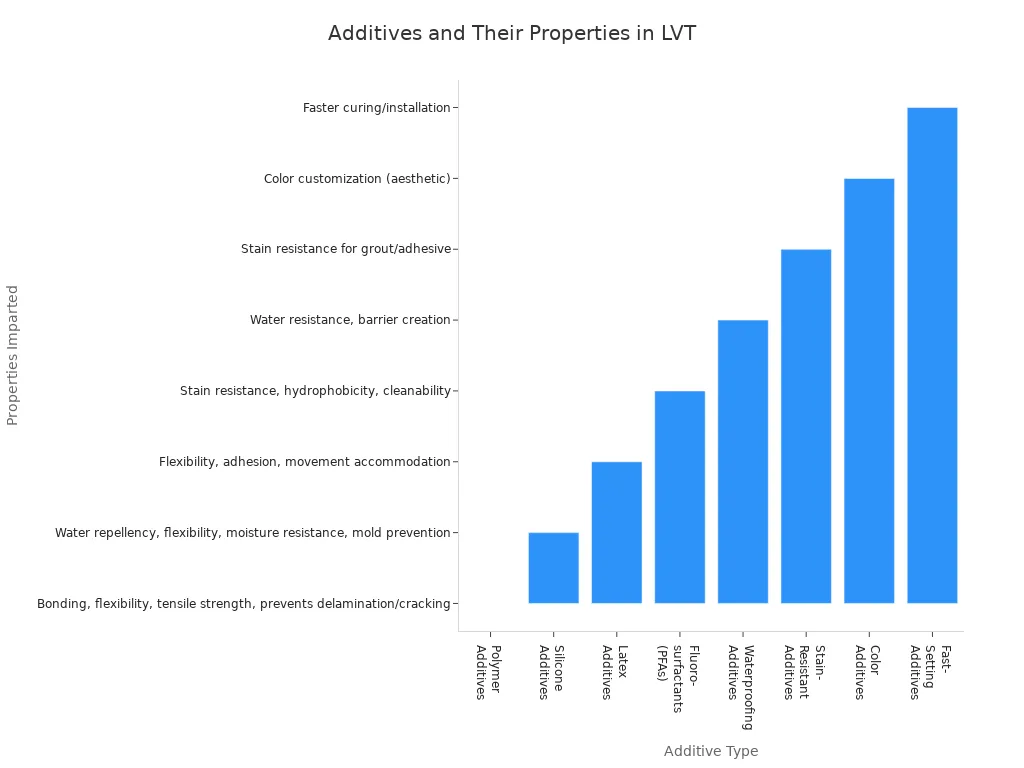
You find PVC resins at the heart of every lvt flooring product. These resins form the main structure of vinyl flooring. High-quality PVC resins, mixed with natural fillers like stone powder, give lvt flooring its strength and stability. When you choose floors made with quality raw materials, you get surfaces that resist scratches, dents, and water. Good PVC resins also keep your home safe because they do not release harmful chemicals. Additives like fluoro-surfactants and silicones help the surface resist stains and make cleaning easy. These additives create a hydrophobic layer, so spills bead up and wipe away fast.
| Material/Layer | Role/Function |
|---|---|
| Polyvinyl chloride resins (PVC) | Primary raw material forming the base compound for LVT sheets. |
| Calcium carbonate | Mixed with PVC to create the compound, contributing to the structure. |
| Backing layer | Provides sound absorption and textured grip for stability and comfort. |
| Fill layer | Adds stability and resistance to indentation, enhancing durability. |
| Print layer | Contains realistic photographic designs, giving LVT its visual appeal. |
| Wear layer | Protects the surface, extends lifespan; often enhanced with clear coatings like aluminum oxide for durability. |
You can see how each layer works together to make lvt flooring strong and attractive.
Fillers, Stabilizers, and Plasticizers
Fillers like calcium carbonate add weight and strength to vinyl flooring. They help your lvt flooring stay flat and resist dents from heavy furniture. Stabilizers protect the floor from heat and sunlight, so it does not fade or crack over time. Plasticizers make the flooring flexible. This means you can install lvt on uneven surfaces without worrying about cracks. These ingredients work together to give you a floor that lasts for years.
| Additive Type | Common Use in LVT Manufacturing | Influence on Product Characteristics |
|---|---|---|
| Fillers | Improve density and stability | Enhance flooring density and stability, contributing to overall product robustness |
| Stabilizers | Prevent degradation from heat, UV, and environmental factors | Increase resistance to heat and UV radiation, improving durability and longevity |
| Plasticizers | Added to PVC resin to improve flexibility | Provide softness and pliability, allowing the flooring to conform to uneven surfaces and prevent cracking or splitting |
Tip: The right mix of fillers, stabilizers, and plasticizers helps your lvt flooring handle daily wear and tear.
Decorative Films and Printing Inks
You get the look of real wood or stone in lvt flooring because of advanced decorative films and printing inks. Digital printing technology creates high-definition images with rich colors and fine details. This makes vinyl flooring look almost identical to natural materials. Water-based inks support eco-friendly lvt flooring production and keep indoor air clean. Embossing adds texture, so your floor not only looks real but also feels real under your feet. You can even find lvt with unique patterns and custom designs, thanks to digital printing.
- Digital printing gives you realistic visuals and a wide range of colors.
- Embossing adds texture for a natural feel.
- Water-based inks help make lvt flooring safer for your home.
With these materials, lvt flooring combines beauty, strength, and easy care. You get a floor that fits your style and stands up to daily life.
Wear Layers and Protective Coatings
When you choose lvt flooring, you want a surface that stands up to daily life. The wear layer and protective coatings play a big role in how long your floor lasts and how well it resists damage. The wear layer sits on top of the decorative film. This clear layer shields the design from scratches, dents, stains, and fading. You can find different thicknesses for the wear layer, measured in mils. For light residential spaces like guest rooms, a 6–12 mil wear layer gives basic protection. If you have kids or pets, a 12–20 mil wear layer works better for busy homes. For commercial spaces or heavy traffic, a 20+ mil wear layer offers the highest level of defense.
| Wear Layer Thickness (mils) | Typical Use Case | Impact on Scratch Resistance | Impact on Stain Resistance |
|---|---|---|---|
| 6–12 | Light residential (guest rooms) | Basic protection against scratches and scuffs | Helps prevent liquid penetration and staining |
| 12–20 | Moderate residential (living areas) | Improved abrasion resistance for active households | Enhanced stain resistance due to thicker barrier |
| 20+ | Heavy residential/commercial | High scratch and scuff resistance, suitable for pets and heavy traffic | Strong stain resistance, repels spills effectively |
You get more than just thickness with lvt flooring. The type of protective coating matters, too. Many lvt products use polyurethane or enhanced urethane coatings. Some even add ceramic beads or aluminum oxide to the top layer. These hard particles boost scratch resistance and help your floor stay clear and bright. Advanced coatings also repel spills and block moisture, making cleaning easier and stopping stains before they start.
Tip: The right combination of wear layer thickness and advanced coatings gives your lvt flooring the best protection. You get a floor that looks great and lasts longer, even in busy spaces.
Vinyl flooring with a strong wear layer and quality coatings can handle heavy foot traffic, pets, and spills. You protect your investment and enjoy a beautiful floor for years. Remember, thickness alone does not guarantee durability. The quality of the coatings and the materials used in your lvt make a big difference in performance.
Step-by-Step Luxury Vinyl Tile Manufacturing Process
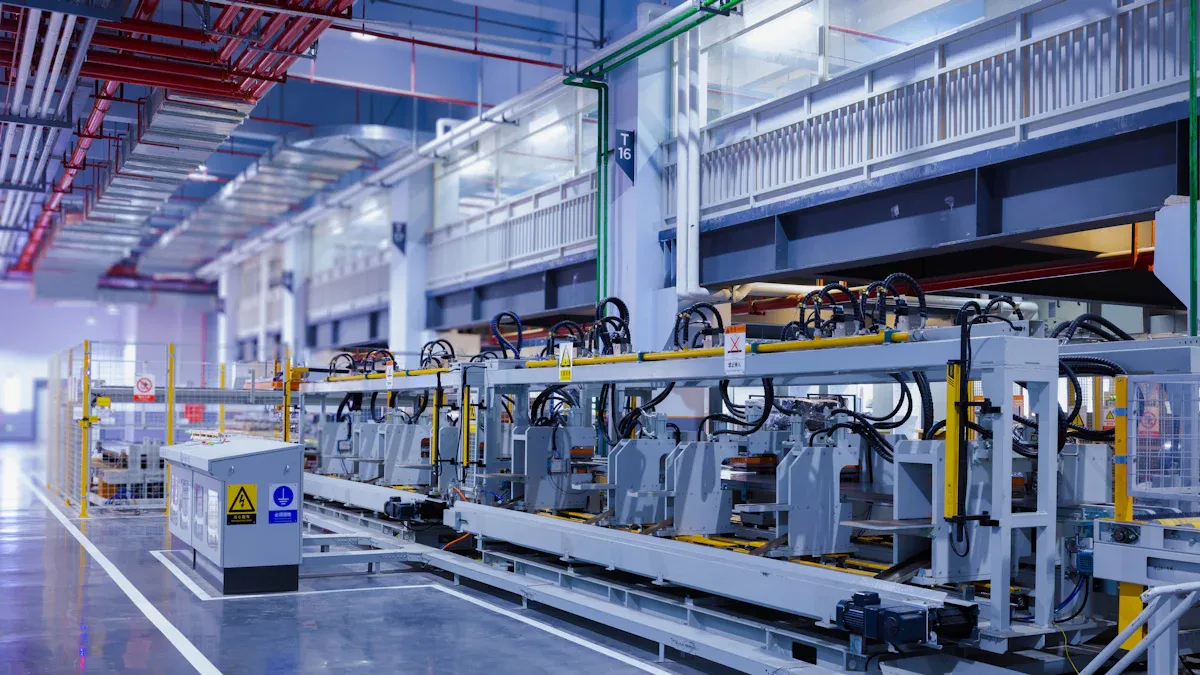
You might wonder how lvt flooring goes from raw materials to the finished product you see in homes and businesses. The production process involves several important steps. Each step shapes the quality, durability, and appearance of the final lvt flooring.
Material Preparation and Compounding
You start with the right mix of raw materials. Manufacturers gather polyvinyl chloride (PVC) resins, plasticizers, stabilizers, and pigments. These ingredients form the base of lvt flooring. Workers measure and mix these materials carefully to create a uniform vinyl compound. This step is crucial because the quality of the compound affects the strength and flexibility of the finished tiles.
The process looks like this:
- Workers source and weigh PVC, plasticizers, stabilizers, and pigments.
- Machines blend these materials to form a consistent mixture.
- The mixture is heated to create a flexible vinyl compound.
Note: The right blend of materials ensures your lvt flooring resists dents, scratches, and moisture.
Mixing the materials well helps prevent weak spots in the flooring. This step sets the foundation for the rest of the production process.
Core Layer Extrusion and Calendering
Next, you move to the core layer, which gives lvt flooring its strength. The vinyl compound enters an extruder, where it gets heated to high temperatures—sometimes up to 200°C. The machine presses the mixture into a thick, flat sheet. This sheet forms the backbone of your lvt flooring.
Here’s how this step works:
- The heated vinyl compound passes through the extruder, forming the core layer.
- Precise temperature and pressure control ensure the core stays strong and stable.
- The sheet moves through calendering rollers, which flatten it and set its thickness.
- Embossing rollers press patterns into the surface, giving the core layer texture and a realistic look.
Calendering does more than just flatten the sheet. It also adds texture that mimics wood grain or stone. This step affects how your lvt flooring feels underfoot and how it looks in your space. The density and stability of the core layer depend on careful control during extrusion and calendering.
Tip: Advanced embossing during calendering helps your lvt flooring look and feel like real wood or stone.
Layer Construction and Lamination
After forming the core, you build the rest of the layers. Lvt flooring uses a layered structure for strength and beauty. You add a decorative film with a printed design, then a clear wear layer on top for protection.
The lamination process bonds all these layers together. Manufacturers use heat, pressure, and time to fuse the layers into a single, solid tile. Two main methods help with this:
- Continuous lamination: Machines like rotocure systems apply steady heat and pressure, creating a strong bond and high-quality finish.
- Static press lamination: Workers stack pre-cut layers and press them together in a chamber. This method takes more time and energy but still produces a durable product.
No extra chemical adhesives are needed. The heat and pressure alone create a tight seal between layers. This strong bond keeps your lvt flooring from peeling or separating, even in busy areas.
Callout: Proper lamination ensures your lvt flooring stands up to daily wear and tear, keeping the layers locked together for years.
The production process continues with cooling, cutting, and finishing, but these three steps—compounding, extrusion/calendering, and lamination—form the heart of lvt flooring production. When you choose lvt, you get a floor built for strength, beauty, and long-lasting performance.
Printing and Design Application
You see the beauty of lvt flooring because of advanced printing and design techniques. Manufacturers use high-definition printing to create images that look just like real wood, stone, or ceramic tile. These images go onto the vinyl core as a design layer. The process uses high-resolution printers that capture every detail, from wood grain to stone texture.
- High-definition printing gives you realistic visuals that are hard to tell apart from natural materials.
- The design layer sits right on the vinyl core, making the pattern clear and sharp.
- A clear wear layer goes on top to protect the printed design from scratches and stains.
- Embossing adds texture, so your lvt flooring feels like real wood or stone.
- The layers bond together under heat and pressure, locking in the design and making the floor strong.
You get many choices with lvt. Some floors cost as little as $1.50 per square foot, while premium options can reach $12.00 per square foot. No matter the price, you still get a floor that looks real and lasts a long time. The combination of printing and embossing gives you both beauty and texture. This makes lvt a popular choice for homes and businesses.
Tip: Digital printing and embossing let you pick from many styles, colors, and patterns. You can match any room in your home.
Wear Layer and UV Coating
The wear layer and UV coating protect your lvt flooring from daily damage. The wear layer is a clear film made from PVC. It sits above the printed design and shields it from scratches, stains, and fading. Manufacturers often add urethane or hardening additives to make this layer even stronger.
The thickness of the wear layer matters. In the United States, you measure it in mils. A thicker wear layer means better protection and a longer-lasting floor. For example, a 6 mil wear layer works well in guest rooms. A 12 mil layer fits bedrooms and home offices. If you have a busy kitchen or hallway, a 20 mil layer gives you more durability. For stores or restaurants, a 30+ mil layer stands up to heavy foot traffic.
| Wear Layer Thickness | Recommended Use | Durability & Purpose |
|---|---|---|
| 6 mil | Low traffic residential areas (e.g., guest rooms) | Basic protection against scratches and stains, suitable for light use |
| 12 mil | Medium residential traffic (e.g., bedrooms, home offices) | Moderate durability for everyday use |
| 20 mil | High residential and light commercial traffic (e.g., kitchens, hallways) | Enhanced protection for busy households with pets and kids |
| 30+ mil | Heavy commercial traffic (e.g., retail stores, restaurants) | Maximum durability for intense foot traffic and wear |
The UV coating, also called the finish layer, goes on top of the wear layer. This coating protects your lvt from bacteria and discoloration. It helps your floor stay bright and clean for years. The UV coating also blocks sunlight, so your floor does not fade. You get a floor that looks new even after years of use.
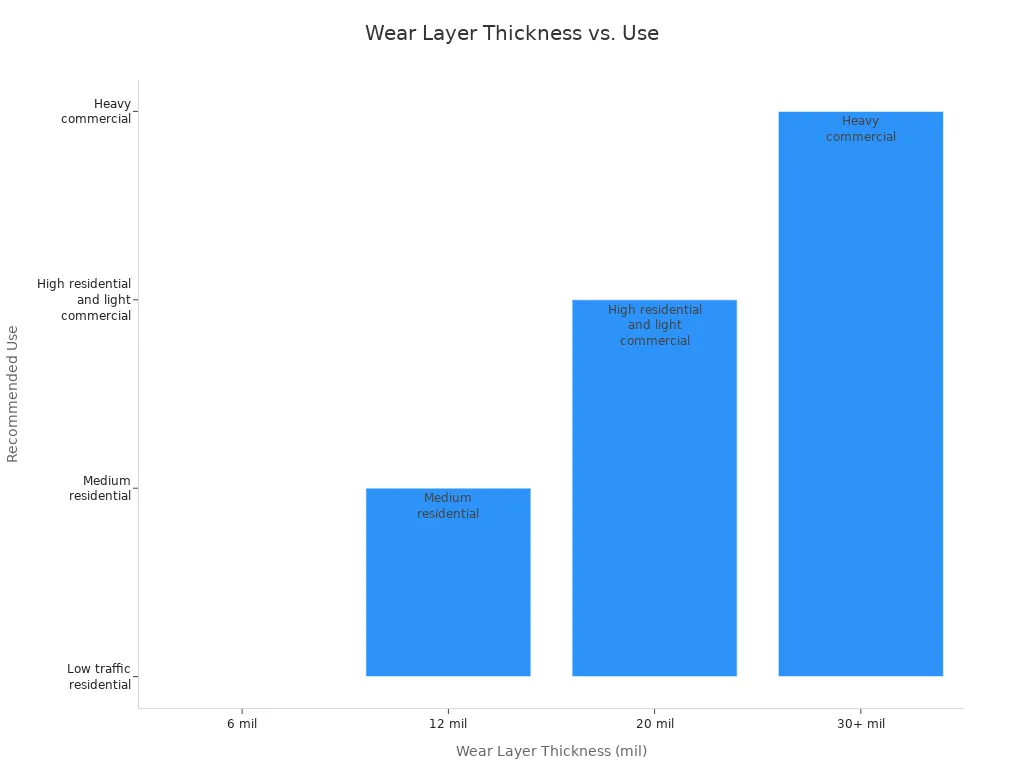
Note: The number of mils in the wear layer often matches the number of years your lvt flooring will last. For example, a 20 mil wear layer can last up to 20 years with proper care.
Cutting, Shaping, and Finishing
After printing, layering, and coating, your lvt flooring goes through cutting and shaping. Machines cut the large sheets into tiles or planks. Each piece gets trimmed to the right size and shape. This step ensures every tile fits together perfectly when you install your floor.
Manufacturers use special tools to add edges and locking systems. Some lvt tiles have beveled edges for a more natural look. Others use click-lock systems that make installation easy. You can lay the tiles without glue or nails.
The finishing step checks every tile for quality. Workers inspect the surface for defects, color, and texture. They test the tiles for strength and flexibility. Only the best tiles move on to packaging.
- Cutting machines shape the tiles for a perfect fit.
- Edge treatments and locking systems help with easy installation.
- Quality checks make sure your lvt flooring meets high standards.
Callout: Careful cutting and finishing give you a floor that looks great and installs easily. You get a smooth, seamless surface in your home.
When you choose lvt, you get a floor made with care at every step. From printing to finishing, each stage adds to the beauty, strength, and value of your flooring.
Quality Control in LVT Flooring Production
When you choose lvt flooring, you want every tile to look great and last a long time. Quality control plays a big role in making sure your floor meets high standards. Each step in the process helps deliver lvt that is consistent, reliable, and safe for your home or business.
Raw Material Inspection
You start with the best materials to get the best results. Before production begins, workers check all raw materials, including PVC resins and additives. They make sure each batch meets strict quality standards. If the materials do not pass inspection, they do not enter the production line. This step prevents defects and keeps your lvt flooring strong from the start.
Tip: Careful inspection of color films ensures that every tile matches the sample swatch. This prevents color differences and keeps your floor looking uniform.
In-Process Quality Checks
During production, you see many checks to catch problems early. Machines and skilled workers monitor temperature, pressure, and screw speed. These controls help prevent defects like air bubbles or uneven surfaces. Surface hardness gets tested with special tools to make sure your lvt resists scratches. Workers also check the bond between layers to stop delamination.
| Parameter/Stage | Description | Purpose/Impact |
|---|---|---|
| Flexibility Testing | Bends tiles to check for cracks | Ensures resilience in busy areas |
| Wear Resistance | Measures how well tiles resist abrasion | Confirms long-term durability |
| Adhesion and Bonding | Tests how well layers stick together | Prevents peeling and keeps tiles strong |
| Process Monitoring | Tracks temperature and pressure | Maintains consistent quality |
You benefit from these checks because they help keep your lvt flooring free from defects and ready for daily use.
Performance and Durability Testing
Before lvt flooring reaches you, it goes through tough tests. These tests check how well the tiles handle real-life situations. Workers test for wear resistance by simulating foot traffic. They check slip resistance to keep you safe in wet areas. Fire and flammability tests make sure your floor meets safety standards. Some tests even measure sound transmission and moisture resistance. These steps confirm the durability and strength of your lvt.
- Durability testing simulates years of use.
- Slip resistance keeps you safe in kitchens and bathrooms.
- Fire safety and acoustic tests ensure your floor meets building codes.
You can trust that lvt flooring has passed many checks before it arrives at your door. This careful process gives you a floor that looks good, lasts long, and stands up to daily life.
Environmental and Sustainability Practices in LVT Flooring
Use of Recycled Materials
You help the planet when you choose lvt flooring made with recycled materials. Many manufacturers use up to 50% recycled content, especially in the backing layers. This recycled content often comes from post-production waste, like off-cuts and trimmings. Some brands even use recycled plastics, such as water bottles, to make their floors more eco-friendly. When you pick lvt with recycled materials, you reduce the need for new resources and help keep waste out of landfills. These floors stay strong and durable, so you do not have to replace them often.
- Recycled content lowers the carbon footprint of lvt.
- Closed-loop systems recycle waste back into new flooring.
- Some lvt products are fully recyclable at the end of their life.
Tip: Look for lvt brands that share details about their recycled content and recycling programs.
Emissions and Waste Management
You want clean air and less waste in your home. Lvt flooring supports this goal with low VOC emissions, which means fewer harmful chemicals in the air. Manufacturers use energy-efficient equipment and renewable electricity to cut greenhouse gas emissions. They recycle pre-consumer and post-industrial waste, turning scraps into new products. Some companies use closed-loop water systems to save water and reduce pollution. By choosing phthalate-free plasticizers and safer additives, you get a healthier floor. Many brands also sell byproducts, like sawdust, to other industries, so nothing goes to waste.
- Low VOC emissions improve indoor air quality.
- Energy-saving technology and solar power reduce emissions.
- Recycling programs keep vinyl scraps out of landfills.
Note: Some lvt manufacturers set carbon neutrality goals and work toward a circular economy.
Certifications and Eco-Friendly Initiatives
You can trust lvt flooring with the right certifications. Look for labels like FloorScore, GreenGuard, and ISO 14001. These show that your floor meets strict standards for indoor air quality, safety, and environmental care. Many lvt products also earn LEED credits, which help with green building projects. Some brands use bio-based materials or phthalate-free formulas to make their floors even safer. When you see these certifications, you know your lvt flooring supports a healthy home and a cleaner planet.
| Certification | What It Means for You |
|---|---|
| FloorScore | Low VOC emissions, better indoor air |
| GreenGuard | Safe chemical levels, healthier spaces |
| ISO 14001 | Strong environmental management |
| LEED | Eco-friendly materials for green homes |
Callout: Certified lvt flooring gives you peace of mind and supports your eco-friendly lifestyle.
You get more than just a floor when you choose lvt. This product uses advanced technology and high-quality materials in every layer. You see the benefits in its strength, style, and easy care. Lvt stands up to scratches, stains, and water, lasting over 20 years with simple cleaning. Quality control checks keep each tile strong and safe. Many lvt options use recycled content and eco-friendly methods, making them a smart choice for modern spaces. You enjoy a floor that looks great, feels comfortable, and supports a healthier home.
Tip: Lvt gives you style, resilience, and environmental responsibility in one package.
FAQ
How do you clean LVT flooring?
You can sweep or vacuum your LVT floor every day. Use a damp mop with mild soap for deeper cleaning. Avoid harsh chemicals or abrasive pads. Your floor will stay bright and clean with regular care.
Can you install LVT flooring over existing floors?
Yes, you can install LVT over most hard surfaces, like tile or concrete. Make sure the surface is clean, dry, and level. This helps your new floor lay flat and last longer.
Is LVT flooring safe for homes with pets and kids?
LVT flooring resists scratches, stains, and spills. You get a tough surface that stands up to pets and active children. Many LVT products use low-VOC materials, so your home stays healthy.
How long does LVT flooring last?
You can expect your LVT floor to last 15–25 years with proper care. The wear layer thickness and quality of materials affect lifespan. Regular cleaning and quick spill cleanup help your floor look new.
Does LVT flooring need special maintenance?
No special maintenance is needed. You only need to sweep, vacuum, and mop with mild soap. Avoid wax or polish. Your LVT floor keeps its shine and strength with simple cleaning.




