
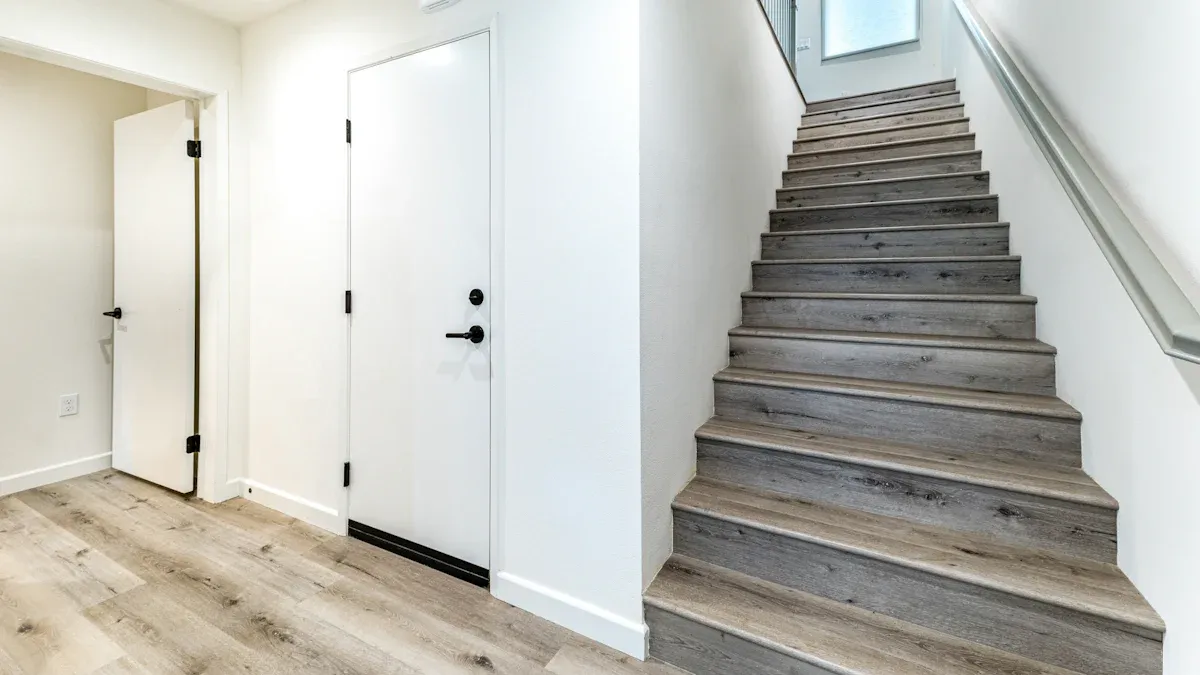
Yes, you can install vinyl plank floor on stairway platforms with the right approach. This type of flooring provides both durability and aesthetic appeal, making it a great choice for stairways. Compared to hardwood and carpet, vinyl plank flooring has a lifespan of 10 to 20 years, which offers a moderate level of durability. Understanding these benefits and preparing properly are essential steps for a successful installation.
Benefits of Vinyl Plank Flooring
Vinyl plank flooring offers numerous advantages, especially when installed on stairs. Here are some key benefits you should consider:
-
Sturdiness: Luxury vinyl planks feature a four-layer construction. This design makes them sturdier than traditional flooring options. You can trust that they will hold up well under daily use.
-
Longevity: With proper installation and maintenance, vinyl plank flooring can last up to 20 years. This durability makes it a smart investment for your home.
-
Durability: Vinyl plank flooring is designed to withstand high foot traffic. This quality is particularly important for stairways, where wear and tear can occur quickly.
-
Aesthetic Appeal: You can find vinyl planks that replicate the look of more expensive materials like hardwood or stone. This allows you to achieve a stylish appearance without breaking the bank.
-
Low Maintenance: Maintaining vinyl plank flooring is easy. Regular cleaning involves simple tasks like sweeping and mopping. You can use a microfiber mop or a vacuum without a beater bar to keep your stairs looking great.
-
Moisture Resistance: Vinyl plank flooring is resistant to moisture. This feature makes it practical for various environments, including areas prone to spills.
-
Safety Features: Many luxury vinyl options come with slip-resistant surfaces. This texture enhances grip, reducing the risk of slips and falls on stairs. Additionally, seamless transitions minimize uneven edges, which can be tripping hazards.
-
Cost-Effective: When comparing costs, vinyl plank flooring is often more affordable than hardwood or tile. Here’s a quick comparison of costs per square foot:
Material Cost per square foot Total cost for 100 sq ft Total cost for 200 sq ft Total cost for 300 sq ft Vinyl Plank $2 – $7 $250 – $1,300 $500 – $2,600 $750 – $3,900 Hardwood Higher than vinyl Varies Varies Varies Tile Higher than vinyl Varies Varies Varies
By choosing vinyl plank flooring for your stairs, you can enjoy these benefits while enhancing your home’s value. Quality flooring materials can lead to a positive return on investment, especially in high-traffic areas.
Types of Vinyl for Stairs
When selecting vinyl for your stairs, you have a couple of excellent options. The most popular types are luxury vinyl planks (LVP) and luxury vinyl tiles (LVT). Both choices offer durability and versatility, making them ideal for high foot traffic areas like stairs. Here’s a closer look at these options:
-
Luxury Vinyl Planks (LVP): These planks mimic the look of hardwood. They are water-resistant and can withstand spills and scratches. This makes LVP a great choice for families with children or pets.
-
Luxury Vinyl Tiles (LVT): Similar to LVP, LVT offers a wide range of design choices. You can find styles that resemble stone or ceramic. LVT is also stain-proof and slip-resistant, which is essential for stairs.
Both LVP and LVT provide easy maintenance. Regular cleaning involves simple tasks like sweeping and mopping. You can keep your stairs looking great without much effort.
Safety Features
Safety is crucial when it comes to stairs. Luxury vinyl flooring has several features that enhance safety:
| Feature | Description |
|---|---|
| Slip Resistance | Luxury vinyl has slip-resistant properties and textured finishes that minimize accidents. |
| Traction in Damp Conditions | Specialized finishes increase traction, crucial for stairs where footing is important. |
| Cushioning Effect | Built-in padding reduces impact from falls, making it safer for children and the elderly. |
| Visibility Enhancements | Options like stair nosing improve visibility and provide extra grip, enhancing stair safety. |
By choosing the right type of vinyl plank flooring, you can create a stylish and safe environment for your home.
Preparing to Install Vinyl Plank Flooring
Before you start installing vinyl plank flooring on your stairs, you need to prepare properly. This preparation ensures a smooth installation process and a professional-looking finish. Follow these steps to get ready:
-
Gather Your Materials: Collect all necessary tools and materials. You will need vinyl plank flooring, adhesive, measuring tape, a utility knife, and safety gear.
-
Measure and Prepare: Accurately measure each stair tread and riser. Clean the stairs thoroughly to remove any debris. This step is crucial for ensuring proper adhesion.
-
Cut the Vinyl Planks: Measure and cut the vinyl planks to fit each stair tread and riser. Leave a small gap for expansion. This gap allows the flooring to expand and contract without buckling.
-
Apply Adhesive: Depending on the type of flooring you choose, apply adhesive or double-sided tape to the back of each plank before installation. This step helps secure the planks in place.
Tools and Materials Needed
Here’s a quick overview of the tools and materials you will need for this project:
| Tools Needed | Materials Needed |
|---|---|
| Drill | LVP Flooring |
| Tape Measure | Stair Nosing/ Stair Bullnose |
| Nail Gun | Stair Risers |
| Carpenter Square | Construction Adhesive |
| Jigsaw | Caulk |
| Tablesaw | Caulk Gun |
| Air Compressor | Paint (for risers) |
| Miter Saw | Paint Brush |
| Screws & Nails |
Common Preparation Mistakes
Avoid these common mistakes during the preparation phase:
- Not Leveling the Subfloor: An uneven subfloor can lead to gaps and creaks.
- Using the Wrong Underlayment: The right underlayment is crucial for durability.
- Not Planning for Expansion Gaps: Failing to leave enough space can cause buckling.
- Not Ensuring Proper Alignment: Forgetting to stagger seams can lead to an unprofessional look.
- Not Removing Baseboards: Keeping baseboards can prevent a clean edge.
By preparing the stairs correctly, you set yourself up for a successful installation of vinyl plank flooring.
Step-by-Step Guide to Install Vinyl Plank Flooring on Stairs
Installing vinyl plank flooring on stairs can seem daunting, but with the right approach, you can achieve a professional finish. Follow these steps to ensure a successful installation.
Installing Vinyl on Stair Treads
-
Gather Your Tools: Start by collecting your tools. You will need a jigsaw, caulking gun, carpenter square, tape measure, and adhesive. Ensure everything is ready before you begin.
-
Prepare the Stair Tread: Measure the tread accurately. The tread is the flat part of the step where you place your foot. Make sure the surface is clean and dry. This step is crucial for proper adhesion.
-
Cut the Vinyl Plank: Use a jigsaw with an 80-tooth blade for precise cuts. Measure the tread and cut the vinyl plank to size. Ensure a flush fit with the edges of the stair.
-
Apply Adhesive: Apply adhesive in an S pattern on the back of the vinyl plank. This method helps create a strong bond. Press the plank firmly into place on the tread.
-
Install the Nose: The nose is the rounded edge of the tread. Measure and cut the nosing to fit. Sand the underside of the nosing for a stronger bond. After applying adhesive, press it into place, ensuring it aligns with the plank.
-
Roll the Tread: After setting the tread, roll it with a hand roller. This action ensures a firm bond between the vinyl and the stair tread.
Installing Vinyl on Stair Risers
-
Measure the Riser: The riser is the vertical part of the step. Measure it accurately to ensure a perfect fit.
-
Cut the Vinyl for the Riser: Cut the vinyl plank to match the height of the riser. Use the same jigsaw for consistency.
-
Apply Adhesive: Apply adhesive to the back of the vinyl riser. Ensure you use a pressure-sensitive adhesive designed for vinyl flooring. This type provides strong bonding and flexibility.
-
Secure the Riser: Press the vinyl riser into place. Make sure it fits snugly against the tread. If needed, secure it with nails or screws for added stability.
Securing Vinyl Planks on Stairs
To ensure your vinyl planks stay in place, follow these best practices:
- Use the Right Adhesive: Different adhesives work better for various applications. Here’s a quick reference table:
| Adhesive Type | Application |
|---|---|
| Construction Adhesive | General use on steps |
| Roberts 7350 | For treads |
| Sika 11FC | For nosing |
-
Check for Level Surfaces: Before installation, ensure the surfaces of the steps are level, clean, and free from any foreign substances. This preparation helps achieve a tight fit between the stair treads and risers.
-
Consider Safety Features: Use bullnose pieces for the edges of the stairs. These pieces enhance safety and aesthetics. They help prevent slips and provide a finished look.
-
Perform a Dry Run: Before applying adhesive, do a dry run. Check the fit of each piece to ensure everything aligns correctly.
By following these steps, you can successfully install vinyl plank flooring on stairs. This DIY project not only enhances the beauty of your home but also provides durable flooring that can withstand high foot traffic.
Finishing Touches for Vinyl Planks on Stairs
Adding Trim and Molding
Adding trim and molding to your vinyl plank flooring enhances both its appearance and durability. Here are some key benefits of using trim:
- Protect Your Edges: Trim pieces like baseboards and transitions shield the edges of your vinyl plank flooring from damage. This protection helps keep your floors looking great for years.
- Create a Seamless Look: Molding bridges gaps between different flooring types or uneven surfaces. This creates a smooth, cohesive appearance that elevates your space.
- Add Style: Decorative trim options enhance your room’s overall design. They give your stairs a high-end, professional finish.
One essential piece of trim is stair nose molding. This molding is thicker and wider than standard options. It ensures strength and durability on stairs. The wider stair nose keeps the seam away from the edge of the stair, which is crucial for safety and aesthetics. Additionally, it creates a smooth transition between the vertical riser and the horizontal tread. This transition protects the edge of the stair from wear and tear while enhancing visibility, which can help prevent slips and falls.
Cleaning and Maintenance Tips
Maintaining your vinyl plank flooring on stairs is vital for longevity. Follow these tips to keep your stairs looking their best:
- Use a damp mop with warm water and a gentle, pH-neutral floor cleaner for everyday cleaning.
- Address spills promptly with a soft cloth or paper towel to prevent damage.
- Avoid harsh chemicals and abrasive tools to protect the flooring’s surface.
- Use floor mats or rugs in high-traffic areas to capture dirt and debris.
- Place furniture pads under heavy furniture to prevent scratches.
For daily upkeep, sweep or vacuum your floors to remove dirt and debris. For a deeper clean, mop with a pH-neutral cleaner once a week or as needed. Avoid using string mops and steam mops, as they can cause water damage to vinyl plank flooring. Always ensure that the mop is well-wrung to prevent excess water from seeping into seams.
By following these cleaning and maintenance tips, you can ensure your vinyl plank flooring remains beautiful and functional for years to come.
Installing vinyl plank flooring on stairs is a feasible DIY project that you can tackle with confidence. Proper preparation and following the outlined steps can lead to a professional-looking finish. Here are some long-term benefits to consider:
| Benefit | Description |
|---|---|
| Durability | High-quality vinyl plank flooring can withstand daily wear and tear, ideal for stairs. |
| Low Maintenance | Regular sweeping and occasional mopping keep the flooring in good condition. |
| Aesthetic Versatility | Offers a wide range of designs and textures, mimicking natural materials. |
| Safety Features | Slip-resistant nature makes it safer for homes with children or elderly members. |
As you embark on this project, remember these expert tips for a polished look:
- Use either an overlapping stair nose or a flush stair nose tread.
- The flush stair nose provides a modern appearance, while the overlapping option offers a traditional look.
Take on the challenge of installing vinyl plank flooring on your stairs. Enjoy the results and the enhanced beauty and safety of your home!
FAQ
What tools do I need to install vinyl plank flooring on stairs?
You need a jigsaw, tape measure, carpenter square, caulking gun, and adhesive. Having a utility knife and safety gear is also essential for a smooth installation.
How long does it take to install vinyl plank flooring on stairs?
The installation time varies based on your experience and the number of stairs. Generally, you can expect to spend a few hours to a full day for a standard staircase.
Can I install vinyl plank flooring over carpet on stairs?
No, you should not install vinyl plank flooring over carpet. The carpet creates an uneven surface, which can lead to instability and safety hazards.
Is vinyl plank flooring slippery on stairs?
Many luxury vinyl options feature slip-resistant surfaces. However, you should still exercise caution, especially in wet conditions. Consider adding stair nosing for extra grip.
How do I clean vinyl plank flooring on stairs?
For daily cleaning, sweep or vacuum to remove dirt. Use a damp mop with a pH-neutral cleaner for deeper cleaning. Avoid harsh chemicals to protect the flooring’s surface.




