
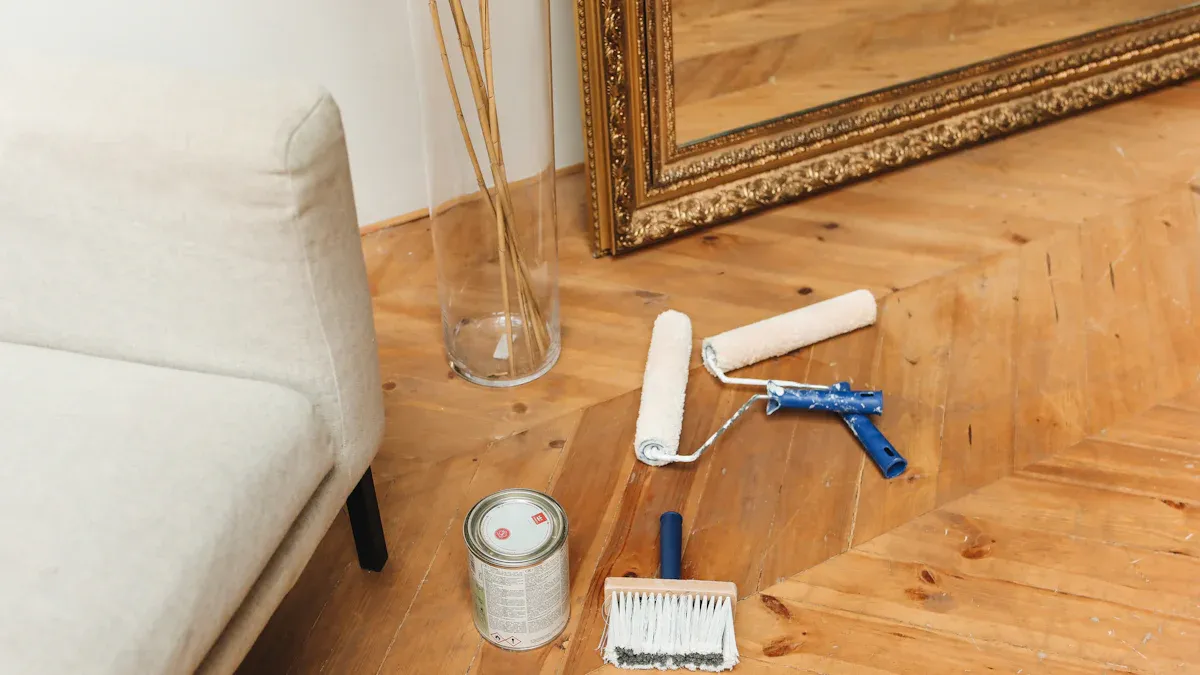
You can think of wood floor urethane as a liquid plastic shield for your floors. This polyurethane floor finish creates a durable barrier against daily wear and tear. With the global hardwood flooring market projected to reach $55.74 billion in 2025, selecting the best polyurethane is more important than ever. Your first major decision involves choosing between oil-based polyurethane and water-based polyurethane. Each type of polyurethane offers a different look and performance, making this choice vital for your home’s aesthetic.
Oil-Based vs. Water-Based Wood Floor Urethane
Choosing between the two main types of polyurethane finishes is the most significant decision you will make for your project. Your choice impacts the floor’s final look, durability, and the application process itself. Let’s break down the key differences between oil-based and water-based polyurethane to help you select the perfect wood floor urethane for your home.
Appearance and Ambering Effect
The most immediate difference you will notice between these polyurethane floor finishes is their color. Oil-based polyurethane imparts a warm, amber tone that deepens and darkens over time. This “ambering” effect can beautifully enhance the richness of woods like red oak, giving them a classic, traditional glow. However, on lighter woods such as maple or birch, this same effect can make the floor appear yellowish.
In contrast, water-based polyurethane goes on clear and is designed to stay that way. It preserves the natural color of your wood, making it an excellent choice if you want to maintain the pale, modern look of light-colored species. While some water-based polyurethane products may develop a very soft straw color over many years, they will not yellow like oil-based finishes.
Here is a quick comparison of their visual characteristics:
| Feature | Water-Based Urethane Finish | Oil-Based Urethane Finish |
|---|---|---|
| Initial Appearance | Transparent and clear, maintaining the wood’s natural color. | Imparts a warm, “amber” tone to the wood from the start. |
| Long-term Appearance | Remains clear and non-yellowing. | The ambering effect intensifies, causing the finish to darken over time. |
Durability and Scratch Resistance
For years, oil-based polyurethane was considered the tougher option. It is a softer, more flexible finish that can absorb impacts well. However, technology for water-based polyurethane has advanced significantly. High-quality, two-component water-based polyurethane (which includes a separate hardener) is now about 15-20% stronger than single-component water-based finishes. Some modern water-based polyurethane products even include additives like aluminum oxide, which provides exceptional resistance to abrasion.
Did You Know? 💡 While the polyurethane floor finish adds a crucial layer of protection, the wood’s natural hardness (its Janka rating) plays a more significant role in preventing dents. Most scratches you see are actually dents in the wood itself, not scratches in the polyurethane.
Ultimately, both oil-based and premium water-based polyurethane offer excellent protection for residential floors. Your choice may depend more on other factors like appearance and dry time.
Drying and Curing Times
This is where you will find a major difference that directly impacts your project timeline. Water-based polyurethane dries much faster than its oil-based counterpart.
- Water-based polyurethane is typically dry to the touch in about 2-4 hours, allowing you to apply multiple coats in a single day.
- Oil-based polyurethane needs much more time, often requiring 8-12 hours before it is ready for a recoat. It can take two to three times longer to dry between coats compared to water-based polyurethane.
Pro Tip: Ideal drying conditions for any polyurethane are around 70°F (21°C) with 50% humidity. Cooler temperatures or higher humidity can significantly extend drying times. For example, high humidity slows the evaporation needed for water-based polyurethane to dry properly. Temperature also affects curing; a 10°C rise can cut the curing time of some polyurethane types in half. Always ensure good airflow to help the finish dry and cure correctly.
You can tell an oil-based finish is dry when it no longer feels tacky and the strong smell has faded. For a water-based finish, you will know it’s ready for the next step if it’s no longer cool to the touch and you can sand it into a fine powder.
Odor and VOC Levels
The smell of your project is a major factor, especially since you live in your home. Oil-based polyurethane has a very strong, solvent-like odor that can linger for days or even weeks. This smell comes from high levels of Volatile Organic Compounds (VOCs). VOCs are chemicals that turn into gas at room temperature and can affect air quality. You will need excellent ventilation, including open windows and fans, when working with this type of polyurethane.
On the other hand, water-based polyurethane has a much milder, low-odor scent that disappears quickly as it dries. This makes the application process far more pleasant. It contains significantly fewer VOCs, making it a healthier choice for indoor air quality. Many manufacturers now offer low-VOC oil-based polyurethane options. However, water-based polyurethane formulas generally have up to 50% lower VOC content than their traditional oil-based counterparts.
Important Note on Regulations: 📜 Some areas have strict laws about VOCs. For example, in New York City, you cannot use wood coatings with VOC levels over 275 grams per liter (g/L). This rule makes many traditional polyurethane products illegal to use there.
The VOC levels vary significantly between different types of polyurethane.
| Polyurethane Type | Typical VOC Levels (g/L) |
|---|---|
| Water-Based Polyurethane | 0 to 450 |
| Oil-Based Polyurethane | >275 to 550 |
| Moisture-Cured Urethanes (MCU) | 550-700 |
Cost and Project Budget
Your budget plays a big role in your decision. At first glance, oil-based polyurethane seems more affordable. However, you must look at the total project cost, not just the price on the can.
Here is a breakdown of the typical cost per gallon:
| Product Type | Average Cost Per Gallon |
|---|---|
| Oil-based Polyurethane | $30 – $40 |
| Water-based Polyurethane | $50 – $60 |
While water-based polyurethane costs more per gallon, the overall project cost can sometimes even out. Here’s why:
- Number of Coats: You typically need to apply more coats of water-based polyurethane. It is a thinner finish, so you will likely apply four coats compared to three coats of oil-based polyurethane.
- Labor Costs: Time is money, especially if you hire a professional. A crew can often apply all coats of water-based polyurethane in a single day due to its fast drying time. An oil-based project could take three days. This faster completion time can lead to significant labor savings.
- Application Ease: Some modern water-based polyurethane products do not require sanding between coats. This saves you time and the cost of extra sanding materials.
Considering these factors, the higher upfront cost of a premium water-based polyurethane can be a smart investment for a faster, more convenient project.
Making the Right Choice for Your Home
You have learned about the key differences between these two popular polyurethane floor finishes. The best wood floor urethane for you depends entirely on your priorities. There is no single “best” polyurethane, only the one that is best for your specific project.
To help you decide, here is a final summary of the main comparison points:
| Feature | Water-Based Polyurethane | Oil-Based Polyurethane |
|---|---|---|
| Appearance | Crystal clear, preserves natural wood color. | Adds a warm, amber tone that darkens over time. |
| Durability | Excellent scratch resistance, especially two-component formulas. | Very durable and flexible, hides minor scratches well. |
| Dry Time | Fast (2-4 hours per coat). Project can finish in 1-2 days. | Slow (8-12+ hours per coat). Project takes 3+ days. |
| Odor/VOCs | Low odor and low VOCs. | Strong odor and high VOCs. |
| Cost | Higher cost per gallon, but can save on labor. | Lower cost per gallon, but requires more project time. |
Ultimately, you should choose water-based polyurethane if:
- You want to preserve the natural, light color of your wood floors.
- You are sensitive to strong smells or concerned about VOCs.
- You need to complete your flooring project quickly.
You should choose oil-based polyurethane if:
- You desire a traditional, rich, amber glow for your floors.
- You are working with a tighter materials budget.
- You have plenty of time for the polyurethane floor finish to dry and can ensure good ventilation.
By weighing these factors against your personal needs and aesthetic goals, you can confidently select the perfect polyurethane to protect and beautify your floors for years to come.
Selecting the Perfect Polyurethane Sheen
After you choose between oil-based and water-based polyurethane, your next decision is the sheen. The sheen determines how much light your floor reflects. This choice affects both the look and the maintenance of your floor. Manufacturers create different polyurethane floor finishes by adding flattening agents to a high-gloss base. A lower sheen means the polyurethane diffuses more light, while a higher sheen reflects it.
Matte and Satin
Matte and satin are the most popular polyurethane sheens because they offer a modern look and are easy to maintain. They have a low luster that hides minor imperfections well.
- Matte Polyurethane: This finish has almost no sheen. It provides a very natural, raw-wood look that is perfect for rustic, industrial, or contemporary styles. Its low reflectivity is excellent for hiding scratches, dust, and dirt, making it a great choice for high-traffic areas or homes with kids and pets.
- Satin Polyurethane: This is the most common polyurethane floor finish. It has a soft, low-gloss sheen (around 40% luster) that gives wood warmth without being too shiny. Satin polyurethane is versatile and fits almost any home decor, from traditional to modern. It also does a great job of concealing small scratches and dust.
Semi-Gloss
Semi-gloss polyurethane offers a noticeable shine and a sleek appearance. With a sheen level of about 55%, it reflects more light than satin but is not as mirror-like as high-gloss. This polyurethane creates a durable surface that is easy to clean. However, its higher reflectivity means it will show dust, footprints, and imperfections more easily than a lower-sheen polyurethane. You might choose semi-gloss polyurethane for a formal dining room or a space where you want a bit of elegant sparkle without overwhelming shine.
A Quick Look at Sheen Levels 💡 Sheen is a measure of light reflection. A matte polyurethane has very little reflection, while a high-gloss polyurethane has a lot. Think of it as a scale from dull to shiny. Your choice of polyurethane will define your floor’s final character.
High-Gloss
High-gloss polyurethane provides a wet, mirror-like finish with maximum shine. This polyurethane makes a bold statement and can make a room feel brighter and more luxurious. It creates an extremely durable and smooth surface that is very easy to wipe clean. The major downside is that its highly reflective surface highlights every speck of dust, pet hair, and scratch. High-gloss polyurethane is best suited for showpiece areas with low foot traffic where you want a dramatic, high-end look.
Essential Tools and Materials for Application
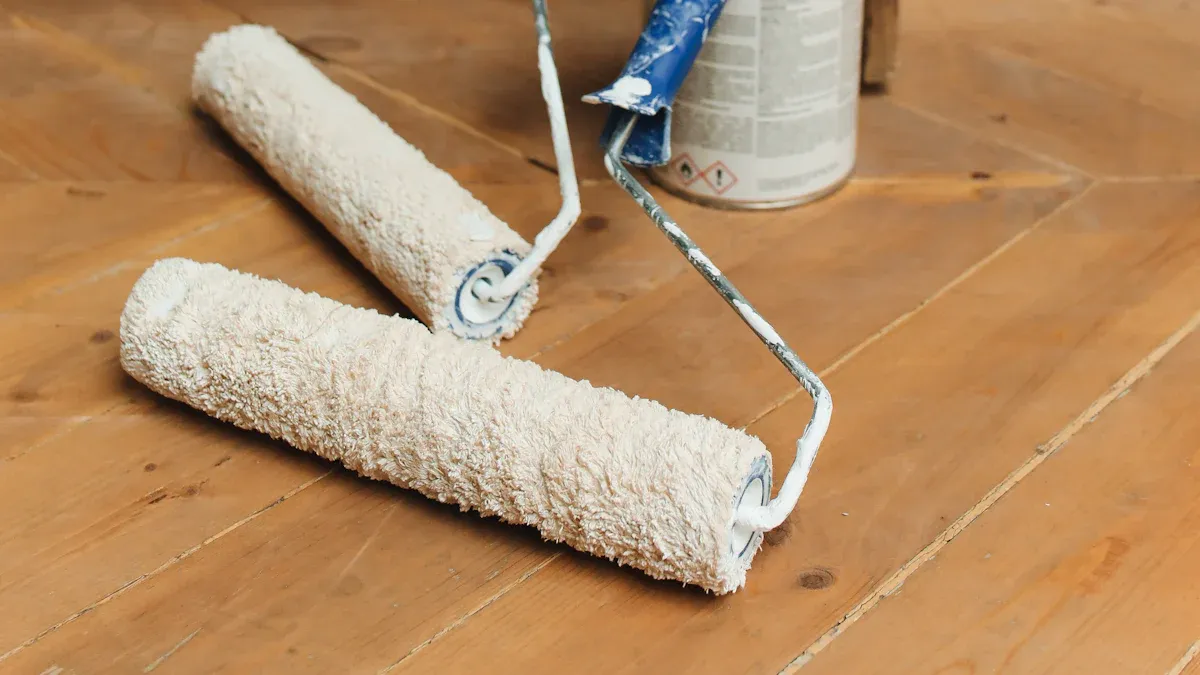
Gathering the right tools before you start makes the entire project run smoothly. A successful polyurethane application depends just as much on your preparation as it does on your technique. Here is what you will need.
Urethane and Applicators
First, you need your chosen polyurethane. Next, you need the right tool to apply it. The applicator you select will affect the final look of your floor.
- T-Bar Applicator: Professionals often use this tool for large, open spaces. It helps you pull the finish in a perfect, even sheet and gives you a high-quality result.
- Lambswool Applicator: This is a great choice for applying a smooth coat of polyurethane. It holds a lot of finish, which helps you cover big areas quickly, especially with oil-based products.
Sanders and Abrasives
Sanding creates the ideal surface for the new polyurethane to stick to. You will need a floor sander and sandpaper in several different grits. The grit number tells you how coarse the paper is. A lower number is more aggressive. You will work from a lower grit to a higher grit.
Sanding Grit Guide 📝 A common sequence for a floor in good shape is 40-grit, then 60-grit, and finally 100-grit sandpaper.
Here is a simple guide to different grits:
| Grit | Purpose |
|---|---|
| 36 grit | Flattens new floors and removes old finish. |
| 60 grit | Smooths out the scratches from the 36-grit paper. |
| 80 grit | Removes 60-grit scratches; a good final grit for many floors. |
| 100 grit | Creates a very smooth surface for hard woods or stained floors. |
Safety Equipment
Your safety is the top priority during this project. The fumes from polyurethane, especially oil-based types, can be harmful.
You must have proper ventilation. You also need personal protective equipment (PPE). A simple dust mask is not enough. For oil-based polyurethane application, you need a respirator with an organic vapor cartridge. Look for a P100-rated filter, like the 3M 60921 or 60926 models, which are designed to protect you from VOCs. This ensures a safe and successful application.
Cleaning Supplies
A perfectly clean floor is the secret to a smooth, professional-looking finish. Dust and debris are the biggest enemies of a flawless polyurethane coat. You must remove every last particle before you begin applying the urethane. Having the right cleaning supplies on hand makes this critical step much easier.
Here is a list of essential items you will need:
- Shop Vacuum: You need a powerful vacuum to remove the vast majority of sanding dust. Make sure it has a fine dust filter to capture the smallest particles and prevent them from blowing back into the air.
- Tack Cloths: These are special sticky cloths designed to pick up the fine dust that vacuums leave behind. This is a non-negotiable step for achieving a glass-smooth surface.
- Mineral Spirits: If you are using an oil-based polyurethane, you will use mineral spirits for the final wipe-down of the floor. It effectively removes any remaining contaminants and helps the finish adhere properly. You can also use it to clean your applicators after the job.
- Clean, Lint-Free Rags: You will use these soft cloths with water or mineral spirits to wipe the floor. Avoid using old t-shirts, as they can leave behind lint.
- Plastic Sheeting and Painter’s Tape: Use these to protect your baseboards, doorways, and any built-in cabinets from dust and stray finish. Sealing off the room helps contain dust during the sanding phase.
Remember This Rule: 🧹 Your floor must be clean enough to eat off of before you apply the first coat of polyurethane. Any dust, hair, or debris left behind will be permanently sealed into your finish. Take your time with this cleaning step for the best results.
Step 1: Preparing Your Floor for a Flawless Finish
Proper preparation is the most important part of your flooring project. It creates the perfect canvas for your new finish. Skipping these steps can lead to a finish that peels, bubbles, or looks uneven. Your patience here will guarantee a beautiful, long-lasting result.
Clear the Room and Clean the Surface
First, you must completely empty the room. Remove all furniture, rugs, and curtains. Next, you should cover your baseboards and any vents with painter’s tape and plastic sheeting. This protects them from dust and stray finish. Then, sweep or vacuum the floor thoroughly to pick up all loose dirt and debris. A clean starting surface prevents deep scratches during the sanding process. This initial cleaning is the first step toward a flawless polyurethane application.
Sanding the Floor to Bare Wood
You need to sand the floor down to the bare wood. This step removes the old finish, scratches, and stains. A drum sander is the best tool for this job. You will start with a coarse-grit sandpaper to strip the old polyurethane. Then, you will switch to a medium grit, followed by a fine grit. This sequence smooths the floor and prepares it for the new polyurethane. The goal is to create a fresh, uniform surface. This new surface allows the first coat of polyurethane to soak in and bond directly with the wood fibers.
Pro Tip: 💡 Always keep the sander moving with the grain of the wood. Stopping in one spot can create a deep divot that is very difficult to fix. A smooth, even sanding job is critical for a professional-looking finish.
The Importance of Buffing Between Coats
After you apply your first coat of polyurethane and it dries, the surface will feel slightly rough. This is normal. You must lightly sand, or “buff,” the floor before applying the next coat. This step is not for removing the finish but for promoting adhesion. Buffing with a very fine-grit abrasive (like a 220-grit screen) creates tiny scratches on the surface. These scratches give the next layer of polyurethane something to grip. This process ensures a strong bond between coats and results in a smoother, more durable final finish.
Final Vacuum and Tack Cloth Cleaning
This is your last chance to achieve a perfectly clean surface. Any dust or debris you leave behind will be permanently sealed into your new polyurethane finish. You must remove every single particle for a smooth, professional result. This final cleaning involves a careful two-step process.
First, you will vacuum the entire room meticulously. Use a shop vacuum equipped with a soft brush attachment to avoid scratching the newly sanded wood.
- Start by vacuuming the windowsills, baseboards, and walls. Dust from these areas can fall onto your floor later.
- Next, vacuum the floor itself. Move slowly and methodically.
- Work in a grid pattern to ensure you cover every inch of the surface.
- Pay special attention to corners and edges where dust loves to collect.
After vacuuming, you will use a tack cloth. A tack cloth is a sticky piece of cheesecloth designed to pick up the fine dust that vacuums miss. Unfold the cloth completely, then loosely bunch it up.
Critical Tip: The Point of No Return ⚠️ Once you start applying the polyurethane, you cannot go back and remove trapped dust. Take your time with this final cleaning step. Your patience here directly impacts the quality of your finished floor. A clean floor is the foundation for a beautiful finish.
Gently wipe the entire floor with the tack cloth. Use light pressure. You want the cloth to pick up dust, not leave a waxy residue. Walk backward as you work, so you do not step on the areas you just cleaned. As the cloth fills with dust, refold it to expose a clean side. Your floor is now perfectly prepared for its first coat of urethane.
Step 2: How to Apply Wood Floor Urethane
You have prepared your floor perfectly. Now it is time for the most rewarding part: the application of the wood floor urethane. This step transforms your sanded wood into a beautifully protected surface. Careful work here ensures a professional result.
Mixing and Preparing the Finish
Before you open the can, read the manufacturer’s instructions. Each brand of polyurethane can have unique requirements. You should never shake a can of polyurethane. Shaking creates tiny air bubbles that will get trapped in your finish. Instead, gently stir the polyurethane with a paint stick for a few minutes. Make sure you scrape the bottom of the can to mix in any settled solids.
Pro Tip: Strain for Success 💡 Pour the polyurethane through a cone-shaped strainer into a separate paint tray. This simple action removes any clumps or impurities. A clean polyurethane leads to a flawless application.
Proper Application Technique
A good application technique prevents streaks and lap marks. You should always maintain a “wet edge.” This means you overlap each new stroke with the previous one before it starts to dry. This blending creates a seamless polyurethane floor finish.
You can also use a technique called “feathering” to smooth out the finish. Feathering helps you blend the edges of your application for a perfect look.
- Apply the polyurethane across a section of the floor.
- Use your applicator without adding more finish.
- Lightly drag the tip of the applicator over the surface.
- Apply just enough pressure to smooth out any puddles.
- Do this once for each line to create a uniform coat of polyurethane.
Applying the First Coat
Your first coat of polyurethane is very important. It seals the wood and creates a base for the next layers. Start in the corner of the room farthest from your exit. Dip your applicator into the polyurethane and apply a thin, even coat. Move with the direction of the wood grain. Work in small, manageable sections of about 3-4 feet wide. This careful application helps you control the process and achieve a great result.
Applying Subsequent Coats
After your first coat is completely dry, you are ready to build the layers that give your floor its strength and smooth feel. Each new coat adds more protection. You must prepare the surface correctly before each new layer.
First, you need to lightly sand, or “abrade,” the dried polyurethane. This step is very important. It creates a slightly rough surface so the next coat can stick properly. Use a very fine-grit abrasive, like a 220-grit sanding screen on a buffer or fine-grit sandpaper on a pole sander. Your goal is to dull the shine, not remove the polyurethane.
Next, you must clean up all the fine dust you just created.
- Vacuum the entire floor thoroughly with a soft brush attachment.
- Wipe the floor with a tack cloth to pick up any remaining particles.
- A perfectly clean surface is essential for a flawless second application.
Now you can apply the next coat of polyurethane. Use the same technique as your first application. Work in manageable sections and maintain a wet edge to avoid marks. This careful application ensures a strong bond between the layers. You will repeat this process of buffing, cleaning, and coating for each subsequent layer. Most projects require three coats of oil-based polyurethane or four coats of water-based polyurethane.
Important Final Step ⚠️ You should not sand or buff the final coat. Your final application is the top layer that everyone will see. Let it cure completely to achieve a beautiful, smooth finish.
Drying, Curing, and Post-Application Care
You have applied the final coat of polyurethane, and your floor looks fantastic. Now, patience is your most important tool. The time you allow for drying and curing will determine the long-term durability of your new floor. Understanding this final phase is crucial for a lasting, beautiful result.
Understanding Drying vs. Curing
You might hear the words “dry” and “cured” used together, but they mean very different things for your polyurethane. A finish that is dry to the touch is not yet strong. Drying is simply the first step where the liquid carriers evaporate. Curing is the chemical process where the polyurethane molecules link together to form a hard, protective shell.
This table breaks down the two distinct processes:
| Process | Chemical Action | Molecular State | Reversibility |
|---|---|---|---|
| Drying | Evaporation of solvents or water. | Resin molecules get closer but are not yet bonded. | Can be redissolved before significant curing. |
| Curing | Formation of new chemical bonds (cross-linking). | Molecules form one large, hard, interconnected surface. | Irreversible; the polyurethane cannot be redissolved. |
How Long to Wait Before Light Foot Traffic
The wait for foot traffic is one of the most common questions. After your final coat of polyurethane, you must wait before walking on the floor. As a general rule, you can allow light foot traffic after 24 hours for both water-based and oil-based polyurethane.
Pro Tip: 👟 When you first walk on the floor, do so only in clean socks. Shoes can track in grit that will scratch the new polyurethane, and bare feet can transfer body oils that may affect the final cure.
When to Move Furniture Back
Moving heavy furniture back is the final step, and it requires the most patience. You must wait for the polyurethane to fully cure. Placing heavy items like sofas or tables on the floor too early can dent or damage your new polyurethane floor finish.
The full curing time depends on the type of polyurethane you used:
- Water-based polyurethane typically cures in 7 to 14 days.
- Oil-based polyurethane takes longer, often requiring up to 21 days to reach maximum hardness.
Always lift furniture into place; never drag it across the new surface. Attaching felt pads to the bottom of all furniture legs will give your polyurethane an extra layer of protection for years to come.
Initial 30-Day Care Instructions
The first month is the most critical time for your new polyurethane floor finish. Your floor is still curing and hardening during this period. Oil-based polyurethane, for example, takes approximately 30 days to fully cure and reach its maximum durability. You must treat the surface gently to ensure a beautiful, long-lasting result. Think of this initial 30-day window as the final, most important step of your project. Your patience now will protect your investment for years.
For daily cleaning, you should only use a dry microfiber mop or a vacuum with a soft brush attachment. This will safely remove dust and grit without harming the delicate surface. You must avoid all moisture during this time. Do not use water or any liquid cleaners on the floor. You should also wait to place any area rugs. Rugs can trap moisture and solvents, which can prevent the polyurethane from curing properly and may leave a permanent impression on your new finish.
Protect Your New Finish! 🛡️ It is extremely important to avoid certain cleaning products that can ruin your new polyurethane. These chemicals are too harsh for a curing finish and can cause permanent damage.
You must keep the following items away from your floor for at least 30 days:
- Ammonia
- Bleach
- Abrasive cleaners
- Harsh detergents
- Alcohol-based cleaners
After the 30-day curing period is complete, you can resume a more normal cleaning routine. By following these simple care instructions, you give your polyurethane floor finish the best possible start. This careful approach guarantees a hard, durable surface that will protect your wood floors beautifully.
Long-Term Maintenance for Your Urethane Floor
Your new polyurethane floor is installed and cured. Now you can begin a simple maintenance routine. Proper care will keep your polyurethane looking great for many years. This regular maintenance protects your investment and preserves the beauty of your wood floors.
Daily and Weekly Cleaning
Consistent cleaning is the best way to protect your polyurethane. Dirt and grit act like sandpaper, scratching the finish over time. You can easily prevent this damage with a simple cleaning schedule.
- Daily: Use a dry microfiber mop or a vacuum with a soft brush attachment. This quick sweep removes dust, pet hair, and small particles.
- Weekly: You can clean more deeply once a week. Use a pH-neutral cleaner made specifically for wood floors with a polyurethane finish. Lightly mist a small section of the floor with the cleaner. Then, wipe it with a microfiber mop. Your mop should be damp, not soaking wet. Too much water can damage both the wood and the polyurethane.
Warning: Avoid These Cleaners! ⚠️ Never use vinegar, ammonia, bleach, or oil soaps on your floor. These products can dull or strip the polyurethane and void your warranty. Stick to cleaners designed for your specific floor type.
Protecting Floors from Scratches
Scratches are the biggest threat to your floor’s appearance. Most scratches come from furniture and daily foot traffic. You can take simple steps to protect your polyurethane from this kind of damage.
- Use Furniture Pads: Place felt pads on the bottom of all furniture legs. Check them often and replace them when they get worn or dirty.
- Lift, Don’t Drag: Always lift furniture when you need to move it. Dragging heavy items can easily gouge or scratch the polyurethane.
- Use Doormats: Place mats both inside and outside your exterior doors. This helps trap the dirt, sand, and grit that people track in on their shoes.
- Trim Pet Nails: Keep your pets’ nails trimmed. Sharp claws can leave fine scratches on the surface of the polyurethane.
Good preventative maintenance is the easiest way to keep your floors looking new.
How to Handle Spills and Stains
Accidents happen. The key to preventing stains on your polyurethane floor is to act quickly. The polyurethane creates a protective barrier, but liquids can seep through if left for too long.
When a spill occurs, follow these steps immediately:
- Wipe up the liquid with a clean, soft cloth or paper towel.
- Spray a small amount of your pH-neutral wood floor cleaner onto another clean cloth.
- Gently wipe the spill area to remove any sticky residue.
- Dry the area completely with a final clean, dry cloth.
For tougher spots like dried food or crayon marks, you can gently scrape the spot with a plastic scraper. Then, clean the area as described above. Quick action will protect your beautiful polyurethane floor finish from lasting damage.
When to Recoat Your Floor
Even with perfect care, your polyurethane floor will eventually show signs of daily life. A maintenance recoat, also called a screen and recoat, is a great way to restore your floor’s beauty without the major work of a full refinishing. This process involves lightly buffing the top layer and applying a new coat of polyurethane. It is a proactive step that extends the life of your floor.
You can tell it is time for a recoat when you notice specific signs of wear. Look for these clues on your floor’s surface:
- Visible scratches that catch the light, especially in high-traffic areas.
- A dull or cloudy appearance that remains even after you clean the floor.
- Clear wear patterns developing in hallways or in front of doorways.
- Water spots or minor marks that you cannot buff out with a cloth.
A recoat is effective only when the existing finish is worn down but still fully attached to the wood. If your polyurethane is actively peeling or lifting, a recoat will not fix the problem. Applying new finish over a peeling layer can make the issue worse.
A recoat is a refresh, not a complete repair. It is important to know what this process cannot fix. A new coat of polyurethane will not solve deeper issues with the wood or finish. You will need to fully sand and refinish your floor to fix problems like:
- Obvious traces of water damage.
- Deep scratches and dents that go into the wood itself.
- Deep stains that have soaked into the wood grain.
- UV discoloration or fading, often seen near windows.
- Areas where the finish is completely worn away to bare wood.
By recognizing the early signs of wear, you can apply a new coat at the right time. This simple step keeps your floors protected and looking their best for years to come.
Troubleshooting Common Polyurethane Issues
Even with careful work, you might run into a few issues. Most common problems with polyurethane are easy to fix if you know the cause. Here is how you can troubleshoot and solve them for a perfect result.
Bubbles or Blisters in the Finish
Bubbles are a frequent problem, but you can prevent them. They often appear when you introduce air into the polyurethane. You can cause bubbles by shaking the can instead of stirring it. Over-brushing or applying the polyurethane too quickly can also trap air.
To avoid bubbles in your polyurethane:
- Never shake the can of polyurethane; always stir it gently.
- Use the correct applicator. A natural bristle brush works best for oil-based polyurethane, while a nylon brush is ideal for water-based types.
- Soak your brush before you start. Use mineral spirits for oil-based polyurethane and water for water-based polyurethane.
- Apply the polyurethane with slow, even strokes.
If you see bubbles, you can fix them. Wait for the polyurethane to dry completely. Then, lightly sand the area to smooth it out. Clean away all the dust before applying your next coat of polyurethane.
Streaks and Lap Marks
Streaks or lap marks happen when you apply polyurethane over an area that has already started to dry. You can avoid this by always maintaining a “wet edge.” This means you should overlap each new stroke onto the previous wet one.
Work Smart, Not Fast 💡 Work in small, manageable sections. This helps you keep the edge of your polyurethane wet. It prevents the finish from drying before you can blend the next section into it. A consistent application is key to a beautiful polyurethane floor finish.
Peeling or Flaking Finish
A peeling polyurethane finish usually means the coat did not stick properly to the surface below. This often happens if the floor was not cleaned or sanded correctly between coats. For small peeling spots, you can make a simple repair.
You can fix a small area of peeling polyurethane with these steps:
- Clean the peeling spot to remove any dirt or oils.
- Gently sand the peeling polyurethane until the edges are smooth.
- Wipe away all the sanding dust with a tack cloth.
- Apply a thin, new coat of polyurethane to the repaired area, feathering the edges to blend it in.
For a very minor lift, you can sometimes place a thin cloth over the spot and carefully press it with a warm iron. This can help the polyurethane re-adhere to the floor.
Dust and Particles Trapped in the Finish
Finding dust, hair, or tiny particles stuck in your new finish is incredibly frustrating. These imperfections ruin the smooth, glass-like surface you worked so hard to achieve. The best way to handle this problem is to prevent it from happening in the first place. A dust-free environment is essential for a perfect polyurethane application.
Experienced woodworkers know that cleaning just once is not enough. Airborne dust needs time to settle. You can create a clean workspace by following a simple, multi-day process.
- First Cleaning Pass: Start by thoroughly vacuuming the entire room. Clean the ceiling, walls, and floor to remove the majority of the dust.
- Wait Patiently: Allow at least 12 hours for any remaining airborne dust to settle onto the floor. Do not enter the room during this time.
- Final Cleaning Pass: The next day, vacuum the entire room again. This second pass removes the fine dust that has settled overnight. Your room is now ready for the polyurethane.
Move Slowly for Success 🚶 When you apply the polyurethane, move slowly and deliberately. Quick movements can stir up any last particles from the floor and send them into your wet finish.
If you do find a piece of debris in your dried polyurethane, you can fix it. Wait for the coat to dry completely. Use fine-grit sandpaper to gently sand the particle and the area around it until it feels smooth. Then, vacuum and wipe the area with a tack cloth. You can now apply your next coat of polyurethane for a flawless result.
You now have the knowledge to achieve a durable, beautiful floor. The success of your wood floor urethane project depends on careful preparation and patience. This guide showed you the path from start to finish. A great polyurethane floor finish is within your reach.
Final Tips for Long-Lasting Results:
- Always read the manufacturer’s instructions.
- Ensure you have proper ventilation.
- Allow full curing time for maximum durability.
FAQ
Can I apply water-based urethane over an old oil-based finish?
Yes, you can apply water-based urethane over an old oil-based finish. You must first sand the surface lightly to dull the shine. Then, clean the floor thoroughly to remove all dust. This preparation helps the new coat stick properly and prevents peeling.
How many coats of polyurethane do I really need?
The number of coats depends on the product. You should apply three coats for most oil-based polyurethane projects. You will need four coats for water-based polyurethane. The extra coat of water-based finish ensures your floor has strong, lasting protection.
What is the best temperature to apply polyurethane?
You should apply polyurethane when the temperature is between 65°F and 75°F (18°C to 24°C). Good weather helps the finish dry and cure correctly. Avoid working in very hot, cold, or humid conditions, as this can cause problems with the final result.
Can I use a roller to apply polyurethane?
You should avoid using a standard paint roller. Rollers can introduce air bubbles into your finish, which ruins the smooth surface. For best results, you should use a T-bar applicator, a lambswool pad, or a quality brush designed for polyurethane application.




