

You can tackle a diy project with LifeProof installation flooring using basic tools and a little preparation. Many homeowners choose this option because LifeProof vinyl flooring offers easy installation and is diy friendly. You follow clear steps, and your floor looks professional.
Tip: Measure your space before you begin to make your project smooth and hassle-free.
Why Choose LifeProof Vinyl Flooring
Benefits of LifeProof Vinyl Flooring
You want a floor that stands up to daily life. LifeProof vinyl flooring gives you durability, style, and easy installation. Many homeowners pick this option because it is diy friendly and holds up well through renovations and busy family life. You can install it over existing surfaces, which saves time and effort.
Here is a quick look at why people choose LifeProof vinyl flooring:
| Feature | Description |
|---|---|
| Durability | Exceptional quality and durability, ideal for modern homes. |
| Waterproof | Completely waterproof, making it suitable for various environments. |
| Low Maintenance | Requires minimal upkeep, appealing to busy homeowners. |
| Aesthetic Versatility | Offers a wide range of styles and designs to enhance any space. |
| Cost-Effectiveness | More affordable compared to other flooring options, providing value for money. |
You get waterproof flooring that resists scratches and stains. The surface is easy to clean, so you spend less time on maintenance. LifeProof vinyl flooring meets strict VOC standards, which means it is safe and durable for your home. You also enjoy a wide variety of styles, so you can match your floor to your taste.
Compare LifeProof vinyl flooring to traditional hardwood or laminate:
| Benefit | LifeProof Vinyl Flooring | Traditional Hardwood/Laminate Flooring |
|---|---|---|
| Water Resistance | Yes | No |
| Durability | High | Moderate |
| Maintenance | Low | High |
| Variety of Styles | Extensive | Limited |
| Scratch Resistance | Yes | Varies |
Tip: LifeProof installation flooring is a smart choice if you want luxury vinyl flooring that lasts and looks great.
Ideal Areas for LifeProof Installation Flooring
You can use LifeProof vinyl flooring in almost any room. It works well in kitchens, bathrooms, and basements because it is waterproof and stain-resistant. You also find it in schools and hospitals, where high foot traffic and rolling equipment demand tough floors.
| Environment | Key Features |
|---|---|
| Schools | High foot traffic areas like hallways and cafeterias. |
| Hospitals | Areas with rolling equipment such as beds and wheelchairs. |
| General Areas | Waterproof and stain-resistant, ideal for moisture-prone environments. |
| Safety | Slip-resistant surface to reduce fall risks, especially in wet conditions. |
You get peace of mind knowing your floor can handle spills, heavy use, and busy family life. LifeProof vinyl flooring is diy friendly, so you can install it yourself and enjoy a professional result.
Tools and Materials for LifeProof Installation Flooring
Essential Tools for Install LifeProof Flooring
You need the right tools to make your LifeProof vinyl flooring installation smooth and successful. These tools help you cut, fit, and secure each plank with ease. You do not need expensive equipment. Most tools are simple and easy to find at your local hardware store.
Here is a list of essential tools you should have ready before you start:
- Flooring spacers help you keep even gaps along the walls.
- Tapping block lets you gently tap planks into place without damage.
- Mallet gives you the force needed to lock planks together.
- Utility knife helps you trim planks for a perfect fit.
- JigSaw allows you to cut around corners, doorways, or odd shapes.
Tip: Always use a sharp utility knife for clean cuts. Dull blades can tear the plank surface.
You can use these tools to handle most installation challenges. You will find that each tool has a specific purpose. For example, the tapping block and mallet work together to secure planks tightly. The jigsaw helps you make precise cuts for tricky areas.
Materials Checklist for LifeProof Vinyl Flooring
You need the right materials to get the best results with LifeProof vinyl flooring. The manufacturer includes a pre-attached sound-mitigating pad, so you do not need extra underlayment. You should install a 6-mil vapor barrier, especially if you have a concrete subfloor. This barrier protects your floor from moisture and helps it last longer.
Here is a simple checklist for your project:
- LifeProof vinyl flooring planks
- 6-mil vapor barrier (recommended for concrete subfloors)
- LifeProof Universal Underlayment (for extra sound reduction and moisture control)
- Trim and moldings for a finished look
You can find these materials at most home improvement stores. The vapor barrier and underlayment add protection and comfort. You get a quieter floor and better moisture control. LifeProof vinyl flooring makes your installation easier because the pad is already attached.
Note: Always check your subfloor before you begin. A clean and level surface helps your new floor last longer.
Preparation Steps for LifeProof Installation Flooring
Measuring and Planning Your Space
You start your lifeproof installation flooring project by measuring your room. Accurate measurements help you avoid mistakes and wasted materials. Follow these steps for best results:
- Measure each wall in feet to find the length and width of your space.
- Multiply the length by the width to get the square footage.
- If your room has odd shapes, break it into smaller sections. Measure each section and add the totals together.
- Add 10% to your total square footage. This extra covers cuts, errors, and future repairs.
Tip: Write your measurements down before you shop. Double-check each number to make sure you have enough flooring.
Ordering the Right Amount of LifeProof Vinyl Flooring
You want to order the correct amount of flooring for your installation process. Use your total square footage plus the extra 10% for waste. Most boxes list the coverage area, so divide your total by the coverage per box. Round up to the nearest whole box to avoid running short.
| Step | Action |
|---|---|
| Calculate Area | Use your measurements from above |
| Add Overage | Multiply by 1.10 for extra material |
| Check Box Coverage | Find square footage per box |
| Order Boxes | Divide total by box coverage, round up |
Note: Always buy a little more than you need. You may need extra planks for future repairs or mistakes during installation.
Prepping and Leveling the Subfloor
You prepare your subfloor before laying lifeproof installation flooring. Remove old flooring if needed. Make sure the subfloor is flat and level. Patch any dips or holes with a self-leveling compound. Sweep and vacuum the area to remove dust, staples, and small rocks. Clear away furniture and obstacles to make the space easy to work in.
- Fill dips greater than 1/8 inch with self-leveling compound.
- Thicker vinyl planks hide small imperfections, but you should still fix major dips.
- LifeProof vinyl flooring can go over existing floors if they are flat and clean.
Tip: A clean and level subfloor helps your new floor last longer and look better.
Step-by-Step Guide to Install LifeProof Flooring
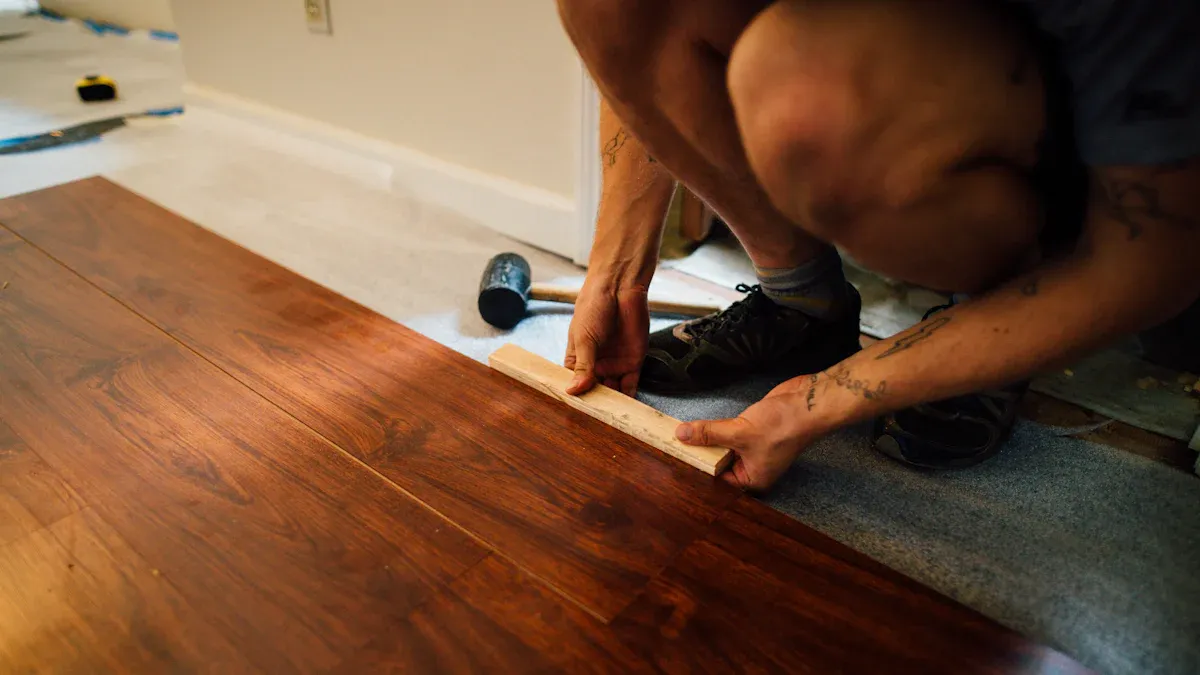
Acclimating LifeProof Vinyl Flooring
You need to let your flooring adjust to the room before you start your project. Acclimating LifeProof vinyl flooring helps prevent problems like warping or gaps after installation. Place the unopened boxes of planks flat in the room where you plan to install them. Let them sit for at least 48 hours. The temperature in the room should stay between 65°F and 85°F. Keep the humidity between 35% and 55%. This step helps the planks match the conditions of your home.
Tip: Stack the boxes with space between them. This allows air to move around each box and helps the planks adjust evenly.
You should not skip this step. Proper acclimation makes your floor last longer and look better.
Planning the Layout and Marking Guidelines
You want your floor to look straight and even. Planning the layout is important for a professional finish. Start by deciding which direction you want the planks to run. Most people choose to run planks parallel to the longest wall or the main light source. This makes the room look bigger.
Measure the width of your room. Divide that number by the width of one plank. This tells you how many rows you will need. If the last row will be less than half a plank wide, trim the first row to make both the first and last rows wider. This gives your floor a balanced look.
Use a chalk line or a straight edge to mark your starting line on the subfloor. This line will guide your first row and keep your installation pattern straight.
Note: Always check your layout before you start. Dry-lay a few planks to see how they fit. Adjust your starting line if needed.
Cutting Planks for LifeProof Installation Flooring
You will need to cut planks to fit around walls, corners, and doorways. Cutting LifeProof installation flooring is easy with the right tools. Use a sharp utility knife for straight cuts. Score the top of the plank, then snap it along the line. For curved or detailed cuts, use a jigsaw.
Follow these steps for clean cuts:
- Measure the space where the plank will go.
- Mark the plank with a pencil.
- Score the plank with a utility knife.
- Snap the plank along the scored line.
- Use a jigsaw for special shapes or notches.
Safety Alert: Always cut planks on a stable surface. Wear safety glasses when using power tools.
You can make your diy project easier by planning your cuts before you start. This helps you waste less material and keeps your floor looking neat. A good cutting plan also helps you follow your chosen installation pattern.
Laying the First Row of LifeProof Vinyl Flooring
You begin your installation by laying the first row of LifeProof vinyl flooring. This step sets the foundation for the rest of your project. Start at the longest, straightest wall in your room. Place spacers between the wall and the planks. These spacers create an expansion gap, which lets your floor expand and contract with temperature changes.
Follow these steps to lay the first row:
- Position the first plank with the tongue side facing the wall.
- Use spacers to keep a gap of about 1/4 inch from the wall.
- Connect the next plank by angling it and snapping it into place.
- Continue placing planks until you reach the end of the row.
- Measure the last space and cut the final plank to fit.
Tip: Always check that the first row is straight. Use a level or a chalk line to guide you. A straight first row helps every row after look neat and professional.
If you need to trim the last plank, use a utility knife or jigsaw. Make sure the cut edge faces the wall. The baseboard or trim will cover this edge later.
Staggering Seams and Installing Remaining Rows
You want your floor to look natural and strong. Staggering the seams gives your floor a better appearance and helps prevent weak spots. To start the second row, cut the first plank so it is longer than 8 inches. This creates a staggered pattern. Position the plank at a 45-degree angle, slide it under the edge of the first row, and align it with the end of the first plank. Snap it into place.
Continue installing planks in each row. Make sure the seams do not line up with the seams in the previous row. This pattern adds strength and style to your floor.
Here is a simple table to help you remember the key points:
| Step | Action |
|---|---|
| Start Second Row | Cut first plank >8 inches |
| Position Plank | Angle at 45°, slide under first row |
| Align Ends | Match ends with previous row |
| Continue Pattern | Stagger seams in each row |
Note: Always check your seams as you work. Staggered seams help your floor resist shifting and wear.
You repeat this process for each row. Use a tapping block and mallet to lock planks together. Check your work often to keep seams tight and rows straight.
Handling Doorways, Corners, and Transitions
You will face tricky spots like doorways, corners, and transitions between rooms. These areas need special attention for a smooth finish. Measure each space carefully. Mark planks before cutting. Use a jigsaw for curved cuts or notches.
For doorways, remove the door trim if possible. Slide the plank under the trim for a clean look. If you cannot remove the trim, cut the plank to fit snugly around it.
Corners require precise cuts. Measure the space, mark the plank, and cut slowly. Test the fit before snapping the plank into place.
Transitions between rooms or flooring types need transition strips. These strips cover gaps and create a safe edge. Install the strip after you finish laying the planks.
Tip: Take your time in these areas. Careful cuts and measurements help your floor look professional and last longer.
You can use these steps to handle any challenge during installation. With patience and attention to detail, you achieve a flawless finish in every part of your room.
Installing Trim and Moldings
You have finished laying your LifeProof vinyl flooring. Now, you need to install trim and moldings to give your floor a polished look. Trim covers the expansion gaps along the walls. Moldings help you create smooth transitions between different flooring types or rooms.
Why Trim and Moldings Matter
Trim and moldings do more than make your floor look good. They protect the edges of your flooring from damage. They also hide small gaps and uneven cuts. You get a clean, professional finish when you add these details.
Types of Trim and Moldings
You can choose from several types of trim and moldings. Each type has a special purpose. Here is a quick guide:
| Type | Where to Use It | Purpose |
|---|---|---|
| Quarter Round | Along baseboards and walls | Covers expansion gaps |
| Baseboard | Bottom of the wall | Decorative edge, covers gaps |
| T-Molding | Between two floors of equal height | Smooth transition |
| Reducer Strip | Between floors of different heights | Sloped transition |
| Stair Nose | Edge of stairs or steps | Protects stair edges |
Tip: Match the color and style of your trim to your flooring for a seamless look.
Tools and Materials You Need
Before you start, gather these tools and materials:
- Measuring tape
- Miter saw or hand saw
- Hammer or nail gun
- Finishing nails or adhesive
- Caulk (paintable, if needed)
- Paint or stain (if you want to match trim color)
How to Install Trim and Moldings
Follow these steps to install trim and moldings like a pro:
-
Measure and Cut
Measure each wall or transition area. Mark your trim pieces. Use a miter saw to cut corners at a 45-degree angle for a tight fit. -
Test Fit
Place each piece where it will go. Check the fit before you attach anything. Adjust your cuts if needed. -
Attach the Trim
Use finishing nails or a nail gun to secure the trim to the wall, not the floor. This lets your floor expand and contract. For moldings over concrete or tile, use a strong adhesive. -
Fill Gaps and Nail Holes
Use caulk to fill small gaps between the trim and the wall. Fill nail holes with wood filler. Let everything dry. -
Paint or Stain (Optional)
Paint or stain your trim to match your floor or walls. Let it dry before moving furniture back.
Note: Never nail or glue trim directly to your LifeProof flooring. Always attach it to the wall or subfloor. This protects your floor and keeps your warranty valid.
Quick Checklist for Success
- ✅ Measure twice, cut once.
- ✅ Use the right trim for each area.
- ✅ Attach trim to the wall, not the floor.
- ✅ Fill gaps for a smooth finish.
- ✅ Match colors for a professional look.
You can make your new floor look finished and beautiful with the right trim and moldings. Take your time and check your work as you go. Your attention to detail will pay off every time you walk into the room.
Troubleshooting LifeProof Installation Flooring Issues
Fixing Gaps and Uneven Planks
You may notice gaps or uneven planks after installing your floor. These problems can happen if the subfloor is not level or if the room’s temperature and humidity change. You can fix these issues with the right tools and by keeping your room’s climate steady.
| Tool | Purpose | Difficulty Level |
|---|---|---|
| Belt Sander | Remove high spots | Moderate |
| Floor Leveler | Fill low areas | Easy |
| Hand Plane | Spot corrections | Advanced |
To keep your floor looking smooth, try these steps:
- Keep the room temperature between 65-85°F.
- Use a dehumidifier in summer.
- Use a humidifier in winter.
- Check that humidity stays between 35-55%.
If you see a gap, gently tap the plank with a mallet and a tapping block. For uneven planks, sand down high spots or fill low areas with a floor leveler. Always check your work as you go.
Replacing Damaged LifeProof Vinyl Flooring Planks
Sometimes a plank gets damaged. You can replace it without removing the whole floor. Follow these steps:
- Draw a line down the center of the damaged plank.
- Mark 45-degree angles from each corner to the center line.
- Use a straight edge and measure the saw blade depth.
- Cut along the center line and diagonals, being careful not to damage nearby planks.
- Remove the middle pieces and clean the area.
- Take off the side locks on the replacement plank.
- Apply adhesive to the new plank and fit it into place.
- Use a rubber mallet to secure the plank.
- Press down to make sure it sticks well.
- Clean up any glue with acetone and a towel.
Your floor will be ready to use right away.
Adjusting for Tight or Awkward Spaces
You may need to install planks in small corners or narrow hallways. Start in a spot that lets you work forward. If you must work backwards, plan your moves and use extra care. Measure each space and cut planks to fit. Use a jigsaw for tricky shapes. Take your time and check each piece before you snap it in.
When you reach a transition, use the right strip for the job:
| Strip Type | Best Used For | Installation Method |
|---|---|---|
| T-Molding | Same-height floors | Center channel mount |
| Reducer | Height differences | Adhesive or nail-down |
| End Cap | Exterior doors | Nail-down with base |
You can solve most problems with patience and the right tools. Lifeproof installation flooring gives you options for every space.
Pro Tips for a Flawless LifeProof Vinyl Flooring Install
Achieving a Professional Finish
You want your LifeProof vinyl flooring to look like it was installed by an expert. Start by planning your layout. Use a chalk line to mark straight guidelines on the subfloor. This helps you keep each row aligned. Place planks parallel to the main light source in the room. This makes the space look bigger and more inviting.
Check each plank before you install it. Make sure the edges are clean and free of debris. Use spacers to create a 1/4 inch gap along the walls. This gap allows the floor to expand and contract with changes in temperature. Tap each plank gently with a mallet and tapping block. This locks the planks together without damaging the edges.
Clean the floor after installation. Remove dust, scraps, and adhesive residue. A clean surface highlights the beauty of your new floor. If you see any small gaps, fill them with matching putty for a seamless look.
Tip: Always follow the manufacturer’s instructions. This protects your warranty and ensures the best results.
Common Mistakes to Avoid
You can avoid many problems by watching out for common mistakes during installation. Here are some issues that often cause trouble:
- Neglecting subfloor preparation. Always make sure the subfloor is clean, dry, and level.
- Installing over an uneven or wet subfloor. Check humidity and let the subfloor dry completely.
- Skipping acclimation. Let planks adjust to room temperature and humidity for at least 48 hours.
- Not leaving expansion gaps. Use spacers to keep a 1/4 inch gap along all edges.
- Using the wrong adhesive. Only use the adhesive recommended by the manufacturer.
- Overlooking underlayment. Choose the right underlayment for noise reduction and comfort.
- Misalignment during installation. Use chalk lines and check alignment often.
- Ignoring manufacturer instructions. Read and follow all guidelines.
- Installing over old flooring without preparation. Remove or smooth old flooring first.
- Improper cutting of planks. Use a utility knife and straight edge for clean cuts.
- Poor planning for light direction. Lay planks to match the room’s natural light.
- Neglecting post-installation cleaning. Clean thoroughly to remove debris and adhesive.
🛠️ Careful planning and attention to detail help you avoid these mistakes and achieve a flawless finish every time.
Maintenance and Care for LifeProof Vinyl Flooring

Cleaning and Protecting Your Floor
You want your floor to look new for years. Regular cleaning keeps your space fresh and protects your investment. Start by sweeping or vacuuming your floor often. This removes dirt and grit that can scratch the surface. Use a soft broom or a vacuum without a beater bar.
When you need a deeper clean, choose a non-abrasive, no-rinse floor cleaner. Some good options include:
- Bona Hard-Surface Floor Cleaner
- Rejuvenate Luxury Vinyl Tile Floor Cleaner
- Quick Shine® Multi-Surface Floor Cleaner
Damp mop with warm water, but do not flood the floor. Too much water can seep into seams and cause problems. Avoid soap-based detergents, wax, bleach, or abrasive products. These can dull or damage the finish. For tough stains, use a full-strength vinyl cleaner or a diluted bleach solution (10 parts water to 1 part bleach). Always test cleaners in a small spot first.
Place unbacked doormats at entrances. Mats catch dirt before it reaches your floor. When moving furniture, lift items or use sliders. Dragging heavy pieces can scratch or dent the surface.
Tip: Clean high-traffic areas more often to keep your floor looking its best.
Preventing Damage and Extending Lifespan
You can help your floor last longer with a few simple steps. Place area rugs in busy spots to reduce wear and protect against sunlight. Rugs also add comfort and style. Use furniture pads under chairs, tables, and sofas. These pads prevent scratches and dents.
Sweep high-traffic areas daily. A pH-neutral cleaner works best for regular mopping. Avoid using cleaning robots or vacuums with harsh brushes. Stick to gentle cleaning tools.
Here are some easy ways to protect your floor:
- Avoid dragging heavy items; always lift or use sliders.
- Place rugs in entryways and hallways.
- Equip all furniture with protective foam pads.
- Keep your floor dry and clean.
- Do not use polishing cleaners, oil soaps, or dish detergents.
Proper care and attention help your lifeproof vinyl flooring stay beautiful and strong for many years.
You can install LifeProof vinyl flooring yourself and enjoy lasting results. Careful planning and attention to detail help you achieve a professional finish. Many homeowners report these long-term benefits:
- The flooring adds value to your home.
- Waterproof planks work well in bathrooms.
- Maintenance is easier than with wood floors.
- The look often resembles real wood.
| Challenges | Rewards |
|---|---|
| Concerns about gaps | Simple installation |
| Strong durability | |
| Attractive appearance |
Enjoy your new, stylish floor for years to come.
FAQ
How long does it take to install LifeProof vinyl flooring?
You can finish a standard room in one day. Larger spaces may take two days. Preparation and careful planning help you work faster. You save time by having all tools and materials ready before you start.
Can you install LifeProof flooring over tile or hardwood?
You can install LifeProof vinyl flooring over tile or hardwood if the surface is flat, clean, and dry. Remove loose tiles or boards. Fill gaps and level uneven spots. This helps your new floor last longer.
Do you need underlayment for LifeProof vinyl flooring?
You do not need extra underlayment. LifeProof planks have a pre-attached pad. You should use a vapor barrier over concrete. This protects your floor from moisture and improves comfort.
What should you do if a plank gets damaged?
You can replace a damaged plank without removing the whole floor. Cut out the damaged piece. Fit a new plank in its place. Use adhesive if needed. Your floor will look new again.
Is LifeProof vinyl flooring safe for pets?
You get a pet-friendly floor with LifeProof vinyl. The surface resists scratches and stains. Clean up accidents quickly. Your pets can enjoy the space without damaging the floor.




