
You can give your vinyl floors a fresh look with a few easy steps. Most vinyl flooring lasts between 10 to 25 years, while luxury vinyl flooring can last from 10 to 20 years, and some warranties go up to 25 years. Hardwood and natural stone usually last longer, but laminate flooring often wears out faster. This tutorial shows you how to refurbish vinyl flooring and make your diy project a success. A diy project like this brings a real transformation to your space. You will see how to refurbish vinyl flooring and make your project shine.
Why Vinyl Floors Lose Their Luster
Everyday Wear and Tear
You walk across your floors every day. Shoes, pets, and furniture all leave marks. Over time, these actions cause scratches and scuffs. You may notice dull spots where people walk the most. Thicker luxury vinyl tile (LVT) works better in busy areas because it resists damage. The wear layer protects the surface from foot traffic and dirt. If you choose thicker LVT, you help your floors last longer and look better.
- Thicker LVT is recommended for high-traffic areas.
- The wear layer thickness protects against damage.
- Thicker wear layers extend the life of your floor.
Tip: Place rugs or mats in entryways to reduce wear and tear.
Dirt and Grime Buildup
Dust and dirt settle on your floors every day. The textured surface of vinyl traps particles in grooves. If you use the wrong cleaning products, sticky residue can build up. This film attracts even more dirt and makes the floor look dull. You need to clean regularly and use safe products to keep your floors bright.
- Dust collects in grooves.
- Stubborn dirt sticks to textured vinyl.
- Cleaning product residue leaves a sticky film.
Note: Lack of maintenance and residue from cleaning products are common reasons for dull floors.
Sunlight and Fading
Sunlight streams through windows and lands on your floors. Over time, UV rays break down the pigments in vinyl floors. You may see fading or discoloration, especially in spots with direct sunlight. Heat from the sun can also cause warping or make the vinyl brittle. You might notice cracks or uneven patches.
- Sunlight causes fading and dullness.
- Discoloration appears in areas with more light.
- Heat leads to warping and brittleness.
Tip: Use curtains or blinds to protect your floors from direct sunlight.
Moisture and Stains
Moisture and stains can change the look and feel of your vinyl floors. You might see cloudy patches, dark spots, or even mold if you do not act quickly. Water and liquids can seep into the seams or cracks, especially if you have gaps from improper installation. When you leave spills or standing water on the floor, stains can form and become hard to remove.
Here are the most common sources of moisture and stains you may find in your home:
- Standing Water or Spills: If you leave water or other liquids on your floor, stains can appear. You should clean spills right away.
- Leaks and Moisture Seepage: Appliances or plumbing can leak. Water can get trapped under the vinyl and cause stains.
- High Humidity Levels: Humid rooms, like bathrooms or basements, can trap moisture under the flooring.
- Improper Installation: Gaps in the floor let water seep in, which leads to staining.
You also face stains from everyday life. Food and drink spills, pet accidents, and ink or paint can leave marks. Oily or greasy foods create tough stains if you do not clean them quickly. Water stains can make your floor look cloudy or discolored. Chemicals sometimes react with vinyl and cause lasting stains. Dyes from products, like markers or colored drinks, can soak in and change the color of your floor. High moisture areas may develop mold and mildew, which leave dark or greenish stains.
- Food and drink spills
- Pet accidents
- Ink or paint
Tip: Wipe up spills as soon as you see them. Use a soft cloth and gentle cleaner to avoid spreading the stain.
You can prevent most moisture problems by checking for leaks and keeping humidity low. Make sure your vinyl floor is installed correctly to block water from getting underneath. Regular cleaning helps you spot stains early and keeps your floor looking fresh. If you see mold or mildew, clean the area with a solution made for vinyl floors. You protect your investment when you act fast and use the right methods.
How to Refurbish Vinyl Flooring: Step-by-Step Tutorial
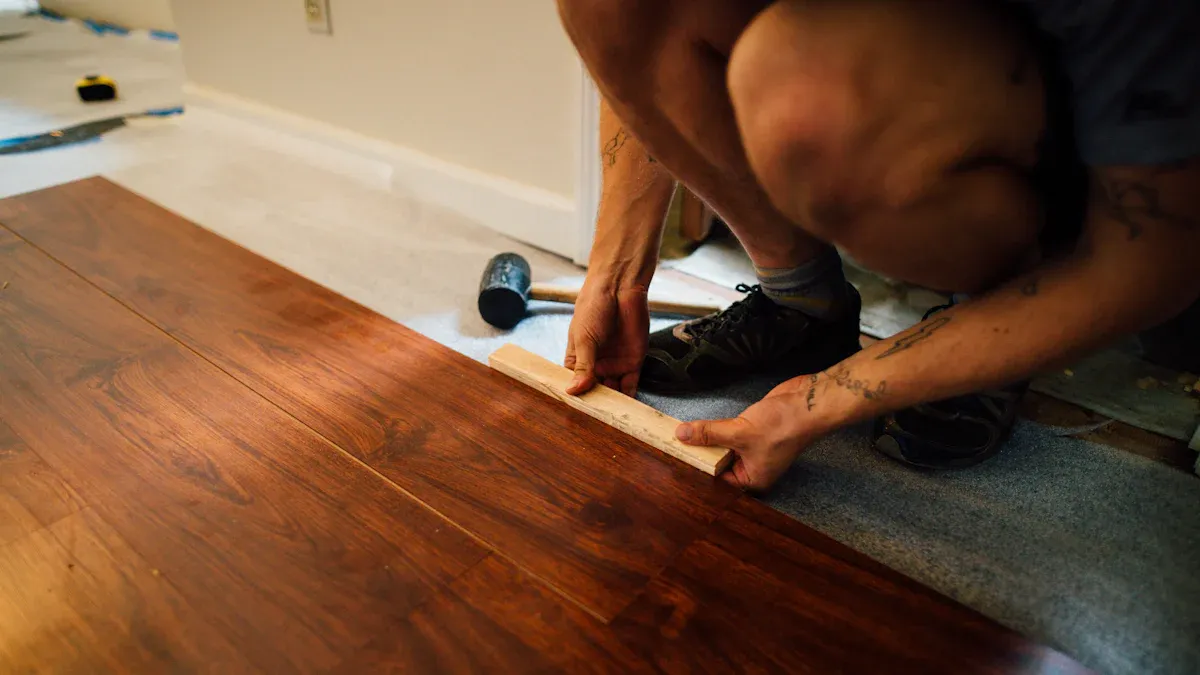
Restoring your vinyl floors can feel easy when you follow a step-by-step tutorial. You can achieve a real transformation with simple steps and basic materials. This guide shows you how to refurbish vinyl flooring using methods that work for any diy project. You will learn the steps and materials needed to bring your flooring back to life.
Clear and Prepare the Area
You need to start every project by preparing your workspace. This step keeps you safe and helps you work faster. Follow these steps to get ready for your diy project:
- Put on PPE. Wear eye goggles, gloves, and non-skid booties to protect yourself.
- Clean the floor. Dry dust and mop to remove loose debris. Remove stuck items like stickers or gum.
- Clear the area. Move all furniture and objects off the flooring so you have space to work.
- Put up caution or wet floor signs. Alert others to the project and prevent accidents.
Tip: Always check the materials needed before you begin. Gather your cleaning supplies, safety gear, and any tools for repairs.
A clean and clear area helps you see every spot that needs attention. You avoid missing stains or scratches when nothing blocks your view.
Deep Clean with the Right Solutions
You need to deep clean before you repair or restore. Dirt and grime can hide damage and make repairs harder. Use these steps to clean your vinyl flooring without causing harm:
- Vacuum the floor with a rolling brush to pick up dust and dirt.
- Mix a mild cleaning solution using 1 gallon of hot water, 1 cup of white vinegar, and 1-2 drops of Dawn dish soap.
- Mop the floor with the solution, moving with the grain of the vinyl.
- Rinse the mop in hot water and repeat for areas with heavy soil.
- For extra cleaning, mix 8 cups of water with 1/2 cup of vinegar. Mop the floor, then rinse with clean hot water.
| Materials Needed | Purpose |
|---|---|
| Vacuum with brush | Remove loose debris |
| White vinegar | Clean and disinfect |
| Dawn dish soap | Lift grease and stains |
| Mop and bucket | Apply cleaning solution |
| Hot water | Rinse and refresh |
Note: Always use a mild cleaning solution to protect your flooring. Harsh chemicals can damage the surface and shorten its life.
You will see a big transformation after deep cleaning. The floor looks brighter, and you can spot areas that need more work.
Fix Minor Scratches and Damage
Minor scratches and scuffs can make your flooring look old. You can fix these problems with simple steps and easy-to-find materials. Here is how to refurbish vinyl flooring and erase small marks:
- Clean the scratched area with a vinyl-safe cleaner.
- Apply a scratch concealer or floor polish to fill in the scratch.
- Buff the area with a microfiber cloth to blend the repair.
Callout: Use gentle pressure when buffing. You want to blend the repair without making new marks.
You can repeat these steps for each scratch you find. This step-by-step tutorial helps you restore the smooth look of your vinyl floors. You will see a transformation as the marks fade away.
You need only basic materials for these repairs. Most stores carry vinyl-safe cleaners, scratch concealers, and microfiber cloths. You do not need special skills for this diy project. You just follow the steps and watch your flooring improve.
Apply a Protective Finish or Restorer
You can make your vinyl floors look new again by applying a protective finish or restorer. This step in your diy tutorial helps seal in your hard work and gives your floor a fresh shine. Many people skip this step, but it makes a big difference in the final transformation.
A protective finish or restorer does more than just add shine. It creates a barrier that keeps your floor safe from daily wear. You can find different types of finishes at most home improvement stores. Some come in a liquid form that you mop on, while others are sprays or wipes. Always choose a product made for vinyl flooring.
Here are some benefits you get when you use a protective finish or restorer:
- Anti-slip coatings help prevent slips and falls, which is important in busy areas like kitchens and bathrooms.
- Protective coatings shield your vinyl floors from scratches and dents, making them last longer.
- These coatings act as a barrier against stains, so cleaning becomes easier and your floor stays protected.
- A glossy finish can make your vinyl floors look brighter and more attractive.
Tip: Always read the instructions on your chosen product. Some finishes need more than one coat for the best results.
To apply the finish, follow these steps in your diy tutorial:
- Shake or stir the product as directed.
- Pour a small amount onto the floor or a clean mop.
- Spread the finish evenly, working in small sections.
- Let the first coat dry before adding another if needed.
You will see a real transformation as the finish dries. The floor will look cleaner, shinier, and more vibrant. This step protects your hard work and keeps your diy project looking great for months.
Allow to Dry and Cure Properly
Letting your vinyl floor dry and cure is just as important as applying the finish. If you rush this step, you might ruin the transformation you worked so hard to achieve. Patience gives you the best results in any diy tutorial.
Here is what you need to know about drying and curing:
- Each coat of finish should dry completely before you add the next one. This usually takes 30 to 60 minutes.
- After the final coat, wait at least 72 hours before moving furniture back onto the floor. This gives the finish time to harden and protect your floor.
Note: Walking on the floor too soon can leave marks or dents in the new finish.
You can speed up drying by opening windows or using fans, but do not use heat directly on the floor. Always check the product label for special instructions. Your patience will pay off when you see the final transformation.
A good drying and curing process locks in the shine and protection. Your vinyl floor will look new and stay strong for a long time. This step completes your diy tutorial and helps your project last.
Restore LVT Flooring and Other Vinyl Types
Repairing Tears and Burns
You may find small tears or burns on your luxury vinyl tile or other vinyl flooring. These problems can make your floor look old, but you can fix them with simple tools. For small tears, you can use clear silicone caulk to seal the damage. This method works well for most types of vinyl, including luxury vinyl tile.
To repair a small tear in vinyl flooring, use clear silicone caulk. Tape around the tear with masking tape to prevent excess caulk from spreading. Pry up the torn areas with a knife, inject caulk into the spaces, and try to get some under the decorative layer. Cover with wax paper or plastic, place a flat board on top, and add weight. Let it dry for 2-3 times the curing time before removing the board and tape.
If you see a burn mark, gently sand the area with fine sandpaper. Clean the spot and fill it with a vinyl repair kit. This helps you restore lvt flooring and keep your floors looking new.
Using Vinyl Patch Compounds
Sometimes, you need to fill deeper holes or cracks in your luxury vinyl tile. Vinyl patch compounds help you restore lvt flooring and fix these problems. You can find several types at your local store:
- Vinyl Spackling: Smooth consistency, easy to apply and sand, resists cracking, and cleans up with water.
- Weatherproof Patching Compound: Offers strong protection, works indoors and outdoors, and prevents discoloration.
- Ready Patch™ Professional Spackling & Patching Compound: Dries fast, resists shrinking, and is great for heavy-duty repairs.
You can use these compounds to restore your flooring and cover up damage. Always follow the instructions on the package for the best results.
Gluing Down Torn Sections
If you notice a section of your luxury vinyl tile lifting or tearing away, you can glue it back down. For this repair, use a strong vinyl flooring adhesive or double-sided flooring tape. These products hold the torn section in place and prevent further damage. Clean the area first, then apply the adhesive under the loose piece. Press it down firmly and let it dry as directed.
Tip: Place a heavy object on the repaired spot to help the adhesive bond well.
You can restore your flooring and make it look smooth again. These steps help you finish your project and keep your floors in top shape.
How to Paint Vinyl Floors
Painting vinyl floors gives you a chance to refresh your space without replacing the flooring. You can learn how to paint vinyl floors by following the right steps and using the best products. This project lets you add color and style to any room. If you want to paint vinyl floors, you need to choose the right primer and paint, prepare the surface, and apply the paint with care. Painted vinyl floors can look great and last longer if you follow each step closely.
Choosing the Right Primer and Paint
You need to select products that stick well to vinyl. Not all paint works on this type of floor. For the best results, use a high-quality bonding primer made for non-porous surfaces. This primer helps the paint grip the vinyl and prevents peeling. After priming, pick a specialized floor paint that offers flexibility and durability. These paints resist scratches and stand up to foot traffic.
Here are the steps to painting with the right products:
- Clean and clear the room before you start.
- Apply one layer of primer using an extended roller brush for even coverage.
- Let the primer dry fully.
- Use a hand brush for edges and a roller for large areas when you paint vinyl floors.
- Allow each coat of paint to dry before adding another.
Tip: Always check the label to make sure the paint is safe for floors and will not crack or peel.
Preparing the Surface for Painting
Proper surface prep is key when you want to paint vinyl floors. You must remove all dirt, wax, and oils so the paint sticks well. Start by scrubbing the floor with a strong cleaner. Use a wet rag or mop and a brush for tough spots. After cleaning, tape along the edges with painter’s tape to keep paint off walls and trim.
Follow these steps to painting for a smooth finish:
- Clean the floor until it feels spotless.
- Lightly sand the surface with fine-grit sandpaper. This step helps the paint bond better.
- Wipe away dust with a damp cloth.
- Tape the edges to protect nearby surfaces.
Note: Never skip cleaning or sanding. These steps help painted vinyl floors last longer.
Applying Paint for a Fresh Look
Now you are ready to paint vinyl floors. Start by outlining the edges with a brush. Use a roller for the main area. Work in small sections to keep the paint even. Let the first coat dry for at least six hours. If you want a deeper color, add a second coat. Wait one to two hours between coats.
After painting vinyl floors, let the surface dry for 24 hours before walking on it. Wait three days before moving furniture back. Painted vinyl floors may show wear in busy areas after two to three years, but you can touch up the paint as needed.
Callout: Patience during drying helps your project look its best and keeps the paint from smudging.
Learning how to paint vinyl floors gives you a budget-friendly way to update your home. By following the right steps to painting, you can enjoy a fresh, new look that lasts.
Tips for Best Results
Choosing Safe Cleaning Products
You want your vinyl floors to look their best, so you need to choose cleaning products that protect the surface. Many homeowners make the mistake of using harsh chemicals, which can damage the finish and shorten the life of your floor. You should look for products that are safe and effective. Here are some top choices recommended by consumer safety organizations:
- Bona Pro Stone, Tile & Laminate Cleaner Spray dries quickly and has low chemical emissions.
- Basic Coatings Squeaky Cleaner gives a streak-free finish and uses a low VOC formula.
- Coretec Encore Floor Cleaner is pH-neutral and works well on tough stains.
- Quick Shine Multi-Surface Floor Finish adds a protective layer and is EPA Safer Choice certified.
- WD-40 helps reduce scuffs and scratches.
Tip: Always read the label before using any cleaner. Test a small area first to make sure it does not harm your floor.
Preventing Future Damage
You can keep your vinyl floors looking new by taking simple steps to prevent damage. Many people focus only on how the floor looks and forget about durability. You should think about how your diy project will stand up to daily life. Try these easy methods:
- Use sheer drapes or blinds to block sunlight and prevent fading.
- Move furniture and rugs from time to time so sunlight does not hit the same spot every day.
- Blot spills right away and use the right cleaner for stains.
- Place doormats and rugs at entrances to catch dirt.
- Ask family and guests to remove shoes before walking on the floor.
- Apply sealants every few years to keep the shine.
- Hire professional cleaning services for deep cleaning.
Note: Choosing the right flooring material for busy areas helps you avoid frequent repairs. Do not settle for low-quality materials just to save money.
Quick Fixes for Common Issues
You may see bubbling, peeling, or discoloration on your vinyl floor. You can fix these problems with a few simple tools and steps. Here is a quick guide for your diy repairs:
- Check the size and spot of the bubbles.
- Gather a utility knife, syringe, adhesive, and other tools.
- For small bubbles, inject adhesive under the bubble with a syringe.
- For large bubbles, make a small cut, add adhesive, and press down.
- Use a hairdryer to soften stubborn bubbles if needed.
- Press and smooth the area with a rolling pin.
- Clean away extra adhesive and let the spot cure.
Callout: Always clean the area before and after repairs. This helps your diy project last longer and look better.
Maintaining Your Refurbished Vinyl Floors
Regular Cleaning Routine
You keep your vinyl floors looking fresh by following a regular maintenance and cleaning schedule. Daily spot cleaning helps you remove spills before they stain. You sweep or vacuum every day, especially in busy areas. Weekly mopping prevents dirt buildup and keeps your flooring bright. You use a clean, white cloth to blot spills right away. Occasional wet cleaning gives your floors a deeper clean. Always vacuum or dust before you mop. This routine helps you restore shine and protect your diy project.
- Blot spills immediately with a clean cloth
- Sweep or vacuum daily
- Mop weekly or more often after spills
- Wet clean occasionally for a deeper clean
Tip: Routine cleaning supports air quality and keeps your flooring in top condition.
Protective Measures for Longevity
You extend the life of your flooring by using smart protective measures. Place door mats at entrances to trap dirt and moisture. Use area rugs in high-traffic spots to prevent excessive wear. Choose non-staining mats instead of rubber-backed ones to avoid discoloration. Attach protective pads to furniture legs so you do not scratch or scuff your vinyl floors. These steps help you restore and maintain your diy project for years.
- Place door mats at every entrance
- Use area rugs in busy areas
- Avoid rubber-backed mats
- Attach protective pads to furniture legs
Callout: Regular buffing improves the appearance and longevity of your flooring.
When to Repeat the Process
You need to know when to restore your flooring for the best results. The frequency depends on the technique you use. Cut and polish touch-ups happen more often, while strip and seal methods last longer. You check your floors for dullness or damage and plan your next diy project when needed. This table shows how often you should repeat each process:
| Maintenance Technique | Frequency of Maintenance |
|---|---|
| Cut & Polish | More frequent touch-ups |
| Strip & Seal | Less frequent, longer-lasting protection |
Regular maintenance and cleaning give you many benefits. You spend less on replacements and repairs. Your property value goes up, and you enjoy better indoor air quality. You keep your flooring looking new and your home feeling fresh.
You can restore your vinyl flooring and achieve a real transformation with simple steps. Regular care keeps your flooring fresh and increases your home’s value. When you choose to restore instead of replace, you save money and time. See the difference in this table:
| Aspect | Refinishing Cost | Replacement Cost |
|---|---|---|
| Material Expenses | Lower | Higher |
| Labor Expenses | Lower | Higher |
| Time Required | Shorter | Longer |
| Environmental Impact | Positive | Negative |
- Refinishing your flooring is budget-friendly.
- You remove cosmetic damage and improve appearance.
- Your project causes minimal disruption.
Take pride in your renewed flooring and enjoy the lasting benefits.
FAQ
Can you restore vinyl floors with household products?
You can restore vinyl floors using items like white vinegar, dish soap, and a microfiber cloth. These products help you clean and remove stains. For deeper scratches or damage, you may need a specialized vinyl restorer or patch compound.
How often should you restore your vinyl flooring?
You should restore your vinyl flooring every one to two years. High-traffic areas may need attention more often. Regular cleaning and protective measures help you keep your floors looking fresh and reduce the need for frequent restoration.
What is the best way to restore shine to dull vinyl floors?
You can mop with a mixture of vinegar and water to remove residue. After cleaning, apply a vinyl floor restorer or protective finish. This process brings back the shine and helps your floor resist future wear.
Can you restore luxury vinyl tile (LVT) after it gets scratched?
You can restore LVT by cleaning the area, applying a scratch concealer, and buffing with a soft cloth. For deeper scratches, use a vinyl patch compound. These steps help you fix damage and keep your flooring smooth.
Is it safe to paint vinyl floors to restore their appearance?
You can safely paint vinyl floors if you use a bonding primer and floor paint designed for vinyl. Proper surface preparation ensures the paint adheres well. Painted floors offer a fresh look and help you restore the style of your space.




